Gimptastic Scraps Available Exclusively @

Gimptastic Scraps CT


Blog Trains

CU Licenses


 This tutorial is of my own creation and any resemblance to any other tuts is purely coincidental. This tutorial is for personal use only, using it for monetary gain is against our TOU's.
Supplies:
Gimp- any version should work
Fab PTU kit from Addictive Pleasures called 'New Year' HERE
Tube of choice. I used the art of Ismael Rac. You must have a license to use his work. You can purchase his tubes HERE
Font- Riesling
Let's get started!
-Go to File>New and open a canvas with a size of 600x600 pixels.
-Open frame 2. Go to Layer>Scale Layer by 60%. Using the magic wand tool click inside the 1st box of the frame. Go to Select>Grow by 2. Open paper 2 and right click the paper in the layer box and choose add alpha channel. Move paper layer below frame layer in layer box. Scale paper by 50%. Go to Select>Invert. Press delete on your keyboard. Select>None. Do the same to the with the other 2
boxes of the frame. Use paper 1 for the middle and paper 3 for the last square of the frame.
-Make the frame layer active. Go to Filters>Light and Shadow>Drop Shadow of 2, 2, 2, black, 50.
-Open frame 3. Move to the bottom layer in the layer box. Scale by 70%. Click inside the frame with the magic wand. Grow by 2. Open paper 9 and add alpha channel. Move this paper layer below the black circle frame in the layer box. Scale paper by 50%. Invert and press delete. Select none. Add drop shadow of 2, 2, 15, black, 100.
-Open tube. Move layer to top. Scale by 75%. Add drop shadow of 2, 2, 2, black, 50.
-Open the filmsrtip. Move to the top layer. Scale by 50%. Place at the bottom of the tube. See mine. Using the rectangle tool, draw a rectangle around the filmstrip boxes..
Add a new layer below the filmstrip.Using the gradient tool and your foreground color set to 952930 and your background set to black, make a bi-linear gradient in the selection. Select none.
Go to Filters>Noise>RGB Noise and change all settings except Alpha to to 0.10. Make the filmstrip layer active. Repeat drop shadow.
-Open tube again. Move tube below filmstrip. Scale by 60%. Go to Layer>Duplicate Layer 3 times for a total of 4 tube layers (not including your main tube). Place each tube in the squares of the frame. Make the
filmstrip layer active. Using the magic wand, click inside the 1st sqaure of the filmstrip. Grow by 3. make the 1st tube layer active. Invert and press delete. Select none. Do the same with the remaining tubes. I changed the mode of my 1st and 4th tube layers to screen, the 2nd to addition and the 3rd to overlay.
Elements:
Add a drop shadow of 2, 2, 2, black, 50 to each element layer. See my tag for placement.
-diamond circle scale 85%
-centerpiece scale 35%
-pearls no scale
-sizzlestick scale 65%
-2011 scale 50%
-glass scale 35%
-glass 2 scale 35%
-starburst no scale and no drop shadow
-Add your name, proper copyright and crop.
You're finished!
Have a happy and safe New Year!!!!
This tutorial is of my own creation and any resemblance to any other tuts is purely coincidental. This tutorial is for personal use only, using it for monetary gain is against our TOU's.
Supplies:
Gimp- any version should work
Fab PTU kit from Addictive Pleasures called 'New Year' HERE
Tube of choice. I used the art of Ismael Rac. You must have a license to use his work. You can purchase his tubes HERE
Font- Riesling
Let's get started!
-Go to File>New and open a canvas with a size of 600x600 pixels.
-Open frame 2. Go to Layer>Scale Layer by 60%. Using the magic wand tool click inside the 1st box of the frame. Go to Select>Grow by 2. Open paper 2 and right click the paper in the layer box and choose add alpha channel. Move paper layer below frame layer in layer box. Scale paper by 50%. Go to Select>Invert. Press delete on your keyboard. Select>None. Do the same to the with the other 2
boxes of the frame. Use paper 1 for the middle and paper 3 for the last square of the frame.
-Make the frame layer active. Go to Filters>Light and Shadow>Drop Shadow of 2, 2, 2, black, 50.
-Open frame 3. Move to the bottom layer in the layer box. Scale by 70%. Click inside the frame with the magic wand. Grow by 2. Open paper 9 and add alpha channel. Move this paper layer below the black circle frame in the layer box. Scale paper by 50%. Invert and press delete. Select none. Add drop shadow of 2, 2, 15, black, 100.
-Open tube. Move layer to top. Scale by 75%. Add drop shadow of 2, 2, 2, black, 50.
-Open the filmsrtip. Move to the top layer. Scale by 50%. Place at the bottom of the tube. See mine. Using the rectangle tool, draw a rectangle around the filmstrip boxes..
Add a new layer below the filmstrip.Using the gradient tool and your foreground color set to 952930 and your background set to black, make a bi-linear gradient in the selection. Select none.
Go to Filters>Noise>RGB Noise and change all settings except Alpha to to 0.10. Make the filmstrip layer active. Repeat drop shadow.
-Open tube again. Move tube below filmstrip. Scale by 60%. Go to Layer>Duplicate Layer 3 times for a total of 4 tube layers (not including your main tube). Place each tube in the squares of the frame. Make the
filmstrip layer active. Using the magic wand, click inside the 1st sqaure of the filmstrip. Grow by 3. make the 1st tube layer active. Invert and press delete. Select none. Do the same with the remaining tubes. I changed the mode of my 1st and 4th tube layers to screen, the 2nd to addition and the 3rd to overlay.
Elements:
Add a drop shadow of 2, 2, 2, black, 50 to each element layer. See my tag for placement.
-diamond circle scale 85%
-centerpiece scale 35%
-pearls no scale
-sizzlestick scale 65%
-2011 scale 50%
-glass scale 35%
-glass 2 scale 35%
-starburst no scale and no drop shadow
-Add your name, proper copyright and crop.
You're finished!
Have a happy and safe New Year!!!!
 This tutorial is of my own creation and any resemblance to any other tuts is purely coincidental. This tutorial is for personal use only, using it for monetary gain is against our TOU's.
Supplies:
Gimp- Any version should work
Awesome PTU kit from Artmama called 'Wild Thing' HERE
Tube of choice. I am using the work of Ismael Rac. You must have a licence to use his art. You can purchase his tubes HERE
Template 15 by Candylicious Designz HERE
Font- Sick Capital Vice
Let's begin!
-Open template. Delete the credits. Go to Image>Scale Image and change the width to 500 and the height to 450. Also change the x & y resolutions to 72. Next, go to Image>Canvas Size 600x540 pixels and click center. Right click every layer in the layer box and choose layer to image size.
-Make the blue circle layer active. Using the magic wand, click outside of the blue circle. Open paper 9 and right click paper layer in the layer box and choose add alpha channel. Go to Layer>Scale Layer by 50%.
Press delete on your keyboard. Go to Select>None. Now go to Filters>Light and Shadow>Drop Shadow of 2, 2, 15, black, 100.
-Make the purple laft layer active. Click outside of circle using the magic wand. Open paper 7 and add alpha channel. Scale by 50%. Press delete. Go to Select>Invert. right click layer and choose
layer to image size. Now go to Select>Grow by 3. Add a new layer below this layer. Using the bucket fill tool and your foreground color set to black, click inside the selection to fill.
Select none. Go to Filters>Repeat Drop Shadow.
-Make the purple right layer active. Click outside with magic wand. Open paper 14 and add alpha channel. Scale by 50% and press delete. Invert and layer to image size. Grow by 3. Add new layer below this layer and fill with black. Select none and repeat drop shadow.
-Make the purple rectangle layer active. Click outside with magic wand. Open paper 11 and add alpha channel. Scale by 50% and press delete.Select none.
-Make the black rectangle layer active. Click outside with magic wand. Open paper 3 and add alpha channel. Scale by 55% and press delete. Invert and layer to image size. Grow by 3. Add new
layer below this layer and fill with white. Select none and repeat drop shadow.
-Make the white square frame layer active. Using the bucket fill tool and your foreground color set to black, click the frame to change the color of the frame to black. Go to
Filters>Noise>RGB Noise and change the red to 0.50 and leave the rest of the settings where they are at.
-Open your tube. Move tube layer below the frame layer in the layer box. Position the tube in the frame. See mine as a reference. Go to Layer>Duplicate Layer. Position the duplicate tube in the other frame. If needed, erase parts of the tube that stick in the other box. Make the top tube active and go to Layer>Merge Down. Add drop shadow of 2, 2, 2, black, 50. Make the frame layer active.
Using the magic wand, click inside both of the square (making sure your magic wand is set to add to the current selection: shift). grow my 2. Invert and make the tube laye active.
Press delete. Cange the mode to overlay.
-Open tube once again. Move to top layer in layer box. Scale by 85%. Place in the center of the tag. Repeat drop shadow.
Elements:
Use drop shadow or 2, 2, 2, black, 50 on all element layers. See my tag for placement.
-06 scale by 75%
-32 scale by 65%
-19 no scale
-56 scale by 65%
-60 scale by 50%
-01 scale by 50%
-08 no scale
-34 scale by 70%
-51 scale by 70%
-Add your name, proper copyright and crop and you are done!
This tutorial is of my own creation and any resemblance to any other tuts is purely coincidental. This tutorial is for personal use only, using it for monetary gain is against our TOU's.
Supplies:
Gimp- Any version should work
Awesome PTU kit from Artmama called 'Wild Thing' HERE
Tube of choice. I am using the work of Ismael Rac. You must have a licence to use his art. You can purchase his tubes HERE
Template 15 by Candylicious Designz HERE
Font- Sick Capital Vice
Let's begin!
-Open template. Delete the credits. Go to Image>Scale Image and change the width to 500 and the height to 450. Also change the x & y resolutions to 72. Next, go to Image>Canvas Size 600x540 pixels and click center. Right click every layer in the layer box and choose layer to image size.
-Make the blue circle layer active. Using the magic wand, click outside of the blue circle. Open paper 9 and right click paper layer in the layer box and choose add alpha channel. Go to Layer>Scale Layer by 50%.
Press delete on your keyboard. Go to Select>None. Now go to Filters>Light and Shadow>Drop Shadow of 2, 2, 15, black, 100.
-Make the purple laft layer active. Click outside of circle using the magic wand. Open paper 7 and add alpha channel. Scale by 50%. Press delete. Go to Select>Invert. right click layer and choose
layer to image size. Now go to Select>Grow by 3. Add a new layer below this layer. Using the bucket fill tool and your foreground color set to black, click inside the selection to fill.
Select none. Go to Filters>Repeat Drop Shadow.
-Make the purple right layer active. Click outside with magic wand. Open paper 14 and add alpha channel. Scale by 50% and press delete. Invert and layer to image size. Grow by 3. Add new layer below this layer and fill with black. Select none and repeat drop shadow.
-Make the purple rectangle layer active. Click outside with magic wand. Open paper 11 and add alpha channel. Scale by 50% and press delete.Select none.
-Make the black rectangle layer active. Click outside with magic wand. Open paper 3 and add alpha channel. Scale by 55% and press delete. Invert and layer to image size. Grow by 3. Add new
layer below this layer and fill with white. Select none and repeat drop shadow.
-Make the white square frame layer active. Using the bucket fill tool and your foreground color set to black, click the frame to change the color of the frame to black. Go to
Filters>Noise>RGB Noise and change the red to 0.50 and leave the rest of the settings where they are at.
-Open your tube. Move tube layer below the frame layer in the layer box. Position the tube in the frame. See mine as a reference. Go to Layer>Duplicate Layer. Position the duplicate tube in the other frame. If needed, erase parts of the tube that stick in the other box. Make the top tube active and go to Layer>Merge Down. Add drop shadow of 2, 2, 2, black, 50. Make the frame layer active.
Using the magic wand, click inside both of the square (making sure your magic wand is set to add to the current selection: shift). grow my 2. Invert and make the tube laye active.
Press delete. Cange the mode to overlay.
-Open tube once again. Move to top layer in layer box. Scale by 85%. Place in the center of the tag. Repeat drop shadow.
Elements:
Use drop shadow or 2, 2, 2, black, 50 on all element layers. See my tag for placement.
-06 scale by 75%
-32 scale by 65%
-19 no scale
-56 scale by 65%
-60 scale by 50%
-01 scale by 50%
-08 no scale
-34 scale by 70%
-51 scale by 70%
-Add your name, proper copyright and crop and you are done!
 This tutorial is of my own creation and any resemblance to any other tuts is purely coincidental. This tutorial is for personal use only, using it for monetary gain is against our TOU's.
~Gimp (any version will do).
~Chocolate Dreams PTU scrapkit which you can get from Creative Intentionz HERE.
~Tube of choice. I used the adorable PinUpToons, you must have a license to use this art which you can get HERE.
~Template of choice. I used temp 209 from Divine Intentionz which you can get HERE.
~Mask of choice. I used WSL mask 353 which you can get HERE.
~Font of choice. I used Milk & Cereal.
Let's get started!!!
1. Open a new layer ( I prefer a large canvas, so I make mine 1050x656). Make your canvas transparent (Layer > Transparency > Color to Alpha).
2. Open template in PSD format, move layers of template around until they are the way you like them.
~Add paper from scrapkit to individual layers of the template (Right click on template layer in layer box > Alpha to Selection > CTRL I > Select paper layer in layer box > Delete).
These are the papers I used:
Paper 6
Paper 9
~I added noise to some of the template layers to make them look glittery (Filters > Noise > RGB Noise).
~I colorized some of the template layers to better match the scrapkit (Colors > Colorize > play with the setting until you get the desired color).
~Add drop shadow to template layers (Filters > Light & Shadow > Drop Shadow).
3. Open tubes, I used both a full body and a close up. I lowered the opacity of the close ups to 50 (at the top of the layer box you will see a bar you can slide to change the opacity of the selected layer). Add drop shadow to the full body tube.
4. Open and place the following elements:
Brad 4
Brad 5
Brad 6
Satin Heart 3
Organza Flower 1
Organza Flower 2
Organza Flower 3
Scattered Hearts 2
Light (placed over close-up tube)
~Some of the elements may need to be sized down. Using your scale tool in your tool box adjust the pixel size until element is the correct size~
~Add drop shadow to all elements~
4. Open Paper 3
5. Open mask
6. Add mask to paper.
7. Merge Layers (Image > Merge Visible Layers).
8. Crop Image (Image > Autocrop Image).
9. Scale image to desired size (Image > Scale Image).
10. Add copyright info and name
11. Save as .png
YOU ARE ALL DONE!!!!!!!!!!
This tutorial is of my own creation and any resemblance to any other tuts is purely coincidental. This tutorial is for personal use only, using it for monetary gain is against our TOU's.
~Gimp (any version will do).
~Chocolate Dreams PTU scrapkit which you can get from Creative Intentionz HERE.
~Tube of choice. I used the adorable PinUpToons, you must have a license to use this art which you can get HERE.
~Template of choice. I used temp 209 from Divine Intentionz which you can get HERE.
~Mask of choice. I used WSL mask 353 which you can get HERE.
~Font of choice. I used Milk & Cereal.
Let's get started!!!
1. Open a new layer ( I prefer a large canvas, so I make mine 1050x656). Make your canvas transparent (Layer > Transparency > Color to Alpha).
2. Open template in PSD format, move layers of template around until they are the way you like them.
~Add paper from scrapkit to individual layers of the template (Right click on template layer in layer box > Alpha to Selection > CTRL I > Select paper layer in layer box > Delete).
These are the papers I used:
Paper 6
Paper 9
~I added noise to some of the template layers to make them look glittery (Filters > Noise > RGB Noise).
~I colorized some of the template layers to better match the scrapkit (Colors > Colorize > play with the setting until you get the desired color).
~Add drop shadow to template layers (Filters > Light & Shadow > Drop Shadow).
3. Open tubes, I used both a full body and a close up. I lowered the opacity of the close ups to 50 (at the top of the layer box you will see a bar you can slide to change the opacity of the selected layer). Add drop shadow to the full body tube.
4. Open and place the following elements:
Brad 4
Brad 5
Brad 6
Satin Heart 3
Organza Flower 1
Organza Flower 2
Organza Flower 3
Scattered Hearts 2
Light (placed over close-up tube)
~Some of the elements may need to be sized down. Using your scale tool in your tool box adjust the pixel size until element is the correct size~
~Add drop shadow to all elements~
4. Open Paper 3
5. Open mask
6. Add mask to paper.
7. Merge Layers (Image > Merge Visible Layers).
8. Crop Image (Image > Autocrop Image).
9. Scale image to desired size (Image > Scale Image).
10. Add copyright info and name
11. Save as .png
YOU ARE ALL DONE!!!!!!!!!! This tutorial is of my own creation and any resemblance to any other tuts is purely coincidental. This tutorial is for personal use only, using it for monetary gain is against our TOU's.
Supplies Needed:
~Gimp (any version will do).
~New Year PTU scrapkit which you can get from Addictive Pleasures HERE.
~Tubes of choice. I used the art of Elias Chatzoudis, you must have a license to use his art which you can get HERE.
~Template of choice. I used the Celebrate Template which you can get at Crazy Cakes Scraps HERE.
~Mask of choice. I used AR315 mask 64 which you can get HERE.
~Font of choice. I used Japan.
Let's get started!!!
1. Open a new layer ( I prefer a large canvas, so I make mine 1050x656). Make your canvas transparent (Layer > Transparency > Color to Alpha).
2. Open template in PSD format, move layers of template around until they are the way you like them.
~Add paper from scrapkit to individual layers of the template (Right click on template layer in layer box > Alpha to Selection > CTRL I > Select paper layer in layer box > Delete).
These are the papers I used:
Paper 2
Paper 3
Paper 10
Paper 12
~I added noise to some of the template layers to make them look glittery (Filters > Noise > RGB Noise).
~I colorized some of the template layers to better match the scrapkit (Colors > Colorize > play with the setting until you get the desired color).
~Add drop shadow to template layers (Filters > Light & Shadow > Drop Shadow).
3. Open tubes, I used both a full body and close ups. I lowered the opacity of the close ups to 50 (at the top of the layer box you will see a bar you can slide to change the opacity of the selected layer). Add drop shadow to the full body tube.
4. Open and place the following elements:
Music Notes
Stars
Fireworks
Sparkles2
Piano Keys
Champagne
Glass2
Sizzle Stick
2011
Star
Hat
Watch
Mask
~Some of the elements may need to be sized down. Using your scale tool in your tool box adjust the pixel size until element is the correct size~
~Add drop shadow to all elements~
5. Open Paper 5
6. Open mask
7. Add mask to paper (click HERE for a tut on using masks)
8. Merge Layers (Image > Merge Visible Layers).
9. Crop Image (Image > Autocrop Image).
10. Scale image to desired size (Image > Scale Image).
11. Add copyright info and name
12. Save as .png
ALL DONE!!!!!!!!!!
This tutorial is of my own creation and any resemblance to any other tuts is purely coincidental. This tutorial is for personal use only, using it for monetary gain is against our TOU's.
Supplies Needed:
~Gimp (any version will do).
~New Year PTU scrapkit which you can get from Addictive Pleasures HERE.
~Tubes of choice. I used the art of Elias Chatzoudis, you must have a license to use his art which you can get HERE.
~Template of choice. I used the Celebrate Template which you can get at Crazy Cakes Scraps HERE.
~Mask of choice. I used AR315 mask 64 which you can get HERE.
~Font of choice. I used Japan.
Let's get started!!!
1. Open a new layer ( I prefer a large canvas, so I make mine 1050x656). Make your canvas transparent (Layer > Transparency > Color to Alpha).
2. Open template in PSD format, move layers of template around until they are the way you like them.
~Add paper from scrapkit to individual layers of the template (Right click on template layer in layer box > Alpha to Selection > CTRL I > Select paper layer in layer box > Delete).
These are the papers I used:
Paper 2
Paper 3
Paper 10
Paper 12
~I added noise to some of the template layers to make them look glittery (Filters > Noise > RGB Noise).
~I colorized some of the template layers to better match the scrapkit (Colors > Colorize > play with the setting until you get the desired color).
~Add drop shadow to template layers (Filters > Light & Shadow > Drop Shadow).
3. Open tubes, I used both a full body and close ups. I lowered the opacity of the close ups to 50 (at the top of the layer box you will see a bar you can slide to change the opacity of the selected layer). Add drop shadow to the full body tube.
4. Open and place the following elements:
Music Notes
Stars
Fireworks
Sparkles2
Piano Keys
Champagne
Glass2
Sizzle Stick
2011
Star
Hat
Watch
Mask
~Some of the elements may need to be sized down. Using your scale tool in your tool box adjust the pixel size until element is the correct size~
~Add drop shadow to all elements~
5. Open Paper 5
6. Open mask
7. Add mask to paper (click HERE for a tut on using masks)
8. Merge Layers (Image > Merge Visible Layers).
9. Crop Image (Image > Autocrop Image).
10. Scale image to desired size (Image > Scale Image).
11. Add copyright info and name
12. Save as .png
ALL DONE!!!!!!!!!! This tutorial is of my own creation and any resemblance to any other tuts is purely coincidental. This tutorial is for personal use only, using it for monetary gain is against our TOU's.
Supplies Needed:
~Gimp (any version will do).
~Tubes of choice. I used the awesome artwork of Ismael Rac, you must have a license to use his art which you can get HERE.
~Wild Thing PTU scrapkit by Artmama which you get from Exquisite Scraps HERE.
~Mask of choice. I used Artmama mask 12 which you can get HERE.
~Font of choice. I used World at War.
Let's get started!!!!!
1. Open a new layer ( I prefer a large canvas, so I make mine 1050x656). Make your canvas transparent (Layer > Transparency > Color to alpha).
2. Open embellie 35 (round frame), add drop shadow (Filters > Light & Shadow > Drop Shadow).
3. Open Paper 10 center it behind round portion of the frame, remove excess paper using a cutting tool or eraser.
4. Open embellie 25 (filmstrip frame), add drop shadow.
5. Open Papers 1, 2 & 3 place them behind the filmstrip frame. Remove excess paper using a cutting tool or eraser.
6. Open tubes. I used 4 tubes total. I lowered the opacity on the 3 tubes I placed behind the filmstrip frame to 45 (at the top of the layer box you will see a bar you can slide to change the opacity of the selected layer). Add drop shadow to tube in center of the round frame.
7. Open and place the following elements:
embellie 42
embellie 34
embellie 8
embellie 56
embellie 59
embellie 1
embellie 57
embellie 2
embellie 3
embellie 47
embellie 13
embellie 12
embellie 10
embellie 38
embellie 11
embellie 58
~Some elements may need to be sized down. Using the Scale Tool in your tool box adjust pixels to desired size~
~Add drop shadow to all elements~
8. Open Paper 4.
9. Open mask.
10. Add mask to paper.
11. Merge layers (Image > Merge Visible Layer).
12. Crop image (Image > Autocrop Image).
13. Scale image to desired size (Image > Scale Image).
14. Add copyright info and name.
15. Save as .png
You are finished :)
This tutorial is of my own creation and any resemblance to any other tuts is purely coincidental. This tutorial is for personal use only, using it for monetary gain is against our TOU's.
Supplies Needed:
~Gimp (any version will do).
~Tubes of choice. I used the awesome artwork of Ismael Rac, you must have a license to use his art which you can get HERE.
~Wild Thing PTU scrapkit by Artmama which you get from Exquisite Scraps HERE.
~Mask of choice. I used Artmama mask 12 which you can get HERE.
~Font of choice. I used World at War.
Let's get started!!!!!
1. Open a new layer ( I prefer a large canvas, so I make mine 1050x656). Make your canvas transparent (Layer > Transparency > Color to alpha).
2. Open embellie 35 (round frame), add drop shadow (Filters > Light & Shadow > Drop Shadow).
3. Open Paper 10 center it behind round portion of the frame, remove excess paper using a cutting tool or eraser.
4. Open embellie 25 (filmstrip frame), add drop shadow.
5. Open Papers 1, 2 & 3 place them behind the filmstrip frame. Remove excess paper using a cutting tool or eraser.
6. Open tubes. I used 4 tubes total. I lowered the opacity on the 3 tubes I placed behind the filmstrip frame to 45 (at the top of the layer box you will see a bar you can slide to change the opacity of the selected layer). Add drop shadow to tube in center of the round frame.
7. Open and place the following elements:
embellie 42
embellie 34
embellie 8
embellie 56
embellie 59
embellie 1
embellie 57
embellie 2
embellie 3
embellie 47
embellie 13
embellie 12
embellie 10
embellie 38
embellie 11
embellie 58
~Some elements may need to be sized down. Using the Scale Tool in your tool box adjust pixels to desired size~
~Add drop shadow to all elements~
8. Open Paper 4.
9. Open mask.
10. Add mask to paper.
11. Merge layers (Image > Merge Visible Layer).
12. Crop image (Image > Autocrop Image).
13. Scale image to desired size (Image > Scale Image).
14. Add copyright info and name.
15. Save as .png
You are finished :)  This tutorial is of my own creation and any resemblance to any other tuts is purely coincidental. This tutorial is for personal use only, using it for monetary gain is against our TOU's.
~Gimp (any version will do).
~Jingly Bells PTU scrapkit which you can get from Creative Intentionz HERE.
~Tube of choice. I used the adorable PinUpToons, you must have a license to use this art which you can get HERE.
~Template of choice. I used temp 39 from Vix PSP which you can get HERE.
~Mask of choice. I used DBV xmas mask 8 which you can get HERE.
~Font of choice. I used Mural Script.
Let's get started!!!
1. Open a new layer ( I prefer a large canvas, so I make mine 1050x656). Make your canvas transparent (Layer > Transparency > Color to Alpha).
2. Open template in PSD format, move layers of template around until they are the way you like them.
~Add paper from scrapkit to individual layers of the template (Right click on template layer in layer box > Alpha to Selection > CTRL I > Select paper layer in layer box > Delete).
These are the papers I used:
Paper 5
Paper 6
~I added noise to some of the template layers to make them look glittery (Filters > Noise > RGB Noise).
~I colorized some of the template layers to better match the scrapkit (Colors > Colorize > play with the setting until you get the desired color).
~Add drop shadow to template layers (Filters > Light & Shadow > Drop Shadow).
3. Open tube, add drop shadow.
4. Open and place the following elements:
Bling
Snowflake (x3)
Bells N Bow
Bells N Berries
Berry Branch
Candycane
Bow 1
Polar Bears
Snowman 2
Bauble
Streamer 1
~Some of the elements may need to be sized down. Using your scale tool in your tool box adjust the pixel size until element is the correct size~
~Add drop shadow to all elements~
4. Open Paper 10
5. Open mask
6. Add mask to paper (click HERE for a tut on using masks)
7. Merge Layers (Image > Merge Visible Layers).
8. Crop Image (Image > Autocrop Image).
9. Scale image to desired size (Image > Scale Image).
10. Add copyright info and name
11. Save as .png
YOU ARE ALL DONE!!!!!!!!!!
This tutorial is of my own creation and any resemblance to any other tuts is purely coincidental. This tutorial is for personal use only, using it for monetary gain is against our TOU's.
~Gimp (any version will do).
~Jingly Bells PTU scrapkit which you can get from Creative Intentionz HERE.
~Tube of choice. I used the adorable PinUpToons, you must have a license to use this art which you can get HERE.
~Template of choice. I used temp 39 from Vix PSP which you can get HERE.
~Mask of choice. I used DBV xmas mask 8 which you can get HERE.
~Font of choice. I used Mural Script.
Let's get started!!!
1. Open a new layer ( I prefer a large canvas, so I make mine 1050x656). Make your canvas transparent (Layer > Transparency > Color to Alpha).
2. Open template in PSD format, move layers of template around until they are the way you like them.
~Add paper from scrapkit to individual layers of the template (Right click on template layer in layer box > Alpha to Selection > CTRL I > Select paper layer in layer box > Delete).
These are the papers I used:
Paper 5
Paper 6
~I added noise to some of the template layers to make them look glittery (Filters > Noise > RGB Noise).
~I colorized some of the template layers to better match the scrapkit (Colors > Colorize > play with the setting until you get the desired color).
~Add drop shadow to template layers (Filters > Light & Shadow > Drop Shadow).
3. Open tube, add drop shadow.
4. Open and place the following elements:
Bling
Snowflake (x3)
Bells N Bow
Bells N Berries
Berry Branch
Candycane
Bow 1
Polar Bears
Snowman 2
Bauble
Streamer 1
~Some of the elements may need to be sized down. Using your scale tool in your tool box adjust the pixel size until element is the correct size~
~Add drop shadow to all elements~
4. Open Paper 10
5. Open mask
6. Add mask to paper (click HERE for a tut on using masks)
7. Merge Layers (Image > Merge Visible Layers).
8. Crop Image (Image > Autocrop Image).
9. Scale image to desired size (Image > Scale Image).
10. Add copyright info and name
11. Save as .png
YOU ARE ALL DONE!!!!!!!!!! This tutorial is of my own creation and any resemblance to any other tuts is purely coincidental. This tutorial is for personal use only, using it for monetary gain is against our TOU's.
Supplies Needed:
~Gimp (any version will do).
~CandyCane PTU scrapkit which you can get from Addictive Pleasures HERE.
~Tube of choice. I used the art of Jessica Dougherty, you must have a license to use this art which you can get HERE.
~Template of choice. I used Template 125 which you can get at Blissfully Beth HERE.
~Mask of choice. I used DBV mask111 which you can get HERE.
~Font of choice. I used SwingSet.
Let's get started!!!
1. Open a new layer ( I prefer a large canvas, so I make mine 1050x656). Make your canvas transparent (Layer > Transparency > Color to Alpha).
2. Open template in PSD format, move layers of template around until they are the way you like them.
~Add paper from scrapkit to individual layers of the template (Right click on template layer in layer box > Alpha to Selection > CTRL I > Select paper layer in layer box > Delete).
These are the papers I used:
Paper 4
Paper 5
Paper 12
~I added noise to some of the template layers to make them look glittery (Filters > Noise > RGB Noise).
~I colorized some of the template layers to better match the scrapkit (Colors > Colorize > play with the setting until you get the desired color).
~Add drop shadow to template layers (Filters > Light & Shadow > Drop Shadow).
3. Open tube, add drop shadow.
4. Open and place the following elements:
Beads
Glitter
FluffyBall (x2)
Presents
Candy
Candycane
Candycane 3
Holly
Kitten
~Some of the elements may need to be sized down. Using your scale tool in your tool box adjust the pixel size until element is the correct size~
~Add drop shadow to all elements~
5. Open Paper 7
6. Open mask
7. Apply layer mask (click HERE for a tut on using masks)
8. Merge Layers (Image > Merge Visible Layers).
9. Crop Image (Image > Autocrop Image).
10. Scale image to desired size (Image > Scale Image).
11. Add copyright info and name
12. Save as .png
ALL DONE!!!!!!!!!!
This tutorial is of my own creation and any resemblance to any other tuts is purely coincidental. This tutorial is for personal use only, using it for monetary gain is against our TOU's.
Supplies Needed:
~Gimp (any version will do).
~CandyCane PTU scrapkit which you can get from Addictive Pleasures HERE.
~Tube of choice. I used the art of Jessica Dougherty, you must have a license to use this art which you can get HERE.
~Template of choice. I used Template 125 which you can get at Blissfully Beth HERE.
~Mask of choice. I used DBV mask111 which you can get HERE.
~Font of choice. I used SwingSet.
Let's get started!!!
1. Open a new layer ( I prefer a large canvas, so I make mine 1050x656). Make your canvas transparent (Layer > Transparency > Color to Alpha).
2. Open template in PSD format, move layers of template around until they are the way you like them.
~Add paper from scrapkit to individual layers of the template (Right click on template layer in layer box > Alpha to Selection > CTRL I > Select paper layer in layer box > Delete).
These are the papers I used:
Paper 4
Paper 5
Paper 12
~I added noise to some of the template layers to make them look glittery (Filters > Noise > RGB Noise).
~I colorized some of the template layers to better match the scrapkit (Colors > Colorize > play with the setting until you get the desired color).
~Add drop shadow to template layers (Filters > Light & Shadow > Drop Shadow).
3. Open tube, add drop shadow.
4. Open and place the following elements:
Beads
Glitter
FluffyBall (x2)
Presents
Candy
Candycane
Candycane 3
Holly
Kitten
~Some of the elements may need to be sized down. Using your scale tool in your tool box adjust the pixel size until element is the correct size~
~Add drop shadow to all elements~
5. Open Paper 7
6. Open mask
7. Apply layer mask (click HERE for a tut on using masks)
8. Merge Layers (Image > Merge Visible Layers).
9. Crop Image (Image > Autocrop Image).
10. Scale image to desired size (Image > Scale Image).
11. Add copyright info and name
12. Save as .png
ALL DONE!!!!!!!!!! This tutorial is of my own creation and any resemblance to any other tuts is purely coincidental. This tutorial is for personal use only, using it for monetary gain is against our TOU's.
Supplies Needed:
~Gimp (any version will do).
~Half Past Christmas PTU scrapkit which you can get from Addictive Pleasures HERE.
~Tube of choice. I used the artwork of Lix , you must have a license to use this art which you can get HERE.
~Template of choice. I used EI Template 36 which you can get at Elegant Inspirations HERE.
~Mask of choice. I used WSL mask302 which you can get HERE.
~Font of choice. I used Trubble.
Let's get started!!!
1. Open a new layer ( I prefer a large canvas, so I make mine 1050x656). Make your canvas transparent (Layer > Transparency > Color to Alpha).
2. Open template in PSD format, move layers of template around until they are the way you like them.
~Add paper from scrapkit to individual layers of the template (Right click on template layer in layer box > Alpha to Selection > CTRL I > Select paper layer in layer box > Delete).
These are the papers I used:
Paper 2
Paper 5
Paper 8
Paper 10
Paper 12
~I added noise to some of the template layers to make them look glittery (Filters > Noise > RGB Noise).
~I colorized some of the template layers to better match the scrapkit (Colors > Colorize > play with the setting until you get the desired color).
~Add drop shadow to template layers (Filters > Light & Shadow > Drop Shadow).
3. Open tube, add drop shadow.
4. Open and place the following elements:
Beads
Bells
Tinsel
Present 2
Present 3
KittenWithPresent
SnowmanBox
Tree
Bow
Poinsettia
Bauble2
~Some of the elements may need to be sized down. Using your scale tool in your tool box adjust the pixel size until element is the correct size~
~Add drop shadow to all elements~
5. Open Paper 6
6. Open mask
7. Apply layer mask (click HERE for a tut on using masks)
8. Merge Layers (Image > Merge Visible Layers).
9. Crop Image (Image > Autocrop Image).
10. Scale image to desired size (Image > Scale Image).
11. Add copyright info and name
12. Save as .png
ALL DONE!!!!!!!!!!
This tutorial is of my own creation and any resemblance to any other tuts is purely coincidental. This tutorial is for personal use only, using it for monetary gain is against our TOU's.
Supplies Needed:
~Gimp (any version will do).
~Half Past Christmas PTU scrapkit which you can get from Addictive Pleasures HERE.
~Tube of choice. I used the artwork of Lix , you must have a license to use this art which you can get HERE.
~Template of choice. I used EI Template 36 which you can get at Elegant Inspirations HERE.
~Mask of choice. I used WSL mask302 which you can get HERE.
~Font of choice. I used Trubble.
Let's get started!!!
1. Open a new layer ( I prefer a large canvas, so I make mine 1050x656). Make your canvas transparent (Layer > Transparency > Color to Alpha).
2. Open template in PSD format, move layers of template around until they are the way you like them.
~Add paper from scrapkit to individual layers of the template (Right click on template layer in layer box > Alpha to Selection > CTRL I > Select paper layer in layer box > Delete).
These are the papers I used:
Paper 2
Paper 5
Paper 8
Paper 10
Paper 12
~I added noise to some of the template layers to make them look glittery (Filters > Noise > RGB Noise).
~I colorized some of the template layers to better match the scrapkit (Colors > Colorize > play with the setting until you get the desired color).
~Add drop shadow to template layers (Filters > Light & Shadow > Drop Shadow).
3. Open tube, add drop shadow.
4. Open and place the following elements:
Beads
Bells
Tinsel
Present 2
Present 3
KittenWithPresent
SnowmanBox
Tree
Bow
Poinsettia
Bauble2
~Some of the elements may need to be sized down. Using your scale tool in your tool box adjust the pixel size until element is the correct size~
~Add drop shadow to all elements~
5. Open Paper 6
6. Open mask
7. Apply layer mask (click HERE for a tut on using masks)
8. Merge Layers (Image > Merge Visible Layers).
9. Crop Image (Image > Autocrop Image).
10. Scale image to desired size (Image > Scale Image).
11. Add copyright info and name
12. Save as .png
ALL DONE!!!!!!!!!!
This tutorial is of my own creation and any resemblance to any other tuts is purely coincidental. This tutorial is for personal use only, using it for monetary gain is against our TOU's. Supplies Needed: ~Gimp (any version will do). ~Tubes of choice. I used the adorable artwork of Toosh Toosh, you must have a license to use this art which you can get HERE. ~It's Snow Wonderful PTU scrapkit by Artmama which you can get from Exquisite Scraps HERE. ~It's Snow Wonderful PTU decor add-on by Artmama which you get from Exquisite Scraps HERE. ~Mask of choice. I used WSL mask363 which you can get HERE. ~Font of choice. I used Little Bliss Bold. Let's get started!!!!! 1. Open a new layer ( I prefer a large canvas, so I make mine 1050x656). Make your canvas transparent (Layer > Transparency > Color to alpha). 2. Open Decor 22 (window) from the decor add-on, add drop shadow (Filters > Light & Shadow > Drop Shadow). 3. Open Paper 14 center it behind the window, remove excess paper using a cutting tool or eraser. 4. Open your tubes, add drop shadow. 5. Open and place the following elements from the scrapkit: embellie 32 embellie 1 embellie 42 embellie 19 embellie 56 embellie 37 embellie 38 embellie 39 embellie 40 ~Open and place the following elements from the decor add-on Decor 11 Decor 13 ~Some elements may need to be sized down. Using the Scale Tool in your tool box adjust pixels to desired size~ ~Add drop shadow to all elements~ 6. Open Paper 13 7. Open mask. 8. Add mask to paper (click HERE for a tut on using masks) 9. Merge layers (Image > Merge Visible Layer). 10. Crop image (Image > Autocrop Image). 11. Scale image to desired size (Image > Scale Image). 12. Add copyright info and name. 13. Save as .png You are finished :) Attachments (0)
 This tutorial is of my own creation and any resemblance to any other tuts is purely coincidental. This tutorial is for personal use only, using it for monetary gain is against our TOU's.
~Gimp (any version will do).
~Do You Believe PTU scrapkit which you can get from Creative Intentionz HERE.
~Tube of choice. I used the artwork of Tyson McAdoo, you must have a license to use this art which you can get HERE.
~Template of choice. I used temp 201 from Blissfully Beth which you can get HERE.
~Mask of choice. I used WSL mask 302 which you can get HERE.
~Font of choice. I used Creative Power.
Let's get started!!!
1. Open a new layer ( I prefer a large canvas, so I make mine 1050x656). Make your canvas transparent (Layer > Transparency > Color to Alpha).
2. Open template in PSD format, move layers of template around until they are the way you like them.
~Add paper from scrapkit to individual layers of the template (Right click on layer in layer box > Alpha to Selection > CTRL I > Select paper layer in layer box > Delete).
These are the papers I used:
Paper 1
Paper 2
Paper 9
Paper 11
Paper 13
~I added noise to some of the template layers to make them look glittery (Filters > Noise > RGB Noise).
~I colorized some of the template layers to better match the scrapkit (Colors > Colorize > play with the setting until you get the desired color).
~Add drop shadow to template layers (Filters > Light & Shadow > Drop Shadow).
3. Open tube, add drop shadow.
4. Open and place the following elements:
Candy Cane
Penguin 1
Poinsettia 1
Present 3
(the above embellishment is mislabled, it's actually the yellow poinsettia)
Bell 1
Bell 2
Decoration 1
Holly 1
Holly 2
~Some of the elements may need to be sized down. Using your scale tool in your tool box adjust the pixel size until element is the correct size~
~Add drop shadow to all elements~
4. Open Paper 6
5. Open mask
6. Add mask to paper (click HERE for a tut on using masks)
7. Merge Layers (Image > Merge Visible Layers).
8. Crop Image (Image > Autocrop Image).
9. Scale image to desired size (Image > Scale Image).
10. Add copyright info and name
11. Save as .png
YOU ARE ALL DONE!!!!!!!!!!
This tutorial is of my own creation and any resemblance to any other tuts is purely coincidental. This tutorial is for personal use only, using it for monetary gain is against our TOU's.
~Gimp (any version will do).
~Do You Believe PTU scrapkit which you can get from Creative Intentionz HERE.
~Tube of choice. I used the artwork of Tyson McAdoo, you must have a license to use this art which you can get HERE.
~Template of choice. I used temp 201 from Blissfully Beth which you can get HERE.
~Mask of choice. I used WSL mask 302 which you can get HERE.
~Font of choice. I used Creative Power.
Let's get started!!!
1. Open a new layer ( I prefer a large canvas, so I make mine 1050x656). Make your canvas transparent (Layer > Transparency > Color to Alpha).
2. Open template in PSD format, move layers of template around until they are the way you like them.
~Add paper from scrapkit to individual layers of the template (Right click on layer in layer box > Alpha to Selection > CTRL I > Select paper layer in layer box > Delete).
These are the papers I used:
Paper 1
Paper 2
Paper 9
Paper 11
Paper 13
~I added noise to some of the template layers to make them look glittery (Filters > Noise > RGB Noise).
~I colorized some of the template layers to better match the scrapkit (Colors > Colorize > play with the setting until you get the desired color).
~Add drop shadow to template layers (Filters > Light & Shadow > Drop Shadow).
3. Open tube, add drop shadow.
4. Open and place the following elements:
Candy Cane
Penguin 1
Poinsettia 1
Present 3
(the above embellishment is mislabled, it's actually the yellow poinsettia)
Bell 1
Bell 2
Decoration 1
Holly 1
Holly 2
~Some of the elements may need to be sized down. Using your scale tool in your tool box adjust the pixel size until element is the correct size~
~Add drop shadow to all elements~
4. Open Paper 6
5. Open mask
6. Add mask to paper (click HERE for a tut on using masks)
7. Merge Layers (Image > Merge Visible Layers).
8. Crop Image (Image > Autocrop Image).
9. Scale image to desired size (Image > Scale Image).
10. Add copyright info and name
11. Save as .png
YOU ARE ALL DONE!!!!!!!!!! I am going to show you how to make text 'glitter' using gimp.
Supplies
Gimp- Any version should work
Bold Text- I am using velvenda cooler
Let's do this!
-Go to File>New and open a canvas with the size of 300x300 pixels.
-Type out your name using any color you wish. I am using 52126a. Right click your text layer in your layer box and choose layer to image size. Go to Layers>Duplicate Layer 2 times for a
total of 3 text layers.
-Make your top text layer active. Go to Filters>Noise>RGB Noise. The settings will depend on the color you are using. Just play around with the settings till you get something you like.
Here are the settings I used:
I am going to show you how to make text 'glitter' using gimp.
Supplies
Gimp- Any version should work
Bold Text- I am using velvenda cooler
Let's do this!
-Go to File>New and open a canvas with the size of 300x300 pixels.
-Type out your name using any color you wish. I am using 52126a. Right click your text layer in your layer box and choose layer to image size. Go to Layers>Duplicate Layer 2 times for a
total of 3 text layers.
-Make your top text layer active. Go to Filters>Noise>RGB Noise. The settings will depend on the color you are using. Just play around with the settings till you get something you like.
Here are the settings I used:


 -Click save and your done!
You can download the temp HERE
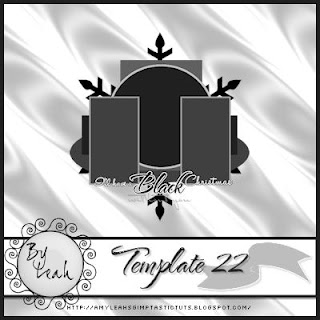
This tutorial is of my own creation and any resemblance to any other tuts is purely coincidental. This tutorial is for personal use only, using it for monetary gain is against our TOU's. Supplies: Gimp Any version should work Stunning PTU kit from Addictive Pleasures called 'Black Christmas' HERE Template 22 by me HERE Font- Ma Sexy Let's get started! -Open template an delete the credits. -Make the circle layer active. Right click layer in layer box and choose layer to image size. Using the magic wand, click outside the circle. Open paper 12. Right click layer in layer box and choose add alpha channel. Layer>Scale Layer by 50%. Press delete on your keyboard. Select none. Delete circle layer. -Make the circle back layer active. Filters>Noise>RGB Noise on default settings. Filters>Light & Shadow> Drop Shadow of 2, 2, 15, black, 100. -Make the square layer active. Layer to image size. Click outside with magic wand. Open paper 10 and add alpha channel. Scale by 50%. Delete and select none. Filters>Repeat Drop Shadow. Delete the square layer. -Make the thin rect layer active. Layer to image size. Click outside with magic wand. Open paper 5 and add alpha channel. Scale by 75%. Delete. Select>Invert. Add new later above this layer. Select>Grow by 1. Fill with white. Select>Shrink by 3. Delete and select none. Repeat drop shadow. Delete the thin rect layer. -Make the oval layer active. Layer to image size. Click outside with magic wand. Open paper 4 and add alpha channel. Scale by 85%. Delete and invert. Add new layer below this layer. Grow by 3. Fill with white. Select none and repeat drop shadow. Delete oval layer. -Make the rect 1 layer active. Layer to image size. Click outside with magic wand. Open paper 7 and add alha channel. Scale by 50%. Delete and select none. -Make rect 2 layer active. Layer to image size. Click outside with magic wand. Open paper 3 and add alpha channel. Scale by 50%. Delete and select none. Delete the rect 2 layer. -Add noise to the frame 1, frame 2 and black layers. -Add a drop shadow of 2, 2, 10, black, 100 to the snowflake layer. -Open your tube (full body). Move layer below word art layers in the layer box. Add drop shdow of 3, 5, 2, black, 50. -Open tube close up. Move layer below frame 2. Layer>Duplicate Layer. Layer to image size. Using the flip tool flip your tube. Move this duplicate tube layer below the frame 1 layer. Erase parts of the tube sticking out of the frame. To do this make the paper layer below the tube active. Click outside with magic wand. Make the tube layer active and press delete. Do with both close up tube layers. Change the mode of both tube layers to value and change the opacity to 50. Elements Add a drop shadow of 2, 2, 2, black, 50 to all element layers. See my tag for placement. -Frame 5 Scale 50% -Snowflake Scale 65% -Sparkles no scale duplicate and flip -Garland Scale 50% -Candle 2 Scale 60% duplicate and flip -Mistletoe 60% -Curtains Scale 85% -Candle no scale -Candles Scale 35% duplicate and flip -Bauble 3 Scale 25% -Tree 5 Scale 50% -Add drop shadow to all 3 word back layers. -Make the without you layer active. Layer to image size. Right click in layer box and choose alpha to selection. Add new layer below this layer. Grow by 2 and fill with white. Select none. Filters>Blur>Gaussian Blur 5. Add drop shadow. -Add your name, copyrights and crop. I hope you enjoyed this tut! Happy Holidays!
 This tutorial is of my own creation and any resemblance to any other tuts is purely coincidental. This tutorial is for personal use only, using it for monetary gain is against our TOU's.
Supplies Needed:
~Gimp (any version will do).
~Black Christmas PTU scrapkit which you can get from Addictive Pleasures HERE.
~Tube of choice. I used the art of Jennifer Janesko, you must have a license to use this art which you can get HERE.
~Template of choice. I used MC Template 76 which you can get at Melissaz Creationz HERE.
~Mask of choice. I used WSL mask363 which you can get HERE.
~Font of choice. I used Scriptina.
Let's get started!!!
1. Open a new layer ( I prefer a large canvas, so I make mine 1050x656). Make your canvas transparent (Layer > Transparency > Color to Alpha).
2. Open template in PSD format, move layers of template around until they are the way you like them.
~Add paper from scrapkit to individual layers of the template (Right click on template layer in layer box > Alpha to Selection > CTRL I > Select paper layer in layer box > Delete).
These are the papers I used:
Paper 2
Paper 4
Paper 5
Paper 11
Paper 12
~I added noise to some of the template layers to make them look glittery (Filters > Noise > RGB Noise).
~I colorized some of the template layers to better match the scrapkit (Colors > Colorize > play with the setting until you get the desired color).
~Add drop shadow to template layers (Filters > Light & Shadow > Drop Shadow).
3. Open tube, add drop shadow.
4. Open and place the following elements:
Beads
Tree 5
Present
Present 2
Present 3
Snowflake
Joy
Bow 2
Candles
Lantern
Twig
Holly
Ornament
Bauble 4
~Some of the elements may need to be sized down. Using your scale tool in your tool box adjust the pixel size until element is the correct size~
~Add drop shadow to all elements~
5. Open Paper 7
6. Open mask
7. Apply layer mask (click HERE for a tut on using masks)
8. Merge Layers (Image > Merge Visible Layers).
9. Crop Image (Image > Autocrop Image).
10. Scale image to desired size (Image > Scale Image).
11. Add copyright info and name
12. Save as .png
ALL DONE!!!!!!!!!!
This tutorial is of my own creation and any resemblance to any other tuts is purely coincidental. This tutorial is for personal use only, using it for monetary gain is against our TOU's.
Supplies Needed:
~Gimp (any version will do).
~Black Christmas PTU scrapkit which you can get from Addictive Pleasures HERE.
~Tube of choice. I used the art of Jennifer Janesko, you must have a license to use this art which you can get HERE.
~Template of choice. I used MC Template 76 which you can get at Melissaz Creationz HERE.
~Mask of choice. I used WSL mask363 which you can get HERE.
~Font of choice. I used Scriptina.
Let's get started!!!
1. Open a new layer ( I prefer a large canvas, so I make mine 1050x656). Make your canvas transparent (Layer > Transparency > Color to Alpha).
2. Open template in PSD format, move layers of template around until they are the way you like them.
~Add paper from scrapkit to individual layers of the template (Right click on template layer in layer box > Alpha to Selection > CTRL I > Select paper layer in layer box > Delete).
These are the papers I used:
Paper 2
Paper 4
Paper 5
Paper 11
Paper 12
~I added noise to some of the template layers to make them look glittery (Filters > Noise > RGB Noise).
~I colorized some of the template layers to better match the scrapkit (Colors > Colorize > play with the setting until you get the desired color).
~Add drop shadow to template layers (Filters > Light & Shadow > Drop Shadow).
3. Open tube, add drop shadow.
4. Open and place the following elements:
Beads
Tree 5
Present
Present 2
Present 3
Snowflake
Joy
Bow 2
Candles
Lantern
Twig
Holly
Ornament
Bauble 4
~Some of the elements may need to be sized down. Using your scale tool in your tool box adjust the pixel size until element is the correct size~
~Add drop shadow to all elements~
5. Open Paper 7
6. Open mask
7. Apply layer mask (click HERE for a tut on using masks)
8. Merge Layers (Image > Merge Visible Layers).
9. Crop Image (Image > Autocrop Image).
10. Scale image to desired size (Image > Scale Image).
11. Add copyright info and name
12. Save as .png
ALL DONE!!!!!!!!!!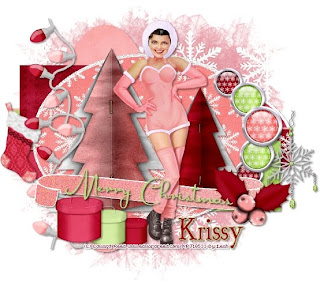
Supplies:
Gimp- Any version should work
Cute PTU Scrap Kit from Krissy's Scraps called Pink Frosting HERE
Tube of Choice. I am using the art of Edward Reed. You must have a license to use his tubes. You can purchase them HERE
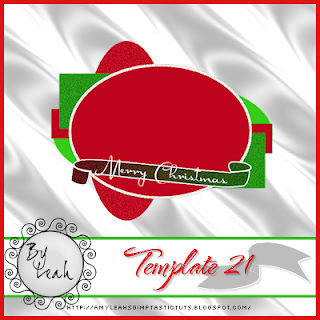
Template 21 form me HERE
Mask 212 from Gems taggin scraps HERE
Font St. Nicholas
Let's get started!
-Open template. Delete the credits. Crop using the crop tool. Go to Image>Scale Image by 500 px. Image>Canvas Size 600x600 px and make sure you click centered. Right click all the layers in the layer box and choose layer to image size.
-Make oval 1 active. Click outside of the oval using your magic wand tool. Open paper 2. Right click paper in layer box and choose Add Alpha Channel. Layer>Scale layer by 50%. Press delete on your keyboard to delete anything outside of the oval. Select>None. Delete the original oval 1 layer.
-Make oval 1 back active. Go to Filters>Light and Shadow>Drop Shadow of 2, 2, 3, black, 40.
-Make square 1 active. Click outside with magic wand. Open paper 11 and add alpha channel. Scale by 40%. Press delete and select none. Filters>Repeat drop Shaodw. Delete original square 1 layer.
-Make square 2 active. Click outside with magic wand. Open paper 12 and add alpha channel. Scale by 40%. Press delete and select none. Repeat drop shadow. Delete original sqaure 2 layer.
-Make oval 2 active. Click outside with magic wand. Open paper 5 and add alpha channel. Scale by 65%. Press delete and select none. Reapeat drop shadow. Delete original oval 2 layer.
-Make oval 3 active. Click outside with magic wand. Open paper 6 and add alpha channel. Scale by 65%. Press delete and select none. Repeat drop shadow. Delete original oval 3 layer.
-Make rect 1 avtive. Click outside with magic wand. Open paper 4 and add alpha channel. Scale by 50%. Press delete. Select>Invert. Select>Grow by 3. Add anew layer below this layer. Using your bucket fill tool, fill with fab3b4. Select none. Repeat drop shadow. Delete original rect 1 layer.
-Make rect 2 active. Click outside with magic wand. Open paper 3 and add alpha channel. Scale by 50%. Press delete. Invert and grow by 3. Add new layer below this layer. Fill with fab3b4. Select none and repeat drop shadow. Delete original rect 2 layer.
-Make the ribbon layer active. Click outside with magic wand. Add new layer above this layer. Invert. Fill with linear gradient using fab3b4 and F78C89. Filters>Noise>RGB Noise using default settings. Select none. Add drop shadow to ribbon back layer. Delete original ribbon layer.
-Make the merry christmas layer active. Right click layer in layer box and choose alpha to selection. Add new layer above this layer. Fill with B9D87B. Select none. Repeat drop shadow. Delete original merry christmas layer.
-Open tube. Scale by 75%. Add drop shdow.
Elements
Add a drop shadow to all element layers. See my tag as a reference as to where to place element layers.
-holly 2 Scale 40%
-paper christmas tree 1 scale 50%
-paper christmas tree 2 scale 40%
-gift box 1 scale 25%
-gift box 3 scale 20%
-gift box 4 scale 15%
-snowflake ornament 3 scale 50%
-lights 1 scale 50% Using rotate tool rotate by 90
-brad 2 scale 35%
-brad 3 scale 30% Layers>Duplicate
-brad 4 scale by 35% Duplicate
-stocking 1 scale 40%
-Open paper 1 and move to the bottom in layer box. Add alpha channel and apply mask. Click HERE for our mask tutorial.
-Add your name and copyrights and crop.
I hope you enjoyed this tut!
Happy Holidays!!

To download them go HERE
 This tutorial is of my own creation and any resemblance to any other tuts is purely coincidental. This tutorial is for personal use only, using it for monetary gain is against our TOU's.
Supplies Needed:
~Gimp (any version will do).
~Tube of choice. I used the art of Elias Chatzoudis. You must have a license to use his art which you can get HERE.
~Funky Punky Christmas FTU scrapkit which you can get from Addictive Pleasures HERE.
~Mask of choice. I used Gem mask 209 which you can get HERE.
~Font of choice. I used Velvenda Heavy.
Let's get started!!!!!
1. Open a new layer ( I prefer a large canvas, so I make mine 1050x656). Make your canvas transparent (Layer > Transparency > Color to alpha).
2. Open Frame 3, add drop shadow (Filters > Light & Shadow > Drop Shadow).
3. Open Paper 9 center it behind the frame 3, remove excess paper using the rectangular cutting tool in your tool box.
4. Open Frame 4, add drop shadow.
5. Open Paper 6 center it behind the frame, remove excess paper using the circular cutting tool in your tool box.
6. Open tube, add drop shadow.
7. Open and place the following elements:
Tree 2
Snowmen
Mistletoe
Present
Presents
Star
PomPom
Label
Skull
~Some of the elements may need to be sized down. Using your scale tool in your tool box adjust the pixel size until element is the correct size~
~Add drop shadow to all elements~
8. Open Paper 11.
9. Open mask.
10. Add mask to paper
11. Merge layers (Image > Merge Visible Layer).
12. Autocrop image (Image > Autocrop Image).
13. Scale image to desired size (Image > Scale Image).
14. Add copyright info and name.
15. Save as .png
You are finished :)
This tutorial is of my own creation and any resemblance to any other tuts is purely coincidental. This tutorial is for personal use only, using it for monetary gain is against our TOU's.
Supplies Needed:
~Gimp (any version will do).
~Tube of choice. I used the art of Elias Chatzoudis. You must have a license to use his art which you can get HERE.
~Funky Punky Christmas FTU scrapkit which you can get from Addictive Pleasures HERE.
~Mask of choice. I used Gem mask 209 which you can get HERE.
~Font of choice. I used Velvenda Heavy.
Let's get started!!!!!
1. Open a new layer ( I prefer a large canvas, so I make mine 1050x656). Make your canvas transparent (Layer > Transparency > Color to alpha).
2. Open Frame 3, add drop shadow (Filters > Light & Shadow > Drop Shadow).
3. Open Paper 9 center it behind the frame 3, remove excess paper using the rectangular cutting tool in your tool box.
4. Open Frame 4, add drop shadow.
5. Open Paper 6 center it behind the frame, remove excess paper using the circular cutting tool in your tool box.
6. Open tube, add drop shadow.
7. Open and place the following elements:
Tree 2
Snowmen
Mistletoe
Present
Presents
Star
PomPom
Label
Skull
~Some of the elements may need to be sized down. Using your scale tool in your tool box adjust the pixel size until element is the correct size~
~Add drop shadow to all elements~
8. Open Paper 11.
9. Open mask.
10. Add mask to paper
11. Merge layers (Image > Merge Visible Layer).
12. Autocrop image (Image > Autocrop Image).
13. Scale image to desired size (Image > Scale Image).
14. Add copyright info and name.
15. Save as .png
You are finished :)  This tutorial is of my own creation and any resemblance to any other tuts is purely coincidental. This tutorial is for personal use only, using it for monetary gain is against our TOU's.
Supplies Needed:
~Gimp (any version will do).
~Tubes of choice. I used the super hot artwork of Ismael Rac. You must have a license to use his art which you can get HERE.
~Punk Rock Barbie PTU scrapkit which you can get from Addictive Pleasures HERE.
~Mask of choice. I used WSL mask 263 which you can get HERE.
~Font of choice. I used Pasta Palazzo.
Let's get started!!!!!
1. Open a new layer ( I prefer a large canvas, so I make mine 1050x656). Make your canvas transparent (Layer > Transparency > Color to alpha).
2. Open Frame, tilt the frame slightly using the Rotate Tool in your tool box. Duplicate the frame so that you have 2 of them, flip one of them so that they are a mirror image of each other, you can use the Flip Tool in your tool box for this. Move the frames in to desired position, add drop shadow (Filters > Light & Shadow > Drop Shadow).
3. Open Paper 6 center it behind the frames, remove excess paper using the rectangular cutting tool in your tool box.
4. Open FilmStrip, add drop shadow.
5. Open Paper 5 center it behind the filmstrip, remove excess paper using the rectangular cutting tool in your tool box.
6. Open tubes, I used both a full body and close ups. Open the close ups behind the filmstrip, I made the close ups back & white (Colors > Desaturate > Luminosity). I also lowered the opacity of the close ups to 65 (at the top of the layer box you will see a bar you can slide to change the opacity of the selected layer). Add drop shadow to all of the tubes.
7. Open and place the following elements:
Discoball
Netting
Flames x2
Guitar
Skull
Sparkle X4
~Some of the elements may need to be sized down. Using your scale tool in your tool box adjust the pixel size until element is the correct size~
~Add drop shadow to all elements~
8. Open Paper 11.
9. Open mask.
10. Add mask to paper (click HERE for a tut on using masks)
11. Merge layers (Image > Merge Visible Layer).
12. Autocrop image (Image > Autocrop Image).
13. Scale image to desired size (Image > Scale Image).
14. Add copyright info and name.
15. Save as .png
You are finished :)
This tutorial is of my own creation and any resemblance to any other tuts is purely coincidental. This tutorial is for personal use only, using it for monetary gain is against our TOU's.
Supplies Needed:
~Gimp (any version will do).
~Tubes of choice. I used the super hot artwork of Ismael Rac. You must have a license to use his art which you can get HERE.
~Punk Rock Barbie PTU scrapkit which you can get from Addictive Pleasures HERE.
~Mask of choice. I used WSL mask 263 which you can get HERE.
~Font of choice. I used Pasta Palazzo.
Let's get started!!!!!
1. Open a new layer ( I prefer a large canvas, so I make mine 1050x656). Make your canvas transparent (Layer > Transparency > Color to alpha).
2. Open Frame, tilt the frame slightly using the Rotate Tool in your tool box. Duplicate the frame so that you have 2 of them, flip one of them so that they are a mirror image of each other, you can use the Flip Tool in your tool box for this. Move the frames in to desired position, add drop shadow (Filters > Light & Shadow > Drop Shadow).
3. Open Paper 6 center it behind the frames, remove excess paper using the rectangular cutting tool in your tool box.
4. Open FilmStrip, add drop shadow.
5. Open Paper 5 center it behind the filmstrip, remove excess paper using the rectangular cutting tool in your tool box.
6. Open tubes, I used both a full body and close ups. Open the close ups behind the filmstrip, I made the close ups back & white (Colors > Desaturate > Luminosity). I also lowered the opacity of the close ups to 65 (at the top of the layer box you will see a bar you can slide to change the opacity of the selected layer). Add drop shadow to all of the tubes.
7. Open and place the following elements:
Discoball
Netting
Flames x2
Guitar
Skull
Sparkle X4
~Some of the elements may need to be sized down. Using your scale tool in your tool box adjust the pixel size until element is the correct size~
~Add drop shadow to all elements~
8. Open Paper 11.
9. Open mask.
10. Add mask to paper (click HERE for a tut on using masks)
11. Merge layers (Image > Merge Visible Layer).
12. Autocrop image (Image > Autocrop Image).
13. Scale image to desired size (Image > Scale Image).
14. Add copyright info and name.
15. Save as .png
You are finished :)  This tutorial is of my own creation and any resemblance to any other tuts is purely coincidental. This tutorial is for personal use only, using it for monetary gain is against our TOU's.
Supplies Needed:
~Gimp (any version will do).
~Tube of choice. I used the tubes included with the kit. Be sure to use proper copyright info when using these tubes
~One Fine Day PTU scrapkit which you can get from Sweet Cravings Scraps HERE.
~Mask of choice. I used DBV mask 10 which you can get HERE.
~Font of choice. I used Freebooter Script.
Let's get started!!!!!
1. Open a new layer ( I prefer a large canvas, so I make mine 1050x656). Make your canvas transparent (Layer > Transparency > Color to alpha).
2. Open Frame 4, add drop shadow (Filters > Light & Shadow > Drop Shadow).
3. Open Paper 8 center it behind circular portion of the frame, remove excess paper using circular cutting tool.
4. Open your tubes, add drop shadow.
5. Open and place the following elements:
Rainbow
Tree
Well
Grass
Flower 10
Flower 12
Carnation Basket
Butterfly 1
Butterfly 2
~Some elements may need to be sized down, use the Scale Tool in your tool box to adjust pixel size~
~Add drop shadow to all elements~
6. Open Paper 14.
7. Open mask.
8. Add mask to paper (click HERE for a tut on using masks).
9. Merge layers (Image > Merge Visible Layer).
10. crop image (Image > Autocrop Image).
11. Scale image to desired size (Image > Scale Image).
12. Add copyright info and name.
13. Save as .png
You are finished :)
This tutorial is of my own creation and any resemblance to any other tuts is purely coincidental. This tutorial is for personal use only, using it for monetary gain is against our TOU's.
Supplies Needed:
~Gimp (any version will do).
~Tube of choice. I used the tubes included with the kit. Be sure to use proper copyright info when using these tubes
~One Fine Day PTU scrapkit which you can get from Sweet Cravings Scraps HERE.
~Mask of choice. I used DBV mask 10 which you can get HERE.
~Font of choice. I used Freebooter Script.
Let's get started!!!!!
1. Open a new layer ( I prefer a large canvas, so I make mine 1050x656). Make your canvas transparent (Layer > Transparency > Color to alpha).
2. Open Frame 4, add drop shadow (Filters > Light & Shadow > Drop Shadow).
3. Open Paper 8 center it behind circular portion of the frame, remove excess paper using circular cutting tool.
4. Open your tubes, add drop shadow.
5. Open and place the following elements:
Rainbow
Tree
Well
Grass
Flower 10
Flower 12
Carnation Basket
Butterfly 1
Butterfly 2
~Some elements may need to be sized down, use the Scale Tool in your tool box to adjust pixel size~
~Add drop shadow to all elements~
6. Open Paper 14.
7. Open mask.
8. Add mask to paper (click HERE for a tut on using masks).
9. Merge layers (Image > Merge Visible Layer).
10. crop image (Image > Autocrop Image).
11. Scale image to desired size (Image > Scale Image).
12. Add copyright info and name.
13. Save as .png
You are finished :)  This tutorial is of my own creation and any resemblance to any other tuts is purely coincidental. This tutorial is for personal use only, using it for monetary gain is against our TOU's.
Supplies:
Wonderful PTU kit 'One Fine Day' from Sweet Cravings Scraps HERE
I am using the art of Pinuptoons. You must have a license to use these tubes. To purchase them go HERE
Fonts- Riddle and Halohandletter
Let's get started!
-Go to File>New and open a canvas of 500x500 pixels.
-Open Frame 2. Go to Layer>Scale Layer by 40%. Using your magic wand tool, click inside the frame. Go to Select>Grow by 3. Open paper 2. Move this paper layer below the frame layer in the
layer box. Right click layer in layer box and choose add alpha channel. Scale by 50%. Go to Select>Invert. Press delete on your keyboard to erase anything outside of the
frame. Go to Select>None. Make the frame layer active. Go to Filters>Light and Shadow>Drop Shadow of 2, 2, 2, black, 50.
-Open Frame 1. Scale by 25%. Using the rotate tool, rotate frame by 25. Click inside with magic wand. Grow by 3. Open paper 4. Add alpha channel. Move this paper layer below frame layer. Scale by 50%.
Invert and press delete. Select none. Make the frame layer active and go to Filters>Repeat drop shadow.
-Open the rainbow. Scale by 50%. See my tag as a reference for placement. Same goes for all element layers.
-Open your tube. Scale by 65%. Add drop shadow.
-Open flower7. Scale by 75%. Add drop shadow.
-Open water pump. Scale by 55%. Add drop shadow.
-Open carnation basket. Scale by 35%. Add drop shadow.
-Open flower12. Scale by40%. Add drop shadow.
-Open shooting stars. Scale by 40%. Add drop shadow.
-Open butterfly2. Scale by 20%. Add drop shadow.
-Open woodbox front. Scale by 50%. Rotate by 90. Add drop shdow.
-Open wood pallette. Scale by 40%. Rotate by 90. Add drop shadow.
-Open flower4. Scale by 25%. Add drop shdow. Change mode to screen.
-Type 'secret garden' with the riddle font.
-Add your name with the halohandletter font.
-Add your copyright and crop.
That's all! I hope you enjoyed this tut!
This tutorial is of my own creation and any resemblance to any other tuts is purely coincidental. This tutorial is for personal use only, using it for monetary gain is against our TOU's.
Supplies:
Wonderful PTU kit 'One Fine Day' from Sweet Cravings Scraps HERE
I am using the art of Pinuptoons. You must have a license to use these tubes. To purchase them go HERE
Fonts- Riddle and Halohandletter
Let's get started!
-Go to File>New and open a canvas of 500x500 pixels.
-Open Frame 2. Go to Layer>Scale Layer by 40%. Using your magic wand tool, click inside the frame. Go to Select>Grow by 3. Open paper 2. Move this paper layer below the frame layer in the
layer box. Right click layer in layer box and choose add alpha channel. Scale by 50%. Go to Select>Invert. Press delete on your keyboard to erase anything outside of the
frame. Go to Select>None. Make the frame layer active. Go to Filters>Light and Shadow>Drop Shadow of 2, 2, 2, black, 50.
-Open Frame 1. Scale by 25%. Using the rotate tool, rotate frame by 25. Click inside with magic wand. Grow by 3. Open paper 4. Add alpha channel. Move this paper layer below frame layer. Scale by 50%.
Invert and press delete. Select none. Make the frame layer active and go to Filters>Repeat drop shadow.
-Open the rainbow. Scale by 50%. See my tag as a reference for placement. Same goes for all element layers.
-Open your tube. Scale by 65%. Add drop shadow.
-Open flower7. Scale by 75%. Add drop shadow.
-Open water pump. Scale by 55%. Add drop shadow.
-Open carnation basket. Scale by 35%. Add drop shadow.
-Open flower12. Scale by40%. Add drop shadow.
-Open shooting stars. Scale by 40%. Add drop shadow.
-Open butterfly2. Scale by 20%. Add drop shadow.
-Open woodbox front. Scale by 50%. Rotate by 90. Add drop shdow.
-Open wood pallette. Scale by 40%. Rotate by 90. Add drop shadow.
-Open flower4. Scale by 25%. Add drop shdow. Change mode to screen.
-Type 'secret garden' with the riddle font.
-Add your name with the halohandletter font.
-Add your copyright and crop.
That's all! I hope you enjoyed this tut!

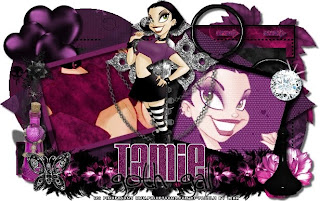
This tutorial is of my own creation and any resemblance to any other tuts is purely coincidental. This tutorial is for personal use only, using it for monetary gain is against our TOU's. Supplies: Amazing PTU kit from Addictive Pleasures called 'Gothica' HERE I used the art of pinuptoons. You must have a license to use them. You can purchase them HERE Template #1 from Brandi over at Creative Misfits HERE Fonts- Velvanda Cooler and Tall Paul Let's Begin! -Open template. Delete the credits. Right click each layer in the layer box and choose layer to image size. Next go to Image>Scale Image and change the x resolution to 72 and press enter and then press scale. -Make the large rectangle layer active. using the magic wand tool clcik outside the rectangle. Open paper 8. Right click in the layer box and choose add alpha channel. Go to Layer>Scale Layer by 75%. Press delete on your keyboard to erase anything outside of the selection. Go to Select>None. Layer to image size. Delete the original large rectangle layer. -Make the triangle 1 layer active. Click outside with magic wand. Open paper 9 and add alpha channel. Scale by 50%. Press delete and select none. Go to Filters>Light and Shadow>Drop Shadow of 4, 4, 3, black, 60. Delete the original triangle 1 layer. -Make the triangle 2 layer active. Click outside with magic wand. Open paper 3 and add alpha channel. Scale by 50%. Press delete and select none. Go to Filters>Repeat Drop Shadow. Delete the original triangle 2 layer. -Make the circle 1 layer active. Click outside with magic wand. Open paper 2 and add alpha channel. Scale by 50%. Press delete and select none. Add drop shadow. Delete the original circle 1 layer. -Make the circle 2 layer active. Click outside with the magic wand. Open paper 12 and add alpha channel. Scale by 50%. Press delete and select none. Add drop shadow. Delete original circle 2 layer. -Make the small rectangle 1 layer active. Click outside with magic wand. Open paper 4 and add alpha channel. Scale by 50%. Press delete. Go to Select>Invert. Layer to image size. Now go to Select>Grow by 2. Add a new layer above this layer. Using the bucket fill tool, fill with 742059. Go to Select>Shrink by 3. Press delete and select none. Add drop shadow. Delete original small rectangle 1 layer. -Make small rectangle 2 layer active. Click outside with magic wand. Open paper 1 and add alpha channel. Scale by 50%. Press delete and invert. Layer to image size. Grow by 2. Add a new layer above this layer. Fill with black. Shrink by 3 and press delete. Select none and add drop shadow. Delete original small rectangle 2 layer. -Make the merged (arrows) layer active. Right click layer in layer box and choose alpha to selection. Add a new layer above this layer. Fill with purple from before. Select none. Go to Filters>Noise>RGB Noise on the default settings. Add drop shadow. Delete original merged layer. -Make square 1 active. Alpha to selection. Add new layer above this layer. Fill with black. Select none. Click inside with magic wand. Grow by 3. Open paper 7 and add alpha channel. Scale by 50%. Move this paper layer below the frame in the layer box. Invert and press delete. Select none. Add drop shadow. Delete original square 1 layer. -Make square 2 active. Alpha to selection. Add new layer above this layer. Fill with same purple. Select none. Click inside with magic wand. Grow by 3. Open paper 6 and add alpha channel. Scale by 50%. Move paper layer below frame layer in layer box. Invert and press delete. Select none and add drop shadow. Delete original square 2 layer. -Open tube. Move this layer to the top in the layer box. Scale by 75% and add drop shadow. -Open tube close up. Move layer below the right frame layer. Using the flip tool flip the tube. Make the paper of the right frame active and clcik outside with magic wand. Make the tube active. Press delete. layer to image size. Select none. Change the layer mode to screen. Do the same with the left frame, except change the layer mode to hard light. Time for elements! Add drop shdow to all element layer. See my tag as a reference as to where to place element layers. -Feathers Scale by 50% -Frame Scale by 50% -Hearts Scale by 50% -Curlylace Scale by 40% -Diamond no scale -Cross Scale by 75% -Butterfly3 Scale by 35% -Bottle Scale by 40% -Leaves no scale -Bottle2 Scale by 35% -Flower3 Scale by 50% -Add your name with the Velevanda Cooler font -Type 'goth gal' with the tall paul font -Add copyright and crop You're finished!!!!
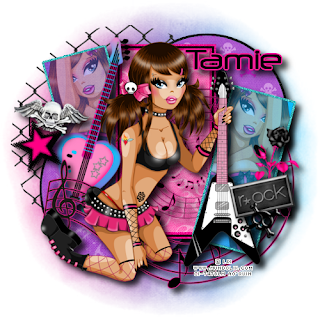
This tutorial is of my own creation and any resemblance to any other tuts is purely coincidental. This tutorial is for personal use only, using it for monetary gain is against our TOU's. Supplies Needed: ~Gimp (any version will do). ~Girlz and Guitars PTU scrapkit which you can get from Addictive Pleasures HERE. ~Tubes of choice. I used the artwork of Lix, you must have a license to use his art which you can get HERE. ~Template of choice. I used Leah's Template 13 which you can get from our blog HERE. ~Mask of choice. I used Monti's Circle Mask which you can get from Monti's Pixel Playground HERE. ~Font of choice. I used Neuropol. Let's get started!!! 1. Open a new layer ( I prefer a large canvas, so I make mine 1050x656). Make your canvas transparent (Layer > Transparency > Color to Alpha). 2. Open template in PSD format, move layers of template around until they are the way you like them. ~Add paper from scrapkit to individual layers of the template (Right click on a template layer in layer box > Alpha to Selection > CTRL I > Select paper layer in layer box > Delete). These are the papers I used: Paper 1 Paper 2 Paper 4 Paper 6 Paper 10 Paper 12 ~I added noise to some of the template layers to make them look glittery (Filters > Noise > RGB Noise). ~I colorized some of the template layers to better match the scrapkit (Colors > Colorize > play with the setting until you get the desired color). ~Add drop shadow to template layers (Filters > Light & Shadow > Drop Shadow). 3. Open tubes, I used both a full body and close ups. I lowered the opacity of the close ups to 50 (at the top of the layer box you will see a bar you can slide to change the opacity of the selected layer). Add drop shadow to the full body tube. 4. Open and place the following elements: Wire Guitar 5 Charm 2 Star Rose 2 Metal Plate Black Chrome (skull) Music Notes ~Some of the elements may need to be sized down. Using your scale tool in your tool box adjust the pixel size until element is the correct size~ ~Add drop shadow to all elements~ 5. Open mask 6. Open Paper 11 7. Add mask to paper 8. Merge Layers (Image > Merge Visible Layers). 9. Crop Image (Image > Autocrop Image). 10. Scale image to desired size (Image > Scale Image). 11. Add copyright info and name 12. Save as .png ALL DONE!!!!!!!!!!
 This tutorial is of my own creation and any resemblance to any other tuts is purely coincidental. This tutorial is for personal use only, using it for monetary gain is against our TOU's.
~Gimp (any version will do).
~Blue Christmas PTU scrapkit which you can get from Creative Intentionz HERE.
~Tube of choice. I used the adorable PinUpToons, you must have a license to use this art which you can get HERE.
~Template of choice. I used xmas temp 8 from Addictive Templates which you can get HERE.
~Mask of choice. I used WSL mask 254 which you can get HERE.
~Animated penguin. I found this cutie at Peachie's Collection HERE.
~Font of choice. I used Kayleigh.
Let's get started!!!
1. Open a new layer ( I prefer a large canvas, so I make mine 1050x656). Make your canvas transparent (Layer > Transparency > Color to Alpha).
2. Open template in PSD format, move layers of template around until they are the way you like them.
~Add paper from scrapkit to individual layers of the template (Right click on layer in layer box > Alpha to Selection > CTRL I > Select paper layer in layer box > Delete).
These are the papers I used:
Paper 2
Paper 8
Paper 10
Paper 12
~I added noise to some of the template layers to make them look glittery (Filters > Noise > RGB Noise).
~I colorized some of the template layers to better match the scrapkit (Colors > Colorize > play with the setting until you get the desired color).
~Add drop shadow to template layers (Filters > Light & Shadow > Drop Shadow).
3. Open tubes, I used both a full body and a close up. I lowered the opacity of the close ups to 50 (at the top of the layer box you will see a bar you can slide to change the opacity of the selected layer). Add drop shadow to the full body tube.
4. Open and place the following elements:
Ribbon Bow 2
SnowFlake 1
SnowFlake 2
SnowBalls
Tree
Snowman
Snow Pile
Lily 1
Lily 2 x2
Sparkles
~Some of the elements may need to be sized down. Using your scale tool in your tool box adjust the pixel size until element is the correct size~
~Add drop shadow to all elements~
4. Open Paper 6
5. Open mask
6. Add mask to paper (click HERE for a tut on using masks)
7. Merge Layers (Image > Merge Visible Layers).
8. Crop Image (Image > Autocrop Image).
9. Scale image to desired size (Image > Scale Image).
10. Add copyright info and name
~At this point I would usually tell you to save as png and you are done, which you can do if you do not want the tag to be animated. If you want the animation continue with the tut~
11. Open the animated penguin. The penguin animation will open in 6 layers in your layer box. Lock all layers of the penguin together using the chain (the little box next to the eye in your layer box). Once the layers are locked together you can move all of the layers of the penguin all at the same time and position the image where you like it on the tag. It is very important that all the layers stay lined up in order for the animation to work properly. Your layer box should look something like this...
This tutorial is of my own creation and any resemblance to any other tuts is purely coincidental. This tutorial is for personal use only, using it for monetary gain is against our TOU's.
~Gimp (any version will do).
~Blue Christmas PTU scrapkit which you can get from Creative Intentionz HERE.
~Tube of choice. I used the adorable PinUpToons, you must have a license to use this art which you can get HERE.
~Template of choice. I used xmas temp 8 from Addictive Templates which you can get HERE.
~Mask of choice. I used WSL mask 254 which you can get HERE.
~Animated penguin. I found this cutie at Peachie's Collection HERE.
~Font of choice. I used Kayleigh.
Let's get started!!!
1. Open a new layer ( I prefer a large canvas, so I make mine 1050x656). Make your canvas transparent (Layer > Transparency > Color to Alpha).
2. Open template in PSD format, move layers of template around until they are the way you like them.
~Add paper from scrapkit to individual layers of the template (Right click on layer in layer box > Alpha to Selection > CTRL I > Select paper layer in layer box > Delete).
These are the papers I used:
Paper 2
Paper 8
Paper 10
Paper 12
~I added noise to some of the template layers to make them look glittery (Filters > Noise > RGB Noise).
~I colorized some of the template layers to better match the scrapkit (Colors > Colorize > play with the setting until you get the desired color).
~Add drop shadow to template layers (Filters > Light & Shadow > Drop Shadow).
3. Open tubes, I used both a full body and a close up. I lowered the opacity of the close ups to 50 (at the top of the layer box you will see a bar you can slide to change the opacity of the selected layer). Add drop shadow to the full body tube.
4. Open and place the following elements:
Ribbon Bow 2
SnowFlake 1
SnowFlake 2
SnowBalls
Tree
Snowman
Snow Pile
Lily 1
Lily 2 x2
Sparkles
~Some of the elements may need to be sized down. Using your scale tool in your tool box adjust the pixel size until element is the correct size~
~Add drop shadow to all elements~
4. Open Paper 6
5. Open mask
6. Add mask to paper (click HERE for a tut on using masks)
7. Merge Layers (Image > Merge Visible Layers).
8. Crop Image (Image > Autocrop Image).
9. Scale image to desired size (Image > Scale Image).
10. Add copyright info and name
~At this point I would usually tell you to save as png and you are done, which you can do if you do not want the tag to be animated. If you want the animation continue with the tut~
11. Open the animated penguin. The penguin animation will open in 6 layers in your layer box. Lock all layers of the penguin together using the chain (the little box next to the eye in your layer box). Once the layers are locked together you can move all of the layers of the penguin all at the same time and position the image where you like it on the tag. It is very important that all the layers stay lined up in order for the animation to work properly. Your layer box should look something like this...


 You are DONE!!!!!!!!!
 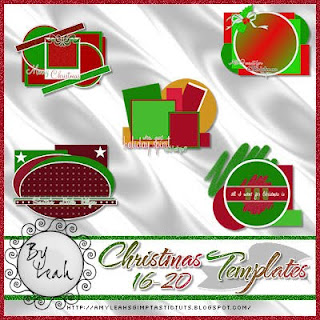 You can download them HERE
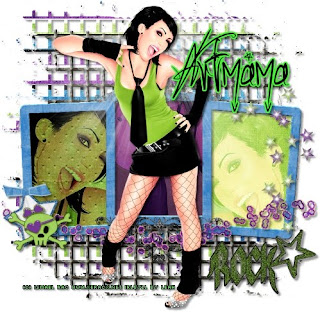
This tutorial is of my own creation and any resemblance to any other tuts is purely coincidental. This tutorial is for personal use only, using it for monetary gain is against our TOU's. Supplies: Gimp Any version should work Awesome PTU kit from Artmama called 'Hey Now, You're a Rockstar' HERE I am using the art of Ismael Rac. You must have a license to use his work. You can purchase his tubes HERE Font- Sick Capital Vice Let's get started! -Open Gimp. Go to FIle>New and open a canvas size of 500x500. -Open embellie 01. Go to Layer>Scale Layer by 65%. Right click this layer in the layer box and choose Layer To Image Size. Using your magic wand tool, click inside the 1st sqaure of the frame. Go to Select>Grow by 4. Open paper 5. Move this paper layer below the frame layer in the layer box. Right click this paper layer in the layer box and choose Add Alpha Channel. Scale by 50%. Go to Select>Invert. Press delete on your keyboard to erase everything outside of the frame. Go to Select>None. Rename this layer paper 1. Make the frame layer active and click inside the 2nd square. Grow by 4. Open paper 12 and move layer below frame layer. Add alpha channel. Scale by 50%. Invert and press delete. Select none. Name this layer paper 2. Make the frame layer active and click inside the last sqaure. Grow by 4. Open paper 11 and move layer below frame layer. Add alpha channel. Scale by 50%. Invert and press delete. Select none. Name this layer paper 3. Make the frame layer active again and go to Filters>Light and Shadow>Drop shadow of 3, 3, 3, black, 40. -Open your tube. Scale by 75%. Go to Filters>Repeat Drop Shadow. Go to Layers>Duplicate Layer. Now go to Filters>Blur>Gaussian Blur of 3. Change the mode of this tube layer to Soft Light. -Open close up of tube. Move this layer below theframe layer in the layer box. Position this tube in the 1st square of the frame.Name this layer Tube 1. Duplicate. Using the flip tool flip your duplicate tube layer. Position in the last sqaure of the frame. Name this layer Tube 3. Duplicate once more and postion in the middle sqaure. Name this layer tube 2. Make paper 1 layer active and click outside of the paper with the magic wand. Make tube 1 layer active. Press delete on your keyboard. Change the mode to multiply. Do this to the other tube and paper layers. Change the mode of tube 2 to Soft lIght and the mode of tube 3 will be overlay. -Open Embelli 16. Move this layer to the bottom. Scale by 75%. See my tag for placement for this and all element layers. Right click this layer in the layer box and choose Alpha To Selection. Open paper 14. Move this layer below embelli 16. Add alpha channel. Scale by 55%. Invert and press delete. Select none. Move this paper with the move tool towards the top of the tag. Add a drop shadow to both of these layers. -Open embelli 39. Move layer above frame. Scale by 50%. Add drop shadow. -Open embelli 15. Scale by 75%. -Open embelli 43. Scale by 75%. Add drop shadow. -Open embelli 4. Scale by 40%. Add drop shadow. -Open embelli 7. Scale by 40%. Move layer below skull. Add drop shadow. -Open embelli 53. Scale by 40%. Add drop shadow. -Add your name, copyright and crop. There you have it! I hope you had fun!
 This tutorial is of my own creation and any resemblance to any other tuts is purely coincidental. This tutorial is for personal use only, using it for monetary gain is against our TOU's.
Supplies Needed:
~Gimp (any version will do).
~Hey Now - You're a Rockstar PTU scrapkit by Artmama which you can get from Exquisite Scraps HERE.
~Tube of choice. I used the art of Lix, you must have a license to use this art which you can get HERE.
~Template of choice. I used Leah template 11 which you can get on our blog HERE.
~Font of choice. I used Velvenda Heavy.
Let's get started!!!
1. Open a new layer ( I prefer a large canvas, so I make mine 1050x656). Make your canvas transparent (Layer > Transparency > Color to Alpha).
2. Open template in PSD format, move layers of template around until they are the way you like them.
~Add paper from scrapkit to individual layers of the template (Right click on template layer in layer box > Alpha to Selection > CTRL I > Select paper layer in layer box > Delete).
These are the papers I used:
Paper 1
Paper 3
Paper 4
Paper 5
Paper 10
Paper 12
Paper 13
~I added noise to some of the template layers to make them look glittery (Filters > Noise > RGB Noise).
~I colorized some of the template layers to better match the scrapkit (Colors > Colorize > play with the setting until you get the desired color).
~Add drop shadow to template layers (Filters > Light & Shadow > Drop Shadow).
3. Open tubes, I lowered the opacity on one of the tubes to 50 (at the top of the layer box you will see a bar you can slide to change the opacity of the selected layer). Add drop shadow.
4. Open and place the following elements:
embellie 39
embellie 36
embellie 41
embellie 32
embellie 4
embellie 48
embellie 5
embellie 19
embellie 8
embellie 25
embellie 27
~Some of the elements may need to be sized down. Using your scale tool in your tool box adjust the pixel size until element is the correct size~
~Add drop shadow to all elements~
5. Open mask
6. Open Paper 11
7. Add mask to paper
8. Merge Layers (Image > Merge Visible Layers).
9. Crop Image (Image > Autocrop Image).
10. Scale image to desired size (Image > Scale Image).
11. Add copyright info and name
12. Save as .png
ALL DONE!!!!!!!!!!
This tutorial is of my own creation and any resemblance to any other tuts is purely coincidental. This tutorial is for personal use only, using it for monetary gain is against our TOU's.
Supplies Needed:
~Gimp (any version will do).
~Hey Now - You're a Rockstar PTU scrapkit by Artmama which you can get from Exquisite Scraps HERE.
~Tube of choice. I used the art of Lix, you must have a license to use this art which you can get HERE.
~Template of choice. I used Leah template 11 which you can get on our blog HERE.
~Font of choice. I used Velvenda Heavy.
Let's get started!!!
1. Open a new layer ( I prefer a large canvas, so I make mine 1050x656). Make your canvas transparent (Layer > Transparency > Color to Alpha).
2. Open template in PSD format, move layers of template around until they are the way you like them.
~Add paper from scrapkit to individual layers of the template (Right click on template layer in layer box > Alpha to Selection > CTRL I > Select paper layer in layer box > Delete).
These are the papers I used:
Paper 1
Paper 3
Paper 4
Paper 5
Paper 10
Paper 12
Paper 13
~I added noise to some of the template layers to make them look glittery (Filters > Noise > RGB Noise).
~I colorized some of the template layers to better match the scrapkit (Colors > Colorize > play with the setting until you get the desired color).
~Add drop shadow to template layers (Filters > Light & Shadow > Drop Shadow).
3. Open tubes, I lowered the opacity on one of the tubes to 50 (at the top of the layer box you will see a bar you can slide to change the opacity of the selected layer). Add drop shadow.
4. Open and place the following elements:
embellie 39
embellie 36
embellie 41
embellie 32
embellie 4
embellie 48
embellie 5
embellie 19
embellie 8
embellie 25
embellie 27
~Some of the elements may need to be sized down. Using your scale tool in your tool box adjust the pixel size until element is the correct size~
~Add drop shadow to all elements~
5. Open mask
6. Open Paper 11
7. Add mask to paper
8. Merge Layers (Image > Merge Visible Layers).
9. Crop Image (Image > Autocrop Image).
10. Scale image to desired size (Image > Scale Image).
11. Add copyright info and name
12. Save as .png
ALL DONE!!!!!!!!!! This tutorial is of my own creation and any resemblance to any other tuts is purely coincidental. This tutorial is for personal use only, using it for monetary gain is against our TOU's.
Supplies:
Gimp- Any Version should work
Adorable PTU kit 'Yesterday's Gone' by Sweet Cravings Scraps HERE
I used the art of Suzanne Woolcott. You must have a license to use her tubes. To can purchase them HERE
Mizz Popular template from CrazyCakesScraps HERE
Mask from Creative Misfits- Autumn/Fall set- Aqua 97 HERE
Font- Precious
Let's begin!
-Open template. Delete the credits and wordart. Go to Image>Scale Image by 500x500 pixles. Now go to Image>Canvas Size> by 600x600 pixels. Make sure you click center. Right
click each layer in the layer box and choose Layer to Image Size.
-Make the squaretangle layer active. Using your magic wand tool, click outside the square. Open paper 6. Right click this layer in the layer box and choose Add Alpha Channel. Go to
Layer>Scale Layer by 50%. Press delete on your keyboard to delete everything outside of the square. Go to Select>None. Delete the squaretangle layer.
-Make the frame layer active. Right click this layer in the layer box and choose alpha to selection. Add a new layer. Using the bucket fill tool, fill this new layer with
black. Select none. Go to Filters>Light and Shadow>Drop Shadow of 2, 2, 2, black, 50. Delete the original frame layer.
-Make the Rect layer active. Click outside with the magic wand. Open paper 20 and add alpha channel. Scale by 60%. Press delete and select none. Add same drop shadow.
Delete the rect layer.
-Make the Innercircleright layer active. Click outside with magic wand. Open paper 5 and add alpha channel. Scale by 50%. Press delete and select none. Add drop shadow.
Delete the innercircleright layer.
. -Make the circleright layer active. Click outside with magic wand. Open paper 19 and add alpha channel. Scale by 50%. Press delete and select none. Add drop shadow.
Delete he circleright layer.
-Make the innercircleleft layer active. Open paper 9 and add alpha channel. Scale by 50%. Press delete and select none. Add drop shadow of -2, -2, 2, black, 50.
Delete the innercicleleft layer.
-Make the circleleft layer active. Click outside with magic wand. Open paper 7 and add alpha channel. Scale by 50%. Press delete and select none. Add drop shadow.
Delete the circleleft layer.
-Make the sq2 layer active. Click outside with magic wand. Open paper 16 and add alpha channel. Scale by 50%. Press delete and select none. Add drop shadow. Delete the
sq2 layer.
-Make the sq1 layer active. Click outside with the magic wand. Open paper 10 and add alpha channel. Scale by 50%. Press delete and select none. Add drop shadow of
2, 2, 2, black, 50. Delete the sq1 layer.
-Open the house element. Move layer to the top in layer box. Scale by 40%. Place to the left of the tag. Add drop shadow.
-Open tube. Scale by 75%. Add drop shadow. Place beside house.
- Open tree 1. Move layer below tube in layer box. Scale by 50%. Move to the right of the tag. Add drop shadow.
-Open leaves 1. Scale by 35%. Add drop shadow and place under tube.
-Open the wheel. Move layer to bottom in layer box. Scale by 50%. Move to the left of the tag. Add drop shadow.
-Open cute fox. Move layer to the top in the layer box. Scale by 25%. Place to the left of tag. Add drop shdow.
-Open gem swirls 3. Move this layer below the house layer in the layer box. Place at the top of the tag. Add drop shadow.
-Open flower 1. Scale by 35%. Place to the right of the tag. Add drop shadow.
-Open bow 6. Scale by 25%. Place at the top of the tag. Add drop shadow.
-Open paper 3 and apply mask.
This tutorial is of my own creation and any resemblance to any other tuts is purely coincidental. This tutorial is for personal use only, using it for monetary gain is against our TOU's.
Supplies:
Gimp- Any Version should work
Adorable PTU kit 'Yesterday's Gone' by Sweet Cravings Scraps HERE
I used the art of Suzanne Woolcott. You must have a license to use her tubes. To can purchase them HERE
Mizz Popular template from CrazyCakesScraps HERE
Mask from Creative Misfits- Autumn/Fall set- Aqua 97 HERE
Font- Precious
Let's begin!
-Open template. Delete the credits and wordart. Go to Image>Scale Image by 500x500 pixles. Now go to Image>Canvas Size> by 600x600 pixels. Make sure you click center. Right
click each layer in the layer box and choose Layer to Image Size.
-Make the squaretangle layer active. Using your magic wand tool, click outside the square. Open paper 6. Right click this layer in the layer box and choose Add Alpha Channel. Go to
Layer>Scale Layer by 50%. Press delete on your keyboard to delete everything outside of the square. Go to Select>None. Delete the squaretangle layer.
-Make the frame layer active. Right click this layer in the layer box and choose alpha to selection. Add a new layer. Using the bucket fill tool, fill this new layer with
black. Select none. Go to Filters>Light and Shadow>Drop Shadow of 2, 2, 2, black, 50. Delete the original frame layer.
-Make the Rect layer active. Click outside with the magic wand. Open paper 20 and add alpha channel. Scale by 60%. Press delete and select none. Add same drop shadow.
Delete the rect layer.
-Make the Innercircleright layer active. Click outside with magic wand. Open paper 5 and add alpha channel. Scale by 50%. Press delete and select none. Add drop shadow.
Delete the innercircleright layer.
. -Make the circleright layer active. Click outside with magic wand. Open paper 19 and add alpha channel. Scale by 50%. Press delete and select none. Add drop shadow.
Delete he circleright layer.
-Make the innercircleleft layer active. Open paper 9 and add alpha channel. Scale by 50%. Press delete and select none. Add drop shadow of -2, -2, 2, black, 50.
Delete the innercicleleft layer.
-Make the circleleft layer active. Click outside with magic wand. Open paper 7 and add alpha channel. Scale by 50%. Press delete and select none. Add drop shadow.
Delete the circleleft layer.
-Make the sq2 layer active. Click outside with magic wand. Open paper 16 and add alpha channel. Scale by 50%. Press delete and select none. Add drop shadow. Delete the
sq2 layer.
-Make the sq1 layer active. Click outside with the magic wand. Open paper 10 and add alpha channel. Scale by 50%. Press delete and select none. Add drop shadow of
2, 2, 2, black, 50. Delete the sq1 layer.
-Open the house element. Move layer to the top in layer box. Scale by 40%. Place to the left of the tag. Add drop shadow.
-Open tube. Scale by 75%. Add drop shadow. Place beside house.
- Open tree 1. Move layer below tube in layer box. Scale by 50%. Move to the right of the tag. Add drop shadow.
-Open leaves 1. Scale by 35%. Add drop shadow and place under tube.
-Open the wheel. Move layer to bottom in layer box. Scale by 50%. Move to the left of the tag. Add drop shadow.
-Open cute fox. Move layer to the top in the layer box. Scale by 25%. Place to the left of tag. Add drop shdow.
-Open gem swirls 3. Move this layer below the house layer in the layer box. Place at the top of the tag. Add drop shadow.
-Open flower 1. Scale by 35%. Place to the right of the tag. Add drop shadow.
-Open bow 6. Scale by 25%. Place at the top of the tag. Add drop shadow.
-Open paper 3 and apply mask.
-Add your name, copyright and crop. You're Finished!
 This tutorial is of my own creation and any resemblance to any other tuts is purely coincidental. This tutorial is for personal use only, using it for monetary gain is against our TOU's.
Supplies Needed:
~Gimp (any version will do).
~Tube of choice. I used PinUpToons. You must have a license to use this art which you can get HERE.
~Yesterday's Gone PTU scrapkit which you can get from Sweet Cravings Scraps HERE.
~Mask of choice. I used Vix mask 238 which you can get HERE.
~Font of choice. I used Scrap Cursive.
Let's get started!!!!!
1. Open a new layer ( I prefer a large canvas, so I make mine 1050x656). Make your canvas transparent (Layer > Transparency > Color to alpha).
2. Open Frame 7, add drop shadow (Filters > Light & Shadow > Drop Shadow).
3. Open Paper 22 center it behind circular portion of the frame, remove excess paper using circular cutting tool.
4. Open your tube, add drop shadow.
5. Open and place the following elements:
Leaves 1
Leaves 3
Leaf 1
Leaf 2
Leaf 3
Butterfly 1
Butterfly 2
Stick
Grass 1
Pumpkin
Flower 2
Flower 6
Mushroom 2
Cute Squirrel
Cute Fox
~Some elements may need to be sized down, use the Scale Tool in your tool box to adjust pixel size~
~Add drop shadow to all elements~
6. Open Paper 17.
7. Open mask.
8. Add mask to paper (click HERE for a tut on using masks).
9. Merge layers (Image > Merge Visible Layer).
10. crop image (Image > Autocrop Image).
11. Scale image to desired size (Image > Scale Image).
12. Add copyright info and name.
13. Save as .png
You are finished :)
This tutorial is of my own creation and any resemblance to any other tuts is purely coincidental. This tutorial is for personal use only, using it for monetary gain is against our TOU's.
Supplies Needed:
~Gimp (any version will do).
~Tube of choice. I used PinUpToons. You must have a license to use this art which you can get HERE.
~Yesterday's Gone PTU scrapkit which you can get from Sweet Cravings Scraps HERE.
~Mask of choice. I used Vix mask 238 which you can get HERE.
~Font of choice. I used Scrap Cursive.
Let's get started!!!!!
1. Open a new layer ( I prefer a large canvas, so I make mine 1050x656). Make your canvas transparent (Layer > Transparency > Color to alpha).
2. Open Frame 7, add drop shadow (Filters > Light & Shadow > Drop Shadow).
3. Open Paper 22 center it behind circular portion of the frame, remove excess paper using circular cutting tool.
4. Open your tube, add drop shadow.
5. Open and place the following elements:
Leaves 1
Leaves 3
Leaf 1
Leaf 2
Leaf 3
Butterfly 1
Butterfly 2
Stick
Grass 1
Pumpkin
Flower 2
Flower 6
Mushroom 2
Cute Squirrel
Cute Fox
~Some elements may need to be sized down, use the Scale Tool in your tool box to adjust pixel size~
~Add drop shadow to all elements~
6. Open Paper 17.
7. Open mask.
8. Add mask to paper (click HERE for a tut on using masks).
9. Merge layers (Image > Merge Visible Layer).
10. crop image (Image > Autocrop Image).
11. Scale image to desired size (Image > Scale Image).
12. Add copyright info and name.
13. Save as .png
You are finished :)
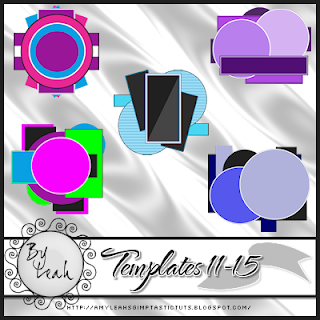
 This tutorial is of my own creation and any resemblance to any other tuts is purely coincidental. This tutorial is for personal use only, using it for monetary gain is against our TOU's.
Supplies Needed:
~Gimp (any version will do).
~Suddenly Sunrise PTU scrapkit by Artmama which you can get from Exquisite Scraps HERE.
~Tube of choice. I used the art of Anna Marine, you must have a license to use this art which you can get HERE.
~Template of choice. I used Toxic Desirez template 63 which you can get HERE.
~Font of choice. I used Riddle.
Let's get started!!!
1. Open a new layer ( I prefer a large canvas, so I make mine 1050x656). Make your canvas transparent (Layer > Transparency > Color to Alpha).
2. Open template in PSD format, move layers of template around until they are the way you like them.
~Add paper from scrapkit to individual layers of the template (Right click on template layer in layer box > Alpha to Selection > CTRL I > Select paper layer in layer box > Delete).
These are the papers I used:
Paper 5
Paper 6
Paper 8
Paper 11
~I added noise to some of the template layers to make them look glittery (Filters > Noise > RGB Noise).
~I colorized some of the template layers to better match the scrapkit (Colors > Colorize > play with the setting until you get the desired color).
~Add drop shadow to template layers (Filters > Light & Shadow > Drop Shadow).
3. Open tubes, I lowered the opacity on one of the tubes to 50 (at the top of the layer box you will see a bar you can slide to change the opacity of the selected layer). Add drop shadow.
4. Open and place the following elements:
embellie 3
embellie 2
embellie 12
embellie 15
embellie 41
embellie 4
embellie 26
embellie 46
embellie 5
embellie 42 x2
embellie 32
embellie 51
embellie 16
embellie 13
~Some of the elements may need to be sized down. Using your scale tool in your tool box adjust the pixel size until element is the correct size~
~Add drop shadow to all elements~
5. Merge Layers (Image > Merge Visible Layers).
6. Crop Image (Image > Autocrop Image).
7. Scale image to desired size (Image > Scale Image).
8. Add copyright info and name
9. Save as .png
ALL DONE!!!!!!!!!!
This tutorial is of my own creation and any resemblance to any other tuts is purely coincidental. This tutorial is for personal use only, using it for monetary gain is against our TOU's.
Supplies Needed:
~Gimp (any version will do).
~Suddenly Sunrise PTU scrapkit by Artmama which you can get from Exquisite Scraps HERE.
~Tube of choice. I used the art of Anna Marine, you must have a license to use this art which you can get HERE.
~Template of choice. I used Toxic Desirez template 63 which you can get HERE.
~Font of choice. I used Riddle.
Let's get started!!!
1. Open a new layer ( I prefer a large canvas, so I make mine 1050x656). Make your canvas transparent (Layer > Transparency > Color to Alpha).
2. Open template in PSD format, move layers of template around until they are the way you like them.
~Add paper from scrapkit to individual layers of the template (Right click on template layer in layer box > Alpha to Selection > CTRL I > Select paper layer in layer box > Delete).
These are the papers I used:
Paper 5
Paper 6
Paper 8
Paper 11
~I added noise to some of the template layers to make them look glittery (Filters > Noise > RGB Noise).
~I colorized some of the template layers to better match the scrapkit (Colors > Colorize > play with the setting until you get the desired color).
~Add drop shadow to template layers (Filters > Light & Shadow > Drop Shadow).
3. Open tubes, I lowered the opacity on one of the tubes to 50 (at the top of the layer box you will see a bar you can slide to change the opacity of the selected layer). Add drop shadow.
4. Open and place the following elements:
embellie 3
embellie 2
embellie 12
embellie 15
embellie 41
embellie 4
embellie 26
embellie 46
embellie 5
embellie 42 x2
embellie 32
embellie 51
embellie 16
embellie 13
~Some of the elements may need to be sized down. Using your scale tool in your tool box adjust the pixel size until element is the correct size~
~Add drop shadow to all elements~
5. Merge Layers (Image > Merge Visible Layers).
6. Crop Image (Image > Autocrop Image).
7. Scale image to desired size (Image > Scale Image).
8. Add copyright info and name
9. Save as .png
ALL DONE!!!!!!!!!!Snag Our Blinkies


Don't Be A Pirate!

