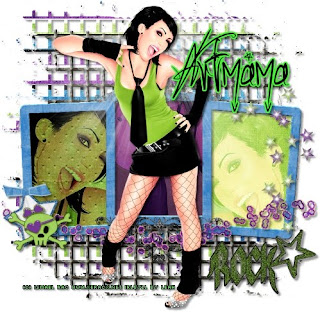
This tutorial is of my own creation and any resemblance to any other tuts is purely coincidental. This tutorial is for personal use only, using it for monetary gain is against our TOU's. Supplies: Gimp Any version should work Awesome PTU kit from Artmama called 'Hey Now, You're a Rockstar' HERE I am using the art of Ismael Rac. You must have a license to use his work. You can purchase his tubes HERE Font- Sick Capital Vice Let's get started! -Open Gimp. Go to FIle>New and open a canvas size of 500x500. -Open embellie 01. Go to Layer>Scale Layer by 65%. Right click this layer in the layer box and choose Layer To Image Size. Using your magic wand tool, click inside the 1st sqaure of the frame. Go to Select>Grow by 4. Open paper 5. Move this paper layer below the frame layer in the layer box. Right click this paper layer in the layer box and choose Add Alpha Channel. Scale by 50%. Go to Select>Invert. Press delete on your keyboard to erase everything outside of the frame. Go to Select>None. Rename this layer paper 1. Make the frame layer active and click inside the 2nd square. Grow by 4. Open paper 12 and move layer below frame layer. Add alpha channel. Scale by 50%. Invert and press delete. Select none. Name this layer paper 2. Make the frame layer active and click inside the last sqaure. Grow by 4. Open paper 11 and move layer below frame layer. Add alpha channel. Scale by 50%. Invert and press delete. Select none. Name this layer paper 3. Make the frame layer active again and go to Filters>Light and Shadow>Drop shadow of 3, 3, 3, black, 40. -Open your tube. Scale by 75%. Go to Filters>Repeat Drop Shadow. Go to Layers>Duplicate Layer. Now go to Filters>Blur>Gaussian Blur of 3. Change the mode of this tube layer to Soft Light. -Open close up of tube. Move this layer below theframe layer in the layer box. Position this tube in the 1st square of the frame.Name this layer Tube 1. Duplicate. Using the flip tool flip your duplicate tube layer. Position in the last sqaure of the frame. Name this layer Tube 3. Duplicate once more and postion in the middle sqaure. Name this layer tube 2. Make paper 1 layer active and click outside of the paper with the magic wand. Make tube 1 layer active. Press delete on your keyboard. Change the mode to multiply. Do this to the other tube and paper layers. Change the mode of tube 2 to Soft lIght and the mode of tube 3 will be overlay. -Open Embelli 16. Move this layer to the bottom. Scale by 75%. See my tag for placement for this and all element layers. Right click this layer in the layer box and choose Alpha To Selection. Open paper 14. Move this layer below embelli 16. Add alpha channel. Scale by 55%. Invert and press delete. Select none. Move this paper with the move tool towards the top of the tag. Add a drop shadow to both of these layers. -Open embelli 39. Move layer above frame. Scale by 50%. Add drop shadow. -Open embelli 15. Scale by 75%. -Open embelli 43. Scale by 75%. Add drop shadow. -Open embelli 4. Scale by 40%. Add drop shadow. -Open embelli 7. Scale by 40%. Move layer below skull. Add drop shadow. -Open embelli 53. Scale by 40%. Add drop shadow. -Add your name, copyright and crop. There you have it! I hope you had fun!
Labels
Chit Chat
Blog Archive
-
▼
2010
(101)
-
▼
November
(22)
- New PTU tut- Pink Christmas and Template!
- New templates by Leah
- New FTU tut "Funky Punky Christmas"
- New PTU tut "Punk Rock Barbie"
- New PTU tut "Little Bo Peep"
- New PTU tut- Secret Garden
- Artmama is having a 'Buy My Store' sale! Click th...
- New PTU tut- Goth Gal
- New PTU tut "Girlz Rock"
- New animated PTU tut "Winter Wonderland"
- Christmas Templates!!
- New PTU Tut- Rockstar
- New PTU tut "Hey Now"
- New PTU Tut- Gorjuss Cutie
- New PTU tut "On the Hunt"
- Freebie!!! Temps 11-15
- New PTU tut "Beautiful"
- New tut- Enjoy This Moment (ptu)
- New PTU tut "Taking the Scenic Route"
- New PTU tut "Fall Friends"
- New FTU tut "Wintertime"
- New PTU tut- Heavenly
-
▼
November
(22)


0 comments:
Post a Comment