Monday, April 30, 2012
This tutorial is of my own creation and any resemblance to any other tuts is purely coincidental. This tutorial is for personal use only, using it for monetary gain is against our TOU's.
Supplies:
Gimp (or progran of choice)
Tube of choice. I am using the art of Keith Garvey. You must have a license to use his tubes. You can purchase the tube I used starting 5-01-12 at PSP Tubes Emporium
Template 4 from Brunette & MzDixi over on the Creative Misfits Blog
FTU scrap kit Time Flies from Aurelie
Font- Lovers Quarrel
-Open template. Delete credits & blurred pink ciecle layer. Image>Scale Image 450x450 px. Image>Canvas Size 600x600 px and click center.
-Let's add papers to the template layers. Make the template layer active (see below). Right click template layer in layer box and choose alpha to selection. Open paper (see below). Right click paper layer in layer box and choose add alpha channel. Right click layer in layer box and choose Scale Image. Scale by 15%. Select>Invert. Press delete on your keyboard. Select>None. Delete the original template layer.Here are the template layers and which papers I used:
pink circle- paper 7 Filters>Light & Shadow>Drop Shadow 2, 2, 10, black, 50
copy of black rectangle- paper 4 repeat drop shadow
black rectangle- paper 6 repeat drop shadow
-Make the small grey square layer active. Alpha to selection. Open paper 9. Add alpha channel. Scale 15%. Invert & delete. Open tube close up. Scale 65%. Place in the selection. Delete. Select none. Change the mode of the tube to grain merge. Repeat for small grey square 1 (using paper 2 and setting the mode of the tube to hard light) and small grey square 2 (using paper 1 and setting the mode of the tube to value).
-Repeat drop shadow on raster 1.
-Make raster 2 active. Colors>Colorize: Hue: 13, Saturation: 85, Lightness: 2. Repeat drop shadow. Rpeat for raster 2.
-Open full body tube. Select the flip tool and click canvas to flip tube. Place in the middle of the tag. Add drop shadow of 2, 2, 2, black, 50. Layer>Duplicate Layer. Filters>Blur>Gaussian Blur on default. Change the mode to soft light and lower the opacity to 50.
Elements:
17
30
14
55
46
32
41
15 - Rotate -25
-Add name and copyright and your done!
Labels:FTU tuts | 0
comments
I am super excited to show off these 2 awesome tags!!!! They were made with my FTU kit Star, which you can find HERE.
This first one was made by my partner in crime Leah :)
This next one was made by my friend Shawna :)
Both totally different, both totally AWESOME!!!!!!!!!!
Thank you so much for making and sharing these.
If any of you would like to share any of your results with us please feel free to email us at gimptasticblog@yahoo.com or contact us on Facebook.
Friday, April 27, 2012
This tutorial is of my own creation and any resemblance to any other tuts is purely coincidental. This tutorial is for personal use only, using it for monetary gain is against our TOU's.
Supplies:
Gimp (or progran of choice)
Tube of choice. I am using a tube from Costanza Ehrenhaus. You must have a license to use these tubes. Purchase them at PSP Tube Stop.
FTU kit from kaccii scrap called Water For Life
FTU kit from kaccii scrap called Water For Life
Template 2 from Tasha's Playground
Font- Signerica Fat
-Open template. Delete credits. Image>Scale Image 450x450 px. Image>Canvas Size 600x600 px and click center.
-Let's add papers to the template layers. Make the template layer active (see below). Right click template layer in layer box and choose alpha to selection. Open paper (see below). Right click paper layer in layer box and choose add alpha channel. Right click layer in layer box and choose Scale Image. Scale by 15%. Select>Invert. Press delete on your keyboard. Select>None. Delete the original template layer.Here are the template layers and which papers I used:
right rect- paper 1 Filters>Light & Shadow>Drop Shadow 1, 1, 0, black, 50
left rect- paper 1 repeat drop shadow
middle rect- paper 3 repeat drop shadow
circle frame- paper 2 drop shadow of 2, 2, 2, black, 50
circle- paper 8
-Make middle square active. Alpha to selection. Open paper 6. Scale 10%. Place paper in selection. Invert & delete. Add new layer. Change your foreground color to 9fc4c5. Invert. Select the bucket fill tool and fill selection. Select>Shrink by 2. Delete. Open tube. Move under the new layer in the layer box. Place in selection. Invert & delete. Select none. Change the mode to grain merge. Make the new layer active. Filters>Noise>RGB Noise. Change all sliders (except alpha) to 0.35. Repeat drop shadow.
-Make top square active. Alpha to selection. Open paper 6. Scale 10%. Place paper in selection. Invert & delete. Add new layer. Change your foreground color to 3c8699. Invert. Select the bucket fill tool and fill selection. Select>Shrink by 2. Delete. Open tube. Move under the new layer in the layer box. Place in selection. Invert & delete. Select none. Change the mode to hard light. Make the new layer active. Filters>Noise>RGB Noise. Change all sliders (except alpha) to 0.35. Repeat drop shadow. Repeat for bottom square.
-Open tube. Make the top layer. Scale 65%. Place to the left of tag. Repeat drop shadow. Layer>Duplicate Layer. Filters>Blur>Gaussian Blur on default. Change the mode to doft loight and lower the opacity to 65.
Elements:
53
17
78
54
60
4
21
49
19
27
44
55- rotate 90
-Add your name and copyright and you're finished!
Labels:FTU tuts | 0
comments
Thursday, April 26, 2012
Here is a tag I made using a tube by Judy Mastrangelo, which has 2 layers (each a different tube), and a PTU scrap kit from JRB Scraps called Delilah. Both were released at PSP Tubes Emporium today, so hurry on over and grab them!
I also have some snags for this tag.
Please leave a quick thanks or click the Thank You button below:)
Labels:CT tags,Extras | 0
comments
This tag was made with a gorgeous new release from Angela Newman called Victoria, you can find her now @ PSP Tubes Emporium.
Here are a few extras I made. Click on the image to snag the full size version.
Do not alter these in any way!!!!
Labels:CT tags,Extras | 0
comments
This tutorial is of my own creation and any resemblance to any other tuts is purely coincidental. This tutorial is for personal use only, using it for monetary gain is against our TOU's.
Supplies:
Gimp (or progran of choice)
PTU kit Patient Love by Darkmoons Dream @ Lollipops N Gumdrops
Tube of choice. I am using the art of Ellie Milk. You must have a license to use these tubes. You can purchase them at PFD
Template 394 from Divine Intentionz
Font- Quinfo
-Open template. Delete credits. Image>Scale Image 450x352 px. Image>Canvas Size 600x600 px and click center.
-Let's add papers to the template layers. Make the template layer active (see below). Right click template layer in layer box and choose alpha to selection. Open paper (see below). Right click paper layer in layer box and choose add alpha channel. Select>Invert. Press delete on your keyboard. Select>None. Delete the original template layer.Here are the template layers and which papers I used:
raster 8- paper 7 Filters>Light & Shadow>Drop Shadow 2, 2, 0, black, 50
copy of raster 14- paper 6 repeat drop shadow
raster 14- paper 5 repeat drop shadow
copy of raster 18- paper 12 repeat drop shadow
raster 20- paper 11
raster 19- paper 14 repeat drop shadow
raster 18- paper 8 repeat drop shadow
-Open frame 1. Make the top layer. Layer>Scale Layer 50%. Select hte rotate tool and in the angle box put -10. Select the magic wand and click inside the frame. Select>Grow by 5. Open paper 15. Move below the frame layer in the layer box. Add alpha channel. Invert & delete. Open tube. Make the top layer. Scale 40%. Place on top of the frame. Layer>Duplicate Layer. Move the duplicate tube layer under the frame layer in layer box. Delete. Select none. Make the top tube layer active. Add drop shadow of 2, 2, 2, black, 50. Layer>Merge Down (to merge the tube layer with its shadow layer). Select the eraser tool. Erase the bottom portion of the tube, so it looks like she is sticking out of the frame.
Elements:
wa 01
flowers
branch 02
basket
bead
bottle
book
scroll- rotate -100
heart 01
quill
hearts 02
string
-Add your name and copyright and you're finished!
Labels:PTU tuts | 0
comments
Wednesday, April 25, 2012
Okay, I finally did it!!!! I made a kit!!!! This is my very first kit I have ever even attempted, so I hope you all kind find some use for it. The colors are inspired by a Screaming Demons tube called Star, but I think there are many other tubes out there that it will work with as well.
Click HERE to download.
Labels:FTU Kits | 4
comments
Tuesday, April 24, 2012
This tutorial is of my own creation and any resemblance to any other tuts is purely coincidental. This tutorial is for personal use only, using it for monetary gain is against our TOU's.
Supplies:
Gimp (or progran of choice)
Tube of choice. I am using the art of Unholy Vault Designs. You must have a license to use these tubes. You can purchase this tube starting today at PSP Tubes Emporium
FTU kit Horror Whorez from Sweet Cravings Scraps
Mask 81 from weescotslass
Font- Depressionist Three
-File>New 600x600 px.
-Open frame 4. Layer>Scale Layer 60%. Place in the middle of canvas. Select the magic wand. Click inside the frame. Select>Grow 5. Open paper 10. Move under the frame layer in layer box. Layer>Transparenct>Add Alpha Channel. Scale 60%. Select>Invert. Press delete on keyboard. Select>None. FIlters>Light & Shadow>Drop Shadow 0, 0, 15, black,80.
-Open cabin. Move below the frame layer. Scale 50%. Place inside the frame, in the middle. Select the eraser and erase any parts of the cabin sticking outside the frame. Repeat drop shadow.
-Open tree. Move above cabin layer. Scale 50%. Place to the right, inside frame. Erase parts of tree sticking outside frame. Add drop shadow of 2, 2, 2, black, 50.
-Open evil hand. Move layer above tree. Scale 50%. Place to the left inside, inside of the frame.
-Open tube. Top layer. Scale 75%. Place to right of tag. Add drop shadow of 0, 0, 150, black, 100. Repeat drop shadow.
Other Elements:
bed
skulls
bloody knife
bow 4
lake sign
spider
bloody heart
-Open paper 6. Apply mask. Click HERE to learn how to use masks.
-Add name and copyright.
All done!
Argh, are you ready for a treasure hunt matey??? This amazing pirate ship is a brand new release from Judy Mastrangelo and is available NOW @ PSP Tubes Emporium.
Here are a few extras I made. Click on the image to snag the full size version.
Do not alter these in any way!!!!
Labels:CT tags,Extras | 0
comments
This tutorial is of my own creation and any resemblance to any other tuts is purely coincidental. This tutorial is for personal use only, using it for monetary gain is against our TOU's.
Supplies:
Gimp (or progran of choice)
PTU kit Taste The Rainbow from Wendy Gerber. You can purchase this kit at The PSP Project
Tube of choice. I am using the art of Redfill. You must have a license to use these tubes. You can purchase them at PFD
Font- Devil Breeze
-Open template. Delete credits amd star layers. Image>Scale Image 450x450 px. Image>Canvas Size 600x600 px and click center.
-Let's add papers to the template layers. Make the template layer active (see below). Right click template layer in layer box and choose alpha to selection. Open paper (see below). Right click paper layer in layer box and choose add alpha channel. Select>Invert. Press delete on your keyboard. Select>None. Delete the original template layer.Here are the template layers and which papers I used:
1- paper 5 Filters>Light & Shadow>Drop Shadow 2, 2, 2, black, 50
2- paper 1
3- paper 6 repeat drop shadow
4- paper 2 repeat drop shadow
5- paper 7 repeat drop shadow
6- paper 10 repeat drop shadow
7- paper 9 repeat drop shadow
-Make word art layer active. Colors>Colorize. Change only the hue to 264. Repeat drop shadow.
-Open tube. Move below the wordart layer. Select the flip tool and flip. Layer>Scale Layer 50%. Place in the middle of tag. Repeat drop shadow. Layer>Duplicate Layer. Filters>Blur>Gaussian Blur on default. Change the mode to soft light and lower the opacity to 60.
Elements:
38
15
60
14
12
32
5
3
4
21
11
57 - Rotate 20
-Add name and copyright and you're done!
Labels:PTU tuts | 0
comments
Monday, April 23, 2012
I have some snags for everyone using this cute tube from Jaz Higgins, released today at PSP Tubes Emporium HERE!
Thanks for stopping by our blog :)
Labels:CT tags,Extras | 0
comments
Sunday, April 22, 2012
This tutorial is of my own creation and any resemblance to any other tuts is purely coincidental. This tutorial is for personal use only, using it for monetary gain is against our TOU's.
Supplies:
Gimp (or progran of choice)
Tube of choice. I am using the art of Jose Cano. You must have a license to use his tubes. You can purchase the one I used starting 4-23-12 at PSP Tubes Emporium HERE
FTU kit from Sweet Cravings Scraps called Strawberry Wine HERE
Template 79 by me HERE
Mask 1 from Melissaz Creationz HERE
Font- Send Flowers
-Open template. Delete credits amd star layers. Image>Scale Image 450x371 px. Image>Canvas Size 600x600 px and click center.
-Let's add papers to the template layers. Make the template layer active (see below). Right click template layer in layer box and choose alpha to selection. Open paper (see below). Right click paper layer in layer box and choose add alpha channel. Select>Invert. Press delete on your keyboard. Select>None. Delete the original template layer.Here are the template layers and which papers I used:
square 1- paper 3
circle 3- paper 7 Filters>Light & Shadow>Drop Shadow 2, 2, 2, black, 50
square 2- paper 4 repeat drop shadow
square 3- paper 8 repeat drop shadow
-Make circle 1 active. Alpha to selection. Open paper 5. Add alpha channel. Invert & Delete. Open tube close up. Place tube in the selection. Delete. Select none. Change the mode of the tube to grain merge. Open frame 5. Layer>Scale Layer 35%. Place on top of tube. Repeat drop shadow on frame.
-Make circle 2 active. Alpha to selection. Open paper 6. Add alpha channel. Invert & Delete. Open tube close up. Place tube in the selection. Delete. Select none. Change the mode of the tube to overlay. Open frame 4. Layer>Scale Layer 35%. Place on top of tube. Repeat drop shadow on frame.
-Repeat drop shadow on frame layer.
-Open full body tube. Top layer. Scale 85%. Place in the middle of tag. Repeat drop shadow.
Elements:
grass
flower 3 - flip
basket of berries
frog
flower 1
frame 1 - rotate -20
srting 3
hearts 1
hearts 3
-Open paper 1. Apply mask. Click HERE to learn how to use masks. One you have the mask applied, scale 80%.
-Add your name and copyright.
All done!
Here's a tag I made using a beautiful flower by Emerald Eyez and a stunning image by Jon Rattenbury, both will be released 4-23-12 @ PSP Tubes Emporium.
Here are a few extras I made. Click on the image to snag the full size version.
Do not alter these in any way!!!!
Labels:CT tags,Extras | 0
comments
Saturday, April 21, 2012
Here are some tags from our friends over at Cafemom using my Templates 125-129. They all did a wonderful job, don't you think?
Friday, April 20, 2012
This tutorial is of my own creation and any resemblance to any other tuts is purely coincidental. This tutorial is for personal use only, using it for monetary gain is against our TOU's.
Supplies Needed:
~Gimp (any version will do).
~Tube of choice. I used the artwork of Constanza Ehrenhaus, you must have a license to use this art which you can get from PSP Tube Stop HERE.
~Jewelled Spring PTU scrapkit by A Taggers Scrap.
~Mask of choice. I used WSL mask 220 which you can get HERE.
~Font of choice. I used ValentinaJF.
Let's get started!!!!!
1. Open a new layer ( I prefer a large canvas, so I make mine 1050x656). Make your canvas transparent (Layer > Transparency > Color to alpha).
2. Open Frame 8 (rectangle frame), add drop shadow (Filters > Light & Shadow > Drop Shadow).
3. Open Paper 11 center it behind Frame 8, remove excess paper using a cutting tool or eraser.
4. Open Frame 11 (round frame), place it under Frame 8 & Paper 11 in your layer box. Add drop shadow.
5. Open tube, add drop shadow.
6. Open and place the following elements:
Bead scatter
Bead scatter 2
Greenery 2
Greenery 4
Flower 7
Brooch
Bottle 2
Bottle 3
Trinket box
Diary
Butterfly
~Some elements may need to be sized down. Using the Scale Tool in your tool box adjust pixels to desired size~
~Add drop shadow to all elements (except Bead Scatter & Bead Scatter 2)~
7. Open Paper 8
8. Open mask
9. Add mask to paper (click HERE for a tut on using masks).
10. Merge layers (Image > Merge Visible Layer).
11. Crop image (Image > Autocrop Image).
12. Scale image to desired size (Image > Scale Image).
13. Add copyright info and name.
14. Save as .png
You are finished :)
Labels:A Taggers Scrap,PTU tuts | 0
comments

This tutorial is of my own creation and any resemblance to any other tuts is purely coincidental. This tutorial is for personal use only, using it for monetary gain is against our TOU's.
Supplies Needed:
~Gimp (any version will do).
~Tickled Pink scrapkit by Abstract Creations, which you can purcahse from PSP Tubes Emporium HERE. *this kit is coming soon*
~Tube of choice. I used the artwork of Victoria Fox, you must have a license to use this art. You can purchase this art from PTE HERE.*this tube is coming soon*
~Template of choice. I used Leah's template 125 which you can get on our blog HERE.
~Font of choice. I used I'm fashionista!
Let's get started!!!
1. Open a new layer ( I prefer a large canvas, so I make mine 1050x656). Make your canvas transparent (Layer > Transparency > Color to Alpha).
2. Open template in PSD format, remove and move layers of template around until they are the way you like them.
~Add paper from scrapkit to individual layers of the template (Right click on template layer in layer box > Alpha to Selection > CTRL I > Select paper layer in layer box > Delete).
These are the papers I used:
Paper 2
Paper 6
Paper 10
~I added noise to some of the template layers to make them look glittery (Filters > Noise > RGB Noise).
~I colorized some of the template layers to better match the scrapkit (Colors > Colorize > play with the setting until you get the desired color).
~Add drop shadow to template layers (Filters > Light & Shadow > Drop Shadow).
3. Open tube.
~You will need to duplicate the tube so that you have 2 (at the bottom of your layer box click on the blue box. This will give you 2 tube layers).
~Select the top tube layer in your tool box. Add Gaussian Blur (Filters > Blur > Gaussian Blur, use default settings).
~On that same tube layer change the mode to Overlay (at the top of your Layer Box you will see where it says Mode, click the arrow and select Overlay from the drop down menu).
~Add drop shadow to bottom tube layer.
4. Open and place the following elements:
e1
e15
e16
e25
e26
e29
e30
e31
e32
e40
e1
e15
e16
e25
e26
e29
e30
e31
e32
e40
~Some of the elements may need to be sized down. Using your scale tool in your tool box adjust the pixel size until element is the correct size~
~Add drop shadow to all elements (except e30, e32 & e40)~
5. Merge Layers (Image > Merge Visible Layers).
6. Crop Image (Image > Autocrop Image).
7. Scale image to desired size (Image > Scale Image).
8. Add copyright info and name.
9. Save as .png
ALL DONE!!!!!!!!!!
Labels:PTU tuts | 0
comments
 Here's a cluster frame I made using a great kit by Tasha's Playground called Party Rock, this kit is a PTE exclusive and is available for purchase NOW!!!!! The kit is full of bright, fun elements that definitely make you feel like it's party time ;)
Click HERE to download.
 Here's a tag I made with the frame:

Labels:Cluster Frame,Freebies | 0
comments
 This tutorial is of my own creation and any resemblance to any other tuts is purely coincidental. This tutorial is for personal use only, using it for monetary gain is against our TOU's.
Supplies:
Gimp (or program of choice)
Tube of choice. I am using the art of Roman Zaric. You must have a license to use these tubes. The tube I used is coming soon to PSP Tubes Emporium HERE
FTU kit from A Taggers Scrap called Vintage Girl HERE
Template 3 by Sue HERE
Font- Valentina JF
-Open template. Delete credits. Image>Scale Image 450x450 px. Image>Canvas Size 600x600 px and click center.
-Let's add papers to the template layers. Make the template layer active (see below). Right click template layer in layer box and choose alpha to selection. Open paper (see below). Right click paper layer in layer box and choose add alpha channel. Select>Invert. Press delete on your keyboard. Select>None. Delete the original template layer.Here are the template layers and which papers I used:
-Let's add papers to the template layers. Make the template layer active (see below). Right click template layer in layer box and choose alpha to selection. Open paper (see below). Right click paper layer in layer box and choose add alpha channel. Select>Invert. Press delete on your keyboard. Select>None. Delete the original template layer.Here are the template layers and which papers I used:
circle- paper 34
right- paper 32
left- paper 35
middle- paper 26
-Make botom right paper active. Alpha to selection. Open tube close up. Place in selection. Invert & delete. Select none. Change the mode to screen. Repeat for top left paper, but change the mode of the tube to grain merge.
-Open full body tube. Make the top layer. Scale 75%. Place in the middle of tag. Filters>Light & Shadow>Drop Shadow of 2, 2, 2, black, 50.
-Make frame 3 active. Colors>Colorize: Hue: 44 Saturation: 41 Lightness: -50. Repeat drop shadow. Rpeat for frame layer.
-Make frame 1 active. Colorize: Hue: 46 Saturation: 44 Lightness: -26. Repeat drop shadow. repeat for frame #2 layer.
-Make the mask layer active. Alpha to selection. Open paper 28. Invert & delete. Select none. Delete the mask layer.
Elements:
beads
letter- rotate 20
flower 4
bow 5
flower 10
flower 2
sparkels
leaves 3
table 2
purse Rotate -15
-Add your name and copyright and you're done!
Labels:FTU tuts | 0
comments
Wednesday, April 18, 2012
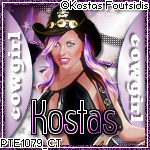
 Check out this rockin' cowgirl by Kostas Foutsidis! You can purchase her starting 4-19-12 at PSP Tubes Emporium HERE
Check out the PTE facebook group for some snags!
Labels:CT tags | 0
comments
We have some awesome tut results to share with all of you!!!!
First off we have this beauty from Amy Marie, she did Leah's FTU tut Private Garden Next we have tags from Tasha, Pammers and Shawna, they all followed Leah's FTU tut Superstar


 Last, but not least we have these tags from Tasha, Emily, Sherena and Shawna. They all followed Amy's FTU tut Steampunk Angel


 All we can say is WOW!!!!! These are all fantastic!!!! Thank you all so much for these amazing tags.
If any of you would like to share your results with us please feel free to email us at gimptasticblog@yahoo.com or contact us on Facebook :)
 Next we have tags from Tasha, Pammers and Shawna, they all followed Leah's FTU tut Superstar

 Last, but not least we have these tags from Tasha, Emily, Sherena and Shawna. They all followed Amy's FTU tut Steampunk Angel


 All we can say is WOW!!!!! These are all fantastic!!!! Thank you all so much for these amazing tags.
If any of you would like to share your results with us please feel free to email us at gimptasticblog@yahoo.com or contact us on Facebook :)
Subscribe to:
Posts
(Atom)
Labels
12x12 Layout
A Taggers Scrap
Animated
Announcements
Art of Freya
Basic tuts
Blog Trains
CDO
Cluster Frame
CT tags
Extras
Forum Set
Freebies
FTU CU
FTU Kits
FTU tuts
Holiday
Jackie's Jewels
Kissing Kate
Masks
PTU Kits
PTU tuts
Quick Pages
Results
Results with Amys kits
Show Offs
Sweet Cravings Scraps
Tasha's Playground
Templates
Timeline Banners
Chit Chat
Blog Archive
-
▼
2012
(550)
-
▼
April
(57)
- FTU Tut- Peach
- Tag Show-off
- FTU Tut- Sea Goddess
- PTE CT Tag & Snags
- PTE CT tag by Amy & some extras
- PTU Tut- I'm Waiting
- FTU Kit - Star
- FTU Tut- Wanna Play?
- PTE CT tag by Amy, plus some extras :)
- PTU Tut- Out Of Control
- PTE CT Tag By Leah
- FTU Tut- To Grandmothers House
- PTE CT tag by Amy
- Tag Show Off!!
- PTU tut - Garden Jewel
- PTU tut - Bring it
- Party Rock Cluster Frame Freebie
- FTU Tut- Audrey
- PTE CT Tag by Leah
- Tut Results
- PTU tut- Troublemaker
- PTU tut - Sexting and the City
- PTE CT tag by Amy
- PTU Tut- Think Good Thoughts
- PTE CT Tag by Leah
- PTU tut - Spring Fling
- PTE CT tag by Amy
- PTE CT Tag by Leah (AC)
- PTU tut - Sail Away
- FREEBIE- Love To Love Facebook Timeline Cover
- FTU tut - Blood Lust
- PTU Tut- California Girl
- PTU Tut- Satisfaction
- Sorrowful You Cluster Frame Freebie
- FTU Tut- Raising Hell
- Freebie- Totally Rad Facebook Timeline Banner
- FTU Tut- Classic Beauty
- PTE CT tag by Amy
- FTU Tut- Hell On Wheels
- FREEBIE - Ladybug Garden Facebook Timeline Banner
- FTU tut - Ask Me if I Care
- PTE CT Tag by Leah
- What a Feeling Cluster Frame Freebie
- FTU tut - End of Days
- FTU Tut- I Love Cupcakes
- FTU tut - Steampunk Angel
- Templates 130-134
- PTU tut - Vintage Reflection
- New PTE Artist- Gina King
- New PTE Artist - Gina King
- PTU tut - Who's that Girl?
- PTU Tut- Spring Breeze
- FTU Tut- Spring Time
- PTU tut - Ladybug Garden
- FTU tut - SWAG
- PTU Tut- Hit Like A Girl
- PTE CT Tag by Leah
-
▼
April
(57)


