Thursday, April 12, 2012
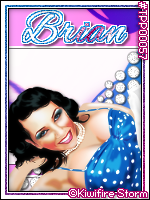
 This tutorial is of my own creation and any resemblance to any other tuts is purely coincidental. This tutorial is for personal use only, using it for monetary gain is against our TOU's.
Supplies:
Gimp
Tube of choice. I am using an awesome tube from Kiwifire Storm. You must have a license to use these tubes. You can purchase this tube at The PSP Project HERE
Polka dot brush set from IntergalacticHussy HERE
Fonts- Will&Grace & Alex Brush
Let's begin!
-File>New 600x225 pixels.
-Change your foreground color to 0c76bc and your background color to white. Select the blend tool. Set the gradient to FG TO BG (RGB). Click the top right corner and drag your mouse to the bottom left corner. Name this layer BG 1.
-Layer>New Layer. Changethe foreground to ae0668. Using the blend tool, on the same settings, click the top left corner and drag all the way to the bottom right corner. Name BG 2. Change the mode of this layer to soft light.
-Open close up tube. Move tube layer below BG 2 layer in layer box. Change the mode to scrren. Filters>Artistic>Soft Glow on default settings. Name this layer TUBE 1.
-Lets add the border. Add new layer. Make the top layer. Layer>Transparency>Alpha To Selection. Change your foreground to black.. Select the bucket fill tool. Bucket fill canvas. Select>Shrink by 1. Press delete on keyboard. Bucket fill canvas with white. Shrink by 5. Delete. Add gradient using the pink and blue colors we used earlier. Filters>Noise>RGB Noise on deafult. Shrink by 2. Delete. Bucket fill with white. Shrink by 1. Delete. Bucket fill with black. Shrink by 1. Delete. Select>None. Name this layer BORDER.
 -Add new layer. Move above the BG 2 Layer. Change foreground to black. Select the paintbrush tool. Select the polkadots24 brush. Change the scale to 0.25. Click the top left corner. Alpha to selection. Change foreground to pink and background to white. Add a gradient to the selection. Repeat noise. Filters>Enhance>Unsharp Mask. Select none. Filters>Light & Shadow>Drop Shadow of 1, 1, 0, black, 50. Name DOTS 1.
-Add new layer. Move below border layer. Bucket fill with black. Alpha to selection. Shrink by 7. Delete. Select none. Filters>Blur>Gaussian Blur. Change both boxes to 10.0.
This is what I have so far:
 -Add new layer. Move above the BG 2 Layer. Change foreground to black. Select the paintbrush tool. Select the polkadots24 brush. Change the scale to 0.25. Click the top left corner. Alpha to selection. Change foreground to pink and background to white. Add a gradient to the selection. Repeat noise. Filters>Enhance>Unsharp Mask. Select none. Filters>Light & Shadow>Drop Shadow of 1, 1, 0, black, 50. Name DOTS 1.
-Add new layer. Change foreground to black and select the polkadots19 brush. Set the scale to 0.35. Clcik the canvas using the paintbrush. Select the flip tool and click canvas. Place this layer to the bottom right corner. Alpha to Selection. Change foreground to blue. Add gradient to selection. Repeat noise & unsharp mask. Select none. Repeat drop shadow. Name DOTS 2.
-Add new layer. Move layer below TUBE 1 layer. Change foreground to black. Apply the different polka dot brushes to the left side of tag.
 -Add new layer. Move above the BG 2 layer. Select the rectangle select tool. Draw a thin rectangle near the bottom of the canvas. Fill selection with blue/pink gradient. Change the mode to grain merge. Add new layer. Bucket fill with white. Shrink by 2. Delete. Select none. Repeat drop shadow. Repeat at the top of tag, only make the rectangle bigger.
 -Add new layer. Move above the BG 2 layer. Select the rectangle select tool. Draw a thin rectangle near the bottom of the canvas. Fill selection with blue/pink gradient. Change the mode to grain merge. Add new layer. Bucket fill with white. Shrink by 2. Delete. Select none. Repeat drop shadow. Repeat at the top of tag, only make the rectangle bigger.
 -Select the text tool. Change font to Will&Grace, size 25, foreground white. Typle 'Classic Beauty'. Place on the bottom left of large rectangle. Repeat drop shadow. Layer>Merge Down. Lower the opacity to 50. Duplicate. Place duplicate at the top right of large rectangle.
-open tube. Flip. Move below the text layers. Scale 50%. Place at the bottom of tag. Add drop shadow of 2, 2, 2, black, 50. Duplicate. Add gaussian blur of 5.0. Change the mode to burn and lower the opacity to 35. Duplicate. Change the mode to screen and the opacity to 25.
-Add name with Alex Brush font. Also add copyright.
Avatar:
-Close all layers above main tube. Edit>Copy Visible.
-File>New 150x200 px.
-Edit>Paste As>New Layer. Postion as you wish.
-Add border like we did above.
-Open tube. Move below border layer. Flip. Scale 40%. Repeat drop shadow. Duplicate. Gaussian blur of 5.0. Change the mode to burn and the opacity to 35. Duplicate. Change the mode to screen and the opacity to 25.
-Add name and copyright.
All done!!
Subscribe to:
Post Comments
(Atom)
Labels
12x12 Layout
A Taggers Scrap
Animated
Announcements
Art of Freya
Basic tuts
Blog Trains
CDO
Cluster Frame
CT tags
Extras
Forum Set
Freebies
FTU CU
FTU Kits
FTU tuts
Holiday
Jackie's Jewels
Kissing Kate
Masks
PTU Kits
PTU tuts
Quick Pages
Results
Results with Amys kits
Show Offs
Sweet Cravings Scraps
Tasha's Playground
Templates
Timeline Banners
Chit Chat
Blog Archive
-
▼
2012
(550)
-
▼
April
(57)
- FTU Tut- Peach
- Tag Show-off
- FTU Tut- Sea Goddess
- PTE CT Tag & Snags
- PTE CT tag by Amy & some extras
- PTU Tut- I'm Waiting
- FTU Kit - Star
- FTU Tut- Wanna Play?
- PTE CT tag by Amy, plus some extras :)
- PTU Tut- Out Of Control
- PTE CT Tag By Leah
- FTU Tut- To Grandmothers House
- PTE CT tag by Amy
- Tag Show Off!!
- PTU tut - Garden Jewel
- PTU tut - Bring it
- Party Rock Cluster Frame Freebie
- FTU Tut- Audrey
- PTE CT Tag by Leah
- Tut Results
- PTU tut- Troublemaker
- PTU tut - Sexting and the City
- PTE CT tag by Amy
- PTU Tut- Think Good Thoughts
- PTE CT Tag by Leah
- PTU tut - Spring Fling
- PTE CT tag by Amy
- PTE CT Tag by Leah (AC)
- PTU tut - Sail Away
- FREEBIE- Love To Love Facebook Timeline Cover
- FTU tut - Blood Lust
- PTU Tut- California Girl
- PTU Tut- Satisfaction
- Sorrowful You Cluster Frame Freebie
- FTU Tut- Raising Hell
- Freebie- Totally Rad Facebook Timeline Banner
- FTU Tut- Classic Beauty
- PTE CT tag by Amy
- FTU Tut- Hell On Wheels
- FREEBIE - Ladybug Garden Facebook Timeline Banner
- FTU tut - Ask Me if I Care
- PTE CT Tag by Leah
- What a Feeling Cluster Frame Freebie
- FTU tut - End of Days
- FTU Tut- I Love Cupcakes
- FTU tut - Steampunk Angel
- Templates 130-134
- PTU tut - Vintage Reflection
- New PTE Artist- Gina King
- New PTE Artist - Gina King
- PTU tut - Who's that Girl?
- PTU Tut- Spring Breeze
- FTU Tut- Spring Time
- PTU tut - Ladybug Garden
- FTU tut - SWAG
- PTU Tut- Hit Like A Girl
- PTE CT Tag by Leah
-
▼
April
(57)


0 comments:
Post a Comment