Tuesday, April 30, 2013
TOOT TOOT!!!!!!!!!!!!!!!!!!!!! Are you all ready for a ride on the January Rain Blog Tran???
This month our theme was Pretty in Paper, kind of an homage to where scrapping began.
I hope you enjoy my portion.
PLEASE leave a thank you if you download
Be sure to check out ALL of the stops on this train...
***************************

Labels:Blog Trains,Freebies,FTU Kits | 10
comments
This tutorial is of my own creation and any resemblance to any other tuts is purely coincidental. This tutorial is for personal use only, using it for monetary gain is against our TOU's.
Supplies:
Gimp or program of choice
Tube of choice. I am using the art of gIO. You must have a license to use these tubes. Purchase the one I used at The PSP Project.
Light textures by tunichtgut
Animation SimoneAni409 (use the PSD version) from Scrappy Bit Of Fun
Font- Segoe UI Light (windows default font)
-File>New 600x200 px.
-Layer>New Layer. Name this layer background. ound color to 792aab. Select the blend tool. Gradient: FG to BG (RGB), Shape: Linear, Repeats: None. While pressing ctrl on your keyboard, click the bottom middle og canvas with your mouse and drag straight up to the top middle. Layer>Duplicate Layer. Filters>Distorts>Blinds. Horizontal, Displacement: 42, Number of Segments: 9.
-Open tube. Make the top layer. Place to the left side of canvas. Layer>Duplicate Layer. Layer>Scale Layer 65%. Scoot duplicate over to the right a tad. Duplicate. Scale 65% and scoot to the right again. Make the top tube layer active. Layer>Merge Down, twice (to merge all 3 tube layers together). Layer>Layer To Image Size. Duplicate. Select the flip tool and click canvas. Merge the 2 tube layers together. Name this layer bottom tubes. Colors>Colorize: Hue, 266, Saturation: 31, Lightness: 0. Change the mode to screen. Duplicate. Name this layer duplicate tubes. Filters>Blur>Gaussian Blur 10.0.
-Make the background layer active. Select the fuzzy select tool. While pressing shift, click inside every other line:
-Make the bottom tubes layer active. Duplicate. Select>Invert. Delete. Select>None. Change the mode to hard light.
-Open tube again. Name this layer main tube. Scale 75%. Place in the center of tag.
-Open light texture extra. Move below main tube layer. Place to the left side of tag.
-Open light texture 15. Rotate 90 Place to right side of tag.
-Open light texture 3. Rotate 90. Move below bottom tubes layer. Place to the left side of tag. Duplicate. Move duplicate layer under main tube layer. Place to the right side of tag.
-Make background layer active. Add new layer. Name this layer circle. Select the ellipse select tool and make a circle in the center of your canvas. Change your foreground color to white and leave your background to the purple used earlier. Select the blend tool. Change the shape to Bi-Linear. Click the top right of your circle with your mouse and drag diagonally to the left bottom. Select none. Gaussian blur 100.0. Change the mode to grain merge.
-Make the top layer active. New Layer. name this layer border. Change foreground color to purple used earlier. Select the bucket fill tool and fill canvas. Filters>Noise>RGB Noise. Change all sliders (except alpha) to 1.00. Filters>Transparency>Alpha To Selection. Select>Shrink by 2. Delete. Bucket fill with white. Shrink 1. Delete. Bucket fill black. Shrink 1. Delete. Select none.
-Add new layer. Make sure it is under the border layer. Name this layer shadow. Bucket fill canvas with black. Alpha to selection. Shrink by 5. Delete. Select none. Gaussian blur 10.0
-Add your name and copyright.
Here is the unanimated version:
If you don't want to animate you're done! If you would like to animate, scroll on down :)
I am putting my animation underneath the main tube layer. Click HERE for a tut on how to use animations in gimp.
For the avatar:
You still need to have your banner open. Edit>Copy Visible.
-File>New 150x150 px.
-Make your main tube layer invisible (click eye next to layer in layer box).
-Edit>Paste As>New Layer.
-As you can see, I put the name for my tag in the upper right side. I just used the mouse to drag my pasted layer until I could see the name.
-To add the border, repeat steps above for adding border to banner.
-Add copyright and you are done!
Labels:Animated,Forum Set,FTU tuts | 0
comments
Monday, April 29, 2013
Happy Monday everyone!!!
I have a fun little CU owl template for all of you today.
I hope you can find some use for it.
PLEASE leave a thank you if you download
Labels:Freebies,FTU CU | 1 comments
Friday, April 26, 2013
This tutorial is of my own creation and any resemblance to any other tuts is purely coincidental. This tutorial is for personal use only, using it for monetary gain is against our TOU's.
Supplies Needed:
~Gimp (any version will do).
~ Colors of the Wind PTU scrapkit by Sweet Cravings Scraps.
~Tube of choice. I used the artwork of Ellie Milk, you must have a license to use this art which you can get HERE.
~Font of choice. I used 1 Snappy DNA.
Let's get started!!!!!
1. Open a new layer ( I prefer a large canvas, so I make mine 1050x656). Make your canvas transparent (Layer > Transparency > Color to alpha).
2. Open Frame 6 (square frame), add drop shadow (Filters > Light & Shadow > Drop Shadow).
3. Open Paper 9 center it behind Frame 6, remove excess paper using a cutting tool or eraser.
4. Open Frame 1 (round frame), place it over Frame 6 & Paper 9 in your layer box. Add drop shadow.
5. Open Paper 6 center it behind Frame 1, remove excess paper using a cutting tool or eraser.
6. Open tube, add drop shadow.
7. Open and place the following elements:
Sea Foam 1
Net
Flower 1
Flower 3
Flower 4
Anchor 2
Coral 2
Dried Leaf 2
Sea Weed 1
Starfish
Dried Plant
Bubbles
Sea Shell 1
Sea Shell 2
Sea Shell 3
~Some elements may need to be sized down. Using the Scale Tool in your tool box adjust pixels to desired size~
~Add drop shadow to all elements (except Sea Foam 1, Net & Bubbles)~
8. Merge layers (Image > Merge Visible Layer).
9. Crop image (Image > Autocrop Image).
10. Scale image to desired size (Image > Scale Image).
11. Add copyright info and name.
12. Save as .png
You are finished :)
Labels:PTU tuts,Sweet Cravings Scraps | 0
comments
Thursday, April 25, 2013
I have a new FTU kit for all of you today called Platinum.
It's got kind of a sexy/nightclub theme and contains 50 elements, 6 frames and 10 papers.
PLEASE leave a thank you if you download
Labels:Freebies,FTU Kits | 10
comments
Wednesday, April 24, 2013
This tutorial is of my own creation and any resemblance to any other tuts is purely coincidental. This tutorial is for personal use only, using it for monetary gain is against our TOU's.
Supplies:
Gimp or program of choice
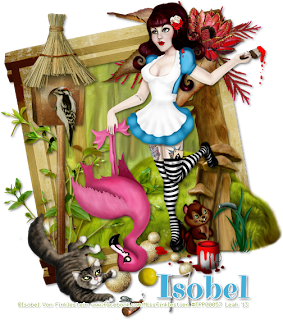
Tube of choice. I am using the art of Isobel Von Finklestein. You must have a license to use these tubes. Purchase the one I used at The PSP Project.
FTU kit It's A Beautiful Life from Wicked Princess Scraps
Font- Purple Purse
-File>New 600x600 px.
-Open wood frame. Layer>Scale Layer 65%. Place in center of canvas. Select the magic wand. Click inside of the frame. Select>Grow 5. Open paper 16 and move this layer below the frame layer in the layer box. Layer>Transparency>Add Alpha Channel. Scale 55%. Place in selection. Select>Invert. Press delete on your keyboard. Select>None. Make the frame layer active. Filters>Light & Shadow>Drop Shadow 2, 2, 5, black, 50.
-Open tube. Make the top layer. Scale 70%. Place to the right side of frame. Repeat drop shadow.
Elements:
grassy hill
mushroom cluster
wood 2
flower cluster 3
chipmunk
baubles
leaves branch
bird house 2
bird
-Add your name and copyright and you're done!
Labels:FTU tuts | 1 comments
We would really love to do some more animated tutorials, but to tell you the truth, it is a pain in the butt! Hopefully this tut will allow us to have more animated tuts on our blog.
I suggest heading over to Scrappy Bit Of Fun for your animations, because you are unable to use MNG files in gimp and she has both MNG and PSD files.
Supplies:
Gimp
Animation SimoneAni396-fairydust (we will be using the PSD file) from Scrappy Bit Of Fun
I am going to be using my tag Bubble Pop for this tutorial. You can find the tut for this tag HERE
Once you have finished your tag, you are ready for animation. DO NOT merge your layers together.
You need to decide which layer you want the animation to be under. I am going to place it just under the main tube layer. So, pick the layer your want to put your animation under. Now you need to merge that layer with all the layers above it. I have 3 layers above my main tube layer. So I will merge 4 layers together. Once I have merged these layers I like to rename the layer TOP so I don't get as confused.
Next, make the merged layer invisible (click on the eye next to it in the layer box). Make one of the visible layers active and right click that layer with your mouse. Choose Merge Visible Layers. Name this layer BOTTOM. You should have only 2 layers now, TOP & BOTTOM.
You can make the TOP layer visible now.
Make sure your BOTTOM layer is active and go to File> Open As Layers and open your animation. It should open up in between the TOP & BOTTOM layers.
You need to count how many frames the animation you have chose has. The one I am using has 16 frames. Now you need to duplicate your TOP layer 15 times so you have a total of 16. Repeat for the BOTTOM layer. Now I have 48 layers, but your number of layers will depend on the number of frames you have in the animation you picked.
Next you need to arrange the layers in groups of 3. It will go TOP, ANIMATION, BOTTOM. You need to do this with all the frames. Start with the 1st frame of the animation and move it under the first TOP layer. Move the first BOTTOM layer below these 2.
Do this with the rest of the layers. Make sure that you keep the animation frames in the right order.
Now we need to merge the groups of 3 together. Press on the TOP copy of the group and Layer>Merge Down 2 times. This will merge the TOP, ANIMATION & BOTTOM layer together. You need to do this with each group of three. Be careful not to merge ALL the layers together, just in groups of three.
With the animation I chose, I ended up with 16 frames (the amount of frame the original animation had).
Go to Filters>Animation>Playback to see your animation.
TO SAVE:
Go to File>Export. Make sure to save as GIF.
Press Export. You will get another pop up box. Make sure your settings are like mine. You can change the milliseconds if you need to.
Press Export and you're done!!!!
Here is my finished tag:
Labels:Animated,Basic tuts,FTU tuts | 0
comments
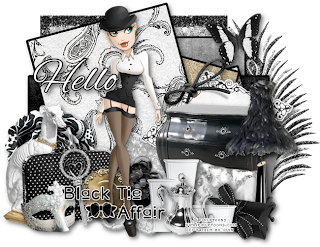
I made some tags using an absolutely gorgeous kit from A Taggers Scrap called Black Tie Affaire.
This kit is so elegant, and is packed full of elements and papers.
I also made some extras for all of you...PLEASE do NOT alter these in any way.
Labels:A Taggers Scrap,CT tags,Extras | 0
comments
Tuesday, April 23, 2013
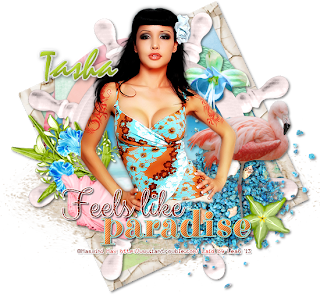
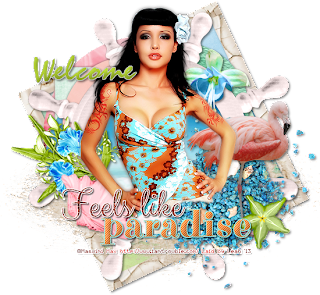
I had the chance to play with the new PTU kit 'Feels Like Paradise' from Tasha's Playground and let me tell you, it is amazing! Head on over to her blog to see where you can purchase this kit. I made some tags and a few snags with this kit, you can find them below.
Here is a new template I made to match this kit:
Labels:CT tags,Extras,Tasha's Playground,Templates | 0
comments
Monday, April 22, 2013
I've got a sweet new FTU kit for all of you called Plum Perfect.
It's full of fun elements all in lovely shades of purple.
PLEASE leave a thank you if you download :)
Labels:Freebies,FTU Kits | 10
comments
Friday, April 19, 2013
I have a new FTU kit for all of you called Bostonian Strength. This kit was inspired by an AWESOME tube that Freya Langford-Sidebottom offered as a freebie on her FB page HERE. The tube is fab, so I hope my kit does it justice.
PLEASE leave a thank you if you download
Labels:Freebies,FTU Kits | 35
comments
This tutorial is of my own creation and any resemblance to any other tuts is purely coincidental. This tutorial is for personal use only, using it for monetary gain is against our TOU's.
Supplies Needed:
~Gimp (any version will do).
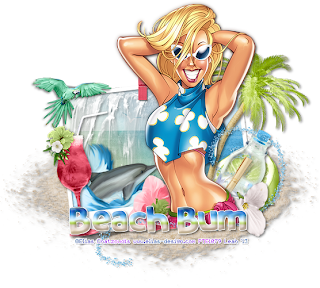
~Feels Like Paradise scrapkit by Tasha's Playground which you can find HERE.
~Tube of choice. I used the artwork of Jaz Higgins, you must have a license to use this art which you can now get from PSP Tube Stop HERE.
~Font of choice. I used DK Porcupine Pickle.
Let's get started!!!!!
1. Open a new layer ( I prefer a large canvas, so I make mine 1050x656). Make your canvas transparent (Layer > Transparency > Color to alpha).
2. Open Frame 3 (square frame), add drop shadow (Filters > Light & Shadow > Drop Shadow).
3. Open Paper 3 center it behind Frame 3, remove excess paper using a cutting tool or eraser.
4. Open Frames 4 & 5, place them under Frame 3 & Paper 3 in your layer box. Add drop shadow.
5. Open tube, add drop shadow.
6. Open and place the following elements:
Waves
Sand
Palm Tree
Palm Frond
Flamingo 2
Star
Starfish
Lime
Stones
Leaf 2
Dolphin 2
Scroll
Shell 2
Flower 2
Deco 1
Bottle 1
~Some elements may need to be sized down. Using the Scale Tool in your tool box adjust pixels to desired size~
~Add drop shadow to all elements (except Waves & Sand)~
7. Merge layers (Image > Merge Visible Layer).
8. Crop image (Image > Autocrop Image).
9. Scale image to desired size (Image > Scale Image).
10. Add copyright info and name.
11. Save as .png
You are finished :)
Labels:PTU tuts,Tasha's Playground | 0
comments
Thursday, April 18, 2013
Labels:Freebies,Templates | 2
comments
This tutorial is of my own creation and any resemblance to any other tuts is purely coincidental. This tutorial is for personal use only, using it for monetary gain is against our TOU's.
Supplies:
Gimp or program of choice
FTU kit Bubble Pop from Gimptastic Scraps
Tube of choice. I am using the art of FourXDesigns. You must have a license to use these tubes. You can purchase them at her store HERE
Template 174 from me HERE
Mask- mask 8 from Gems Taggin Scraps
Font-
-Open template. Image>Canvas Size 600x600 px and click center.
-Let's add papers to the template layers. Make the template layer active (see below). Right click template layer in layer box and choose alpha to selection. Open paper (see below). Right click paper layer in layer box and choose add alpha channel. Select>Invert. Press delete on your keyboard. Select>None. Filters>Light & Shadow>Drop Shadow 0, 0, 10, black, 50. Delete the original template layer. Here are the template layers and which papers I used:
-Let's add papers to the template layers. Make the template layer active (see below). Right click template layer in layer box and choose alpha to selection. Open paper (see below). Right click paper layer in layer box and choose add alpha channel. Select>Invert. Press delete on your keyboard. Select>None. Filters>Light & Shadow>Drop Shadow 0, 0, 10, black, 50. Delete the original template layer. Here are the template layers and which papers I used:
3- paper 9
4- paper 8
5- paper 10
6- paper 5
7- paper 1
8- paper 6
-Make layer 1 active. Alpha to selection. Open paper 3. Layer>Scale Layer 65%. Add alpha channel. Place in selection. Invert & delete. Open tube. Place in selection. Delete. Select>None. Change the mode of the tube to screen. Make paper 3 active. Repeat drop shadow. Repeat for layer 2 using paper 10 and change the mode to overlay.
-Make words 1 active. Filters>Noise>RGB Noise. Change all the sliders (except alpha) to 0.35. Alpha to selection. Select>Grow 2. Layer>New Layer. Move new layer below words layer in layer box. Change your foreground color to white. Select the bucket fill tool. Fill the selection. Select none. Add drop shadow of 2, 2, 5, black, 50.
-Open frame 3. Move below the word layers. Scale place in the center of tag. Select the magic wand and click inside the frame. Grow 5. Open tube close up. Place in center of frame. Layer>Duplicate Layer. Move duplicate below frame layer. Invert & Delete. Select none. Make the top tube layer active. Repeat drop shadow. Layer>Merge Down to merge the tube with the shadow. Select the eraser. Erase the bottom portion of the tube so it looks like she is sticking outside of the frame. Make the frame active and repeat drop shadow.
-Open frame 5. Move below the top tube layer. Scale 40%. Place to the bottom left of tag. Click inside the frame with magic wand. Grow 3. Open paper 4. Add alpha channel. Place in selection. Invert & delete. Open tube. Place in selection. Delete. Select none. Change mode to value. Make the frame active and repeat drop shadow.
Elements:
rainbow
swirl
bubbles 1
frame 5 (rotate 20)
heart 2 (rotate -20)
bubble wand (rotate -25)
label 1
rainbow bubble
glitter 2
flower 1 (flip)
candy 2
-Open paper 1. Make the bottom layer. Apply mask. Click HERE to learn how to use masks in Gimp.
-Add your name and copyright and you're done!
Labels:FTU tuts,Results with Amys kits | 1 comments
I have a brand new FTU kit for all of you called Bubble Pop, this kit was inspired by an awesome new tube from FourXDesigns called Molly.
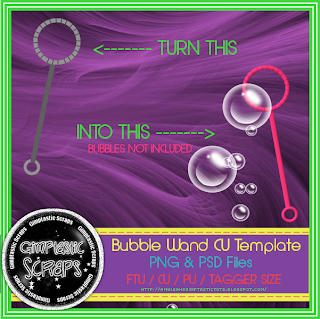
I also decided to give away the bubble wand I made for this kit as a CU freebie
PLEASE leave a thank you if you download
Labels:Freebies,FTU CU,FTU Kits | 10
comments
Wednesday, April 17, 2013
This tutorial is of my own creation and any resemblance to any other tuts is purely coincidental. This tutorial is for personal use only, using it for monetary gain is against our TOU's.
Supplies:
Gimp or program of choice
PTU kit Those Spring Days from Tasha's Playground
Tube of choice. I am using the art of Amy Matthews. You must have a license to use these tubes. Purchase them at CDO.
Mask- 302 from weescotslass
Font- Rouge Script
-File>New 600x600 px.
-Open window. Layer>Scale Layer 75%. Place window in center of canvas. Select the magic wand. While pressing shift on your keyboard, click in all 4 boxes of frame. Select>Grow 5. Open paper 8. Move below window layer in the layer box. Layer>Transparency>Add Alpha channel. Scale 50%. Place in selection. Select>Invert. Press delete on your keyboard. Select>None. Make the window layer active. Filters>Light & Shadow>Drop Shadow 2, 2, 5, black, 50.
-Open leaves. Move below the window layer. Scale 60%. Place to the right side of window. Repeat drop shadow.
-Open flowers 3. Move above the leaves layer. Scale 50%. Place to the right side of window. Repeat drop shadow.
-Open grass. Make the top layer. Scale 75%. Place at the bottom of window. Repeat drop shadow.
-Open rain. Move below window layer. Scale 75%. Place inside window.
-Open tube. Make the top layer. Scale 75%. Place in the center of tag. Repeat drop shadow. Layer>Duplicate Layer. Filters>Blur>Gaussian Blur on default. Change the mode to soft light. Lower the opacity to 70.
Other elements:
bow 1
flowers 2
ladder
flower 5 (flip)
froggie
flowers 1
butterfly 2
leaf
bird
-Open paper 2. Make the bottom layer. Apply mask. Click HERE to learn how to use masks in Gimp.
-Add name and copyright and you're done!!
Labels:PTU tuts,Tasha's Playground | 0
comments
Tuesday, April 16, 2013
Here's a fun FTU kit for all of you called Girls Rule.
It's got a bit of a Goth/Emo vibe and includes 45 elements, 8 papers and 2 cookie/posers.
PLEASE leave a thank you if you download
Labels:Freebies,FTU Kits | 9
comments
Subscribe to:
Posts
(Atom)
Labels
12x12 Layout
A Taggers Scrap
Animated
Announcements
Art of Freya
Basic tuts
Blog Trains
CDO
Cluster Frame
CT tags
Extras
Forum Set
Freebies
FTU CU
FTU Kits
FTU tuts
Holiday
Jackie's Jewels
Kissing Kate
Masks
PTU Kits
PTU tuts
Quick Pages
Results
Results with Amys kits
Show Offs
Sweet Cravings Scraps
Tasha's Playground
Templates
Timeline Banners
Chit Chat
Blog Archive
-
▼
2013
(230)
-
▼
April
(30)
- January Rain Blog Train - Pretty in Paper
- FTU Tut- On The Ritz- Animated
- FTU CU Funky Owl Template
- PTU tut - Colors of the Wind
- New FTU kit - Platinum
- FTU Tut- Wonderland
- FTU Tut- Using animations in Gimp
- CT tags & extras
- CT Tags, Snags and new template!
- New FTU kit - Plum Perfect
- New FTU kit - Bostonian Strength
- PTU tut - Feels Like Paradise
- Template 174
- FTU Tut- Bubble Pop
- New FTU kit - Bubble Pop + CU Freebie Bubble Wand
- PTU tut- Spring Days
- New FTU kit - Girls Rule
- Fantastically Free Blog Train - Inspired by *CENSO...
- Freebie Cluster Frame - All This Time
- PTU tut- Ms. Monroe
- PTU tut - Spring Rain
- PTU Tut- Young Love
- PTU Tut- Spring Is Here
- New FTU kit - One Fine Day
- Sneak Peek Time!!!!!
- PTU tut - Carolina Sunshine
- FTU Forum Set Tut- Color My World
- FTU Tut- Dark Passenger
- PTU tut - Deep in the Forest
- January Rain Blog Train - April Showers
-
▼
April
(30)


