Gimptastic Scraps Available Exclusively @

Gimptastic Scraps CT


Blog Trains

CU Licenses


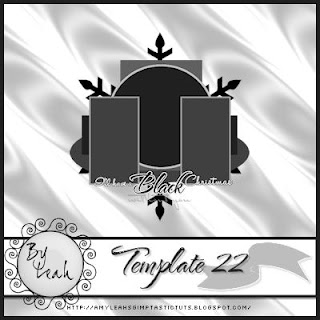
You can download the temp HERE
This tutorial is of my own creation and any resemblance to any other tuts is purely coincidental. This tutorial is for personal use only, using it for monetary gain is against our TOU's. Supplies: Gimp Any version should work Stunning PTU kit from Addictive Pleasures called 'Black Christmas' HERE Template 22 by me HERE Font- Ma Sexy Let's get started! -Open template an delete the credits. -Make the circle layer active. Right click layer in layer box and choose layer to image size. Using the magic wand, click outside the circle. Open paper 12. Right click layer in layer box and choose add alpha channel. Layer>Scale Layer by 50%. Press delete on your keyboard. Select none. Delete circle layer. -Make the circle back layer active. Filters>Noise>RGB Noise on default settings. Filters>Light & Shadow> Drop Shadow of 2, 2, 15, black, 100. -Make the square layer active. Layer to image size. Click outside with magic wand. Open paper 10 and add alpha channel. Scale by 50%. Delete and select none. Filters>Repeat Drop Shadow. Delete the square layer. -Make the thin rect layer active. Layer to image size. Click outside with magic wand. Open paper 5 and add alpha channel. Scale by 75%. Delete. Select>Invert. Add new later above this layer. Select>Grow by 1. Fill with white. Select>Shrink by 3. Delete and select none. Repeat drop shadow. Delete the thin rect layer. -Make the oval layer active. Layer to image size. Click outside with magic wand. Open paper 4 and add alpha channel. Scale by 85%. Delete and invert. Add new layer below this layer. Grow by 3. Fill with white. Select none and repeat drop shadow. Delete oval layer. -Make the rect 1 layer active. Layer to image size. Click outside with magic wand. Open paper 7 and add alha channel. Scale by 50%. Delete and select none. -Make rect 2 layer active. Layer to image size. Click outside with magic wand. Open paper 3 and add alpha channel. Scale by 50%. Delete and select none. Delete the rect 2 layer. -Add noise to the frame 1, frame 2 and black layers. -Add a drop shadow of 2, 2, 10, black, 100 to the snowflake layer. -Open your tube (full body). Move layer below word art layers in the layer box. Add drop shdow of 3, 5, 2, black, 50. -Open tube close up. Move layer below frame 2. Layer>Duplicate Layer. Layer to image size. Using the flip tool flip your tube. Move this duplicate tube layer below the frame 1 layer. Erase parts of the tube sticking out of the frame. To do this make the paper layer below the tube active. Click outside with magic wand. Make the tube layer active and press delete. Do with both close up tube layers. Change the mode of both tube layers to value and change the opacity to 50. Elements Add a drop shadow of 2, 2, 2, black, 50 to all element layers. See my tag for placement. -Frame 5 Scale 50% -Snowflake Scale 65% -Sparkles no scale duplicate and flip -Garland Scale 50% -Candle 2 Scale 60% duplicate and flip -Mistletoe 60% -Curtains Scale 85% -Candle no scale -Candles Scale 35% duplicate and flip -Bauble 3 Scale 25% -Tree 5 Scale 50% -Add drop shadow to all 3 word back layers. -Make the without you layer active. Layer to image size. Right click in layer box and choose alpha to selection. Add new layer below this layer. Grow by 2 and fill with white. Select none. Filters>Blur>Gaussian Blur 5. Add drop shadow. -Add your name, copyrights and crop. I hope you enjoyed this tut! Happy Holidays!
Snag Our Blinkies


Don't Be A Pirate!


0 comments:
Post a Comment