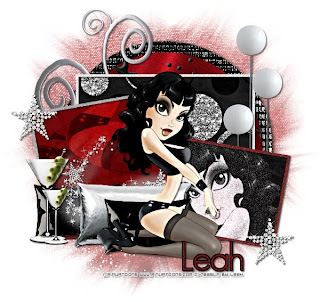
This tutorial is of my own creation and any resemblance to any other tuts is purely coincidental. This tutorial is for personal use only, using it for monetary gain is against our TOU's. Supplies: Gimp- Any version should work FTU scrapkit from Scraps By Jessica called 'Platinum' HERE Tube of choice. I am using Pinuptoons. You must have a license to use them. My license for this one is through CILM, but since they are no longer around you need to purchase them HERE. Template 310 by Divine Intentionz HERE Mask- WSL_Mask241 HERE Font- Maximo Thin Let's get started! -Open template. Delete all the word art layers and credits. Go to Image>Scale Image by 500x427 pixels. Next, go to Image>Canvas Size of 600x600 and be sure to click center. -Now we will be adding papers to the template layers. Do the following to the template layers I name below. Right click template layer in the layer box and choose alpha to selection. Open paper. Right click paper layer in layer box and choose add alpha channel. Layer>Scale Layer by 60%. Select>Invert. Press delete on your keyboard. Select>None. gradient background- paper 2 circle- paper 9 Go to Filters>Light & Shadow>Drop Shadow of 2, 2, 15, black, 100 glittered circle- paper 11 Filters>Repeat drop shadow frame 3 background- paper 6 frame 2 background- paper 13 -Make the frame 3 layer active. Go to Colors>Colorize with these settings: Hue 0 Saturation 0 Lightness -28 Next go to Filters>Noise>RGB Noise on the default settings. Add a drop shadow od 2, 2, 2, black, 50. -Make the frame 2 layer active. Colorize using these settings: Hue 360 Saturation 50 Lightness -66 Repeat noise and drop shdow. -Make frame 1 layer active. Repeat noise and drop shadow. -Make the rectangle 2 layer active. Colorize with these settings: Hue 360 Saturation 50 Lightness -66 -Make the rectangle 1 layer active. Colorize with these settings: Hue 0 Saturation 0 Lightness -70 -Open tube. Move layer to top layer in the layer box. Scale by 70%. Repeat drop shadow. -Open tube again. Go to Layers>Duplicate Layer. Move 1 of the tubes in the black square and the other in the red square. Move the tube layers so they are below the frames of the square they are in. I hope that makes since. See mine if you are confused. Using the flip tool, flip the tube inside of the black square. I'm going to start with the tube in the black square. So make the black square active. Right click and choose alpha to selection. Make the tube layer inside of this square active. Invert and press delete. Select none. Change the mode to value. Add some noise to the tube. Now repeat for the red square and the other tube, but don't add noise to it and change the mode to soft light. Elements Add a drop shadow of 2, 2, 2, black, 50 to all element layers. See my tag for placement. retro lamp- no scale pillow 2- scale 75% pillow 3- scale 75% star bling- scale 35% bling silver star dust- 75% there was a little bit of this element sticking out from under my tube. I didn't like how it looked so I erase it. martini- 45% Duplicate and scale 65% silver swirl- 65% -Open paper 5. Apply mask. If you don't know how to use masks go HERE. Lower the opacity to 50. -Add your name, proper copyright and crop. All finished!
Labels
Chit Chat
Blog Archive
-
▼
2011
(337)
-
▼
January
(24)
- Mardi Gras Templates
- New PTU tut "My Gorjuss Valentine"
- FTU tut- Martini
- New PTU tut "Sweet Temptation"
- OMG!!!! I just had to share!!!!
- PTU Tut- XOXO
- New PTU tut "Love is Toxic"
- Some more templates!
- Tag Show Off
- New PTU tut "Je T'aime Paris"
- New PTU tut- Wild One
- WOOT, we got an AWARD!!!!!!!!!
- New Templates!
- PTU tut- Cupcake Dreams
- Divalicious
- New PTU tut "She's a Diva"
- New PTU tut "Gothic Love"
- New PTU tut "Gorjuss Gift"
- FTU tut- Intoxicating
- New PTU tut- Purple Fairy
- New FTU tut "Pour me a Double"
- Valentine Temps!
- New PTU tut "Crazy Girl"
- New PTU tut "Winter Heat"
-
▼
January
(24)


0 comments:
Post a Comment