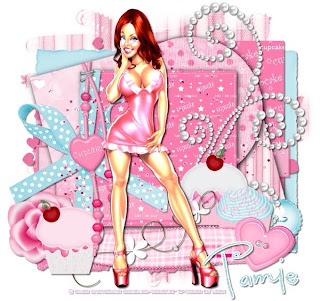
This tutorial is of my own creation and any resemblance to any other tuts is purely coincidental. This tutorial is for personal use only, using it for monetary gain is against our TOU's. Supplies: Gimp- Any version should do PTU scrap kit from Addictive Pleasures called 'Cupcake' HERE Template 378 from Divine Intentionz HERE Tube of Choice. I am using the work of Eliaz Chatzoudis. You must have a license to use his tubes. You can purchase them HERE Mask- WSL_Mask281 HERE Font- Pea Lovey Dovey Let's get started! -Open up template. Delete the credits. Image>Scale Image by 500x500 px. Image>Canvas Size of 600x600 px and make sure you click center. -Let's add some papers to our template layers. You will need to do the following for each layer we add paperto. Right click the layer in the layer box and choose alpha to selection. Open paper. Right click paper layer in layer box and choose add alpha channel. Layer>Scale layer by 60%. Select>Invert. Press delete on your keyboard. Select>None. Square 3- Paper 12 Filters>Light and Shadow>Drop Shadow of 2, 2, 15, black, 100 Circle 2- Paper 5 Filters>Repeat Drop Shadow Circle 1- Paper 6 Repeat drop shadow Sqaure 2- Paper 3 Repeat drop shadow Square 1- Paper 1 Repeat drop shadow Square 5- Paper 9 Filters>Reshow Drop Shadow 2, 2, 2, black, 50 Sqaure 4- Paper 11 Repeat drop shadow Thin Rectangle- Paper 2 Scale by 70% DON'T Select none. Instead go to Select>Invert. Add new layer above this layer. Using the bucket fill tool, fill with fc7cae. Shelect>Shrink by 2. Press delete. Select none and repeat drop shadow. -Open your tube. Move tube layer to the top in the layer box. Repeat drop shadow. Layer>Duplicate Layer. Filters>Blur>Gaussian Blur of 3. Change the mode to grain merge. Elements Add a drop shadow of 2, 2, 2, black, 50 to all element layers. See my tag for placement. -Beads scale 75% -Cupcake scale 40% -Cupcake 3 scale 35% -Label no scale using the flip tool flip the element -Frame 3 no scale -Glitter no scale -Button 2 scale 65% -Pearls no scale -Frame scale 55% -Bow 3 no scale -Cupcake 3 scale 40% -Rose no scale -Hearts no scale -Wire no scale -Open paper 1. Apply mask. -Add your name, copyright and scale. All finished!
Labels
Chit Chat
Blog Archive
-
▼
2011
(337)
-
▼
January
(24)
- Mardi Gras Templates
- New PTU tut "My Gorjuss Valentine"
- FTU tut- Martini
- New PTU tut "Sweet Temptation"
- OMG!!!! I just had to share!!!!
- PTU Tut- XOXO
- New PTU tut "Love is Toxic"
- Some more templates!
- Tag Show Off
- New PTU tut "Je T'aime Paris"
- New PTU tut- Wild One
- WOOT, we got an AWARD!!!!!!!!!
- New Templates!
- PTU tut- Cupcake Dreams
- Divalicious
- New PTU tut "She's a Diva"
- New PTU tut "Gothic Love"
- New PTU tut "Gorjuss Gift"
- FTU tut- Intoxicating
- New PTU tut- Purple Fairy
- New FTU tut "Pour me a Double"
- Valentine Temps!
- New PTU tut "Crazy Girl"
- New PTU tut "Winter Heat"
-
▼
January
(24)


0 comments:
Post a Comment