Saturday, March 31, 2012
 I made this tag using a beauty from Roman Zaric, you can find her along with 2 other tubes by Roman in the New Releases section @ PSP Tubes Emporium now.
Here are some extras for you. Click on the tag to snag the full size version.
DO NOT alter in any way.
Labels:CT tags,Extras | 0
comments
Friday, March 30, 2012
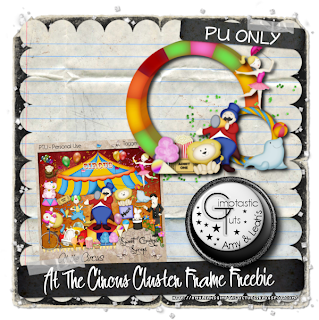 I made this cluster frame using an adorable PTU kit called At The Circus by Sweet Cravings Scraps. This kit is FULL of super cute elements that will take you right back to your childhood. Who doesn't love a trip to the circus???
You can download the frame HERE.
I made this cluster frame using an adorable PTU kit called At The Circus by Sweet Cravings Scraps. This kit is FULL of super cute elements that will take you right back to your childhood. Who doesn't love a trip to the circus???
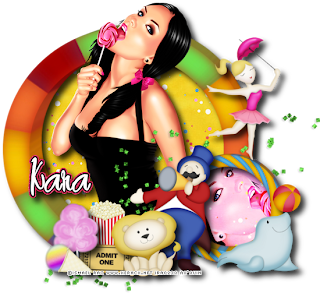
You can download the frame HERE.Here's a tag I made with the frame:
 This tutorial is of my own creation and any resemblance to any other tuts is purely coincidental. This tutorial is for personal use only, using it for monetary gain is against our TOU's.
Supplies:
Gimp
PTU Collab kit My Angel Above from Scraps and the City. For this tut I used Stef's part. Purchase it HERE
Tube of choice. I am using the art of Keith Garvey. You must have a license to use histubes. Purchase them at PTE HERE
Font- Alex Brush
Lets begin!
-File>New 600x600 px.
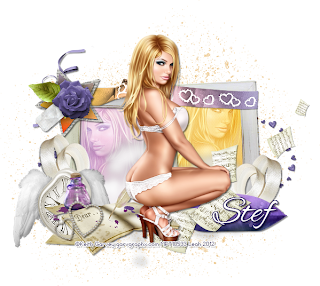
-Open ele 19. Layer>Scale Layer 60%. Select the magic wand. Click inside the 1st box of the frame. Select>Grow by 5. Open paper 3. ove below the frame layer in layer box. Layer>Transparency>Add Alpha Channel. Scale 50%. Place paper in selection. Select>Invert. Press delete on keyboard. Open tube. Place in selection. Delete. Select>None. Change the mode of the tube to soft light. Repeat for the 2nd box of frame, but this time use paper 2. Make the frame active. Filters>Light & Shadow>Drop Shadow 2, 2, 2, black, 50.
-Open tube again. Make the top layer. Scale 75%. Place in the middle of tag. Repeat drop shadow. Layer>Duplicate Layer. Filters>Blur>Gaussian Blur on default. Change the mode to pverlayer. Lower the opacity to 75.
-Open ele 36. Move below tube. Scale 55%. Place at top of frame. Add drop shadow of 1, 1, 1, black, 50.
-Open ele 21. Make the bottom layer. Scale 75%. Place in the middle. Repeat drop shadow.
-Open ele 64. Move below tube. Scale 80%. Place bottom left. Add drop shadow of 2,2, 2, black, 50.
-Open ele 72. Make the top layer. Scale 65%. Place top left. Repeat drop shadow.
-Open ele 52. Move below book layer. Scale 30%. Place to left bottom. Add drop shadow of 1, 1, 1, black, 50.
-Open ele 62. Move below the tube. Scale 65%. Place to right. Repeat drop shadow.
-Open ele 63. Move below papers layer. Scale 50%. Place at bottom right. Add drop shadow of 2, 2, 2, black.
-Open ele 34. Move below the pillow. Scale 50%. Place to the left. Duplicate. Select the flip tool and click canvas. Place duplicate to the right of tube.
-Open ele 13. Make top layer. Scale 30%. Place at bottom left. Repeat drop shadow.
-Open ele 54. Move above frame. Place at the bottom middle. Add drop shadow of 1, 1, 1, black, 50.
-Open ele 56. Make the bottom layer. Place in middle.
-Add your name and copyright.
All done!
Tuesday, March 27, 2012
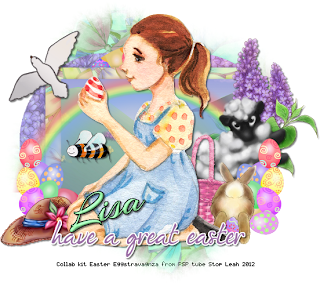 This tutorial is of my own creation and any resemblance to any other tuts is purely coincidental. This tutorial is for personal use only, using it for monetary gain is against our TOU's.
Supplies:
Gimp
PTU Collab kit from PSP Tube Stop called Easter Eggstravagnza at PSP Tube Stop HERE
Template 53 from me HERE
Mask 193 from weescotslass HERE
Fonts- I'm fashoinista & Arizona
Lets begin!
-Open template. Delete credits and word art layers.. Image>Scale Image 450x342 px. Image>Canvas Size 600x600 px and click center.
-Let's add papers to the template layers. Make the template layer active (see below). Right click template layer in layer box and choose alpha to selection. Open paper (see below). Right click paper layer in layer box and choose add alpha channel. Select>Invert. Press delete on your keyboard. Select>None. Delete the original template layer.Here are the template layers and which papers I used:
square 1- easter landscape Filters>Light& Shadow>Drop Shadow 1, 1, 10, black, 35
square 2- ribbon background yellow tint Add Drop Shadow of 1, 1, 10, black, 50
circle 1 # 1- eggs background repeat drop shadow
circle 1- lilac background pink tint repeat drop shadow
circle 2- lilac background blue tint Add drop shadow of 2, 2, 2, black, 50
-Open girl holding egg (from the elements folder). Make the top layer. Layer>Scale Layer 70%. Place in the middle of tag. Repeat drop shadow. Layer>Duplicate Layer. Filters>Blur>Gaussian Blur on default. Changethe mode to burn. Lower the opacity to 30.
-Open egg cluster (from the frames folder). Move below the tube layer. Scale 65%. Place to the left side of tube at the bottom. Layer>Layer To Image Size. Select the flip tool and click canvas.
Other elements:
full rainbow
lamb 2
lilac sprig 1
eater basket oink
easter bunny running away
white dove flying 2
flying bee 2
easter bonnet
-Open ribbon background green tint. Make the bottom layer. Apply mask. Click HERE to learn how to use masks.
-Make the top layer active. Select the text tool. Change your font to I'm Fashonista, size 40, foreground color 9d71a7. Type have a great easter. Place at the bottom of tag. Alpha to selection. Layer>New Layer. Move new layer below text layer. change foreground to white. Select the bucket fill tool and fill selection. Select none. Repeat drop shadow.
-Add your name with the Arizona font. Add copyright.
All done!
Labels:Holiday,PTU tuts | 0
comments
Monday, March 26, 2012

This tutorial is of my own creation and any resemblance to any other tuts is purely coincidental. This tutorial is for personal use only, using it for monetary gain is against our TOU's.
Supplies:
Gimp
PTU kit Bunny Business from A Taggers Scrap HERE
Tube of choice. I am using the art of Pinuptoons. You must have a license to use these tubes. You can purchase them from CDO HERE
Font- Janda Safe and Sound
Lets begin!
-File>New 600x600 px.
-Open frame 7. Layer>Scale Layer 75%. Place to the left of canvas. Select the magic wand. Click inside the frame. Select>Grow 5. Open paper 2. Move paper layer below frame layer in layer box. Layer>Transparency>Add Alpha Channel. Scale 65%. Select>Invert. Press delete on keyboard. Select>None. Make the frame active again. Filters>Light & Shadow>Drop Shadow 1, 1, 1, black, 50.
-Open word art 1. Makethe top layer. Scale 70%. Place at the bottom of frame. Repeat drop shadow.
-Open tube. Move above th frame layer in layer box. Place in the middle of tag. Repeat drop shadow.
-Open border. Make the top layer. Scale 50%. Select the rotate tool. Rotate by -6. Place at bottom of word art layer.
-Open frame 5. Move below the tube layer. Scale 75%. Rotate 15. Place to the right side of tube. Add paper 3 to this frame (repeat steps above for adding paper to frame 7). Repeat drop shadow on frame.
Other Elements:
eggshell
eggs 2
bunny 3
bunny 5
bow 6- flip
ribbon
flower 4
flower 1
button
egg 1
glows
flower scatter
watering can
-Add name and copyright.
All done!
Labels:A Taggers Scrap,Holiday,PTU tuts | 0
comments
Friday, March 23, 2012
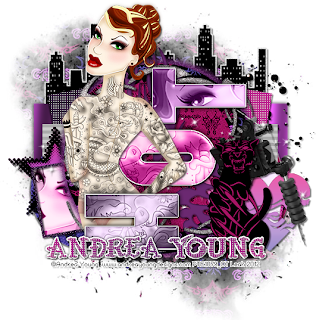
Check out this awesome new tube from Andrea Young. You can purchase this tube starting today @ PSP Tubes Emporium HERE.
Check out the PTE facebook group for some snags :)
Labels:CT tags | 0
comments
Thursday, March 22, 2012
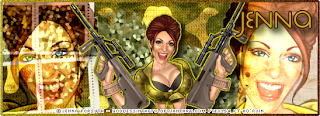 This tag was made using a bad ass chick from Jenna Forsyth. I think all chicks need to play with guns from time to time, it helps keep us sane...LOL. Anyway, you can find this tube at PSP Tubes Emporium 3-23-12.
Here are some extras for you. Click on the tag to snag the full size version.
DO NOT alter in any way.
Labels:CT tags,Extras | 0
comments
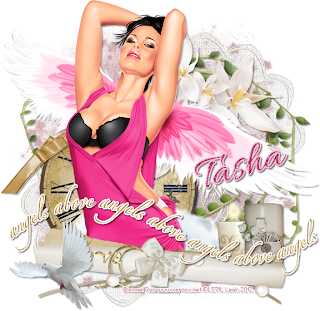 This tutorial is of my own creation and any resemblance to any other tuts is purely coincidental. This tutorial is for personal use only, using it for monetary gain is against our TOU's.
Supplies:
Gimp
PTU scrap kit My Angel Above from Tasha's Playground HERE
Tube of choice. I am using the art of Ismael Rac. You must have a license to use his tubes. You can purchase them at his store HERE
Mask 25 from Witchy's Heart HERE
Font- Allura
Lets begin!
-File>New 600x600 px.
-Open scroll. Place towards the bottom of the canvas.
-Open tube. Move below the scroll layer in the layer box. Place her hips level with the scroll. I had to erase her legs so they weren't sticking underneath the scroll. Filters>Light & Shadow>Drop Shadow 2, 2, 2, black, 35. Layer>Duplicate Layer. Filters>Blur>Gaussian BLur on default. Change the mode to soft light and lower the opacity to 70.
-Open word art. Make the top layer. Place avobe the scroll (see mine). Layer>Transparency>Alpha To Selection. Select>Grow 2. Layer>New Layer. Move new layer below word art layer in layer box. Change your foreground to white. Select the bucket fill tool and fill the selection. Select>None. Repeat drop shadow.
-Open the lace element. Make the bottom layer. Place at the top right. Duplicate. Move duplicate to the bottom left.
-Open clock. Move below the tube layer. Place behind tube. Repeat drop shadow.
Other Elements:
cloud
dove
flower 3
greenery
candle
candle 2
bow
-Open paper 2. Make the bottom layer. Apply mask. Click HERE to learn how to use masks.
-Add your name and copyright.
All finished!
Labels:PTU tuts,Tasha's Playground | 0
comments
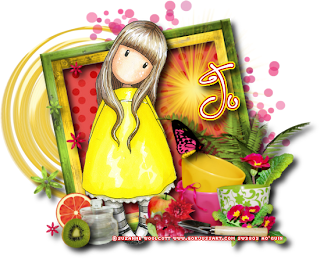
This tutorial is of my own creation and any resemblance to any other tuts is purely coincidental. This tutorial is for personal use only, using it for monetary gain is against our TOU's.
Supplies Needed:
~Gimp (any version will do).
~Tube of choice. I used the artwork of Suzanne Woolcott, you must have a license to use this art which you can get HERE.
~Summer Garden PTU scrapkit by A Taggers Scrap which you can get HERE.
~Font of choice. I used One Starry Night.
Let's get started!!!!!
1. Open a new layer ( I prefer a large canvas, so I make mine 1050x656). Make your canvas transparent (Layer > Transparency > Color to alpha).
2. Open Frame 14, add drop shadow (Filters > Light & Shadow > Drop Shadow). I tilted the frame slightly using the rotate tool in the tool box.
3. Open Paper 17 center it behind frame, remove excess paper using a cutting tool or eraser.
4. Open tube.
~You will need to duplicate the tube so that you have 2 (at the bottom of your layer box click on the blue box. This will give you 2 tube layers).
~Select the top tube layer in your tool box. Add Gaussian Blur (Filters > Blur > Gaussian Blur, use default settings).
~On that same tube layer change the mode to Overlay (at the top of your Layer Box you will see where it says Mode, click the arrow and select Overlay from the drop down menu).
~Add drop shadow to the bottom layer of the tube.
5. Open and place the following elements:
Deco 2
Background
Sun
Scatter
Fern
Apple
Orange
Kiwi
Grapes
Glass jar
Flower 1
Flower 17
Flower 18
Pot
Pots
Trowel
Butterfly
~Some elements may need to be sized down. Using the Scale Tool in your tool box adjust pixels to desired size~
~Add drop shadow to all elements (except Deco 2, Background & Sun)~
6. Merge layers (Image > Merge Visible Layer).
7. Crop image (Image > Autocrop Image).
8. Scale image to desired size (Image > Scale Image).
9. Add copyright info and name.
10. Save as .png
You are finished :)
Labels:A Taggers Scrap,PTU tuts | 0
comments
This tutorial is of my own creation and any resemblance to any other tuts is purely coincidental. This tutorial is for personal use only, using it for monetary gain is against our TOU's.
Supplies:
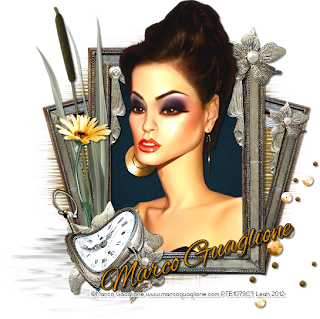
Tube of choice. I am using the art of Marco Guaglione. You must have a license to use these tubes. You can purchase the one I used starting tomorrow @ PSP Tubes Emporium HERE
FTU Add on from Doudou's Design called Venice Masquerade HERE (scroll to bottom for download)
Mask 216 from weescotslass HERE
Font- Alex Brush
Lets begin!
-File>New 600x600 px.
-Open element 5. Layer>Scale Layer 30%. Select the magic wand. Click inside the frame. Open paper. Move below the frame layer. Scale 20%. Layer>Transparency>Add Aplha Channel. Select>Invert. Press delete on your keyboard. Open tube (it should open right below the frame layer). Place tube in selection. Layer>Duplicate Layer. Move duplicate above the frame layer. Make the original tube active (one below frame). Delete. Select>None. Makethe duplicate tube active. Filters>Light & Shadow>Drop Shadow 2, 2, 2, black, 50. Layer>Merge Down (to merge tube and drop shadow). Select the eraser. Erase the bottom portion of the tube, so it looks like she is sticking out of the frame. Make the frame layer active and repeat drop shadow.
-Open element 5 again. Make the bottom layer. Scale 23%. Selectthe rotate tool and click canvas. In the angle box put -15. Place behind the big frame (see mine). Filters>Enhance>Sharpen. Change the sharpness to 30. Layer>Layer To Image Size. Duplicate. Select the filp tool and click canvas. Repeat drop shadow on both of these frames.
Other elements:
2
8
1
9
3- flip
-Open paper again. Make the bottom layer. Scale 600x600 px. Colors>Colorize. Hue: 41 Saturation: 59 Lightness: 29. Apply mask. Duplicate.
-Add name and copyright.
All done!
Labels:FTU tuts | 1 comments
Wednesday, March 21, 2012
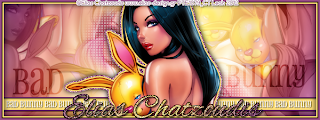
I made this using the newly released Elias Chatzoudis tube available for purchase at PSP Tubes Emporium HERE.
Check out the PTE facebook group for some snags!
Labels:CT tags | 0
comments
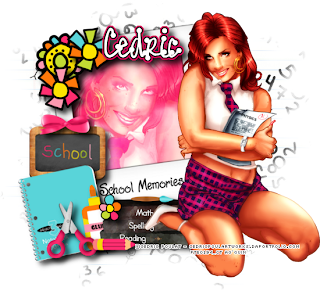
This tutorial is of my own creation and any resemblance to any other tuts is purely coincidental. This tutorial is for personal use only, using it for monetary gain is against our TOU's.
Supplies Needed:
~Gimp (any version will do).
~Tube of choice. I used the artwork of Cedric Poulat, you must have a license to use this art which you can get @ PSP Tubes Emporium HERE.
~Back to School FTU scrapkit by Sweet Cravings Scraps which you can get HERE.
~Mask of choice. I used mask 17 which you can get from HorsePlay's Pasture HERE.
~Font of choice. I used Pea Faith Dots.
Let's get started!!!!!
1. Open a new layer ( I prefer a large canvas, so I make mine 1050x656). Make your canvas transparent (Layer > Transparency > Color to alpha).
2. Open Frame 2, add drop shadow (Filters > Light & Shadow > Drop Shadow). I tilted the frame slightly using the rotate tool in the tool box.
3. Open Paper 12 center it behind frame, remove excess paper using a cutting tool or eraser.
4. Open tubes. I used both a full body and a close-up.
~For the full body tube you will need to duplicate the tube so that you have 2 (at the bottom of your layer box click on the blue box. This will give you 2 tube layers).
~Select the top tube layer in your tool box. Add Gaussian Blur (Filters > Blur > Gaussian Blur, use default settings).
~On that same tube layer change the mode to Overlay (at the top of your Layer Box you will see where it says Mode, click the arrow and select Overlay from the drop down menu).
~Add drop shadow to bottom tube layer of full body tube.
~For the close-up tube layer, place it under the frame (but above the paper) in your layer box. Change the mode to Screen (at the top of your Layer Box you will see where it says Mode, click the arrow and select Screen from the drop down menu). Remove excess tube layer using cutting tool or eraser from your tool box.
5. Open and place the following elements:
Chalkboard
Word art 3
Flower 1
Flower 2
Flower 3
Flower 4
Notebook 3
Glue
School books
Bow 6
Scissors 4
Pencil 4
Paintbrush 3
~Some elements may need to be sized down. Using the Scale Tool in your tool box adjust pixels to desired size~
~Add drop shadow to all elements (except Word art 3)~
6. Open Paper 20.
7. Open mask.
8. Add mask to paper (click HERE for a tut on using masks).
9. Merge layers (Image > Merge Visible Layer).
10. Crop image (Image > Autocrop Image).
11. Scale image to desired size (Image > Scale Image).
12. Add copyright info and name.
13. Save as .png
You are finished :)
Labels:FTU tuts | 0
comments
Tuesday, March 20, 2012
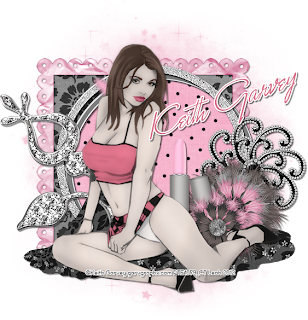 I tried my hand at one of Keith Garvey's newly released images from Garvs Coloring Book 2. I had fun coloring this tube. Keep in mind that this is the very first time I have tried to color something lol! You can purchase Garvs Coloring Book 2 at PSP Tubes Emporium HERE.
Be sure to check out the PTE facebook group to get some snags of this tag!
Labels:CT tags | 0
comments
Monday, March 19, 2012
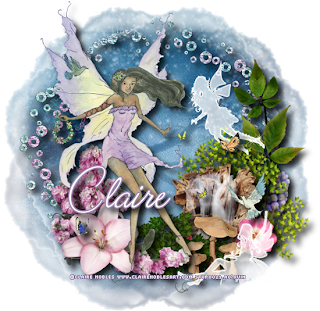 This tag was made featuring a gorgeous fairy by Claire Nobles. This tube comes with 7 layers, that's 1 fairy, 5 butterflies and a bird...tons of fairy fun!!! You can find this beauty @ PSP Tube Stop.
Labels:CT tags | 0
comments
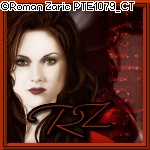
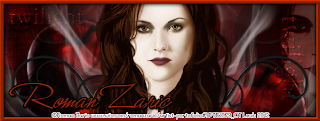 This tutorial is of my own creation and any resemblance to any other tuts is purely coincidental. This tutorial is for personal use only, using it for monetary gain is against our TOU's.
Supplies:
Gimp
Tube of choice. I am using the art of Roman Zaric. You must have a license to use these tubes. You can purchase the tube I used starting today at PSP Tubes Emporium HERE
FTU kit from Artistic Dreams called Twilight HERE
Font- Monika Italic
Lets get started!
-File>New 600x225 px.
-Open paper 5.
-Open tube. Place to the far right. Layer>Layer To Image Size. Change the mode to grain merge. Lower the opacity to 50. Layer>Duplicate Layer. Select the flip tool and click canvas. Change the mode of the flipped tube to soft light.
-Open tube again. Layer Scale Layer 75%. Place in the middle. Filters>Light & Shadow>Drop Shadow 2, 2, 2, black, 50. Duplicate. Filters>Blur>Gaussian Blur on default. Change the mode to soft light and lower the opacity to 70.
-Open doodle 1. Place to the right side of the main tube. Layer to image size. Repeat drop shadow. Duplicate. Flip.
-Open shadow. Move below the doodle layer. Scale 30%. Place to the right. Lower the opacity to 60. Layer to image size. Duplicate and flip.
-Open apple. Move above the paper layer. Place on the right side. Duplicate. Move duplicate to the left side.
-Open wordart 1. Scale 35%. Place in the upper left corner. Lower the opacity to 50. Repeat drop shadow.
-Open wordart 1 again. Scale 40%. Select the rotate tool. Rotate 90. Place to the right. Lower the opacity to 50 and repeat drop shadow.
-Make the top layer active. Layer>New Layer. Change foreground color to black. Select the bucket fill tool and click canvas. Layer>Transparency>Alpha To Selection. Select>Shrink 8. Press delete on your keyboard. Select>None. Add a gaussian blur of 10.0.
Add new layer. Change foreground to 9f2600. Bucket fill canvas. Alpha to selection. Shrink by 7. Delete. Select none. Filters>Decor>Add Bevel. Uncheck work on copy.
-Add new layer. Alpha to selection. Shrink by 3. Bucket fill selection with black. Shrink 1. Delete. Select none.
-Add name and copyright.
Avatar:
-Make everything above the doodle layer invisible (click the eye next to each layer).
-File>New 150x150 px.
-Edit>Paste As>New Layer.
-Open tube. Scale 35%. Place to the far left. Repeat drop shadow. Duplicate. Add gaussian blur of 5.0. Change mode to soft light and lower the opacity to 70.
-To add the border repeat steps above for banner.
-Add name or initial. Also add copyright.
All done!
Labels:FTU tuts | 0
comments
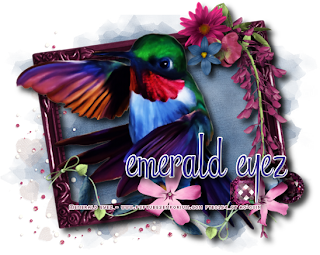
This tutorial is of my own creation and any resemblance to any other tuts is purely coincidental. This tutorial is for personal use only, using it for monetary gain is against our TOU's.
Supplies Needed:
~Gimp (any version will do).
~Tube of choice. I used a beautiful bird by Emerald Eyez, you must have a license to use this art which you can get @ PSP Tubes Emporium HERE.
~Whispering Touch FTU scrapkit by A Taggers Scrap which you can get HERE.
~Mask of choice. I used mask 19 which you can get from HorsePlay's Pasture HERE.
~Font of choice. I used Riddle Medium.
Let's get started!!!!!
1. Open a new layer ( I prefer a large canvas, so I make mine 1050x656). Make your canvas transparent (Layer > Transparency > Color to alpha).
2. Open Frame 2, add drop shadow (Filters > Light & Shadow > Drop Shadow).
3. Open tube.
~You will need to duplicate this tube so that you have 2 (at the bottom of your layer box click on the blue box. This will give you 2 tube layers).
~Select the top tube layer in your tool box. Add Gaussian Blur (Filters > Blur > Gaussian Blur, use default settings).
~On that same tube layer change the mode to Overlay (at the top of your Layer Box you will see where it says Mode, click the arrow and select Overlay from the drop down menu).
~Add drop shadow to bottom tube layer.
4. Open and place the following elements:
Deco 2
Deco 3
Hanging flowers
Scattered blossoms
Flower 1
Flower 3
Flower 5
Gem 1
Gem 2
Gem 3
~Some elements may need to be sized down. Using the Scale Tool in your tool box adjust pixels to desired size~
~Add drop shadow to all elements (except Deco 2)~
5. Open Paper 3.
6. Open mask.
7. Add mask to paper (click HERE for a tut on using masks).
8. Merge layers (Image > Merge Visible Layer).
9. Crop image (Image > Autocrop Image).
10. Scale image to desired size (Image > Scale Image).
11. Add copyright info and name.
12. Save as .png
You are finished :)
Labels:FTU tuts | 0
comments
 This tag was made with a fun kit by JRB Scraps called Springin you can find it in the new releases section @ PSP Tubes Emporium.
Here are a few extras I made. Click on the image to snag the full size version.
Do NOT alter these in any way!!!!
Labels:CT tags,Extras | 0
comments
Sunday, March 18, 2012
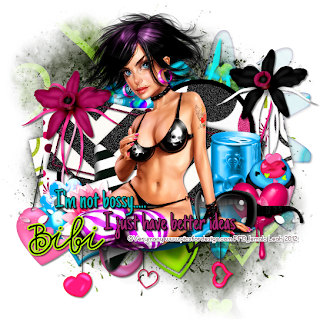
This tutorial is of my own creation and any resemblance to any other tuts is purely coincidental. This tutorial is for personal use only, using it for monetary gain is against our TOU's.
Supplies:
Gimp
PTU kit from Bibi's Collection called Lollipop Babe. You can purchase it at The PSP Project HERE
Tube of choice. I am using the art of Verymany. You must have a license to use these tubes. Purchase them at Pics For Design HERE
Template 126 by me HERE
Mask 21 by Witchys Heart HERE
Font- Milkmoustachio
Lets begin!
-Open template. Delete credits. Image>Scale Image 450x281 px. Image>Canvas Size 600x600 px and click center.
-Let's add papers to the template layers. Make the template layer active (see below). Right click template layer in layer box and choose alpha to selection. Open paper (see below). Right click paper layer in layer box and choose add alpha channel. Select>Invert. Press delete on your keyboard. Select>None. Delete the original template layer.Here are the template layers and which papers I used:
2- paper 2 Filters>Light & Shadow>Drop Shadow 0, 0, 10, black, 80
3- paper 3
5- paper 5
7- paper 1 Drop shadow of 2, 2, 2, black, 50
8- paper 1 repeat drop shadow
9- paper 4 drop shadow of 0, 0, 10, black, 80
-Make layer 1 active. Alpha to selection. Change foreground color to 5f042f. Select the bucket fill tool and fill selection. Select none. Filters>Noise>RGB Noise. Change all the sliders (except alpha) to 0.40. Add drop shadow of 2, 2, 2, black, 50.
-Make layer 4 active. Colors>Colorize. Change the lightness to -100. Repeat drop shadow. Repeat for layer 5.
-Make words 1 active. Colorize: Hue: 325, Saturation: 63, Lightness: -24.
-Repeat drop shadow on words 2 and words 4.
-Open tube. Move below the word layers. Layer>Scale Layer 55%. Place tube in the middle of tag. Repeat drop shadow. Layer>Duplicate Layer. Filters>Blur>Gaussian Blur on default. Change the mode to soft light and lower the opacity to 50.
Elements:
43
20
16
81
5
19
37
6
51
55
56
15
71
-Open paper 8. Make the bottom layer. Apply mask. Click HERE to learn how to use masks.
-Add name and copyright.
All finished!
Labels:PTU tuts | 0
comments
Friday, March 16, 2012
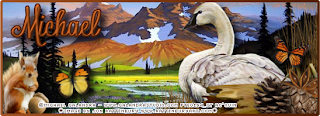 This tag was made using a beautiful swan from Michael Calandra and an amazing image by Jon Rattenbury, both will be available at PSP Tubes Emporium tomorrow.
Here are a few extras I made. Click on the image to snag the full size version.
Labels:CT tags,Extras | 0
comments

I made this tag using a new tube from Unholy Vault Designs. This tube will be available for purchase starting 3-17-12 @ PSP tubes Emporium HERE!
Check out the PTE facebook group for snags.
Labels:CT tags | 0
comments
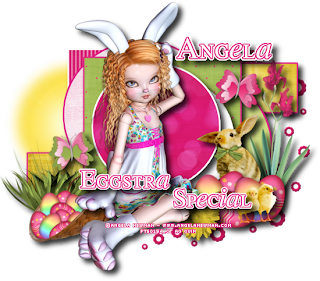
This tutorial is of my own creation and any resemblance to any other tuts is purely coincidental. This tutorial is for personal use only, using it for monetary gain is against our TOU's.
Supplies Needed:
~Gimp (any version will do).
~Easter Bliss FTU scrapkit by Scraps Dimensions which you can get HERE.
~Tube of choice. I used the artwork of Angela Newman. You must have a license to use this art, which you can get from PSP Tubes Emporium HERE. You can find this tube in the New Easter Releases.
~Template of choice. I used Leah's template 63 which you can get on our blog HERE.
~Font of choice. I used Will&Grace.
Let's get started!!!
1. Open a new layer ( I prefer a large canvas, so I make mine 1050x656). Make your canvas transparent (Layer > Transparency > Color to Alpha).
2. Open template in PSD format, remove and move layers of template around until they are the way you like them.
~Add paper from scrapkit to individual layers of the template (Right click on template layer in layer box > Alpha to Selection > CTRL I > Select paper layer in layer box > Delete).
These are the papers I used:
Paper 2
Paper 7
Paper 10
Paper 11
Paper 12
Paper 13
~I colorized some of the template layers to better match the scrapkit (Colors > Colorize > play with the setting until you get the desired color).
~Add drop shadow to template layers (Filters > Light & Shadow > Drop Shadow).
3. Open tube, add drop shadow.
4. Open and place the following elements:
Sun
Decor 1
Flower 8
Daisy 5
Grass
Bunny 2
Butterfly 2
Butterfly 4
Easter Eggs
Easter Basket
Chicks
~Some of the elements may need to be sized down. Using your scale tool in your tool box adjust the pixel size until element is the correct size~
~Add drop shadow to all elements (except Sun & Decor1)~
5. Merge Layers (Image > Merge Visible Layers).
6. Crop Image (Image > Autocrop Image).
7. Scale image to desired size (Image > Scale Image).
8. Add copyright info and name.
9. Save as .png
ALL DONE!!!!!!!!!!
Labels:FTU tuts | 0
comments
Thursday, March 15, 2012

This tutorial is of my own creation and any resemblance to any other tuts is purely coincidental. This tutorial is for personal use only, using it for monetary gain is against our TOU's.
Supplies:
Gimp
Tube of choice. I am using the art of Michelle Soneja. You must have a license to use these tubes. You can purchase the tube I used starting today at PSP Tubes Emporium HERE
FTU kit from Sweet Cravings Scraps called Bunny Bop HERE
Template 66 by me HERE
Mask- WSL 356 HERE
Font- Porky's & Signericia Fat
Lets begin!
-Open template. Delete credits. Image>Scale Image 450x227 px. Image>Canvas Size 600x600 px and click center.
-Let's add papers to the template layers. Make the template layer active (see below). Right click template layer in layer box and choose alpha to selection. Open paper (see below). Right click paper layer in layer box and choose add alpha channel. Select>Invert. Press delete on your keyboard. Select>None. Delete the original template layer.Here are the template layers and which papers I used:
circle 1- paper 1 Filters>Light & Shadow>Drop Shadow 2, 2, 2, black, 50
rect 1- paper 10 Flters>Repeat Drop Shadow
rect 2- paper 2 repeat drop shadow
circle 2- paper 8
square 1- paper 5 repeat drop shadow
square 2- paper 4 repeat drop shadow
square 3- paper 6 repeat drop shadow
frame- paper 9 repeat drop shadow
-Open tube. Make the top layer. Layer>Scale Layer 75%. Place to the left. Repeat drop shadow.
-Select the text tool. Change the font to Porky's, Size: 40, Foreground color 7225bd. Type "Hoppy Easter". Place text on thin rectangle near bottom. Filters>Noise>RGB Noise. Change all sliders (except alpha) to 0.30. Alpha to selection. Select>Grow 1. Layer>New Layer. Move new layer below text layer. Change your foreground to white. Select the bucket fill tool and fill selection. Select none. Repeat drop shadow.
Elements:
frame 3
grass
bunny
flower 2
flower 3
basket
ribbon 3
ribbon 2
egg 1
egg 2
egg 3
egg 5
Open paper 1. Make the bottom layer. Apply mask. Click HERE to learn how to use masks.
-Add your name with the Signericia Fat font. Add your copyright.
All finished!
Labels:FTU tuts | 0
comments
Labels:Freebies,Templates | 3
comments
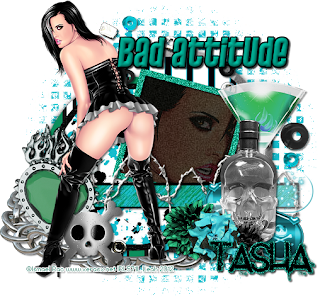
This tutorial is of my own creation and any resemblance to any other tuts is purely coincidental. This tutorial is for personal use only, using it for monetary gain is against our TOU's.
Supplies:
Gimp
PTU scrap kit from Tasha's Playground called Skullz N Stripes HERE
Tube of choice. I am using the art of Ismael Rac. You must have a license to use his tubes. You can purchase them at his store HERE
Template 99 by Essence of Creativity HERE
Mask 125 from weescotslass HERE
Fonts- Pussycat & Alpaca54
Lets get started!
-Open template. Delete credits. Image>Scale Image 450x354 px and change the x & y resolutions to 72. Image>Canvas Size 600x600 px and click center.
-Let's add papers to the template layers. Make the template layer active (see below). Right click template layer in layer box and choose alpha to selection. Open paper (see below). Right click paper layer in layer box and choose add alpha channel. Select>Invert. Press delete on your keyboard. Select>None. Delete the original template layer.Here are the template layers and which papers I used:
black thin rectangle- paper 14
black circle- paper 6
large white circle- paper 3
large pink circle- paper 9 Filters>Light & Shadow> Drop Shadow 0, 0, 10, black, 80
large black circle- paper 2
large glittered circle- paper 15 Filters>Repeat Drop Shadow
-Make frame background active. Alpha to selection. Invert. Open paper 13. Add alpha channel. Delete. Open tube close up. Place tube in selection. Delete. Select none. Change the mode to grainmerge and lower the opacity to 35.
-Make thin rectangle active. Colors>Colorize. Change the lightness to -100. Add drop shadow of 2, 2, 2, black, 50.
-Make white frame active. Colorize- Hue: 168 Saturation: 88 Lightness: -65. Filters>Noise>RGB Noise. Change all sliders (except alpha) to 0.40. Repeat drop shadow.
-Make the top layer active. Select the text tool. Change the font to Pussycat, size 70, foreground 00907b. Type 'Bad Attitude'. Place at the top. Filters>Decor>Add Bevel. Uncheck work on copy. Alpha to selection. Select>Grow 2. Layer>New Layer. Move new layer below text layer. Change foreground to black. Select the bucket fill tool and fill selection. Select none. Repeat drop shadow.
-Open full body tube. Make the top layer. Layer>Scale Layer 75%. Place to the left. Repeat drop shadow.
Elements:
scatter
barbed wire
flame heat- Rotate 10
bottle
flower 2
flower 3
flower 4
pills
skull
drink
chain
-Open paper 8. Apply mask. Click HERE to learn how to use masks.
-Add your name with the Alpaca54 font. Add your copyright.
All done!
Labels:PTU tuts,Tasha's Playground | 0
comments
Wednesday, March 14, 2012
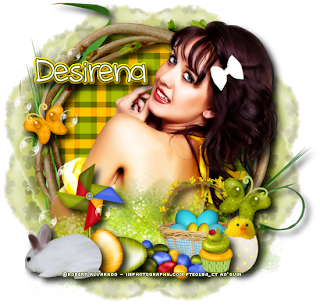 This tag was made using a fab kit from Desirena Designs called Spring Melody. This kit, along with other wonderful Easter goodies will be available at PSP Tubes Emporium 3-15-12. Get your bunny ears on and hop on over to PTE tomorrow ;)
Labels:CT tags | 0
comments

This tutorial is of my own creation and any resemblance to any other tuts is purely coincidental. This tutorial is for personal use only, using it for monetary gain is against our TOU's.
Supplies:
Gimp
FTu kit from Wicked Princess Scraps called Jackie. You can purchase this kit at PSP tubes Emporium HERE
Tube of choice. I am using the art of Elias Chatzoudis. You must have a license to use these tubes. you can purchase them at PTE HERE
Template- Make Me Bad from Crazy Cakes Scraps HERE
Mask 138 from weescotslass HERE
Font- Contribute
-Open template. Delete credits. Image>Scale Image 450x450 px. Image>Canvas Size 600x600 px and click center.
-Let's add papers to the template layers. Make the template layer active (see below). Right click template layer in layer box and choose alpha to selection. Open paper (see below). Right click paper layer in layer box and choose add alpha channel. Select>Invert. Press delete on your keyboard. Select>None. Delete the original template layer.Here are the template layers and which papers I used:
1- paper 9 Filters>Light & Shadow>Drop Shadow 2, 2, 2, black, 50
4- paper 2
5- paper 6 Filters>Repeat Drop Shadow
6- paper 8 repeat drop shadow
7 & 8- paper 10 repeat drop shadow
9 & 10- paper 1 repeat drop shadow
11 & 12- paper 7 repeat drop shadow
13 & 14- paper 3
Make layer 3 active. Colors>Colorize. Change the lightness to 100. Repeat drop shadow.
-Make the wordart layer active. Alpha to selection. Select>Grow 2. Layer>New Layer. Move new layer below wordart layer in layer box. Select the bucket fill tool and change your foreground color to black. Fill selection. Select none. Add drop shadow of 0, 0, 10, black, 100.
Open tube. Move below the wordart layer. Layer>Scale Layer 80%. Place at the bottom. Repeat drop shadow. Layer>Duplicate Layer. Filters>Blur>Gaussian Blur on default. Change the mode to soft light. Lower the opacity 50.
Elements:
banner
drape
candle
rose bush
double heart bow
glass jars
broach
glass Rotate 13
flame
piano keys
-Open paper 7. Make the bottom layer. Apply mask. Click HERE to learn how to use masks.
-Add name and copyright!
All Done!
Labels:PTU tuts | 0
comments
Tuesday, March 13, 2012
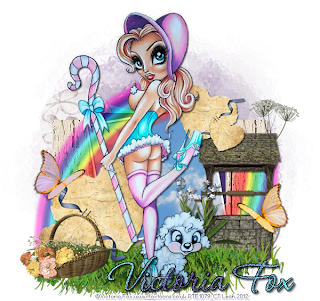
Check out this adorable new tube from Victoria Fox! You can purchase this cutie starting 2-14-12 at PSP Tubes Emporium HERE.
Pick up some snags of this tag in the PTE facebook group!
Labels:CT tags | 0
comments
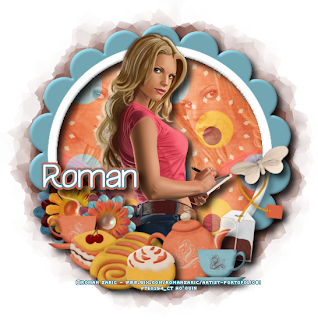
This tutorial is of my own creation and any resemblance to any other tuts is purely coincidental. This tutorial is for personal use only, using it for monetary gain is against our TOU's.
Supplies Needed:
~Gimp (any version will do).
~Tube of choice. I used the artwork of Roman Zaric, you must have a license to use this art which you can get @ PSP Tubes Emporium HERE.
~Tea Time FTU scrapkit by PolkaDot Scraps which you can get HERE.
~Mask of choice. I used mask 9 which you can get from HorsePlay's Pasture HERE.
~Font of choice. I used Trees of Happiness.
Let's get started!!!!!
1. Open a new layer ( I prefer a large canvas, so I make mine 1050x656). Make your canvas transparent (Layer > Transparency > Color to alpha).
2. Open Frame 3, add drop shadow (Filters > Light & Shadow > Drop Shadow).
3. Open Paper 14 center it behind frame, remove excess paper using a cutting tool or eraser.
4. Open tubes, I used both full body and close-up tubes.
~Open the close-up tube, duplicate the tube layer. Flip one of the tubes using the Flip tool in your tool box. Place both layers under the frame but above the paper. Merge the 2 tube layers together (right click top tube layer > Merge Down). Change the mode to Overlay (at the top of your Layer Box you will see where it says Mode, click the arrow and select Overlay from the drop down menu). Remove excess tube layer using cutting tool or eraser from your tool box.
~Add drop shadow to full body tube.
5. Open and place the following elements:
Element 29
Element 30
Element 43
Element 44
Element 46
Element 47
Element 48
Element 49
Element 50
Element 55
~Some elements may need to be sized down. Using the Scale Tool in your tool box adjust pixels to desired size~
~Add drop shadow to all elements~
6. Open Paper 1.
7. Open mask.
8. Add mask to paper (click HERE for a tut on using masks).
9. Merge layers (Image > Merge Visible Layer).
10. Crop image (Image > Autocrop Image).
11. Scale image to desired size (Image > Scale Image).
12. Add copyright info and name.
13. Save as .png
You are finished :)
Labels:FTU tuts | 1 comments
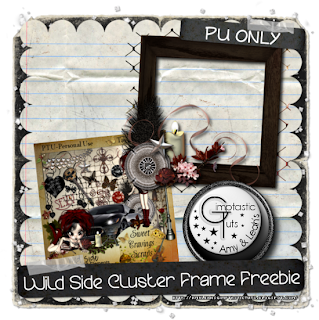 Here's a cluster frame I made using a fab kit from Sweet Cravings Scraps called Wild Side. If you like a kit with a bit of a grunge edge this kit is for you!!!
You can grab the frame HERE.
When you take a walk on the Wild Side it is ALWAYS a good idea to have a hunk along for the ride...LOL.
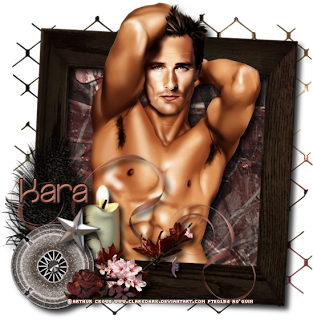
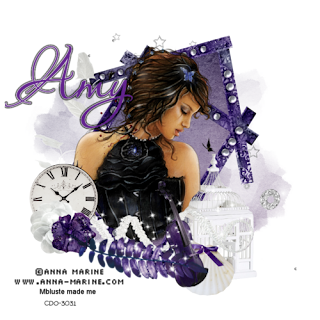
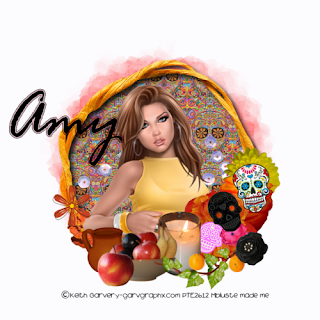

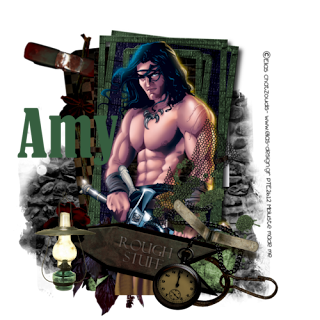
Here are some awesome tut results all done by our girl Melinda. The tuts featured here are all FTU, they are Dark Serenade, Day of the Dead, Irish Wench & Rough Stuff.
Thank you so much Melinda for the great tags!!!
If any of you would like to share your tags with us feel free to email us @ gimptasticblog@yahoo.com or hit us up on Facebook.
Monday, March 12, 2012
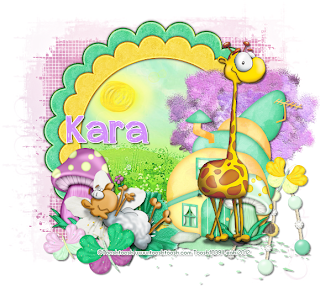
This tutorial is of my own creation and any resemblance to any other tuts is purely coincidental. This tutorial is for personal use only, using it for monetary gain is against our TOU's.
Supplies:
Gimp
PTU kit from Sweet Cravings Scraps called Afternoon Delight HERE
Tube of choice. I am using the art of toosh toosh. You must have a license to use these tubes. You can purchase them HERE
Mask 404 by Vix HERE
Font- Appleberry
Lets begin!
-File>New 600x600 px.
-Open frame 6. Layer>Scale LAyer 50%. Select the magic wand. Click inside the frame. Select>Grow 5. Open paper 8. Layer>Transparenct>Add Alpha Channel. Move paper below frame layer in layer box. Scale paper 65%. Place paper in selection. Select>Invert. Press delete on your keyboard. Select>None. Make frame active. Filters>Light & Shadow>Drop Shadow 0, 0, 5, black, 100.
-Open frame 7. Make the bottom layer. Scale 57%. Repeat drop shadow.
-Open tube. Place to right side. Add drop shadow of 2, 2, 2, black, 50.
Elements:
sun
tree 1
mushroom 1
mushroom 2
house
paint splatter 1
flower 3
flower 6
beads 3
butterfly 2
butterfly 3
butterfly 4
-Open paper 9. Make th bottom layer. Apply mask. Click HERE to learn how to use masks.
-Add your name and copyright and you are done!!
Labels:PTU tuts,Sweet Cravings Scraps | 0
comments
Sunday, March 11, 2012
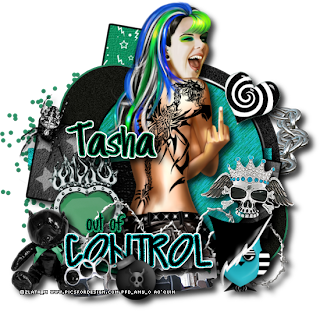
This tutorial is of my own creation and any resemblance to any other tuts is purely coincidental. This tutorial is for personal use only, using it for monetary gain is against our TOU's.
Supplies Needed:
~Gimp (any version will do).
~Tube of choice. I used the artwork of Zlata M. You must have a license to use this art, which you can get at PFD HERE.
~Template of choice. I used CCS template Out of Control which you can get from Crazy Cakes Scraps HERE.
~Font of choice. I used rolina.
Let's get started!!!
1. Open a new layer ( I prefer a large canvas, so I make mine 1050x656). Make your canvas transparent (Layer > Transparency > Color to Alpha).
2. Open template in PSD format, remove and move layers of template around until they are the way you like them.
~Add paper from scrapkit to individual layers of the template (Right click on template layer in layer box > Alpha to Selection > CTRL I > Select paper layer in layer box > Delete).
These are the papers I used:
Paper 3
Paper 11
Paper 13
Paper 14
Paper 15
Paper 11
Paper 13
Paper 14
Paper 15
~I added noise to some of the template layers to make them look glittery (Filters > Noise > RGB Noise).
~I colorized some of the template layers to better match the scrapkit (Colors > Colorize > play with the setting until you get the desired color).
~Add drop shadow to template layers (Filters > Light & Shadow > Drop Shadow).
3. Open tube, add drop shadow.
4. Open and place the following elements:
Chain
Dot scatter
Spider
Heart 1
Flame heart
Barbed wire
Owl
Skull charm
Blade
Bear
Brass knuckles
Bomb
Chain
Dot scatter
Spider
Heart 1
Flame heart
Barbed wire
Owl
Skull charm
Blade
Bear
Brass knuckles
Bomb
~Some of the elements may need to be sized down. Using your scale tool in your tool box adjust the pixel size until element is the correct size~
~Add drop shadow to all elements (except Dot scatter)~
5. Merge Layers (Image > Merge Visible Layers).
6. Crop Image (Image > Autocrop Image).
7. Scale image to desired size (Image > Scale Image).
8. Add copyright info and name.
9. Save as .png
ALL DONE!!!!!!!!!!
Labels:PTU tuts,Tasha's Playground | 0
comments
Subscribe to:
Comments
(Atom)
Labels
12x12 Layout
A Taggers Scrap
Animated
Announcements
Art of Freya
Basic tuts
Blog Trains
CDO
Cluster Frame
CT tags
Extras
Forum Set
Freebies
FTU CU
FTU Kits
FTU tuts
Holiday
Jackie's Jewels
Kissing Kate
Masks
PTU Kits
PTU tuts
Quick Pages
Results
Results with Amys kits
Show Offs
Sweet Cravings Scraps
Tasha's Playground
Templates
Timeline Banners
Chit Chat
Blog Archive
-
▼
2012
(550)
-
▼
March
(50)
- PTE CT tag by Amy
- At The Circus Cluster Frame Freebie
- PTU Tut- Love Letters
- PTU Tut- Great Easter
- PTU Tut- Happy Easter 2012
- PTE CT Tag by Leah
- PTE CT tag by Amy
- PTU Tut- Angel Above
- PTU tut - Bright Summer
- FTU Tut- Elegant
- PTE CT Tag by Leah
- FTU tut - School Memories
- PTE CT Tag by Leah
- PSP Tube Stop CT tag by Amy
- FTU Tut- Bella
- FTU tut - Spring is in the Air
- PTE CT tag by Amy
- PTU Tut- Not Bossy
- PTE CT tag by Amy
- PTE CT Tag by Leah
- FTU tut - Eggstra Special
- FTU Tut- Hoppy Easter
- Templates 125-129
- PTU Tut- Bad Attitude
- PTE CT tag by Amy
- PTU Tut- Make Me Bad
- PTE CT Tag by Leah
- FTU tut - Can I Take Your Order?
- Wild Side Cluster Frame Freebie
- Tut Results
- PTU Tut- Afternoon Delight
- PTU tut - Out of Control
- PTE CT tag by Amy
- PTE CT Tag by Leah
- FTU tut - Best Friends
- FTU tut - Irish Wench
- FTU tut - Rough Stuff
- FTU Tut- Superstar
- PTE CT tag by Amy
- PTU tut - Always Me
- PTE CT tag by Amy
- Roller Girl Cluster Frame Freebie
- PTU Tut- Roller Girl
- PTE CT tag by Amy
- FTU tut - Sexy Sailor
- FTU Tut- Take It Off
- PTU Tut- Magically Delicious
- PTE CT tag by Amy
- PTE CT Tag by Leah
- Feels Like Today Cluster Frame Freebie
-
▼
March
(50)


