Gimptastic Scraps Available Exclusively @

Gimptastic Scraps CT


Blog Trains

CU Licenses


Friday, September 30, 2011
This tutorial is of my own creation and any resemblance to any other tuts is purely coincidental. This tutorial is for personal use only, using it for monetary gain is against our TOU's.
Supplies
Gimp
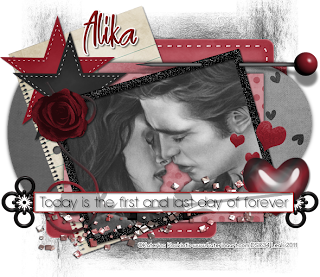
Lovely PTU scrap kit from Alikas Scraps called Eternal Twiilight HERE
Tube of choice. I am using thework of Katerina Koukiotis. You must have a license to use her tubes. You can purchase them HERE
Template 99 by me HERE
Mask 11 from Melissaz Creationz HERE
Font: 1 snappy DNA
Let's get started!
-Open template. Delete the credits. Image>Canvas Size 600x600 pixels and make sure to click center.
-Let's add papers to the template layers. Make the template layer active (see below). Right click template layer in layer box and choose alpha to selection. Open paper (see below). Right click paper layer in layer box and choose add alpha channel. Layer>Scale Layer by 60%.
Select>Invert. Press delete on your keyboard. Select>None. Delete the original template layer.
Here are the template layers and which papers I used:
square 1- paper 7 Filters>Light & Shadow>Drop Shadow 0, 0, 10, black, 100
circle 1- paper 5 Fitlers>Repeat Drop Shadow
square 2- paper 11 repeat drop shadow
circle 2- paper 3 repeat drop shadow
-Make frame 2 active. Select your magic wand and click inside frame. Select>Grow by 5. Open tube. Move tube layer below frame. Invert & delete. Select none.
make frame active. Filters>Noise>RGB Noise. Change all sliders (except alpha) to 0.50. Fitlers>Decor>Add Bevel. Uncheck work on cpy and change thickness to
20. Add drop shadow of 2, 2, 2, black, 50 to frame.
-Repeat drop shadow on frame 1 and words layers.
-Make the rect layer actvie. Alpha to selection. Open as40 (black rose). Place on white rectangel. Invert & delete. Select none. Lower the opacity to 30.
Elements:
Add drop shadow of 2 ,2, 2, black, 50 to all element layers unless you see NDS (no drop shadow). See my tag for placement.
as66 NDS
as80 Rotate -20
as13
as02
as03
as37 NDS
as49
as41 Rotate 75
as45 NDS
as05 NDS
as48 NDS
-Open paper 12. Make the bottom layer. Apply mask. Click HERE to learn how to use masks.
-Add your name and copyright and you are finished!
Subscribe to:
Post Comments
(Atom)
Snag Our Blinkies


Don't Be A Pirate!


0 comments:
Post a Comment