Gimptastic Scraps Available Exclusively @

Gimptastic Scraps CT


Blog Trains

CU Licenses


 This tutorial is of my own creation and any resemblance to any other tuts is purely coincidental. This tutorial is for personal use only, using it for monetary gain is against our TOU's.
Supplies Needed:
~Gimp (any version will do).
~Tube of choice. I used the art of Simon Han. You must have a license to use his art which you can purchase from PTE HERE.
~My Everything FTU scrapkit which you can get from Polka Dot Scraps HERE.
~Mask of choice. I used Vix Big mask 5 which you can get HERE.
~Font of choice. I used Riddle Medium.
Let's get started!!!!!
1. Open a new layer ( I prefer a large canvas, so I make mine 1050x656). Make your canvas transparent (Layer > Transparency > Color to alpha).
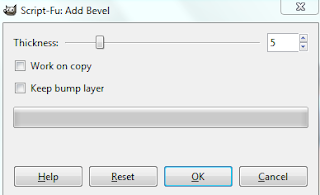
2. Open Frame 7 (rectangular frame), add drop shadow (Filters > Light & Shadow > Drop Shadow).
3. Open Paper 10 & Paper 13 center them behind frame 7, remove excess paper using the rectangular cutting tool in your tool box.
4. Open Frame 6 (heart frame), add drop shadow.
5. Open Paper 5 center it behind Frame 6, remove excess paper using the circular cutting tool in your tool box.
6. Open tube, add drop shadow.
7. Open and place the following elements:
element 1
element 5
element 6
element 8
element 12
element 17
element 19
element 22
element 23
element 24
element 26
element 27
element 30
element 32
element 46
~Some of the elements may need to be sized down. Using your scale tool in your tool box adjust the pixel size until element is the correct size~
~Add drop shadow to all elements~
8. Open Paper 9.
9. Open mask.
10. Add mask to paper
11. Merge layers (Image > Merge Visible Layer).
12. Autocrop image (Image > Autocrop Image).
13. Scale image to desired size (Image > Scale Image).
14. Add copyright info and name.
15. Save as .png
You are finished :)
This tutorial is of my own creation and any resemblance to any other tuts is purely coincidental. This tutorial is for personal use only, using it for monetary gain is against our TOU's.
Supplies Needed:
~Gimp (any version will do).
~Tube of choice. I used the art of Simon Han. You must have a license to use his art which you can purchase from PTE HERE.
~My Everything FTU scrapkit which you can get from Polka Dot Scraps HERE.
~Mask of choice. I used Vix Big mask 5 which you can get HERE.
~Font of choice. I used Riddle Medium.
Let's get started!!!!!
1. Open a new layer ( I prefer a large canvas, so I make mine 1050x656). Make your canvas transparent (Layer > Transparency > Color to alpha).
2. Open Frame 7 (rectangular frame), add drop shadow (Filters > Light & Shadow > Drop Shadow).
3. Open Paper 10 & Paper 13 center them behind frame 7, remove excess paper using the rectangular cutting tool in your tool box.
4. Open Frame 6 (heart frame), add drop shadow.
5. Open Paper 5 center it behind Frame 6, remove excess paper using the circular cutting tool in your tool box.
6. Open tube, add drop shadow.
7. Open and place the following elements:
element 1
element 5
element 6
element 8
element 12
element 17
element 19
element 22
element 23
element 24
element 26
element 27
element 30
element 32
element 46
~Some of the elements may need to be sized down. Using your scale tool in your tool box adjust the pixel size until element is the correct size~
~Add drop shadow to all elements~
8. Open Paper 9.
9. Open mask.
10. Add mask to paper
11. Merge layers (Image > Merge Visible Layer).
12. Autocrop image (Image > Autocrop Image).
13. Scale image to desired size (Image > Scale Image).
14. Add copyright info and name.
15. Save as .png
You are finished :)  This tutorial is of my own creation and any resemblance to any other tuts is purely coincidental. This tutorial is for personal use only, using it for monetary gain is against our TOU's.
Supplies Needed:
~Gimp (any version will do).
~My Little Ladybug PTU scrapkit by Angel's Designz which you can get from Scrap-U-nique HERE.
~Tubes of choice. I used the artwork of BamBam, you must have a license to use this art. You can purchase this art from PTE HERE.
~Template of choice. I used plain template 2 which you can get from Brutal Designs HERE.
~Font of choice. I used Pea Faith Dots.
Let's get started!!!
1. Open a new layer ( I prefer a large canvas, so I make mine 1050x656). Make your canvas transparent (Layer > Transparency > Color to Alpha).
2. Open template in PSD format, remove and move layers of template around until they are the way you like them.
~Add paper from scrapkit to individual layers of the template (Right click on template layer in layer box > Alpha to Selection > CTRL I > Select paper layer in layer box > Delete).
These are the papers I used:
Paper 5
Paper 9
Paper 10
Paper 12
~I added noise to some of the template layers to make them look glittery (Filters > Noise > RGB Noise).
~I colorized some of the template layers to better match the scrapkit (Colors > Colorize > play with the setting until you get the desired color).
~Add drop shadow to template layers (Filters > Light & Shadow > Drop Shadow).
3. Open tubes, I used a full body and a close-up. I changed the mode on the close-up tube to Dodge (at the top of your Layer Box you will see where it says Mode, click the arrow and select Dodge from the drop down menu). The close-up tube has been added to the template in the same way you add paper (Right click on template layer in layer box > Alpha to Selection > CTRL I > Select tube layer in layer box > Delete). Add drop shadow to the other full body tube.
4. Open and place the following elements:
Sparkles
Grass
Foliage 2
Ladybug
Ladybug Trail (x2)
Flower
Flower 3
Button Flower
Roses
Ribbon Bow
Bow
Element 2
~Some of the elements may need to be sized down. Using your scale tool in your tool box adjust the pixel size until element is the correct size~
~Add drop shadow to all elements (except Sparkles)~
5. Merge Layers (Image > Merge Visible Layers).
6. Crop Image (Image > Autocrop Image).
7. Scale image to desired size (Image > Scale Image).
8. Add copyright info and name
9. Save as .png
ALL DONE!!!!!!!!!!
This tutorial is of my own creation and any resemblance to any other tuts is purely coincidental. This tutorial is for personal use only, using it for monetary gain is against our TOU's.
Supplies Needed:
~Gimp (any version will do).
~My Little Ladybug PTU scrapkit by Angel's Designz which you can get from Scrap-U-nique HERE.
~Tubes of choice. I used the artwork of BamBam, you must have a license to use this art. You can purchase this art from PTE HERE.
~Template of choice. I used plain template 2 which you can get from Brutal Designs HERE.
~Font of choice. I used Pea Faith Dots.
Let's get started!!!
1. Open a new layer ( I prefer a large canvas, so I make mine 1050x656). Make your canvas transparent (Layer > Transparency > Color to Alpha).
2. Open template in PSD format, remove and move layers of template around until they are the way you like them.
~Add paper from scrapkit to individual layers of the template (Right click on template layer in layer box > Alpha to Selection > CTRL I > Select paper layer in layer box > Delete).
These are the papers I used:
Paper 5
Paper 9
Paper 10
Paper 12
~I added noise to some of the template layers to make them look glittery (Filters > Noise > RGB Noise).
~I colorized some of the template layers to better match the scrapkit (Colors > Colorize > play with the setting until you get the desired color).
~Add drop shadow to template layers (Filters > Light & Shadow > Drop Shadow).
3. Open tubes, I used a full body and a close-up. I changed the mode on the close-up tube to Dodge (at the top of your Layer Box you will see where it says Mode, click the arrow and select Dodge from the drop down menu). The close-up tube has been added to the template in the same way you add paper (Right click on template layer in layer box > Alpha to Selection > CTRL I > Select tube layer in layer box > Delete). Add drop shadow to the other full body tube.
4. Open and place the following elements:
Sparkles
Grass
Foliage 2
Ladybug
Ladybug Trail (x2)
Flower
Flower 3
Button Flower
Roses
Ribbon Bow
Bow
Element 2
~Some of the elements may need to be sized down. Using your scale tool in your tool box adjust the pixel size until element is the correct size~
~Add drop shadow to all elements (except Sparkles)~
5. Merge Layers (Image > Merge Visible Layers).
6. Crop Image (Image > Autocrop Image).
7. Scale image to desired size (Image > Scale Image).
8. Add copyright info and name
9. Save as .png
ALL DONE!!!!!!!!!!
This tutorial is of my own creation and any resemblance to any other tuts is purely coincidental. This tutorial is for personal use only, using it for monetary gain is against our TOU's. Supplies Needed: ~Gimp (any version will do). ~Tubes of choice. I used the awesome artwork of Elias Chatzoudis, you must have a license to use this art which you can now get HERE. ~This is Me PTU scrapkit by Wicked Princess Scraps which you get HERE. ~Mask of choice. I used WSL mask 364 which you can get HERE. ~Font of choice. I used Creative Block. Let's get started!!!!! 1. Open a new layer ( I prefer a large canvas, so I make mine 1050x656). Make your canvas transparent (Layer > Transparency > Color to alpha). 2. Open Circle Frame, add drop shadow (Filters > Light & Shadow > Drop Shadow). 3. Open Paper 2 center it behind frame, remove excess paper using a cutting tool or eraser. 4. Open tube, add drop shadow. 5. Open and place the following elements: Doodle Bead Boombox Glitter Star Trail Painted Star Painted Star 2 Ipod Heart Locket Fingers Whatever Wordart Boot Bow Yorkie Money Sign Skull ~Some elements may need to be sized down. Using the Scale Tool in your tool box adjust pixels to desired size~ ~Add drop shadow to all elements~ 6. Open Paper 3. 7. Open mask. 8. Add mask to paper (click HERE for a tut on using masks) 9. Merge layers (Image > Merge Visible Layer). 10. Crop image (Image > Autocrop Image). 11. Scale image to desired size (Image > Scale Image). 12. Add copyright info and name. 13. Save as .png You are finished :)
 This tutorial is of my own creation and any resemblance to any other tuts is purely coincidental. This tutorial is for personal use only, using it for monetary gain is against our TOU's.
Supplies Needed:
~Gimp (any version will do).
~Somewhere Over the Rainbow PTU scrapkit by Sweet Cravings Scraps HERE.
~Tube of choice. I used the artwork of Elias Chatzoudis, you must have a license to use this art which you can now get HERE.
~Template of choice. I used Template 70 by Leah which you can get on our blog HERE.
~Font of choice. I used Sinclair Medium Script.
Let's get started!!!
1. Open a new layer ( I prefer a large canvas, so I make mine 1050x656). Make your canvas transparent (Layer > Transparency > Color to Alpha).
2. Open template in PSD format, move layers of template around until they are the way you like them.
~Add paper from scrapkit to individual layers of the template (Right click on template layer in layer box > Alpha to Selection > CTRL I > Select paper layer in layer box > Delete).
These are the papers I used:
Paper 8
Paper 11
Paper 12
Paper 15
Paper 17
Paper 18
Paper 19
Paper 20
~I colorized some of the template layers to better match the scrapkit (Colors > Colorize > play with the setting until you get the desired color).
~Add drop shadow to template layers (Filters > Light & Shadow > Drop Shadow).
3. Open tube, add drop shadow.
4. Open and place the following elements:
Cute Tin Man
Cute Scarecrow
Cute Cowardly Lion
Cute Flying Monkey
Cute Toto
Flying Violins
Butterfly 1
Butterfly 2
Flower 11
Flower 12
Basket
Ruby Shoes
Glitter Sparkles 1
Rainbow
~Some of the elements may need to be sized down. Using your scale tool in your tool box adjust the pixel size until element is the correct size~
~Add drop shadow to all elements (except Rainbow & Glitter Sparkles 1)~
5. Merge Layers (Image > Merge Visible Layers).
6. Crop Image (Image > Autocrop Image).
7. Scale image to desired size (Image > Scale Image).
8. Add copyright info and name
9. Save as .png
ALL DONE!!!!!!!!!!
This tutorial is of my own creation and any resemblance to any other tuts is purely coincidental. This tutorial is for personal use only, using it for monetary gain is against our TOU's.
Supplies Needed:
~Gimp (any version will do).
~Somewhere Over the Rainbow PTU scrapkit by Sweet Cravings Scraps HERE.
~Tube of choice. I used the artwork of Elias Chatzoudis, you must have a license to use this art which you can now get HERE.
~Template of choice. I used Template 70 by Leah which you can get on our blog HERE.
~Font of choice. I used Sinclair Medium Script.
Let's get started!!!
1. Open a new layer ( I prefer a large canvas, so I make mine 1050x656). Make your canvas transparent (Layer > Transparency > Color to Alpha).
2. Open template in PSD format, move layers of template around until they are the way you like them.
~Add paper from scrapkit to individual layers of the template (Right click on template layer in layer box > Alpha to Selection > CTRL I > Select paper layer in layer box > Delete).
These are the papers I used:
Paper 8
Paper 11
Paper 12
Paper 15
Paper 17
Paper 18
Paper 19
Paper 20
~I colorized some of the template layers to better match the scrapkit (Colors > Colorize > play with the setting until you get the desired color).
~Add drop shadow to template layers (Filters > Light & Shadow > Drop Shadow).
3. Open tube, add drop shadow.
4. Open and place the following elements:
Cute Tin Man
Cute Scarecrow
Cute Cowardly Lion
Cute Flying Monkey
Cute Toto
Flying Violins
Butterfly 1
Butterfly 2
Flower 11
Flower 12
Basket
Ruby Shoes
Glitter Sparkles 1
Rainbow
~Some of the elements may need to be sized down. Using your scale tool in your tool box adjust the pixel size until element is the correct size~
~Add drop shadow to all elements (except Rainbow & Glitter Sparkles 1)~
5. Merge Layers (Image > Merge Visible Layers).
6. Crop Image (Image > Autocrop Image).
7. Scale image to desired size (Image > Scale Image).
8. Add copyright info and name
9. Save as .png
ALL DONE!!!!!!!!!! This tutorial is of my own creation and any resemblance to any other tuts is purely coincidental. This tutorial is for personal use only, using it for monetary gain is against our TOU's.
Supplies Needed:
~Gimp (any version will do).
~Gothic Inspirations portion of the Independent Woman blog train FTU scrapkit HERE.
~Tubes of choice. I used the artwork of BamBam, you must have a license to use this art. You can purchase this art from PTE HERE.
~Template of choice. I used template 70 by Leah which you can get on our blog HERE.
~Font of choice. I used Pea Faith.
Let's get started!!!
1. Open a new layer ( I prefer a large canvas, so I make mine 1050x656). Make your canvas transparent (Layer > Transparency > Color to Alpha).
2. Open template in PSD format, remove and move layers of template around until they are the way you like them.
~Add paper from scrapkit to individual layers of the template (Right click on template layer in layer box > Alpha to Selection > CTRL I > Select paper layer in layer box > Delete).
These are the papers I used:
Paper 1
Paper 4
Paper 5
Paper 6
Paper 7
~I added noise to some of the template layers to make them look glittery (Filters > Noise > RGB Noise).
~I colorized some of the template layers to better match the scrapkit (Colors > Colorize > play with the setting until you get the desired color).
~Add drop shadow to template layers (Filters > Light & Shadow > Drop Shadow).
3. Open tubes, I used 2 full body tubes. I changed the mode on one of the tubes to Dodge (at the top of your Layer Box you will see where it says Mode, click the arrow and select Dodge from the drop down menu). That same tube has been added to the template in the same way you add paper (Right click on template layer in layer box > Alpha to Selection > CTRL I > Select tube layer in layer box > Delete). Add drop shadow to the other full body tube.
4. Open and place the following elements:
Glitter Spill
WA mask
Stars
Jar
Tag
Star 1
Star 2
Bow 1
Candle
Envelope
Key 1
Wordart
~Some of the elements may need to be sized down. Using your scale tool in your tool box adjust the pixel size until element is the correct size~
~Add drop shadow to all elements (except WA mask & stars)~
5. Merge Layers (Image > Merge Visible Layers).
6. Crop Image (Image > Autocrop Image).
7. Scale image to desired size (Image > Scale Image).
8. Add copyright info and name
9. Save as .png
ALL DONE!!!!!!!!!!
This tutorial is of my own creation and any resemblance to any other tuts is purely coincidental. This tutorial is for personal use only, using it for monetary gain is against our TOU's.
Supplies Needed:
~Gimp (any version will do).
~Gothic Inspirations portion of the Independent Woman blog train FTU scrapkit HERE.
~Tubes of choice. I used the artwork of BamBam, you must have a license to use this art. You can purchase this art from PTE HERE.
~Template of choice. I used template 70 by Leah which you can get on our blog HERE.
~Font of choice. I used Pea Faith.
Let's get started!!!
1. Open a new layer ( I prefer a large canvas, so I make mine 1050x656). Make your canvas transparent (Layer > Transparency > Color to Alpha).
2. Open template in PSD format, remove and move layers of template around until they are the way you like them.
~Add paper from scrapkit to individual layers of the template (Right click on template layer in layer box > Alpha to Selection > CTRL I > Select paper layer in layer box > Delete).
These are the papers I used:
Paper 1
Paper 4
Paper 5
Paper 6
Paper 7
~I added noise to some of the template layers to make them look glittery (Filters > Noise > RGB Noise).
~I colorized some of the template layers to better match the scrapkit (Colors > Colorize > play with the setting until you get the desired color).
~Add drop shadow to template layers (Filters > Light & Shadow > Drop Shadow).
3. Open tubes, I used 2 full body tubes. I changed the mode on one of the tubes to Dodge (at the top of your Layer Box you will see where it says Mode, click the arrow and select Dodge from the drop down menu). That same tube has been added to the template in the same way you add paper (Right click on template layer in layer box > Alpha to Selection > CTRL I > Select tube layer in layer box > Delete). Add drop shadow to the other full body tube.
4. Open and place the following elements:
Glitter Spill
WA mask
Stars
Jar
Tag
Star 1
Star 2
Bow 1
Candle
Envelope
Key 1
Wordart
~Some of the elements may need to be sized down. Using your scale tool in your tool box adjust the pixel size until element is the correct size~
~Add drop shadow to all elements (except WA mask & stars)~
5. Merge Layers (Image > Merge Visible Layers).
6. Crop Image (Image > Autocrop Image).
7. Scale image to desired size (Image > Scale Image).
8. Add copyright info and name
9. Save as .png
ALL DONE!!!!!!!!!! This tutorial is of my own creation and any resemblance to any other tuts is purely coincidental. This tutorial is for personal use only, using it for monetary gain is against our TOU's.
Supplies Needed:
~Gimp (any version will do).
~Tubes of choice. I used the awesome artwork of Ismael Rac, you must have a license to use this art which you can get HERE.
~Girly Girl PTU scrapkit by Rebellious Scraps which you get from Scraps U Nique HERE.
~Mask of choice. I used mask 5 which you can get from Lizquis Scraps HERE.
~Font of choice. I used HaloHandletter Medium.
Let's get started!!!!!
1. Open a new layer ( I prefer a large canvas, so I make mine 1050x656). Make your canvas transparent (Layer > Transparency > Color to alpha).
2. Open Frame 1 (Round Frame), add drop shadow (Filters > Light & Shadow > Drop Shadow).
3. Open Paper 1 center it behind frame, remove excess paper using a cutting tool or eraser.
4. Open tubes. I used both a full body tube and a close-up. I changed the Mode on the close-up tube to Dodge (at the top of the layer box you will see where it says Mode, click on the arrow and choose Dodge from the drop down menu). Add drop shadow to the full body tube.
5. Open and place the following elements:
Netting
Blings
Butterfly 1
Butterfly 2
Heart Charm
Fan 2
Bag 1
Tied Heart 1
Heart Lock 2
Lips 2
Flower 1
Flower 2
Lipstick
Compact
Shoe 2
~Some elements may need to be sized down. Using the Scale Tool in your tool box adjust pixels to desired size~
~Add drop shadow to all elements (except Netting & Blings)~
6. Open Paper 6.
7. Open mask.
8. Add mask to paper
9. Merge layers (Image > Merge Visible Layer).
10. Crop image (Image > Autocrop Image).
11. Scale image to desired size (Image > Scale Image).
12. Add copyright info and name.
13. Save as .png
You are finished :)
This tutorial is of my own creation and any resemblance to any other tuts is purely coincidental. This tutorial is for personal use only, using it for monetary gain is against our TOU's.
Supplies Needed:
~Gimp (any version will do).
~Tubes of choice. I used the awesome artwork of Ismael Rac, you must have a license to use this art which you can get HERE.
~Girly Girl PTU scrapkit by Rebellious Scraps which you get from Scraps U Nique HERE.
~Mask of choice. I used mask 5 which you can get from Lizquis Scraps HERE.
~Font of choice. I used HaloHandletter Medium.
Let's get started!!!!!
1. Open a new layer ( I prefer a large canvas, so I make mine 1050x656). Make your canvas transparent (Layer > Transparency > Color to alpha).
2. Open Frame 1 (Round Frame), add drop shadow (Filters > Light & Shadow > Drop Shadow).
3. Open Paper 1 center it behind frame, remove excess paper using a cutting tool or eraser.
4. Open tubes. I used both a full body tube and a close-up. I changed the Mode on the close-up tube to Dodge (at the top of the layer box you will see where it says Mode, click on the arrow and choose Dodge from the drop down menu). Add drop shadow to the full body tube.
5. Open and place the following elements:
Netting
Blings
Butterfly 1
Butterfly 2
Heart Charm
Fan 2
Bag 1
Tied Heart 1
Heart Lock 2
Lips 2
Flower 1
Flower 2
Lipstick
Compact
Shoe 2
~Some elements may need to be sized down. Using the Scale Tool in your tool box adjust pixels to desired size~
~Add drop shadow to all elements (except Netting & Blings)~
6. Open Paper 6.
7. Open mask.
8. Add mask to paper
9. Merge layers (Image > Merge Visible Layer).
10. Crop image (Image > Autocrop Image).
11. Scale image to desired size (Image > Scale Image).
12. Add copyright info and name.
13. Save as .png
You are finished :)  This tutorial is of my own creation and any resemblance to any other tuts is purely coincidental. This tutorial is for personal use only, using it for monetary gain is against our TOU's.
Supplies:
Gimp- Any version should work
Cute PTU kit from Wicked Princess Scraps called Little Bo Peepers HERE
Tube of choice. I am using Tony Tzanoukakis. You must have a license to use his tubes. You can purchase them HERE
Font- Japan
Let's Begin
-File>New 600x600 pixels.
-Open cracked wood frame. Layer>Scale Layer by 75%. Select your magic wand. Click inside the left top frame. Select>Grow 5. Open paper 5 and move below the frame layer. Right click paper layer in layer box and choose alpha to selection.
Scale 50%. Select>Invert. Press delete on your keyboard. Select>None. Repeat for the remaining squares in the frame. I used paper 7 for the top left, paper 8 bottom left, paper 2 bottom right. Make the frame layer active.
Filters>Light & Shadow>Drop Shadow 2, 2, 2, black, 50.
-Open heart wreath frame. Scale 50%. Make the top layer. Add paper 1 to this frame the same way as before. Repeat drop shadow on frame layer.
-Open tube close up. Make the top layer. Repeat drop shadow. Layer>Dulpicate Layer. Move the duplicate tube under the heart wreath layer in the layer box. Erase parts of the duplicate tube sticking out of the heart wreath frame.
Make the original tube layer active. Erase the bottom part of the tube so it looks like she is sticking out of the frame.
Elements
Add drop shadow of 2, 2, 2, black, 50 to all element layers, unless otherwise stated. See my tag for placement.
rainbow no drop shadow
cloud no drop shadow
rose swag
flowers bow
petal spray 2 no drop shadow
leaves
table
tea cup no drop shadow
bowl no drop shadow
stacked baskets
doggy
folded parisol
heart pillows
-Add your name and copyright and you are done!!
This tutorial is of my own creation and any resemblance to any other tuts is purely coincidental. This tutorial is for personal use only, using it for monetary gain is against our TOU's.
Supplies:
Gimp- Any version should work
Cute PTU kit from Wicked Princess Scraps called Little Bo Peepers HERE
Tube of choice. I am using Tony Tzanoukakis. You must have a license to use his tubes. You can purchase them HERE
Font- Japan
Let's Begin
-File>New 600x600 pixels.
-Open cracked wood frame. Layer>Scale Layer by 75%. Select your magic wand. Click inside the left top frame. Select>Grow 5. Open paper 5 and move below the frame layer. Right click paper layer in layer box and choose alpha to selection.
Scale 50%. Select>Invert. Press delete on your keyboard. Select>None. Repeat for the remaining squares in the frame. I used paper 7 for the top left, paper 8 bottom left, paper 2 bottom right. Make the frame layer active.
Filters>Light & Shadow>Drop Shadow 2, 2, 2, black, 50.
-Open heart wreath frame. Scale 50%. Make the top layer. Add paper 1 to this frame the same way as before. Repeat drop shadow on frame layer.
-Open tube close up. Make the top layer. Repeat drop shadow. Layer>Dulpicate Layer. Move the duplicate tube under the heart wreath layer in the layer box. Erase parts of the duplicate tube sticking out of the heart wreath frame.
Make the original tube layer active. Erase the bottom part of the tube so it looks like she is sticking out of the frame.
Elements
Add drop shadow of 2, 2, 2, black, 50 to all element layers, unless otherwise stated. See my tag for placement.
rainbow no drop shadow
cloud no drop shadow
rose swag
flowers bow
petal spray 2 no drop shadow
leaves
table
tea cup no drop shadow
bowl no drop shadow
stacked baskets
doggy
folded parisol
heart pillows
-Add your name and copyright and you are done!!
This tutorial is of my own creation and any resemblance to any other tuts is purely coincidental. This tutorial is for personal use only, using it for monetary gain is against our TOU's. Supplies Needed:
~Gimp (any version will do).
~Baby on Board FTU scrapkit which you can find @ Lizquis Scraps HERE.
~Tube of choice. I used the artwork of Elias Chatzoudis, you must have a license to use this art which you can get HERE.
~Template of choice. I used template 86 by Leah which you can get on our blog HERE.
~Mask of choice. I used WSL mask 363 which you can get HERE.
~Font of choice. I used Doctor Soos Bold.
Let's get started!!!
1. Open a new layer ( I prefer a large canvas, so I make mine 1050x656). Make your canvas transparent (Layer > Transparency > Color to Alpha).
2. Open template in PSD format, remove and move layers of template around until they are the way you like them.
~Add paper from scrapkit to individual layers of the template (Right click on template layer in layer box > Alpha to Selection > CTRL I > Select paper layer in layer box > Delete).
These are the papers I used:
Paper 1 Paper 2 Paper 3 Paper 7 Paper 8
~I added noise to some of the template layers to make them look glittery (Filters > Noise > RGB Noise).
~I colorized some of the template layers to better match the scrapkit (Colors > Colorize > play with the setting until you get the desired color).
~Add drop shadow to template layers (Filters > Light & Shadow > Drop Shadow).
3. Open tube, add drop shadow.
4. Open and place the following elements: (the names of the elements are in Spanish)
Colgante 1 Sonaja Biberon Liston 1 Liston 3 Carreola Zapatitos Mariposa 2 Mariposa 22 Flor 2 Flor 3
~Some of the elements may need to be sized down. Using your scale tool in your tool box adjust the pixel size until element is the correct size~
~Add drop shadow to all elements~
5. Open Paper 4
6. Open mask
7. Add mask to paper
8. Merge Layers (Image > Merge Visible Layers).
9. Crop Image (Image > Autocrop Image).
10. Scale image to desired size (Image > Scale Image).
11. Add copyright info and name
12. Save as .png
ALL DONE!!!!!!!!!!
 Here is another tut result from Christina aka: Tragedy
She did one of Leah's tuts this time called Bleeding Hearts. Tragedy put her own spin on this for sure, but it turned out awesome!!!
Thanks again for sending us your results!!!!
Here is another tut result from Christina aka: Tragedy
She did one of Leah's tuts this time called Bleeding Hearts. Tragedy put her own spin on this for sure, but it turned out awesome!!!
Thanks again for sending us your results!!!!


 This tutorial is of my own creation and any resemblance to any other tuts is purely coincidental. This tutorial is for personal use only, using it for monetary gain is against our TOU's.
Supplies:
Gimp- Any version should work
Beautiful PTU kit from Florjuscraps called Enchanted Sea HERE
Tube of choice. I am using Elias Chatzoudis. You must have a license to use his tubes. You can purchase them HERE
Template # 75 by me HERE
Mask 223 by weescotslass HERE
Font- ValentinaJF
Let's get started!!
-Open template. Delete the credits. Image>Scale Image 500x420 pixels. Image>Canvas Size 600x600 pixels and click center.
-Let's add papers to the template layers. Make the template layer active (see below). Right click template layer in layer box and choose alpha to selection. Open paper (see below). Right click paper layer in layer box and choose add alpha channel. Layer>Scale Layer by 15%.
Select>Invert. Press delete on your keyboard. Select>None. Delete the original template layer.
Here are the template layers and which papers I used:
circle 1- paper 8
circle 2- paper 11 Filters>Light & Shadow>Drop Shadow 2, 2, 2, black, 50
circle 3- paper 16 Filters>Repeat Drop Shadow
lrg square- paper 5
circle 4 & circle 4#1- paper3 Repeat drop shadow
square 1- paper 14 repeat drop shadow
square 2 -paper 7 repeat drop shadow
square 3- paper 4 repeat drop shadow
square 3#1- paper 2 repeat drop shadow
-Make the lrg square frame layer active. Filters>Noise>RGB Noise on default. Repeat drop shadow.
-Open element 20. Make the top layer. Scale by 21%. Place on the circle. Repeat drop shadow.
-Open element 25. Make the top layer. Scale 15%. Place at the bottom right of tag. Repeat drop shadow.
-Open tube. Make the top layer. Scale 80%. Place on the shell element. Prepeat drop shadow. Layer>Duplicate Layer. Filters>Blur>Gaussian Blur on default. Change the mode of the duplicate tube layer to soft light.
Elements
Add a drop shadow of 2, 2, 2, black, 50 to all element layers unless otherwise stated. See my tag for placement.
62
6
52
54 no drop shadow
27
22
41 no drop shadow
81
7
74
91
66
116 no drop shadow
14 no drop shadow
-Open background 1. Scale 600x600 pixels. Apply mask. Change the opacity to 65.
-Add your name and copyright and you are finished!!!
This tutorial is of my own creation and any resemblance to any other tuts is purely coincidental. This tutorial is for personal use only, using it for monetary gain is against our TOU's.
Supplies:
Gimp- Any version should work
Beautiful PTU kit from Florjuscraps called Enchanted Sea HERE
Tube of choice. I am using Elias Chatzoudis. You must have a license to use his tubes. You can purchase them HERE
Template # 75 by me HERE
Mask 223 by weescotslass HERE
Font- ValentinaJF
Let's get started!!
-Open template. Delete the credits. Image>Scale Image 500x420 pixels. Image>Canvas Size 600x600 pixels and click center.
-Let's add papers to the template layers. Make the template layer active (see below). Right click template layer in layer box and choose alpha to selection. Open paper (see below). Right click paper layer in layer box and choose add alpha channel. Layer>Scale Layer by 15%.
Select>Invert. Press delete on your keyboard. Select>None. Delete the original template layer.
Here are the template layers and which papers I used:
circle 1- paper 8
circle 2- paper 11 Filters>Light & Shadow>Drop Shadow 2, 2, 2, black, 50
circle 3- paper 16 Filters>Repeat Drop Shadow
lrg square- paper 5
circle 4 & circle 4#1- paper3 Repeat drop shadow
square 1- paper 14 repeat drop shadow
square 2 -paper 7 repeat drop shadow
square 3- paper 4 repeat drop shadow
square 3#1- paper 2 repeat drop shadow
-Make the lrg square frame layer active. Filters>Noise>RGB Noise on default. Repeat drop shadow.
-Open element 20. Make the top layer. Scale by 21%. Place on the circle. Repeat drop shadow.
-Open element 25. Make the top layer. Scale 15%. Place at the bottom right of tag. Repeat drop shadow.
-Open tube. Make the top layer. Scale 80%. Place on the shell element. Prepeat drop shadow. Layer>Duplicate Layer. Filters>Blur>Gaussian Blur on default. Change the mode of the duplicate tube layer to soft light.
Elements
Add a drop shadow of 2, 2, 2, black, 50 to all element layers unless otherwise stated. See my tag for placement.
62
6
52
54 no drop shadow
27
22
41 no drop shadow
81
7
74
91
66
116 no drop shadow
14 no drop shadow
-Open background 1. Scale 600x600 pixels. Apply mask. Change the opacity to 65.
-Add your name and copyright and you are finished!!!
 This tutorial is of my own creation and any resemblance to any other tuts is purely coincidental. This tutorial is for personal use only, using it for monetary gain is against our TOU's.
Supplies Needed:
~Gimp (any version will do).
~Tube of choice. I used the artwork of Zlata M . You must have a license to use this art which you can get HERE.
~I Heart Emo PTU scrapkit by Rieka Rafita. This kit is an exclusive for SATC, you can find out more info on Rieka's blog HERE.
~Font of choice. I used Creative Block .
Let's get started!!!!!
1. Open a new layer ( I prefer a large canvas, so I make mine 1050x656). Make your canvas transparent (Layer > Transparency > Color to alpha).
2. Open Frame 1, tilt the frame slightly using the Rotate Tool in your tool box. Duplicate the frame so that you have 2 of them, flip one of them so that they are a mirror image of each other, you can use the Flip Tool in your tool box for this. Move the frames in to desired position, add drop shadow (Filters > Light & Shadow > Drop Shadow).
3. Open Paper 10 & Paper 13 center one behind each frame, remove excess paper using the rectangular cutting tool or eraser from your tool box.
4. Open Frame 2, add drop shadow.
5. Open Paper 5 center it behind Frame 2, remove excess paper using the rectangular cutting tool in your tool box.
6. Open tube, add drop shadow.
7. Open and place the following elements:
Bunny Emo
Emo Doll
Splat 2
Star
Skull 1
Doodle
Can
Cuff 2
Metal
Emo Brad
Razor Blade
Sneakers
Lips
~Some of the elements may need to be sized down. Using your scale tool in your tool box adjust the pixel size until element is the correct size~
~Add drop shadow to all elements~
8. Open Mask element and place under all other layers.
9. Merge layers (Image > Merge Visible Layer).
10. Autocrop image (Image > Autocrop Image).
11. Scale image to desired size (Image > Scale Image).
12. Add copyright info and name.
13. Save as .png
You are finished :)
This tutorial is of my own creation and any resemblance to any other tuts is purely coincidental. This tutorial is for personal use only, using it for monetary gain is against our TOU's.
Supplies Needed:
~Gimp (any version will do).
~Tube of choice. I used the artwork of Zlata M . You must have a license to use this art which you can get HERE.
~I Heart Emo PTU scrapkit by Rieka Rafita. This kit is an exclusive for SATC, you can find out more info on Rieka's blog HERE.
~Font of choice. I used Creative Block .
Let's get started!!!!!
1. Open a new layer ( I prefer a large canvas, so I make mine 1050x656). Make your canvas transparent (Layer > Transparency > Color to alpha).
2. Open Frame 1, tilt the frame slightly using the Rotate Tool in your tool box. Duplicate the frame so that you have 2 of them, flip one of them so that they are a mirror image of each other, you can use the Flip Tool in your tool box for this. Move the frames in to desired position, add drop shadow (Filters > Light & Shadow > Drop Shadow).
3. Open Paper 10 & Paper 13 center one behind each frame, remove excess paper using the rectangular cutting tool or eraser from your tool box.
4. Open Frame 2, add drop shadow.
5. Open Paper 5 center it behind Frame 2, remove excess paper using the rectangular cutting tool in your tool box.
6. Open tube, add drop shadow.
7. Open and place the following elements:
Bunny Emo
Emo Doll
Splat 2
Star
Skull 1
Doodle
Can
Cuff 2
Metal
Emo Brad
Razor Blade
Sneakers
Lips
~Some of the elements may need to be sized down. Using your scale tool in your tool box adjust the pixel size until element is the correct size~
~Add drop shadow to all elements~
8. Open Mask element and place under all other layers.
9. Merge layers (Image > Merge Visible Layer).
10. Autocrop image (Image > Autocrop Image).
11. Scale image to desired size (Image > Scale Image).
12. Add copyright info and name.
13. Save as .png
You are finished :) 


 Thank you so much Tragedy for sharing your results with us :)


This tutorial is of my own creation and any resemblance to any other tuts is purely coincidental. This tutorial is for personal use only, using it for monetary gain is against our TOU's. Supplies Needed: ~Gimp (any version will do). ~Back to Basics PTU scrapkit by Wicked Princess Scraps which you can find HERE. ~Tubes of choice. I used the artwork of Verymany, you must have a license to use this art which you can get HERE. ~Template of choice. I used the High School Template which you can get from Sarah's Tags -N- Things HERE. ~Font of choice. I used 12 Ton Goldfish. Let's get started!!! 1. Open a new layer ( I prefer a large canvas, so I make mine 1050x656). Make your canvas transparent (Layer > Transparency > Color to Alpha). 2. Open template in PSD format, move layers of template around until they are the way you like them. ~Add paper from scrapkit to individual layers of the template (Right click on template layer in layer box > Alpha to Selection > CTRL I > Select paper layer in layer box > Delete). These are the papers I used: Paper 1 Paper 2 Paper 10 Paper 14 ~I added noise to some of the template layers to make them look glittery (Filters > Noise > RGB Noise). ~I colorized some of the template layers to better match the scrapkit (Colors > Colorize > play with the setting until you get the desired color). ~Add drop shadow to template layers (Filters > Light & Shadow > Drop Shadow). 3. Open tubes, I used both a full body and 2 close-ups. I changed the mode on the close-ups to Grain Merge (at the top of your Layer Box you will see where it says Mode, click the arrow and select Grain Merge from the drop down menu). The close-ups have been added to the template in the same way you add paper (Right click on template layer in layer box > Alpha to Selection > CTRL I > Select tube layer in layer box > Delete). Add drop shadow to the full body tube. 4. Open and place the following elements: Wire Flowers Star Sticker Tape Folder Calculator Red Crayon Stacked Books Ruler Scissors Glue Stick Red Paint Tube Brush ~Some of the elements may need to be sized down. Using your scale tool in your tool box adjust the pixel size until element is the correct size~ ~Add drop shadow to all elements~ 5. Merge Layers (Image > Merge Visible Layers). 6. Crop Image (Image > Autocrop Image). 7. Scale image to desired size (Image > Scale Image). 8. Add copyright info and name 9. Save as .png ALL DONE!!!!!!!!!!
 This tutorial is of my own creation and any resemblance to any other tuts is purely coincidental. This tutorial is for personal use only, using it for monetary gain is against our TOU's.
Supplies Needed:
~Gimp (any version will do).
~At the Movie PTU scrapkit by Rebellious Scraps which you can get from Scrap-U-Nique HERE.
~Tube of choice. I used the artwork of Elias Chatzoudis, you must have a license to use this art which you can now get HERE.
~Template of choice. I used Template 109 by Rosey's Tag Templates which you can get HERE.
~Font of choice. I used Desigers.
Let's get started!!!
1. Open a new layer ( I prefer a large canvas, so I make mine 1050x656). Make your canvas transparent (Layer > Transparency > Color to Alpha).
2. Open template in PSD format, move layers of template around until they are the way you like them.
~Add paper from scrapkit to individual layers of the template (Right click on template layer in layer box > Alpha to Selection > CTRL I > Select paper layer in layer box > Delete).
These are the papers I used:
Paper 5
Paper 8
Paper 9
Paper 10
Paper 11
Paper 12
~I added noise to some of the template layers to make them look glittery (Filters > Noise > RGB Noise).
~I colorized some of the template layers to better match the scrapkit (Colors > Colorize > play with the setting until you get the desired color).
~Add drop shadow to template layers (Filters > Light & Shadow > Drop Shadow).
3. Open tube, add drop shadow.
4. Open and place the following elements:
Stage Light
Ray of Light
Chair
Negative 2
Lips
Clap 2
Film Box
Ticket
Popcorn
Stars 1
(the stars were rotated 90 degrees. Layer > Transform > Rotate 90' clockwise).
~Some of the elements may need to be sized down. Using your scale tool in your tool box adjust the pixel size until element is the correct size~
~Add drop shadow to all elements (except Ray of Light)~
5. Merge Layers (Image > Merge Visible Layers).
6. Crop Image (Image > Autocrop Image).
7. Scale image to desired size (Image > Scale Image).
8. Add copyright info and name
9. Save as .png
ALL DONE!!!!!!!!!!
This tutorial is of my own creation and any resemblance to any other tuts is purely coincidental. This tutorial is for personal use only, using it for monetary gain is against our TOU's.
Supplies Needed:
~Gimp (any version will do).
~At the Movie PTU scrapkit by Rebellious Scraps which you can get from Scrap-U-Nique HERE.
~Tube of choice. I used the artwork of Elias Chatzoudis, you must have a license to use this art which you can now get HERE.
~Template of choice. I used Template 109 by Rosey's Tag Templates which you can get HERE.
~Font of choice. I used Desigers.
Let's get started!!!
1. Open a new layer ( I prefer a large canvas, so I make mine 1050x656). Make your canvas transparent (Layer > Transparency > Color to Alpha).
2. Open template in PSD format, move layers of template around until they are the way you like them.
~Add paper from scrapkit to individual layers of the template (Right click on template layer in layer box > Alpha to Selection > CTRL I > Select paper layer in layer box > Delete).
These are the papers I used:
Paper 5
Paper 8
Paper 9
Paper 10
Paper 11
Paper 12
~I added noise to some of the template layers to make them look glittery (Filters > Noise > RGB Noise).
~I colorized some of the template layers to better match the scrapkit (Colors > Colorize > play with the setting until you get the desired color).
~Add drop shadow to template layers (Filters > Light & Shadow > Drop Shadow).
3. Open tube, add drop shadow.
4. Open and place the following elements:
Stage Light
Ray of Light
Chair
Negative 2
Lips
Clap 2
Film Box
Ticket
Popcorn
Stars 1
(the stars were rotated 90 degrees. Layer > Transform > Rotate 90' clockwise).
~Some of the elements may need to be sized down. Using your scale tool in your tool box adjust the pixel size until element is the correct size~
~Add drop shadow to all elements (except Ray of Light)~
5. Merge Layers (Image > Merge Visible Layers).
6. Crop Image (Image > Autocrop Image).
7. Scale image to desired size (Image > Scale Image).
8. Add copyright info and name
9. Save as .png
ALL DONE!!!!!!!!!! Download them HERE
 This tutorial is of my own creation and any resemblance to any other tuts is purely coincidental. This tutorial is for personal use only, using it for monetary gain is against our TOU's.
Supplies:
Gimp- Any version should work
Fun PTU kit from Sweet Cravings Scraps HERE
Tube of choice. I am using Elias Chatzoudis. You must have a license to use his tubes. You can purchase them HERE
Font- Satisfaction
-File>New 600x600 px.
-Open frame 1. Layer>Scale Layer 50%. Select the magic wand and click inside of the frame. Select>Grow by 5. Open paper 14. Move below the frame in the layer box. Right click pape rlayer in the layer box and choose alpha to selection. Scale by 40%. Select>Invert. Press delete on your
keyboard. Select>None. Make the frame layer active. Filters>Light & Shadow>Drop Shadow of 2, 2, 2, black, 50.
-Open tube. Make the top layer. Scale 75%. Repeat drop shadow. Layer>Duplicate Layer. Move the duplicate tube layer below the frame. Make the paper layer active. Using the magic wand click outside of the paper. Make the duplicate tube active.
Press delete. Select none. Make the original tube layer active. Select the eraser tool. Erase the bottom part of the tube so she sticks out of the frame.
-Open frame 2. Move to the bottom layer. Scale 50%. Select the rotate tool and in the angle box put -15.00. Move to the lest side of the circle frame. Right click layer in layer box and choose layer to image size. Duplicate. Select the flip tool and click canvas.
Make the left frame active.Add paper 7 to this frame repeating the steps above. Add paper 6 to the right frame. Repeat drop shadow on both frame layers.
-Open frame 3. Make bottom layer. Scale 60%. Repeat drop shadow.
Elements:
Add drop shadow to all element layers unless otherwise stated. See my tag for placement.
flower 10
flower 11
ribbon 1
grass no drop shadow
flower 6
cute bird
tag 1
paper butterfly no drop shadow
air balloon
butterfly
pebble 1
pebble 2
cloud 1 no drop shadow
cloud 2 no drop shadow
-Add your name and copyright and you are finished!
This tutorial is of my own creation and any resemblance to any other tuts is purely coincidental. This tutorial is for personal use only, using it for monetary gain is against our TOU's.
Supplies:
Gimp- Any version should work
Fun PTU kit from Sweet Cravings Scraps HERE
Tube of choice. I am using Elias Chatzoudis. You must have a license to use his tubes. You can purchase them HERE
Font- Satisfaction
-File>New 600x600 px.
-Open frame 1. Layer>Scale Layer 50%. Select the magic wand and click inside of the frame. Select>Grow by 5. Open paper 14. Move below the frame in the layer box. Right click pape rlayer in the layer box and choose alpha to selection. Scale by 40%. Select>Invert. Press delete on your
keyboard. Select>None. Make the frame layer active. Filters>Light & Shadow>Drop Shadow of 2, 2, 2, black, 50.
-Open tube. Make the top layer. Scale 75%. Repeat drop shadow. Layer>Duplicate Layer. Move the duplicate tube layer below the frame. Make the paper layer active. Using the magic wand click outside of the paper. Make the duplicate tube active.
Press delete. Select none. Make the original tube layer active. Select the eraser tool. Erase the bottom part of the tube so she sticks out of the frame.
-Open frame 2. Move to the bottom layer. Scale 50%. Select the rotate tool and in the angle box put -15.00. Move to the lest side of the circle frame. Right click layer in layer box and choose layer to image size. Duplicate. Select the flip tool and click canvas.
Make the left frame active.Add paper 7 to this frame repeating the steps above. Add paper 6 to the right frame. Repeat drop shadow on both frame layers.
-Open frame 3. Make bottom layer. Scale 60%. Repeat drop shadow.
Elements:
Add drop shadow to all element layers unless otherwise stated. See my tag for placement.
flower 10
flower 11
ribbon 1
grass no drop shadow
flower 6
cute bird
tag 1
paper butterfly no drop shadow
air balloon
butterfly
pebble 1
pebble 2
cloud 1 no drop shadow
cloud 2 no drop shadow
-Add your name and copyright and you are finished!
 This tutorial is of my own creation and any resemblance to any other tuts is purely coincidental. This tutorial is for personal use only, using it for monetary gain is against our TOU's.
Supplies Needed:
~Gimp (any version will do).
~Tube of choice. I used the artwork of Lix. You must have a license to use this art which you can now get HERE.
~Crush PTU scrapkit which you can get from Sweet Cravings Scraps HERE.
~Font of choice. I used Fineliner Script.
Let's get started!!!!!
1. Open a new layer ( I prefer a large canvas, so I make mine 1050x656). Make your canvas transparent (Layer > Transparency > Color to alpha).
2. Open Frame 4 (rectangular frame), add drop shadow (Filters > Light & Shadow > Drop Shadow).
3. Open Paper 12 center behind Frame 4, remove excess paper using a cutting tool or eraser in your tool box.
4. Open Frame 6 (oval frame), add drop shadow.
5. Open Paper 14 center behind Frame 6, remove excess paper using a cutting tool or eraser in your tool box.
6. Open tube, add drop shadow.
7. Open and place the following elements:
Cloud 1
Ribbon 4
Cute Bird
Cute Bunny
Flower 5
Flower 10
Flower 12
Grass
Butterfly
Paper Butterfly 2
~Some of the elements may need to be sized down. Using your scale tool in your tool box adjust the pixel size until element is the correct size~
~Add drop shadow to all elements (except Cloud 1)~
8. Merge layers (Image > Merge Visible Layer).
9. Autocrop image (Image > Autocrop Image).
10. Scale image to desired size (Image > Scale Image).
11. Add copyright info and name.
12. Save as .png
You are finished :)
This tutorial is of my own creation and any resemblance to any other tuts is purely coincidental. This tutorial is for personal use only, using it for monetary gain is against our TOU's.
Supplies Needed:
~Gimp (any version will do).
~Tube of choice. I used the artwork of Lix. You must have a license to use this art which you can now get HERE.
~Crush PTU scrapkit which you can get from Sweet Cravings Scraps HERE.
~Font of choice. I used Fineliner Script.
Let's get started!!!!!
1. Open a new layer ( I prefer a large canvas, so I make mine 1050x656). Make your canvas transparent (Layer > Transparency > Color to alpha).
2. Open Frame 4 (rectangular frame), add drop shadow (Filters > Light & Shadow > Drop Shadow).
3. Open Paper 12 center behind Frame 4, remove excess paper using a cutting tool or eraser in your tool box.
4. Open Frame 6 (oval frame), add drop shadow.
5. Open Paper 14 center behind Frame 6, remove excess paper using a cutting tool or eraser in your tool box.
6. Open tube, add drop shadow.
7. Open and place the following elements:
Cloud 1
Ribbon 4
Cute Bird
Cute Bunny
Flower 5
Flower 10
Flower 12
Grass
Butterfly
Paper Butterfly 2
~Some of the elements may need to be sized down. Using your scale tool in your tool box adjust the pixel size until element is the correct size~
~Add drop shadow to all elements (except Cloud 1)~
8. Merge layers (Image > Merge Visible Layer).
9. Autocrop image (Image > Autocrop Image).
10. Scale image to desired size (Image > Scale Image).
11. Add copyright info and name.
12. Save as .png
You are finished :) 

 This tutorial is of my own creation and any resemblance to any other tuts is purely coincidental. This tutorial is for personal use only, using it for monetary gain is against our TOU's.
Supplies Needed:
~Gimp (any version will do).
~Emo Cutie PTU scrapkit by Toxic Desirez which you can find HERE.
~Tubes of choice. I used the artwork of Alex Prihodko, you must have a license to use this art which you can get HERE.
~Template of choice. I used the Bad Self Template which you can get from Crazy Cakes Scraps HERE.
~Font of choice. I used Retrofit Light.
Let's get started!!!
1. Open a new layer ( I prefer a large canvas, so I make mine 1050x656). Make your canvas transparent (Layer > Transparency > Color to Alpha).
2. Open template in PSD format, move layers of template around until they are the way you like them.
~Add paper from scrapkit to individual layers of the template (Right click on template layer in layer box > Alpha to Selection > CTRL I > Select paper layer in layer box > Delete).
These are the papers I used:
Paper 18
Paper 25
Paper 31
~I added noise to some of the template layers to make them look glittery (Filters > Noise > RGB Noise).
~I colorized some of the template layers to better match the scrapkit (Colors > Colorize > play with the setting until you get the desired color).
~Add drop shadow to template layers (Filters > Light & Shadow > Drop Shadow).
3. Open tubes, I used both a full body and a close-up. I changed the mode on the close-up to HardLight (at the top of your Layer Box you will see where it says Mode, click the arrow and select HardLight from the drop down menu). The close-up has been added to the template in the same way you add paper (Right click on template layer in layer box > Alpha to Selection > CTRL I > Select tube layer in layer box > Delete). Add drop shadow to the full body tube.
4. Open and place the following elements:
Doodle
Flame
Razor Blade
Ribbon 2
Skull 5
Chrome Skull
Flower 1
Flower 2
Bomb
Spider
Butterfly 1
Sparkles
~Some of the elements may need to be sized down. Using your scale tool in your tool box adjust the pixel size until element is the correct size~
~Add drop shadow to all elements~
5. Open Background element from scrapkit. Place it under all other layers of the tag. This will give the effect of using a mask.
6. Merge Layers (Image > Merge Visible Layers).
7. Crop Image (Image > Autocrop Image).
8. Scale image to desired size (Image > Scale Image).
9. Add copyright info and name
10. Save as .png
ALL DONE!!!!!!!!!!
This tutorial is of my own creation and any resemblance to any other tuts is purely coincidental. This tutorial is for personal use only, using it for monetary gain is against our TOU's.
Supplies Needed:
~Gimp (any version will do).
~Emo Cutie PTU scrapkit by Toxic Desirez which you can find HERE.
~Tubes of choice. I used the artwork of Alex Prihodko, you must have a license to use this art which you can get HERE.
~Template of choice. I used the Bad Self Template which you can get from Crazy Cakes Scraps HERE.
~Font of choice. I used Retrofit Light.
Let's get started!!!
1. Open a new layer ( I prefer a large canvas, so I make mine 1050x656). Make your canvas transparent (Layer > Transparency > Color to Alpha).
2. Open template in PSD format, move layers of template around until they are the way you like them.
~Add paper from scrapkit to individual layers of the template (Right click on template layer in layer box > Alpha to Selection > CTRL I > Select paper layer in layer box > Delete).
These are the papers I used:
Paper 18
Paper 25
Paper 31
~I added noise to some of the template layers to make them look glittery (Filters > Noise > RGB Noise).
~I colorized some of the template layers to better match the scrapkit (Colors > Colorize > play with the setting until you get the desired color).
~Add drop shadow to template layers (Filters > Light & Shadow > Drop Shadow).
3. Open tubes, I used both a full body and a close-up. I changed the mode on the close-up to HardLight (at the top of your Layer Box you will see where it says Mode, click the arrow and select HardLight from the drop down menu). The close-up has been added to the template in the same way you add paper (Right click on template layer in layer box > Alpha to Selection > CTRL I > Select tube layer in layer box > Delete). Add drop shadow to the full body tube.
4. Open and place the following elements:
Doodle
Flame
Razor Blade
Ribbon 2
Skull 5
Chrome Skull
Flower 1
Flower 2
Bomb
Spider
Butterfly 1
Sparkles
~Some of the elements may need to be sized down. Using your scale tool in your tool box adjust the pixel size until element is the correct size~
~Add drop shadow to all elements~
5. Open Background element from scrapkit. Place it under all other layers of the tag. This will give the effect of using a mask.
6. Merge Layers (Image > Merge Visible Layers).
7. Crop Image (Image > Autocrop Image).
8. Scale image to desired size (Image > Scale Image).
9. Add copyright info and name
10. Save as .png
ALL DONE!!!!!!!!!! This tutorial is of my own creation and any resemblance to any other tuts is purely coincidental. This tutorial is for personal use only, using it for monetary gain is against our TOU's.
Supplies:
Gimp- Any version should work
PTU kit from Wicked Princess called Opposites Attract Dark HERE
Mask 178 from weescotslass HERE
Font- bleeding cowboys
Let's get started!
-File>New 600x600 pixels.
-Open torn frame. Layers>Scale Layer by 70%. Select the magic wand. Select>Grow by 5. Open paper 6. Move paper below frame layer in the layer box. Right click paper layer in layer box and choose add alpha channel. Scale by 50%. Select>Invert. Press delete on
your computer. Select>None. Make the frame layer active. Filters>Light & Shadow>Drop Shadow of 3, 3, 3, black, 80.
-Open tube. Scale 80%. Repeat drop shadow. Layers>Duplicate Layer. Filters>Blur>Gaussian Blur on default. Change the mode of the duplicate layer to overlay and lower the opacity to 40.
-Open circle frame. Scale 60%. Add paper 10 to this frame the same way we added the other paper to the torn frame. Repeat drop shadow on circle frame layer.
-Open the horned frame. Scale 50%. Click inside frame with magic wand. Grow by 5. Add new layer below this frame layer. Using the bucket fill tool, fill the selection with black. Open tube again. Place the face of your tube inside the selection.
Invert & delete. Select none. Change the mode of the tube to value and lower the opacity to 50. Repeat drop shadow on the horned frame layer.
Elements:
Add drop shadow of 2, 2, 2, black, 50 to all element layers. See my tag for placement.
canalabra
rose
blood splatter NO drop shadow
bling trim
hourglass
blood
doodle bow
tree NO drop shadow
music papers
old paper Rotate 15.00
-Add a new layer at the bottom. Fill with black. Apply mask.
-Add your name and copyright and you're finished!!
This tutorial is of my own creation and any resemblance to any other tuts is purely coincidental. This tutorial is for personal use only, using it for monetary gain is against our TOU's.
Supplies:
Gimp- Any version should work
PTU kit from Wicked Princess called Opposites Attract Dark HERE
Mask 178 from weescotslass HERE
Font- bleeding cowboys
Let's get started!
-File>New 600x600 pixels.
-Open torn frame. Layers>Scale Layer by 70%. Select the magic wand. Select>Grow by 5. Open paper 6. Move paper below frame layer in the layer box. Right click paper layer in layer box and choose add alpha channel. Scale by 50%. Select>Invert. Press delete on
your computer. Select>None. Make the frame layer active. Filters>Light & Shadow>Drop Shadow of 3, 3, 3, black, 80.
-Open tube. Scale 80%. Repeat drop shadow. Layers>Duplicate Layer. Filters>Blur>Gaussian Blur on default. Change the mode of the duplicate layer to overlay and lower the opacity to 40.
-Open circle frame. Scale 60%. Add paper 10 to this frame the same way we added the other paper to the torn frame. Repeat drop shadow on circle frame layer.
-Open the horned frame. Scale 50%. Click inside frame with magic wand. Grow by 5. Add new layer below this frame layer. Using the bucket fill tool, fill the selection with black. Open tube again. Place the face of your tube inside the selection.
Invert & delete. Select none. Change the mode of the tube to value and lower the opacity to 50. Repeat drop shadow on the horned frame layer.
Elements:
Add drop shadow of 2, 2, 2, black, 50 to all element layers. See my tag for placement.
canalabra
rose
blood splatter NO drop shadow
bling trim
hourglass
blood
doodle bow
tree NO drop shadow
music papers
old paper Rotate 15.00
-Add a new layer at the bottom. Fill with black. Apply mask.
-Add your name and copyright and you're finished!! This tutorial is of my own creation and any resemblance to any other tuts is purely coincidental. This tutorial is for personal use only, using it for monetary gain is against our TOU's.
Supplies:
Gimp- Any version should work
PTU kit Skull Rock from Rebellious Scraps HERE
Tube of choice. I am using Lix. You must have a license to use these tubes. You can get them HERE
Template 414 from Divine Intentionz HERE
Font- Weltron
Let's Begin!
-Open template. Delete credits. Image>Scale Image 500x301 pixels. Image>Canvas Size 600x600 pixles and press center.
-Let's add papers to the template layers. Make the template layer active (see below). Right click template layer in layer box and choose alpha to selection. Open paper (see below). Right click paper layer in layer box and choose add alpha channel. Layer>Scale Layer by 60%.
Select>Invert. Press delete on your keyboard. Select>None. Delete the original template layer.
Here are the template layers and which papers I used:
frame back 3- paper 3
frame back 2- paper 2
frame back- paper 8
circle 3- paper 4
circle 2- paper 7 Filters>Light and Shadow>Drop Shadow 3, 3, 3, black, 50
circle 1-paper 3 Repeat drop shadow
square 2- paper 9 Repeat drop shadow
square 1- paper 10 Repeat drop shadow
-Open frame 3. Colors>Colorize
Hue: 185
Saturation- 94
Lightness: -41
Filters>Noise>RGB Noise. Put all sliders except alpha on 0.50. Add drop shadow of 2, 2, 2, black, 50. Repeat for frame 2. Repeat drop shadow on frame layer.
Open tube. Move into the bottom frame. Right click the layer in the layer box and choose layer to image size. Layer>Dupicate Layer. Select the flip tool. Click the canvas. Place the duplicate tube in top frame. Select the eraser tool and erase parts of the tube outside of the frame.
Change the mode of the tube to screen. Lower the opacity to 45.
-Open tube again. Scale by 80%. Repeat drop shadow. Duplicate. Filters>Blur>Gaussian Blur on default. Change mode to soft light.
-Open frame 1. Move to the bottom. Place on the left of tag. Using the magic wand, click inside the frame. Select>Grow by 5. Open paper 12. Move layer below the frame layer. Add alpha channel. Scale by 50%. Invert & delete. Select none. Repeat drop shadow on frame.
-Open frame 3. Scale by 60%. Move above frame 3. Using the magic wand, click inside the first box. Add a new layer below the frame. Bucket fill selection with 45eeff. Select none. Repeat the above for the remaining boxes. I only have 3 showing. For the second, the color I used to bucket fill was f966c3. For the third boxI used the same blue as before. On the frame layer add a drop shadow of 1, 1, 1, black, 50. Add noise to all 3 squares.
Elements:
Add a drop shadow of 2, 2, 2, black, 50 to all element layers. See my tag for placement.
cds & vinyls
sign- rotate by 30
chain with spike
boot
boot 2
disco ball
screw 1
sign 2
chains
skull pillow
wire- no drop shadow
-Add your name and copyright and you are finished!
This tutorial is of my own creation and any resemblance to any other tuts is purely coincidental. This tutorial is for personal use only, using it for monetary gain is against our TOU's.
Supplies:
Gimp- Any version should work
PTU kit Skull Rock from Rebellious Scraps HERE
Tube of choice. I am using Lix. You must have a license to use these tubes. You can get them HERE
Template 414 from Divine Intentionz HERE
Font- Weltron
Let's Begin!
-Open template. Delete credits. Image>Scale Image 500x301 pixels. Image>Canvas Size 600x600 pixles and press center.
-Let's add papers to the template layers. Make the template layer active (see below). Right click template layer in layer box and choose alpha to selection. Open paper (see below). Right click paper layer in layer box and choose add alpha channel. Layer>Scale Layer by 60%.
Select>Invert. Press delete on your keyboard. Select>None. Delete the original template layer.
Here are the template layers and which papers I used:
frame back 3- paper 3
frame back 2- paper 2
frame back- paper 8
circle 3- paper 4
circle 2- paper 7 Filters>Light and Shadow>Drop Shadow 3, 3, 3, black, 50
circle 1-paper 3 Repeat drop shadow
square 2- paper 9 Repeat drop shadow
square 1- paper 10 Repeat drop shadow
-Open frame 3. Colors>Colorize
Hue: 185
Saturation- 94
Lightness: -41
Filters>Noise>RGB Noise. Put all sliders except alpha on 0.50. Add drop shadow of 2, 2, 2, black, 50. Repeat for frame 2. Repeat drop shadow on frame layer.
Open tube. Move into the bottom frame. Right click the layer in the layer box and choose layer to image size. Layer>Dupicate Layer. Select the flip tool. Click the canvas. Place the duplicate tube in top frame. Select the eraser tool and erase parts of the tube outside of the frame.
Change the mode of the tube to screen. Lower the opacity to 45.
-Open tube again. Scale by 80%. Repeat drop shadow. Duplicate. Filters>Blur>Gaussian Blur on default. Change mode to soft light.
-Open frame 1. Move to the bottom. Place on the left of tag. Using the magic wand, click inside the frame. Select>Grow by 5. Open paper 12. Move layer below the frame layer. Add alpha channel. Scale by 50%. Invert & delete. Select none. Repeat drop shadow on frame.
-Open frame 3. Scale by 60%. Move above frame 3. Using the magic wand, click inside the first box. Add a new layer below the frame. Bucket fill selection with 45eeff. Select none. Repeat the above for the remaining boxes. I only have 3 showing. For the second, the color I used to bucket fill was f966c3. For the third boxI used the same blue as before. On the frame layer add a drop shadow of 1, 1, 1, black, 50. Add noise to all 3 squares.
Elements:
Add a drop shadow of 2, 2, 2, black, 50 to all element layers. See my tag for placement.
cds & vinyls
sign- rotate by 30
chain with spike
boot
boot 2
disco ball
screw 1
sign 2
chains
skull pillow
wire- no drop shadow
-Add your name and copyright and you are finished!Snag Our Blinkies


Don't Be A Pirate!

