Monday, March 7, 2011

This tutorial is of my own creation and any resemblance to any other tuts is purely coincidental. This tutorial is for personal use only, using it for monetary gain is against our TOU's.
Supplies Needed:
~Gimp (any version will do).
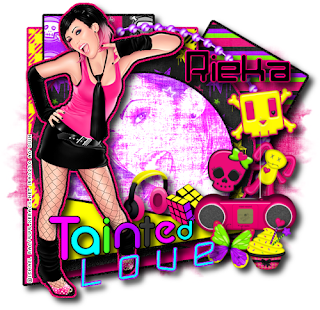
~Cyber Babe PTU scrapkit by Rieka Rafita which you can get HERE.
~Tubes of choice. I used the art of Ismael Rac, you must have a license to use this art which you can get HERE.
~Template of choice. I used Leah's template 41 which you can get on our blog HERE.
~Mask of choice. I used WSL mask 302 which you can get HERE.
~Font of choice. I used Poophead.
Let's get started!!!
1. Open a new layer ( I prefer a large canvas, so I make mine 1050x656). Make your canvas transparent (Layer > Transparency > Color to Alpha).
2. Open template in PSD format, move layers of template around until they are the way you like them.
~Add paper from scrapkit to individual layers of the template (Right click on template layer in layer box > Alpha to Selection > CTRL I > Select paper layer in layer box > Delete).
These are the papers I used:
Paper 1
Paper 6
Paper 9
Paper 13
Paper 14
~I added noise to some of the template layers to make them look glittery (Filters > Noise > RGB Noise).
~I colorized some of the template layers to better match the scrapkit (Colors > Colorize > play with the setting until you get the desired color).
~Add drop shadow to template layers (Filters > Light & Shadow > Drop Shadow).
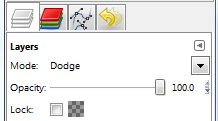
3. Open tubes, I used a full body and a close-up. I changed the mode on the close-up to Dodge (at the top of the layer box you will see a box marked Mode. Click on the arrow and pick Dodge from the drop down menu. See the image below. I added colored outlines to the full body tube (right click on the tube layer in your layer box > Select > Grow (by 2) > add a new transparent layer to your layer box (click the symbol that looks like a piece of paper at the bottom of your layer box) > place new layer under your tube layer > select a color and fill with your bucket fill tool from your tool box. Repeat these steps if you would like more than one outline. Add drop shadow to full body tube.
 4. Open and place the following elements:
Sparkle 2
Frame 5
Headphones
Skull 1
Skull 2
Bunny
Magic Cube
Radio
Butterfly
Cupcake
~Some of the elements may need to be sized down. Using your scale tool in your tool box adjust the pixel size until element is the correct size~
~Add drop shadow to all elements~
5. Open Paper 17
6. Open mask
7. Add mask to paper (click HERE for a tut on using masks)
8. Merge Layers (Image > Merge Visible Layers).
9. Crop Image (Image > Autocrop Image).
10. Scale image to desired size (Image > Scale Image).
11. Add copyright info and name
12. Save as .png
ALL DONE!!!!!!!!!!
Labels:PTU tuts
Subscribe to:
Post Comments
(Atom)
Labels
12x12 Layout
A Taggers Scrap
Animated
Announcements
Art of Freya
Basic tuts
Blog Trains
CDO
Cluster Frame
CT tags
Extras
Forum Set
Freebies
FTU CU
FTU Kits
FTU tuts
Holiday
Jackie's Jewels
Kissing Kate
Masks
PTU Kits
PTU tuts
Quick Pages
Results
Results with Amys kits
Show Offs
Sweet Cravings Scraps
Tasha's Playground
Templates
Timeline Banners
Chit Chat
Blog Archive
-
▼
2011
(337)
-
▼
March
(33)
- New FTU tut "Strike A Pose" No Scraps/Animated
- New Templates!
- New PTU tut "Only Prettier"
- New PTU tut "Frisky Bunny"
- New PTU tut "Easter Fun"
- New PTU tut- Spring is Here
- New PTU tut "School Girl Crush"
- PTU tut- Eggstra Special
- New PTU tut "Sweet Punky"
- FTU tut!!!!
- PTU tut- Amour
- Tutorial with one of my templates!
- We have received another blog award!!!!!!!!!!!!!
- Easter Templates
- PTU tut- Tattooed
- FTU tut- Funky Punky
- New PTU tut "Irish Eyes"
- Templates 58-61
- PTU tut- Pure Poison
- New PTU tut "Heavy Metal"
- PTU tut- Happy St. Pattys Day
- FTU tut- Sweet Pea
- St. Patrick's Day Masks
- St. Patrick's Day Templates
- Masks 12-16
- PTU tut- Beautiful Disaster
- New PTU tut "Tainted Love"
- PTU tut- Skulls Are Girly
- New FTU tut "Bad Thing"
- PTU tut- Crazy Chick
- PTU tut- Spring Flowers
- New PTU tut "Daydream Believer"
- Artmama's having a SALE!!!!!!!!!
-
▼
March
(33)


0 comments:
Post a Comment