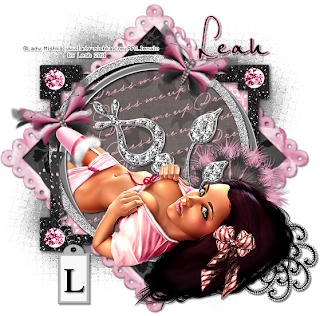
This tutorial is of my own creation and any resemblance to any other tuts is purely coincidental. This tutorial is for personal use only, using it for monetary gain is against our TOU's. Supplies: Gimp- Any version should work FTU kit from cinnamon Scraps called 'Dress Me Up' HERE Tube of Choice. I used the work of Lady Mishka. You must have a licence to use her tubes. You can purchase them HERE WSL_Mask152 HERE Font- Will & Grace and PetraScriptEF Let's Begin! -Open Gimp. Go to File>New and open a canvas with the size of 600x600 pixels. -Open frame 3. Select your rotate tool. Click the canvas. In the angle box put 90. Layer>Cale Layer by 70%. Select your magic wand. Click inside the frame. Select>grow by 3. Open paper 6. Move this layer below the frame layer in the layer box. Right click paper layer in the layer box and choose add alpha channel. Scale by 70%. Select>Invert. Press delete on your computer. Select>None. Make the frame layer active. Filters>Light & Shadow>Drop Shadow of 2, 2, 10, black, 80. -Open frame 2. Move this layerto the top. Scale by 65%. Click inside frame with magic wand. Frop by 3. Open ppaer 4 and move this layer below frame layer. Add alpha channel. Scale by 70%. Invert & delete. Select none. Add drop shadow of 2, 2, 2, black, 50 to frame layer. -Open tube. Make the top layer. Scale by 65%. Layer>Duplicate Layer. Move the duplicate tube layer below the circle frame in the layer box. Make the circle frame layer active. Using the magic wand, click indise the frame. Grow by 7. Make the duplicate tube layer active. Invert & delete. Select none. Make the original tube layer active. Select your eraser tool. Erase her bottom leg. See mine. -Open frame 5. Move to the bottom layer. Scale by 65%. Rotate by 45. Using the magic wand click inside the frame. Grow by 3. Open paper 18 and move layer below frame. Add alpha channel. Scale by 70%. Invert & delete. Select none. Repeat drop shadow on frame. Elements Add a drop shadow of 2, 2, 2, black, 50 to all element layers. See my tag for placement. flower 3- scale 50% doodle 2- scale 65% gem flower 4- scale 50% tag 3- scale 60% butterfly 1- scale 35% - rotate 25 - duplicate - flip -Using the Will & Grace font, zise 60, foreground color black, type the first letter of your name. Place it inside tag 3. Repeat drop shadow. -Open paper 17. Move layer to bottom. Apply mask. -Add your name using the PetraScriptEF font. Add your copyright and you are finished!!!!!!!
Labels
Chit Chat
Blog Archive
-
▼
2011
(337)
-
▼
March
(33)
- New FTU tut "Strike A Pose" No Scraps/Animated
- New Templates!
- New PTU tut "Only Prettier"
- New PTU tut "Frisky Bunny"
- New PTU tut "Easter Fun"
- New PTU tut- Spring is Here
- New PTU tut "School Girl Crush"
- PTU tut- Eggstra Special
- New PTU tut "Sweet Punky"
- FTU tut!!!!
- PTU tut- Amour
- Tutorial with one of my templates!
- We have received another blog award!!!!!!!!!!!!!
- Easter Templates
- PTU tut- Tattooed
- FTU tut- Funky Punky
- New PTU tut "Irish Eyes"
- Templates 58-61
- PTU tut- Pure Poison
- New PTU tut "Heavy Metal"
- PTU tut- Happy St. Pattys Day
- FTU tut- Sweet Pea
- St. Patrick's Day Masks
- St. Patrick's Day Templates
- Masks 12-16
- PTU tut- Beautiful Disaster
- New PTU tut "Tainted Love"
- PTU tut- Skulls Are Girly
- New FTU tut "Bad Thing"
- PTU tut- Crazy Chick
- PTU tut- Spring Flowers
- New PTU tut "Daydream Believer"
- Artmama's having a SALE!!!!!!!!!
-
▼
March
(33)


0 comments:
Post a Comment