Gimptastic Scraps Available Exclusively @

Gimptastic Scraps CT


Blog Trains

CU Licenses


Sunday, March 4, 2012
 This tag was made featuring a beautiful image from Jon Rattenbury. This image comes in a 3 pack along with 2 other breathtaking beach images and will be available for purchase 3-5-12 @ PSP Tubes Emporium.

This tutorial is of my own creation and any resemblance to any other tuts is purely coincidental. This tutorial is for personal use only, using it for monetary gain is against our TOU's.
Supplies Needed:
~Gimp (any version will do).
~Tube of choice. I used the artwork of Robert Alvarado, you must have a license to use this art which you can get @ PSP Tubes Emporium HERE. *This tube will be available 3-5-12*
~Nautical Vibes FTU scrapkit which you can get from Scraps Dimensions HERE.
~Mask of choice. I used mask 9 which you can get from HorsePlay's Pasture HERE.
~Font of choice. I used The NautiGal.
Let's get started!!!!!
1. Open a new layer ( I prefer a large canvas, so I make mine 1050x656). Make your canvas transparent (Layer > Transparency > Color to alpha).
2. Open Porthole element, add drop shadow (Filters > Light & Shadow > Drop Shadow).
3. Open Paper 10 center it behind porthole, remove excess paper using a cutting tool or eraser.
4. Open tube, add drop shadow.
5. Open and place the following elements:
Net
Lighthouse
Rope
Compass
Binoculars
Lantern
Sea plant 1
Seashells 1
Fish 3
Crab
Starfish 3
~Some elements may need to be sized down. Using the Scale Tool in your tool box adjust pixels to desired size~
~Add drop shadow to all elements (except net)~
6. Open Paper 4.
7. Open mask.
8. Add mask to paper (click HERE for a tut on using masks).
9. Merge layers (Image > Merge Visible Layer).
10. Crop image (Image > Autocrop Image).
11. Scale image to desired size (Image > Scale Image).
12. Add copyright info and name.
13. Save as .png
You are finished :)

 This tutorial is of my own creation and any resemblance to any other tuts is purely coincidental. This tutorial is for personal use only, using it for monetary gain is against our TOU's.
Supplies:
Gimp
Tube of choice. I am using the art of Emerald Eyez. This tube will be available at PSP Tubes Emporium HERE starting 3-5-12
Font- Weltron and Syncopate
Lets Begin!
-File>New 600x625.
-Change your foreground color to 5d6685 and change your background color to 37241f. Select the gradient tool. Gradient: FG TO BG (RGB). Shape: Bi-Linear. Layer>New Layer. Rename this layer gradient. Press CTRL on your keyboard and click the middle of your canvas. Drag to the left.
-Open tube. Duplicate 4 times (you should have 5 tubes total). Place each tube on a different spot of the canvas.
 -Make the top tube active. Layer>Merge Down. Merge the rest of the tube layers together. Rename this layer tube 1. Change the mode of this layer to value. Filters>Blur>Motion Blur. Change to radial and click okay. Duplicate. Rename duplicate layer tube 2. Change the mode to soft light. Lower the opacity to 40. Filters>Distorts>Shift on default settings. Repeat shift 3 times. Filters>Enhance>Unsharp Mask on default settings.
-Open tube again. Make the top layer. Rename layer main tube. Layer>Scale Layer 65%. Place to the left of canvas. Filters>Light & Shadow>Drop Shadow 2, 2, 2, black, 50.
-Make the top tube active. Layer>Merge Down. Merge the rest of the tube layers together. Rename this layer tube 1. Change the mode of this layer to value. Filters>Blur>Motion Blur. Change to radial and click okay. Duplicate. Rename duplicate layer tube 2. Change the mode to soft light. Lower the opacity to 40. Filters>Distorts>Shift on default settings. Repeat shift 3 times. Filters>Enhance>Unsharp Mask on default settings.
-Open tube again. Make the top layer. Rename layer main tube. Layer>Scale Layer 65%. Place to the left of canvas. Filters>Light & Shadow>Drop Shadow 2, 2, 2, black, 50.
-Add New Layer. Rename brush. Movebelow the tube 1 layer. Change foreground to blue from before. Select the paintbrush and brush 17. Click the right side of the canvas. Change the mode to soft light. Repeat drop shadow.
-New Layer. Move below tube 1. Rename this layer lines. Select the rectangle select tool. Make a thin selection near the middle.

-Change foreground to brown used earlier. Select the bucket fill tool and fill the selection. Select>None. Add new layer. Move new layer above lines layer. Change foreground to blue. Make a thin selection on the brown line using the rectangle select tool.
 -Bucket fill selection. Select none. Merge these line layers together. Duplicate. Select the rotate tool and click canvas. Change the angle to 90. Place to the right side of canvas.
-Make the top layer active. Select the text tool. Change the font to Weltron, Size 65, Foreground white. Type 'Take it off'. Place text on the lines. Layer>Layer To Image Size. Layer>Tranparency>Alpha To Selection. Select>Grow by 1. Add new layer. Move new layer below text layer. Bucket fill with black. Select none. Add drop shadow of 2, 4, 2, black, 80.
-Select text tool again. Change the size to 25. Now type 'Baby.....take it off'. Place this text above the other text. Lower the opacity to 50. Add drop shadow of 2, 2, 2, black, 50.
-Add new layer and move to the top. Select the magic wand and click canvas. Bucket fill with black. Select>Shrink by 7. Press delete on your keyboard. Select none. Filters>blur>Gaussian Blur on default.
-Time to add a border. Add new layer and move it to the top. Click canvas using the magic wand. Bucket fill with brown/blue gadient. Shrink by 5. Delete. Bucket fill white. Shrink by 1 and delete.
-Add name and copyright.
Avatar:
-Close of all the layers above the tube 2 layer (by clickng the eye next to each layer in layer box).
-Edit>Copy Visible.
-File>New 150x150 px. Edit>Paste As>New Layer.
-Open tube. Scale 50%. Repeat drop shadow.
-Add border like we did for the banner.
-Add your name and copyright.
All done!!!
Saturday, March 3, 2012
This tutorial is of my own creation and any resemblance to any other tuts is purely coincidental. This tutorial is for personal use only, using it for monetary gain is against our TOU's.
Supplies:
Gimp
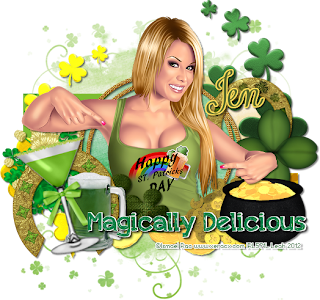
PTU kit Shake Your Shamrocks from SnS Designz @ Lollipops N Gumdrops HERE
Tube of choice. I am using the art of Ismael Rac. You must have a licesne to use his tubes. Purchase them HERE
Template 131 by me HERE
Mask 1 b by Ella from Creative Misfits HERE
Font- Contribute
Let's get started!
-Open template. Image>Scale Image 450x289 px. Image>Canvas Size 600x600 px and click center.
-Let's add papers to the template layers. Make the template layer active (see below). Right click template layer in layer box and choose alpha to selection. Open paper (see below). Right click paper layer in layer box and choose add alpha channel. Select>Invert. Press delete on your keyboard. Select>None. Delete the original template layer.Here are the template layers and which papers I used:
circle 1- paper 1
square 1 & square 2- paper5 Filters>Light & Shadow>Drop Shadow 2, 2, 2, black, 50
circle 2 & circle 3- paper 13 Filters>Repeat Drop Shadow
square 3- paper 3 repeat drop shadow
square 4- paper 6 repeat drop shadow
rect 1- paper 19 repeat drop shadow
rect 2- paper 15
-Open double circular gold frame. Move below words 2 in the layer box. Scale 50%. Place on the big green circle in the middle of the tag. Select the magic wand. Click inside the frame. Select>Grow 3. Open tube. Move above the frame layer. Scale 60%. Place inside the selection.Layer>Duplicate Layer. Move the duplicate tube below the frame. Invert & delete. Select none. Make the tube above the frame active. Repeat drop shadow. Select th eraser. Erase the bottom of this tube, so it looks like she is sticking out of the frame.
-Make words 2 active. Repeat drop shadow.
-Elements:
paddy gold 8
clovers 2
martini- Rotate -15
4 leaf clover
horseshoe- Rotate 20
horseshoe 2
paddy gold 4
paddy gold 7
beer
shamrocks
shamrocks 2
-Open paper 2. Make the bottom layer. Apply mask. Click HERE to learn how to use masks.
-Add your name and coyright and you're finished!
Friday, March 2, 2012
 Here's a tag I made using some sweet new tubes from Jaz Higgins. All 3 of these come in a pack together and will be available for purchase March 3rd @ PSP Tubes Emporium.

Sneak Peek! I made this tag with a wonferful tube from Vinegar. You can purchase this tube at PSP Tubes Emporium HERE starting 3-3-12. Check out the PTE facebook group to get some snags!
 I made this cluster frame using a beautiful kit called Feels Like Today from Sweet Cravings Scraps. If you love ladybugs this is the kit for you!!! You can grab the cluster frame HERE.
I made this tag with the frame:

Subscribe to:
Posts
(Atom)
Snag Our Blinkies


Don't Be A Pirate!

