Gimptastic Scraps Available Exclusively @

Gimptastic Scraps CT



Blog Trains
CU Licenses


 This tutorial is of my own creation and any resemblance to any other tuts is purely coincidental. This tutorial is for personal use only, using it for monetary gain is against our TOU's.
Supplies Needed:
~Gimp (any version will do).
~Tube of choice. I used the art of Elias Chatzoudis. You must have a license to use this art which you can now get HERE.
~Easter Parade PTU scrapkit which you can get from Sweet Cravings Scraps HERE.
~Mask of choice. I used WSL mask 363 which you can get HERE.
~Font of choice. I used Angelina.
Let's get started!!!!!
1. Open a new layer ( I prefer a large canvas, so I make mine 1050x656). Make your canvas transparent (Layer > Transparency > Color to alpha).
2. Open Frame 7, add drop shadow (Filters > Light & Shadow > Drop Shadow).
3. Open Paper 1 center it behind frame, remove excess paper using a cutting tool or eraser from your tool box.
4. Open your tube, add drop shadow.
5. Open and place the following elements:
Bubbles 1
Grass
Kite 1
Bunny 1
Bunny 3
Bunny 4
Bow 6
Eggs
Egg 1
Egg 2
Egg 3
CocoPop Bunny
Basket
Carrot
Chick 1
Owl 2
Flower 1
Flower 2
~Some elements may need to be sized down, use the Scale Tool in your tool box to adjust pixel size~
~Add drop shadow to all elements~
6. Open Paper 20.
7. Open mask.
8. Add mask to paper (click HERE for a tut on using masks).
9. Merge layers (Image > Merge Visible Layer).
10. crop image (Image > Autocrop Image).
11. Scale image to desired size (Image > Scale Image).
12. Add copyright info and name.
13. Save as .png
You are finished :)
 This tutorial is of my own creation and any resemblance to any other tuts is purely coincidental. This tutorial is for personal use only, using it for monetary gain is against our TOU's.
Supplies:
Gimp- Any version should work
Lovely PTU kit from Artmama called 'Spring Morning'. Check out her blog HERE to see the store she sells in
I am using the work of Suzanne Woolcott. you must have a licence to use her tubes. You can purchase them HERE
WSL_Mask229 HERE
Font- Miss Brooks
Let's get started!
-File>New. Open a canvas with the size of 600x600 pixels.
-Open embellie 04. Layer>Scale layer by 65%. Select your magic wand. Click inside the frame. Select>Grow by 5. Open paper 5. Move paper layer below the frame layer in the layer box. Scale by 50%. Select>Invert. Press delete on your keyboard. Select>None. Make the frame layer active .
Filters>Light & Shadow>Drop Shadow of 2, 2, 2, black, 50.
-Open your tube. Move under the frame layer. Place to the far left of the frame.Layer>Duplicate Layer. Select your flip tool and click the canvas to flip the duplicate tube. Move to the far right of the frame. Duplicate. Place this tube layer in the middle of the other 2 tube layers. Make the top tube layer active. Layer>Merge Down. Merge down again to merge all the tube layers together. Make the paper layer below the frame layer active. Right click the paper layer in the layer box and choose alpha to selection. Make the tube layer active. Invert and delete. Select none.
Change the mode to screen.
-Open tube again. Make the top layer. Place on top of the frame. Filters>Repeat Drop Shdaow. Duplicate. Filters>Blur>Gaussian Blur on the default settings. Change the mode to overlay.
-Open embelli 01. Scale by 50%. Move to bottom layer. Select your rotate tool. Click the canvas. In the angle box put 90 and click rotate. Right click layer in the layer box and choose layer to image size. Dulpicate and flip. Using the magic wand click inside the frame. Grow by 5.
Open paper 1. Move layer below frame layer. Right click layer in layer box and choose add alpha channel. Scale by 50%. Invert and delete. Select none. Repeat drop shadow on the frame layer. Add paper 14 to the other frame repeating the steps above.
Elements:
Add drop shadow of 2, 2, 2, black, 50 to all element layers. See my tag for placement.
23- no scale-duplicate-flip
22- no scale- flip
36- no scale
24- no scale- duplicate-flip
27- scale 75%
31- scale 50%
-Open paper 08. Move to bottom layer. Apply mask. If you don't know how to use masks click HERE. Scale mask layer by 85%.
-Add your name and copyright.
You're finished!

 This tutorial is of my own creation and any resemblance to any other tuts is purely coincidental. This tutorial is for personal use only, using it for monetary gain is against our TOU's.
Supplies Needed:
~Gimp (any version will do).
~Girly PTU scrapkit which you can get from Addictive Pleasures HERE.
~Tube of choice. I used the artwork of Celine, you must have a license to use this art which you can get HERE.
~Template of choice. I used Template 31 by Artmama which you can get HERE.
~Font of choice. I used Glider Girls.
Let's get started!!!
1. Open a new layer ( I prefer a large canvas, so I make mine 1050x656). Make your canvas transparent (Layer > Transparency > Color to Alpha).
2. Open template in PSD format, move layers of template around until they are the way you like them.
~Add paper from scrapkit to individual layers of the template (Right click on template layer in layer box > Alpha to Selection > CTRL I > Select paper layer in layer box > Delete).
These are the papers I used:
Paper 4
Paper 10
Paper 11
Notepaper
~I added noise to some of the template layers to make them look glittery (Filters > Noise > RGB Noise).
~I colorized some of the template layers to better match the scrapkit (Colors > Colorize > play with the setting until you get the desired color).
~Add drop shadow to template layers (Filters > Light & Shadow > Drop Shadow).
3. Open tube, add drop shadow.
4. Open and place the following elements:
Glitter 2
Netting
Paperclip
Paperclips
Clock
Glass Button 2
Book
Flower
Flower 2
MP3player
Headphones
Pencil
XO
Lips
~Some of the elements may need to be sized down. Using your scale tool in your tool box adjust the pixel size until element is the correct size~
~Add drop shadow to all elements~
5. Merge Layers (Image > Merge Visible Layers).
6. Crop Image (Image > Autocrop Image).
7. Scale image to desired size (Image > Scale Image).
8. Add copyright info and name
9. Save as .png
ALL DONE!!!!!!!!!!
 This tutorial is of my own creation and any resemblance to any other tuts is purely coincidental. This tutorial is for personal use only, using it for monetary gain is against our TOU's.
Supplies:
Gimp- Any version should work
Adorable PTU kit from Sweet Cravings Scraps called 'Easter Parade' HERE
Tube of choice. I am using pinuptoons. You must have a licence to use them. You can purchase them HERE
Template 63 by me HERE
Mask- WSL_Mask147 HERE
Fonts- Airplanes in the night sky
Let's get started!
-Open template. Delete the credits. Image>Scale Image 500x330 pixels. Image>Canvas Size of 600x600 pixels and make sure to press center.
-Let's add papers to the template layers. Make the template layer active (see below). Right click template layer in layer box and choose alpha to selection. Open paper (see below). Right click paper layer in layer box and choose add alpha channel. Layer>Scale Layer by 60%.
Select>Invert. Press delete on your keyboard. Select>None. Delete the original template layer.
Here are the template layers and which papers I used:
circle 1- paper 2 FIlters>Light & Shadow>Drop Shadow of 2, 2, 2, black, 50
circle 2- paper 16 Filters>Repeat Drop Shadow
square 1- paper 1 repeat drop shadow
circle 3- paper 21 repeat drop shadow
circle 4- paper 23
rect 1 & rect 2- paper 5 repeat drop shadow
square 2- paper 3 Add a drop shadow of 2, 2, 10, black, 80
-Make the words back layer active. Add a drop shadow of 2, 2, 2, black, 50.
-Open tube. Move tube below the word layers in the layer box. Scale by 80%. Repeat drop shadow.
Elements:
eggs- scale 60%
frame 2- scale 50%
egg 3- scale 25%
egg 2- scale 20%
flower 8- scale 40%
cute bunny 2- scale 25%
candy stick 1- scale 70%
candy stick 2- scale 65%
candy stick 3- scale 60%
bead shower- scale 35% NO drop shadow
cute bunny 3- scale 35%
-Open paper 24 and move to the bottom layer. Apply mask. If you don't know how to use a mask click HERE.
-Add your name and copyright and you are finished!!!!!

This tutorial is of my own creation and any resemblance to any other tuts is purely coincidental. This tutorial is for personal use only, using it for monetary gain is against our TOU's. Supplies Needed: ~Gimp (any version will do). ~Tubes of choice. I used the awesome artwork of Lix, you must have a license to use this art which you can now get HERE. ~Sweet Punky PTU scrapkit by Rieka Rafita which you get HERE. ~Mask of choice. I used Gems mask 206 which you can get from Gems Taggin Scraps HERE. ~Font of choice. I used Twelve Ton Goldfish. Let's get started!!!!! 1. Open a new layer ( I prefer a large canvas, so I make mine 1050x656). Make your canvas transparent (Layer > Transparency > Color to alpha). 2. Open Frame 1, add drop shadow (Filters > Light & Shadow > Drop Shadow). 3. Open Paper 12 center it behind frame, remove excess paper using a cutting tool or eraser. 4. Open Frame 3, add drop shadow. 5. Open Paper 8 center it behind frame, remove excess paper using a cutting tool or eraser. 6. Open tubes. I used both a full body tube and a close-up. I lowered the opacity on the close-up to 50 (at the top of the layer box you will see a bar you can slide to change the opacity of the selected layer). Add drop shadow to the full body tube. 7. Open and place the following elements: Glittery Bits Skull 2 Skull 3 Ribbon 1 Flower 1 Flower 2 Star 1 Poison Cupcake Lips Cat Wordart ~Some elements may need to be sized down. Using the Scale Tool in your tool box adjust pixels to desired size~ ~Add drop shadow to all elements~ 8. Open Paper 6. 9. Open mask. 10. Add mask to paper (click HERE for a tut on using masks) 11. Merge layers (Image > Merge Visible Layer). 12. Crop image (Image > Autocrop Image). 13. Scale image to desired size (Image > Scale Image). 14. Add copyright info and name. 15. Save as .png You are finished :)
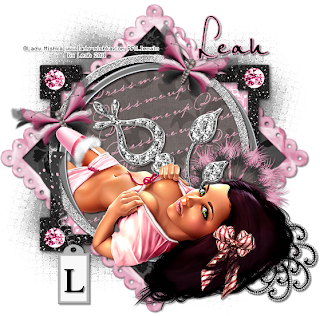
This tutorial is of my own creation and any resemblance to any other tuts is purely coincidental. This tutorial is for personal use only, using it for monetary gain is against our TOU's. Supplies: Gimp- Any version should work FTU kit from cinnamon Scraps called 'Dress Me Up' HERE Tube of Choice. I used the work of Lady Mishka. You must have a licence to use her tubes. You can purchase them HERE WSL_Mask152 HERE Font- Will & Grace and PetraScriptEF Let's Begin! -Open Gimp. Go to File>New and open a canvas with the size of 600x600 pixels. -Open frame 3. Select your rotate tool. Click the canvas. In the angle box put 90. Layer>Cale Layer by 70%. Select your magic wand. Click inside the frame. Select>grow by 3. Open paper 6. Move this layer below the frame layer in the layer box. Right click paper layer in the layer box and choose add alpha channel. Scale by 70%. Select>Invert. Press delete on your computer. Select>None. Make the frame layer active. Filters>Light & Shadow>Drop Shadow of 2, 2, 10, black, 80. -Open frame 2. Move this layerto the top. Scale by 65%. Click inside frame with magic wand. Frop by 3. Open ppaer 4 and move this layer below frame layer. Add alpha channel. Scale by 70%. Invert & delete. Select none. Add drop shadow of 2, 2, 2, black, 50 to frame layer. -Open tube. Make the top layer. Scale by 65%. Layer>Duplicate Layer. Move the duplicate tube layer below the circle frame in the layer box. Make the circle frame layer active. Using the magic wand, click indise the frame. Grow by 7. Make the duplicate tube layer active. Invert & delete. Select none. Make the original tube layer active. Select your eraser tool. Erase her bottom leg. See mine. -Open frame 5. Move to the bottom layer. Scale by 65%. Rotate by 45. Using the magic wand click inside the frame. Grow by 3. Open paper 18 and move layer below frame. Add alpha channel. Scale by 70%. Invert & delete. Select none. Repeat drop shadow on frame. Elements Add a drop shadow of 2, 2, 2, black, 50 to all element layers. See my tag for placement. flower 3- scale 50% doodle 2- scale 65% gem flower 4- scale 50% tag 3- scale 60% butterfly 1- scale 35% - rotate 25 - duplicate - flip -Using the Will & Grace font, zise 60, foreground color black, type the first letter of your name. Place it inside tag 3. Repeat drop shadow. -Open paper 17. Move layer to bottom. Apply mask. -Add your name using the PetraScriptEF font. Add your copyright and you are finished!!!!!!!
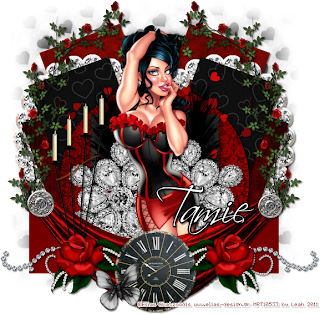 This tutorial is of my own creation and any resemblance to any other tuts is purely coincidental. This tutorial is for personal use only, using it for monetary gain is against our TOU's.
Supplies:
Gimp- Any version should work
Beautiful PTU kit from Addictive Pleasures called 'Amour' HERE
Tube of choice. I am using the work of Elias Chatzoudis. You must have a license to use his tubes. You can purchase them HERE
Template 58 by me (Leah) HERE
Mask- Vix_Mask_Valentine15 HERE
Font- Scriptina
Let's begin!
-Open template. Delete the credits. Image>Canvas Size of 600x600 pixels. Make sure to click center.
-Let's add papers to the template layers. Make the template layer active (see below). Right click template layer in layer box and choose alpha to selection. Open paper (see below). Right click paper layer in layer box and choose add alpha channel. Layer>Scale Layer by 70%.
Select>Invert. Press delete on your keyboard. Select>None. Delete the original template layer.
Here are the template layers and which papers I used:
square1- paper 6 Filters>Light and Shadow>Drop Shadow of 2, 2, 15, black, 80.
circle 1- paper 3 Filters>Repeat Drop Shadow
circle 2- paper 8 Repeat drop shadow
rect 7- paper 1
rect 1 & rect 2- paper 2 Add drop shadow of 2, 2, 2, black, 50
rect 3 & rect 4- paper 7 Repeat drop shadow
rect 5 & rect 6- paper 9 Repeat drop shadow
-Open tube. Move tube to top layer in the layer box. Scale by 85%. Place in the middle of the tag. Repeat drop shadow. Layer>Duplicate Layer. Filters>Blur>Gaussian Blur on the default settings. Change the mode to soft light.
Elements:
Add drop shadow of 2, 2, 2, black, 50 to all element layers. See my tag for placement.
35- scale 60%
34- scale 75% Right click this element layer in the layer box and choose layer to image size. Duplicate. Select your flip tool. Click canvas to flip duplicate layer.
29- scale 65%
62- no scale
1- scale 50% layer to image size duplicate and flip
11- scale 45%
22- scale 85% layer to image size duplicate and flip
65- scale 35%
33- no scale & no drop shadow layer to image size duplicate & flip
43- scale 65%
66- scale 90%
-Open paper 10. Apply mask.
Snag Our Blinkies


Don't Be A Pirate!