Gimptastic Scraps Available Exclusively @

Gimptastic Scraps CT



Blog Trains
CU Licenses




 This tutorial is of my own creation and any resemblance to any other tuts is purely coincidental. This tutorial is for personal use only, using it for monetary gain is against our TOU's.
Supplies:
Gimp- Any version should work
Cute PTU kit from Creative Intentionz called 'Obsession' which you can purchase HERE
Tube of choice. I am using the work of Elias Chatzoudis. You must have a license to use his tubes. You can purchase them HERE
Template 186 from Blissfully Beth HERE
WSL_Mask141 HERE
Font- Pea Lisel
Let's Begin!!!
-Open template. Delete the cresits and the background layer. Image>Scale Image by 500x424 pixels. Image>Canvas Size of 600x600 pixels and make sure youi press center.
-Let's add papers to the template layers. Make the template layer active (see below). Right click template layer in layer box and choose alpha to selection. Open paper (see below). Right click paper layer in layer box and choose add alpha channel. Layer>Scale Layer by 60%.
Select>Invert. Press delete on your keyboard. Select>None. Delete the original template layer.
Here are the template layers and which papers I used:
white circle- paper 5
pink circle- paper 8
rect 1- paper 3
rect 2- paper 7
rect 3- paper 1
-Make the sm black circle layer active. Colors>Colorize
Hue: 0
Saturation: 64
Lightness: 77
Filters>Noise>RGB Noise on default settings. Uncheck independent RGB.Filters>Light & Shadow Drop Shadow of 2, 2, 2, black, 50.
-Make the circle frame layer active. Colorize.
Hue: 180
Saturation: 50
Lightness: 100
Filters>Repeat Drop Shadow.
-Make the rect frame layer active. Colorize.
Hue: 311
Saturation: 92
Lightness: 22
Repeat noise and repeat drop shadow.
-Make copy of rect frame layer active. Colorize.
Hue: 125
Saturation: 82
Lightness: 81
Repeat noise and drop shadow.
-Make copy (2) of rect frame layer active. Colorize.
Hue: 180
Saturation: 85
Lightness: 76
Repeat noise and drop shadow.
-Make the wordart layer active. Add a drop shadow of 2, 2, 2, black, 25. Add the same drop shadow to the dots layer.
-Open the folded ribbon element. Make the top layer in your layer box. Scale by 60%. Place at the bottom of your tag (see mine). Add drop shadow of 2, 2, 2, black, 50.
-Open tube. Move this layer below the folded ribbon layer in the layer box. Scale by 75%. Erase the part of the tube beneath the ribbon. Repeat drop shadow.
Elements:
Add a drop shadow of 2, 2, 2, black, 50 to all element layers. See my tag for placement.
branch- no scale select your rotate too and click the canvas. In the angle box put 90 and click rotate.
bow 2- scale 35%
two hearts- scale 60% erase bottom
butterfly- scale 35%
sparkle- scale 75% no drop shadow
puppy- scale 30%
sunflower- no scale
button 2- scale 15%
-Open paper 9 and apply mask.
-Add your name and copyright and you are finished!!!!!

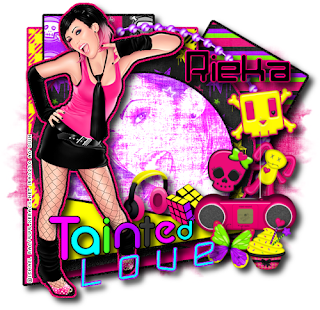
 4. Open and place the following elements:
Sparkle 2
Frame 5
Headphones
Skull 1
Skull 2
Bunny
Magic Cube
Radio
Butterfly
Cupcake
~Some of the elements may need to be sized down. Using your scale tool in your tool box adjust the pixel size until element is the correct size~
~Add drop shadow to all elements~
5. Open Paper 17
6. Open mask
7. Add mask to paper (click HERE for a tut on using masks)
8. Merge Layers (Image > Merge Visible Layers).
9. Crop Image (Image > Autocrop Image).
10. Scale image to desired size (Image > Scale Image).
11. Add copyright info and name
12. Save as .png
ALL DONE!!!!!!!!!!

 This tutorial is of my own creation and any resemblance to any other tuts is purely coincidental. This tutorial is for personal use only, using it for monetary gain is against our TOU's.
Supplies Needed:
~Gimp (any version will do).
~Misfits Attitude FTU scrapkit by Rieka Rafita which you can get from Creative Misfits HERE.
~Tubes of choice. I used the super HOT art of Celine, you must have a license to use his art which you can get HERE.
~Template of choice. I used Missy Temp 355 which you can get at Divine Intentionz HERE
~Mask of choice. I used Winni mask 22.6 (you'll find it on page 2) which you can get HERE.
~Font of choice. I used My Nerd.
Let's get started!!!
1. Open a new layer ( I prefer a large canvas, so I make mine 1050x656). Make your canvas transparent (Layer > Transparency > Color to Alpha).
2. Open template in PSD format, move layers of template around until they are the way you like them.
~Add paper from scrapkit to individual layers of the template (Right click on template layer in layer box > Alpha to Selection > CTRL I > Select paper layer in layer box > Delete).
These are the papers I used:
Paper 1
Paper 4
Paper 5
Paper 9
~I added noise to some of the template layers to make them look glittery (Filters > Noise > RGB Noise).
~I colorized some of the template layers to better match the scrapkit (Colors > Colorize > play with the setting until you get the desired color).
~Add drop shadow to template layers (Filters > Light & Shadow > Drop Shadow).
3. Open tubes, I used both a full body and close up. I lowered the opacity of the close up to 40 (at the top of the layer box you will see a bar you can slide to change the opacity of the selected layer). Add drop shadow to the full body tube.
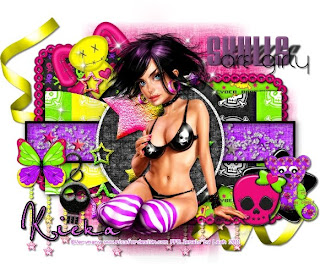
4. Open and place the following elements:
Sparkles 1
Flower 1
Flower 4
Skull 1
Skull 2
Bow 1
Star (x2)
Corset
Teddy
Beads
Cupcakes (x2)
Butterfly 1
~Some of the elements may need to be sized down. Using your scale tool in your tool box adjust the pixel size until element is the correct size~
~Add drop shadow to all elements~
5. Open Paper 7
6. Open mask
7. Add mask to paper
8. Merge Layers (Image > Merge Visible Layers).
9. Crop Image (Image > Autocrop Image).
10. Scale image to desired size (Image > Scale Image).
11. Add copyright info and name
12. Save as .png
ALL DONE!!!!!!!!!!
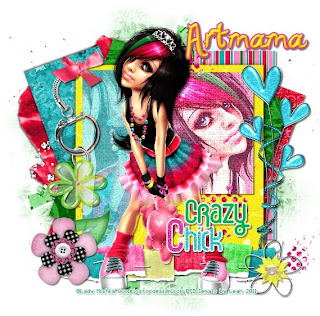 This tutorial is of my own creation and any resemblance to any other tuts is purely coincidental. This tutorial is for personal use only, using it for monetary gain is against our TOU's.
Supplies:
Gimp- Any version should work
I used a wicked PTU kit from Artmama called 'Magical Mishka'. Check out her blog HERE to see what stores she sells in.
Tube of Choice. I am using the work of Lady Mishka. You must have a license to use her tubes. You can purchase them HERE.
Template- square-2 by me (Leah) on the Creative Misfits blog HERE. (7th down)
WSL_Mask325 HEREFont- Katy Berry
Let's get started!!!!
-Open template. Delete the credits. Image>Scale Image by 500x430 pixels. Image>Canvas Size of 600x600 pixels and make sure to click center.
-Let's add some papers. Select the template layer (below). Right click the template layer in the layer box and choose alpha to selection. Open paper (below). Right click paper layer and choose add alpha channel. Layers>Scale Layer by 60%. Select>Invert. Press
delete on your keyboard. Select>None.
Square 2- paper 11- Filters>Light & Shadow>Drop Shadow of 2, 2, 15, black, 100
Square 3- paper 2- Filters>Repeat Drop Shadow
Rect 2- paper 1- Add drop shadow of 2, 2, 2, black, 50
Rect 3- paper 9- Add drop shadow of -2, -2, 2, black, 50
Square 4- paper 12- Add drop shadow of 2, 2, 2, black, 50
Rect 1- paper 14- Repeat drop shadow
Square 1- paper 16- Repeat drop shadow
-Open your tube. Place tube layer above pink paper layer in the layer box. Select the flip tool. Click your canvas to flip your tube. Layer>Dulpicate Layer. Hide the duplicate tube layer by clicking the eye next to it in the layer box. Make the visible tube active. Invert and delete.
Select none. Change the mode to grain merge. Unhide the duplicate tube layer. Place her body in the blue rectangle next to the pink square. Do exactly the same as above to add the tube to the blue rectangle. Change the opacity of this tube to 40.
-Make the crazy layer active. Set your foreground color to 09b64b. Alpha to selection. Using the bucket fill tool fill the selection. Add a new layer below this layer. Slect>Grow by 2. Fill the selection with white. Select none. Repeat drop shadow.
-Make the chick layer active. Filters>Noise>RGB Noise on the default settings. Alpha to selection. Add a new layer below. Grow by 2 and fill with white. Select none. Repeat drop shadow.
-Open the tube again. Move layer below the word art layers in the layer box. Scale by 60%. Place tube in center of the tag. Repeat drop shadow. Dulpicate. Filters>Blur>Gaussian Blur on the default settings. Change the mode to soft light.
Lower the opacity to 60.
Elements
Add drop shadow of 2, 2, 2, black, 50 to all element layers. See my tag for placement.
05- scale 85%- no drop shadow
16- scale 65%
08- no scale
39- scale 40%
23- scale 60%
14- scale 50%
35- scale 25%
37- scale 50%
38- scale 50%
-Open paper 8. Apply mask.
-Add your name and copyright and you're finished!!!!

This tutorial is of my own creation and any resemblance to any other tuts is purely coincidental. This tutorial is for personal use only, using it for monetary gain is against our TOU's. Supplies: Gimp- Any version should work Adorable PTU kit from Sweet Cravings Scraps called 'What a Feeling' HERE Tube of choice. I am using pinuptoons. You must have a license to use them. You can purchase them HERE. WSL_Mask329 HERE Font- Pea Bhea Let's Begin! Go to File New and open a canvas with the size of 500x500 pixels. Open frame 10. Layer>Scale Layer by 40%. Select your magic wand and click inside the frame. Select>Grow by 5. Open paper 9. Move paper below frame layer in the layer box. Right click paper layer in the layer box and choose add alpha channel. Scale by 40%. Select>Invert. Press delete on your keyboard. Select>None. Make frame layer active.Filters>Light and Shadow>Drop Shadow of 2, 2, 2, black, 50. -Open tube. Scale by 70%. Filters>Repeat Drop Shadow. Move to the left of the frame. Laye>Duplicate Layer. Filters>Blur>Gaussian Blur on default settings. Change mode to soft light. -Open frame 8. Move this later to the bottom in the layer box. Scale by 50%. Using the magic wand, click inside the frame. Grow by 5. Open paper 14. Move paper layer below frame layer. Add alpha channel. Invert and press delete. Select none. Repeat drop shadow on frame. -Open frame 3. Move this layer to the bottom. Scale by 50%. Click inside the frame using the magic wand. Grow by 5. Open paper 3. Move paper layer below frame layer. Add alpha channel. Scale by 50%. Invert and press delete. Select none. Repeat drop shadow on frame layer. Elements Add a drop shadow of 2, 2, 2, black, 50 to all element layers. See my tag for placement. pillow 1- scale 50% pillow 2- scale 45% flower 5- scale 50% long bow 4- scale by 40% umbrella 1- scale 50% flower 7- scale 35% flower 3- scale 25% flower 6- scale 50% cute owl- scale 15% bubbles 2- scale 50% flower 9- scale scale 60% flower 1- scale 30% Open paper 12 and move to the bottom layer. Apply mask. If you don't know how to use masks click HERE. -Add your name and proper copyrights and you are finished!!!
 This tutorial is of my own creation and any resemblance to any other tuts is purely coincidental. This tutorial is for personal use only, using it for monetary gain is against our TOU's.
Supplies Needed:
~Gimp (any version will do).
~Tube of choice. I used the artwork of Lady Mishka, you must have a license to use this art which you can now get HERE.
~Magical Mishka PTU scrapkit by Artmama Made. Please stop by her blog HERE to see what stores she sells in.
~Mask of choice. I used WSL Mask 220 which you can get HERE.
~Font of choice. I used Black Boys on Mopeds.
Let's get started!!!!!
1. Open a new layer ( I prefer a large canvas, so I make mine 1050x656). Make your canvas transparent (Layer > Transparency > Color to alpha).
2. Open embellie 15 (frame), add drop shadow (Filters > Light & Shadow > Drop Shadow).
3. Open embellie 18 (ripped paper), center it behind frame. Remove excess using your eraser or circular cutting tool from your tool box. Add drop shadow.
4. Open Paper 7, center it behind frame and behind embellie 18. Remove excess using your eraser or circular cutting tool from your tool box.
5. Open tube, add drop shadow.
6. Open and place the following elements:
embellie 5
embellie 17
embellie 19
embellie 47
embellie 4
embellie 8
embellie 35
embellie 37
embellie 36
embellie 39
embellie 12
~Some elements may need to be sized down. Using the Scale Tool in your tool box adjust pixels to desired size~
~Add drop shadow to all elements~
7. Open Paper 9.
8. Open mask.
9. Add mask to paper
10. Merge layers (Image > Merge Visible Layer).
11. Crop image (Image > Autocrop Image).
12. Scale image to desired size (Image > Scale Image).
13. Add copyright info and name.
14. Save as .png
You are finished :)
Snag Our Blinkies


Don't Be A Pirate!