Gimptastic Scraps Available Exclusively @

CDO

Gimptastic Scraps CT

TonyasTemptations
AlwaysCreations
Kiyas
Kiyas
TagsnTutsbyPam
LadyDragus
BKCDesigns

Blog Trains

FantasticallyFreeBlogTrain

CU Licenses

CapriciousCULicense
ScrapNTubesCU
AnoriesWorldCU
CreativeArtDesignCU
LaCarolitasDesignCU
ScrapsDimensionsCUEricaWilmaSensibiityCUGOFCUTheScrappingCopCU
Wednesday, February 29, 2012
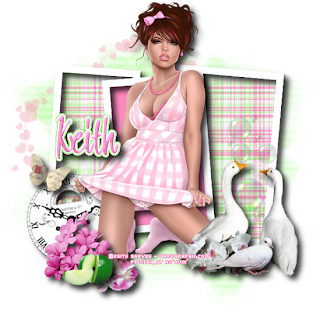
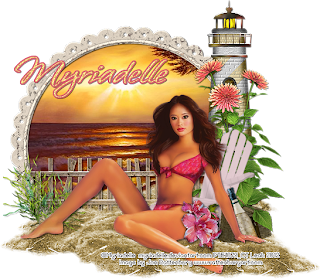
Here is a tag I made using a tube from Myriadelle. I also used an image from Jon Rattenbury. You can purchase both the tube and the image starting March 1st at PSP Tubes Emporium HERE
This tutorial is of my own creation and any resemblance to any other tuts is purely coincidental. This tutorial is for personal use only, using it for monetary gain is against our TOU's.
Supplies Needed: ~Gimp (any version will do). ~Tube of choice. I used the artwork of Keith Garvey, this tube will be available for purchase 3-1-12. You must have a license to use this art which you can get from PTE HERE. ~Summer Blossom FTU scrapkit by Twisted Summertime Designs which you can get HERE. ~Mask of choice. I used mask 19 which you can get from HorsePlay's Pasture HERE. ~Font of choice. I used 1 Snappy DNA. Let's get started!!!!! 1. Open a new layer (I prefer a large canvas, so I make mine 1050x656). Make your canvas transparent (Layer > Transparency > Color to alpha). 2. Open Frame 1, add drop shadow (Filters > Light & Shadow > Drop Shadow). 3. Open Papers 2 & 9 center them behind Frame 1, remove excess paper using a cutting tool or eraser. 4. Open tube, add drop shadow. 5. Open and place the following elements: Hearts Clock Butterfly Geese Dove Bubbles Flower 3 Flower 6 Flower 7 Apple ~Some elements may need to be sized down. Using the Scale Tool in your tool box adjust pixels to desired size~ ~Add drop shadow to all elements (except for Hearts and Bubbles)~ ~Go to Colors > Colorize > adjust until you have desired color~ 6. Open Paper 4. 7. Open mask. 8. Add mask to paper (click HERE for a tut on using masks). 9. Merge layers (Image > Merge Visible Layer). 10. Crop image (Image > Autocrop Image). 11. Scale image to desired size (Image > Scale Image). 12. Add copyright info and name. 13. Save as .png You are finished :)
Tuesday, February 28, 2012
This tutorial is of my own creation and any resemblance to any other tuts is purely coincidental. This tutorial is for personal use only, using it for monetary gain is against our TOU's. Supplies: Gimp PTU kit Taggerlicious from Kirsty's Scraps at The PSP Project HERE Tube of choice. I am using the art of Verymany. You must have a licesne to use these tubes. You can purchase them HERE Template- Miss Fabulous from Brutal Designs HERE Mask 302 from weescottslass HERE Font- Pharamacy Let's Begin! -Open template. Image>Scale Image 450x450 px. Change the x & y resolutions to 72. Image>Canvas Size 600x600 pixels and click center. -Let's add papers to the template layers. Make the template layer active (see below). Right click template layer in layer box and choose alpha to selection. Open paper (see below). Right click paper layer in layer box and choose add alpha channel. Select>Invert. Press delete on your keyboard. Select>None. Delete the original template layer.Here are the template layers and which papers I used: purple circle bottom & purple circle top- paper 9 Filters>Light & Shadow>Drop Shadow 2, 2, 2, black, 50 teal rect right- paper 7 repeat drop shadow teal rect left- paper 6 repeat drop shadow yellow rect- paper 4 repeat drop shadow purple rect- paper 7 repeat drop shadow blk circle bottom- paper 18 repeat drop shadow blk circle top- paper 15 repeat drop shadow grey square bottom- paper 8 repeat drop shadow grey square top- paper 2 repeat drop shadow -Make pink square left active. Alpha to selection. Open paper 5. Scale 50%. Place in selection. Invert & delete. Open tube. Place tube in selection. Delete. Change the mode of the tube to screen. Layer>New Layer. Invert. Change your foreground color to white. Select your bucket fill tool and fill selection. Select>Shrink 3. Delete. Select none. Repeat drop shadow. Repeat the above steps for the copy of pink square left layer, except use paper 3. -Make pink circle frame bottom active. Colors>Colorize. Change only the lightness to 100. Repeat drop shadow. Repeat for pink circle frame top. -Make pink dotted frame bottom active. Colorize. Change only the lightness to -100. Repeat drop shadow. Repeat for pink dotted frame top. -Make the fabulous layer active. Colrize. Change the lightness to -100. Make fabulous back active. Repeat drop shadow. -Make miss back active. Colorize and change the lightness to -100. Repeat drop shadow. -Open tube. Move below the word art layers in the layer box. Scale 65%. Place at the bottom of the tag. Elements: piano keys curtain 1 curtain 2 bubble halftone 2 ribbon 2 ribbon 4 charm 3 drops doodle 4 flower 4 key- Rotate 25 frame 2- rotate -20 -Open paper 16. Make the bottom layer. Apply mask. Click HERE to learn how to use masks. -Add name and copyright.
Monday, February 27, 2012

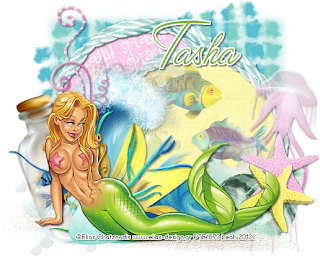
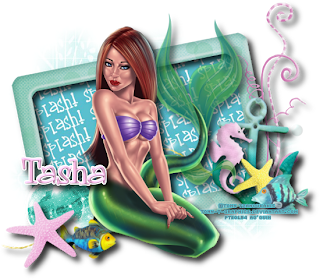
This tutorial is of my own creation and any resemblance to any other tuts is purely coincidental. This tutorial is for personal use only, using it for monetary gain is against our TOU's.
Supplies:
Gimp
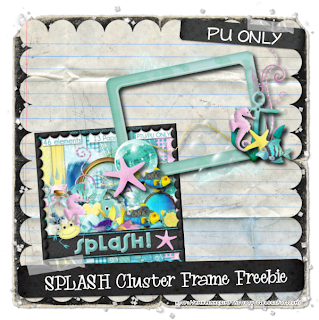
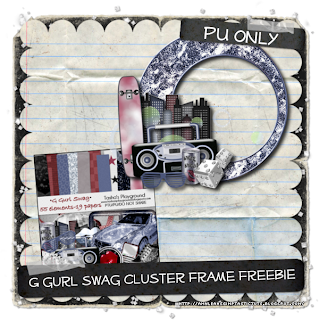
PTU kit from Tasha's Playground called Splash HERE
Tube of choice. I am using the art of Elias Chatzoudis. You must have a licesne to use his tubes. You can purchase them at PTE HERE
Mask 126 by weescotslass HERE
Let's get started!
File>New 600x600 px.
-Open tube. Layer>Scale Layer 75%. Place tag in middle of canvas. Filters>Light & Shadow>Drop Shadow 2, 2, 2, black, 50.
-Open frame 4. Move below the tube layer. Scale 65%. Open paper 5. Scale 65%. Move paper below frame Layer>Transparency>Add Alpha Channel. Select>Invert. Press delete on your keyboard. Filters>Repeat Drop Shadow.
-Open frame 4 again. Move below tube. Scale 60%. Add paper 11 to frame (repeat dteps above). Repeat drop shadow on frame.
-Open sand. Move below tube. Scale 75%. Place at bottom of tube.
-Open wave. Move under sand. Scale 75%. Place to the left of tag. Repeat drop shadow.
-Open bottle. Move below tube. Scale 75%. Select the rotate tool. Rotate -20. Place to left side of tag.
Other Elements:
flower 3
fish 3
fish 4
starfish
starfish 1
shell
shell 2
seaweed
seaweed 2
bubbles
jellyfish rotate 20
-Open paper 10. Make the bottom layer. Apply mask. Click HERE if you don't know how to use masks.
-Add your name and copyright and you're finished!
Saturday, February 25, 2012

This tutorial is of my own creation and any resemblance to any other tuts is purely coincidental. This tutorial is for personal use only, using it for monetary gain is against our TOU's.
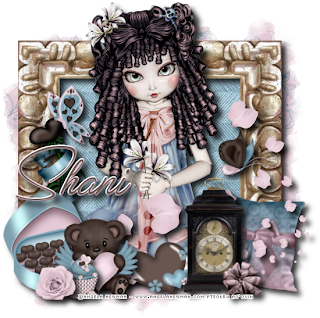
Supplies Needed: ~Gimp (any version will do). ~Tube of choice. I used the artwork of Angela Newman you must have a license to use this art which you can get from PTE HERE. ~Suzanne PTU scrapkit by Wicked Princess Scraps which you can also get from PTE HERE. ~Mask of choice. I used WSL mask 363 which you can get HERE. ~Font of choice. I used ValentinaJF. Let's get started!!!!! 1. Open a new layer ( I prefer a large canvas, so I make mine 1050x656). Make your canvas transparent (Layer > Transparency > Color to alpha). 2. Open Frame, add drop shadow (Filters > Light & Shadow > Drop Shadow). 3. Open Paper 10 center it behind frame, remove excess paper using a cutting tool or eraser. 4. Open tube, add drop shadow. 5. Open and place the following elements: Pillow Petals Heart flower ribbon Old clock Loopy bow Flower butterfly Butterfly Chocolates Teddy bear Cupcake Rose ~Some elements may need to be sized down. Using the Scale Tool in your tool box adjust pixels to desired size~ ~Add drop shadow to all elements~ 6. Open Paper 3. 7. Open mask. 8. Add mask to paper (click HERE for a tut on using masks). 9. Merge layers (Image > Merge Visible Layer). 10. Crop image (Image > Autocrop Image). 11. Scale image to desired size (Image > Scale Image). 12. Add copyright info and name. 13. Save as .png You are finished :)

This tutorial is of my own creation and any resemblance to any other tuts is purely coincidental. This tutorial is for personal use only, using it for monetary gain is against our TOU's.
Supplies Needed:
~Gimp (any version will do).
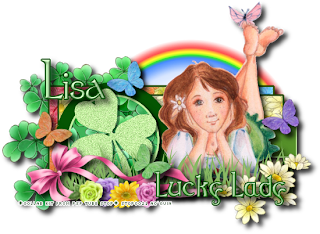
~Over the Rainbow PTU collab scrapkit which you can find @ PSP Tube Stop HERE. This kit is FULL of awesome stuff!!!! Including the tube I used in this tut.
~Tube of choice. I used one of the tubes that came with the collab kit. ~Template of choice. I used Leah's template 54 which you can get on our blog HERE.
~Font of choice. I used Stonehenge Thin.
Let's get started!!!
1. Open a new layer ( I prefer a large canvas, so I make mine 1050x656). Make your canvas transparent (Layer > Transparency > Color to Alpha).
2. Open template in PSD format, remove and move layers of template around until they are the way you like them.
~Add paper from scrapkit to individual layers of the template (Right click on template layer in layer box > Alpha to Selection > CTRL I > Select paper layer in layer box > Delete).
These are the papers I used:
Butterfly Daisies Shamrock green
~I added noise to some of the template layers to make them look glittery (Filters > Noise > RGB Noise).
~I colorized some of the template layers to better match the scrapkit (Colors > Colorize > play with the setting until you get the desired color).
~Add drop shadow to template layers (Filters > Light & Shadow > Drop Shadow).
3. Open tube (Leprechaun girl element from kit), add drop shadow.
4. Open and place the following elements: Rainbow 2 Shamrock-cluster Green grass layer 2 White daisy cluster Ribbons double bow pink Purple rose 3 Green rose 1 Pink rose 3 Yellow daisy 2 Butterfly purple Butterfly green Butterfly orange Butterfly skyblue
~Some of the elements may need to be sized down. Using your scale tool in your tool box adjust the pixel size until element is the correct size~
~Add drop shadow to all elements (except Rainbow 2)~
5. Merge Layers (Image > Merge Visible Layers).
6. Crop Image (Image > Autocrop Image).
7. Scale image to desired size (Image > Scale Image).
8. Add copyright info and name.
9. Save as .png
ALL DONE!!!!!!!!!!
Friday, February 24, 2012
This tutorial is of my own creation and any resemblance to any other tuts is purely coincidental. This tutorial is for personal use only, using it for monetary gain is against our TOU's.
Supplies:
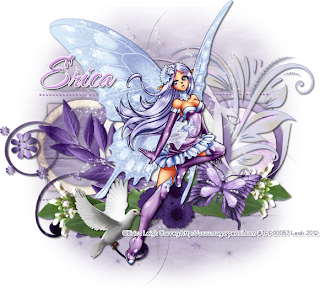
Tube of choice. I am using the art of Erica Leigh Currey. you must have a licesne to use these tubes. You can purchase the one I used at The PSP Project HERE
FTU scrap kit Flowers For You from Collab Girls Creations HERE
Template 59 by me HERE
Mask 14 from Melissaz Creationz HERE
Font- TheNaugtiGal
Let's Begin!
-Open template. Delete credits. Image>Scale Image 450x258 px. Image>Canvas Size 600x600 px. Click center.
-Let's add papers to the template layers. Make the template layer active (see below). Right click template layer in layer box and choose alpha to selection. Open paper (see below). Right click paper layer in layer box and choose add alpha channel. Layer>Scale Layer by 15%. Select>Invert. Press delete on your keyboard. Select>None. Delete the original template layer.Here are the template layers and which papers I used:
circle 1- paper etdesigns_paper1 Filters>Light & Shadow>Drop Shadow 0, 0, 10, black, 80
circle 2- paper steffi_paper01 Filters>Repeat Drop Shadow
circle 3- paper JanaO_paper3 repeat drop shadow
circle 4- paper Janett_paper01 repeat drop shadow
circle 5- paper SusanneDesigns_paper01 repeat drop shadow
circle 6- paper zuzzkap_paper01 repeat drop shadow
rect- paper JanaO_paper2 repeat drop shadow
-Open tube. Make the top later. Scale 60%. Place tube in the middle of tag. Repeat drop shadow.
Elements:
Janett: 6 (rotate 20) & 7
Jano O: 4
Susanne Designs: 11 & 15
Zuzzkap: 6
klapinka: 5
Bryanna: 5 (duplicate & flip)
Steffi: 4
Xena (bird)
-Open paper 8. Make the bottom layer. Apply mask. Click HERE to learn how to use masks.
-Add your name and copyright.
You're finished!
Thursday, February 23, 2012

This tutorial is of my own creation and any resemblance to any other tuts is purely coincidental. This tutorial is for personal use only, using it for monetary gain is against our TOU's.
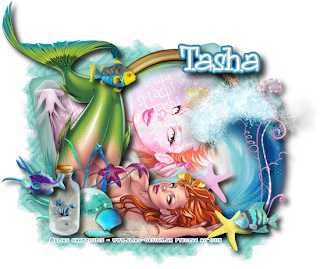
Supplies Needed: ~Gimp (any version will do). ~Tube of choice. I used the artwork of Elias Chatzoudis, you must have a license to use this art which you can get from PSP Tubes Emporium HERE. ~Splash PTU scrapkit by Tasha's Playground which you can find HERE. ~Mask of choise. I used WSL mask 363 which you can get HERE. ~Font of choice. I used 0 Whoa DNA. Let's get started!!!!! 1. Open a new layer ( I prefer a large canvas, so I make mine 1050x656). Make your canvas transparent (Layer > Transparency > Color to alpha). 2. Open Frame 1, add drop shadow (Filters > Light & Shadow > Drop Shadow). 3. Open Paper 5 center it behind frame, remove excess paper using a cutting tool or eraser. 4. Open tubes. I used both a full body tube and a close-up. ~Take the close up layer and move it (in your layer box) under Frame 1, but above the paper. Change the Mode on the tube to Hardlight (at the top of your Layer Box you will see where it says Mode, click the arrow and select Hardlight from the drop down menu). Remove excess tube layer using a cutting tool or eraser. ~Add drop shadow to the full body tube. 5. Open Porthole element and place it (in your layer box) above the close up tube but under the full body layer. Do not added drop shadow. 6. Open and place the following elements: Wave Starfish Starfish 2 Fish 1 Fish 3 Fish 4 Jellyfish Seaweed Seaweed 2 Marble Sand Bottle Clamshell ~Some elements may need to be sized down. Using the Scale Tool in your tool box adjust pixels to desired size~ ~Add drop shadow to all elements (except Sand)~ 7. Open Paper 13. 8. Open mask. 9. Add mask to paper (click HERE for a tut on using masks). 10. Merge layers (Image > Merge Visible Layer). 11. Crop image (Image > Autocrop Image). 12. Scale image to desired size (Image > Scale Image). 13. Add copyright info and name. 14. Save as .png You are finished :)
This tutorial is of my own creation and any resemblance to any other tuts is purely coincidental. This tutorial is for personal use only, using it for monetary gain is against our TOU's.
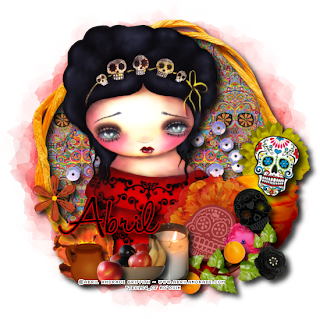
Supplies Needed: ~Gimp (any version will do). ~Tube of choice. I used the artwork of Abril Andrade Griffith, this tube comes in a pack of 2 tubes. You must have a license to use this art which you can get from PTE HERE. ~La Catrina FTU scrapkit by Amigas Del Scrap which you can get HERE. *This kit is full sized* ~Mask of choice. I used mask 9 which you can get from HorsePlay's Pasture HERE. ~Font of choice. I used HaloHandletter Medium. Let's get started!!!!! 1. Open a new layer (I prefer a large canvas, so I make mine 1050x656). Make your canvas transparent (Layer > Transparency > Color to alpha). 2. Open Element 35 (frame), add drop shadow (Filters > Light & Shadow > Drop Shadow). 3. Open Paper 2 center it behind frame, remove excess paper using a cutting tool or eraser. 4. Open tube. ~You will need to duplicate this tube so that you have 2 (at the bottom of your layer box click on the blue box. This will give you 2 tube layers). ~Select the top tube layer in your tool box. Add Gaussian Blur (Filters > Blur > Gaussian Blur, use default settings). ~On that same tube layer change the mode to Overlay (at the top of your Layer Box you will see where it says Mode, click the arrow and select Overlay from the drop down menu). ~Add drop shadow to bottom tube layer. 5. Open and place the following elements: 4 10 12 29 30 39 43 44 45 46 47 49 53 64 74* 87 ~Some elements may need to be sized down. Using the Scale Tool in your tool box adjust pixels to desired size~ ~Add drop shadow to all elements~ *Element 74 has been colorized to match the tag. ~Go to Colors > Colorize > adjust until you have desired color~ 6. Open Paper 35. 7. Open mask. 8. Add mask to paper (click HERE for a tut on using masks). 9. Merge layers (Image > Merge Visible Layer). 10. Crop image (Image > Autocrop Image). 11. Scale image to desired size (Image > Scale Image). 12. Add copyright info and name. 13. Save as .png You are finished :)
This tutorial is of my own creation and any resemblance to any other tuts is purely coincidental. This tutorial is for personal use only, using it for monetary gain is against our TOU's.
Supplies:
gimp
Tube of choice. I am using the art of MrsHomerLynn. You must have a license to use these tubes. You can purchase this tube starting 2-24-12 at PSP Tubes Emporium HERE
FTU kit from Digicats (and dogs) called Love My Pet HERE Mask 358 from weescotslass HERE
Font- Yesteryear
Let's begin!
-File>New 600x600 pixels.
-Open frame 8. Layer>Scale Layer 65%. Select the magic wand. Click inside the frame. Select>Grow by 5. Open paper 22 and move below the frame in the layer box. Layer>Transparency>Add Alpha Channel. Select>Invert. Press delete on your keyboard. Select>None. Make the frame active. Filters>Light & Shadow>Drop Shadow 2, 2, 2, black, 50.
-Open tube. Make the top layer. Scale 65%. Place inthe middle of frame. Filters>Repeat Drop Shadow.
Elements:
pet bed
paper hearts
ribbon 3
toy mouse 2
fish bones 2
-Layer>New Layer. Move to the bottom. Change your foreground color to 946e49. Select your bucket fill tool and fill canvas. Apply mask. Click HERE to learn how to use masks. Scale 75%.
-Add your name and comyright.
All done!

This tutorial is of my own creation and any resemblance to any other tuts is purely coincidental. This tutorial is for personal use only, using it for monetary gain is against our TOU's.

Supplies Needed:

~Gimp (any version will do).

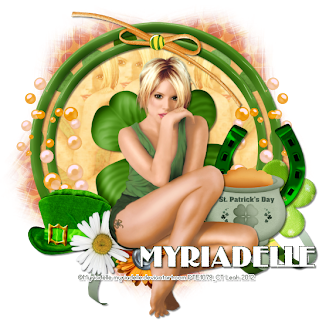
~Tube of choice. I used the artwork of Myriadelle you must have a license to use this art which you can get from PTE HERE.

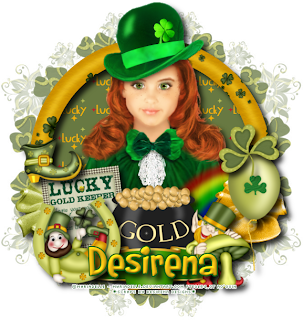
~Golden & Greenish PTU scrapkit by Desirena Designs which you can also get from PTE HERE. This kit will be available for purchase 2-22-12.

~Mask of choice. I used St. Pats mask 2 by Melissa which you can from Creative Misfits blog HERE.

~Font of choice. I used Rumpelstiltskin.

Let's get started!!!!!

1. Open a new layer ( I prefer a large canvas, so I make mine 1050x656). Make your canvas transparent (Layer > Transparency > Color to alpha).

2. Open Frame 1, add drop shadow (Filters > Light & Shadow > Drop Shadow).

3. Open Paper 6 center it behind frame, remove excess paper using a cutting tool or eraser.

4. Open tube.

~You will need to duplicate this tube so that you have 2 (at the bottom of your layer box click on the blue box. This will give you 2 tube layers).

~Select the top tube layer in your tool box. Add Gaussian Blur (Filters > Blur > Gaussian Blur, use default settings).

~On that same tube layer change the mode to Overlay (at the top of your Layer Box you will see where it says Mode, click the arrow and select Overlay from the drop down menu).

~Add drop shadow to bottom tube layer.

5. Open and place the following elements:

Rainbow
Flower 1
Flower 2
Gold keeper
Gold
Banner
Balloon 3
Shoe
Leprechaun
Leprechaun 2
Clover 2

~Some elements may need to be sized down. Using the Scale Tool in your tool box adjust pixels to desired size~

~Add drop shadow to all elements (except Rainbow)~

6. Open Paper 2.

7. Open mask.

8. Add mask to paper (click HERE for a tut on using masks).

9. Merge layers (Image > Merge Visible Layer).

10. Crop image (Image > Autocrop Image).

11. Scale image to desired size (Image > Scale Image).

12. Add copyright info and name.

13. Save as .png

You are finished :)
This tutorial is of my own creation and any resemblance to any other tuts is purely coincidental. This tutorial is for personal use only, using it for monetary gain is against our TOU's.
Supplies:
Tube of choice. I am using the art of Jaz Higgins. You must have a license to use these tubes. You can purchase this tube at PSP Tubes Emporium HERE on 2-22-12.
Texture 68 by Sirius HERE
Water brushes by Redstock HERE. Get the gimp version of brushes HERE.
Fonts- Will&Grace and Signerica Fat
Let's begin!
-File>New 600x225 pixels.
-Layer>New Layer. Name this layer gradient 1. Pick 2 colors from your tube. I set my foreground to 2d98cc and my background to c13348. Select the gradient tool. Gradient: FG TO BG (RGB). Shape: Radial. While pressing CTRL on your keyboard, click the middle of your canvas with your mouse and drag all the way to the left.
-Add new layer. Make the top layer. Name this layer gradient 2. Flip your foreground and background colors by click the arrow by the colors in your tool box. Change the shape of your gradient to Bi-Linear. While pressing CTRL, click the middle of your canvas and drag up. Changethe mode of this layer to value.
-Open texture. Name this layer texture. Make your top layer. Layer>Scale Layer 27%. Change the mode to overlay.
-Opem tube. Make the top layer. Name layer tube. Scale 50%. Place in the middle of tag. Filters>Light & Shadow>Drop Shadow 2, 2, 2, black, 50. Layer>Duplicate Layer. Filters>BLur>Gaussian Blur on default. Change mode to Hard Light and lower the opacity to 50. Merge the tube layers together by going to Layer>Merge Down.
-Add new layer. Move below the gradient 2 layer. Name layer brush 1. Set foreground color to the blue we used earlier. Select your paintbrush. Using water 15 brush, click canvas.
-Add new layer. Name brush 2. Move above brush 1 layer. Set foreground color to pink used earlier. Using water 8 brush, click canvas. Change the mode to overlay and repeat drop shadow.
-Add new layer. Name rect 1. Move below the tube layer. Select the rectangle select tool. Make a selection near the bottom of your tag. (See picture below)
Set foreground to white. Select the bucket fill tool and fill selection. Lower the opacity to 50. Select>Shrink by 5. Add new layer. Name rect 2. Add gradient using the 2 color you picked earlier. Filters>Noise>RGB Noise on default. Select>None. Add drop shadow of 1, 1, 5, black, 50.
-Select the text tool. Font: will&grace. Size: 30. Foreground: white. Type 'Under The Sea'. Place text on top of noise layer. Duplicate. Move the duplicate text to the other side of the tube. Merge text layers together. Add drop shadow of 2, 2, 2, black, 50.
-Let's add the border. Add new layer. Move tothe top. Bucket fill with white. Layer>Transparency>Alpha To Selection. Shrink by 5. Press delete on keyboard. Add new layer. Fill with gradient. Repeat noise. Shrink by 3 & delete. Add new layer. Fill with white. Shrink by 1 & delete. Select none.
-Add your name with the signerica fat font. Also add copyright.
-Save as png.
Avatar:
On original image, close off all layers above the texture layer (click eye next to each layer).
-Edit>Copy Visible.
-File>New 150x150 pixels.
Edit>Paste As>New Layer. Open tupbe. Make the top layer. Scale 30%. Place in middle of canvas. Repeat drop shadow. Duplicate. Repeat gaussian blur. change the mode to hard light and lower the opacity to 50.
-New layer. Move to the top. Fill with white. Alpha to selection. Shrink by 2. Delete. Add new layer. Fill with gradient. Repeat noise. Shrink by 2. Delete. Add new layer. Fill with white. Shrink by 1. Delete. Select none.
-Add name and copyright.
All finished!
Sunday, February 19, 2012

This tutorial is of my own creation and any resemblance to any other tuts is purely coincidental. This tutorial is for personal use only, using it for monetary gain is against our TOU's.
Supplies:
Gimp
PTu scrap kit from A Taggers Scrap called Dark Romance HERE
Tube of choice. I am using the art of Misticheskaya. You can purchase these tubes at Pics For Design HERE
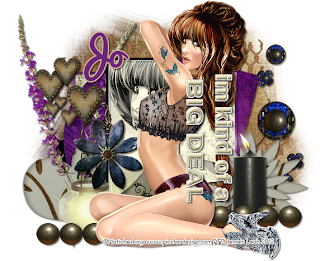
Template- I'm Kind Of A Big Deal from Crazy Cakes Scraps HERE
Mask 141 from weescotslass HERE
Let's Begin!
-Open template. Delete credits. Image>Scale Image 450x450 pixels. Image>Canvas Size 600x600 pixels and click center.
-Let's add papers to the template layers. Make the template layer active (see below). Right click template layer in layer box and choose alpha to selection. Open paper (see below). Right click paper layer in layer box and choose add alpha channel. Layer>Scale Layer by 60%.Select>Invert. Press delete on your keyboard. Select>None. Delete the original template layer.Here are the template layers and which papers I used:
half circle- paper 11
lrgerect- paper 19
sq 2- paper 14 Filters>Light & Shadow>Drop Shadow 2, 2, 2, black, 50
circle 2- paper 1
sq 1- paper 23 Filters>Repeat Drop Shadow
circle 1- paper 4 repeat drop shadow
long rect- paper 8 repeat drop shadow
-Make the rectangle center layer active. Alpha to selection. Open paper 2. Add alpha channel. Invert & Delete. Open tube. Place in the selection. Delete. Select none. Change the mode to value.
-Make the wart layer active. Colors>colorize Hue: 282 saturation: 45 Lightness: 19. Filters>Decor>Add Bevel. Uncheck work on copy. Repeat drop shadow on word back.
-Make the rectangle layer active. Colorize. Change only the lightness to -100. Repeat drop shadow.
-Make glitter frame active. Colorize- change only lightness to 100. Repeat Drop Shadow.
-Make the frame layer active. Colorize- Hue: 292 Saturation: 50 Lightness: -21. Repeat drop shadow.
-Open tube again. Move below the word art layers. Scale 60%. Place in the middle of tag. Repeat drop shadow.
Elements:
beads 1
beads 2
heart 1- Rotate -25
wooden heart 2
chain wire
chandle 1
flower 4
flower 15
metal flower 3
lantern
-Open paper 4. make the bottom layer. Apply mask. Click HERE to learn how to use masks.
-Add your name and copyright.
All done!
Saturday, February 18, 2012
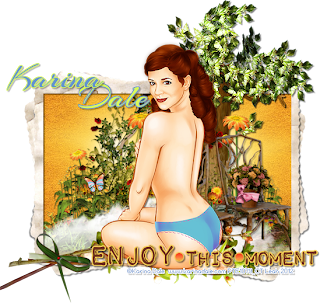
I made this tag with a beautiful tube from Karina Dale. This tube is coming soon to PSP Tubes Emporium HERE. You can grab extras in the PTE Facebook group :)
This tutorial is of my own creation and any resemblance to any other tuts is purely coincidental. This tutorial is for personal use only, using it for monetary gain is against our TOU's.
Supplies Needed: ~Gimp (any version will do). ~Tube of choice. I used the artwork of Unholy Vault Designs, you must have a license to use this art which you can get @ PSP Tubes Emporium HERE. ~Down the Rabbit Hole FTU scrapkit by PolkaDot Scraps which you can get HERE. ~Font of choice. I used 0 Whoa DNA. Let's get started!!!!! 1. Open a new layer ( I prefer a large canvas, so I make mine 1050x656). Make your canvas transparent (Layer > Transparency > Color to alpha). 2. Open Frame 2, I tilted the frame slightly using the Rotate Tool in the tool box. Add drop shadow (Filters > Light & Shadow > Drop Shadow). 3. Open Paper 5 center it behind frame, remove excess paper using a cutting tool or eraser. 4. Open tube, add drop shadow. *I also used the mushroom layer that came along with the tube* 5. Open and place the following elements: Element 2 Element 4 Element 5 Element 7 Element 10 Element 11 Element 16 Element 20 Element 25 Element 27 Element 31 Element 32 Element 35 ~Some elements may need to be sized down. Using the Scale Tool in your tool box adjust pixels to desired size~ ~Add drop shadow to all elements~ 6. Open Frame 6, place it behind Frame 2/Paper 5. This will give the effect of a layer mask. 7. Merge layers (Image > Merge Visible Layer). 8. Crop image (Image > Autocrop Image). 9. Scale image to desired size (Image > Scale Image). 10. Add copyright info and name. 11. Save as .png You are finished :)
Thursday, February 16, 2012
This tutorial is of my own creation and any resemblance to any other tuts is purely coincidental. This tutorial is for personal use only, using it for monetary gain is against our TOU's.
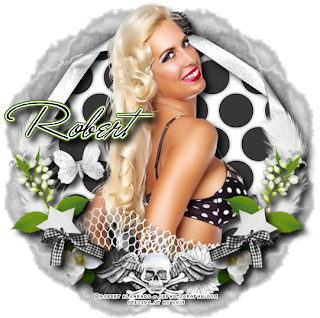
Supplies Needed: ~Gimp (any version will do). ~Tube of choice. I used the artwork of Robert Alvarado you must have a license to use this art which you can get from PTE HERE. ~Treasured PTU scrapkit by Chichi Designz which you can get from Lollipops N Gumdrops HERE. ~Mask of choice. I used WSL mask 363 which you can HERE. ~Font of choice. I used Jey. Let's get started!!!!! 1. Open a new layer ( I prefer a large canvas, so I make mine 1050x656). Make your canvas transparent (Layer > Transparency > Color to alpha). 2. Open Frame 3, add drop shadow (Filters > Light & Shadow > Drop Shadow). 3. Open Paper 6 center it behind frame, remove excess paper using a cutting tool or eraser. 4. Open tube. ~You will need to duplicate this tube so that you have 2 (at the bottom of your layer box click on the blue box. This will give you 2 tube layers). ~Select the top tube layer in your tool box. Add Gaussian Blur (Filters > Blur > Gaussian Blur, use default settings). ~On that same tube layer change the mode to Overlay (at the top of your Layer Box you will see where it says Mode, click the arrow and select Overlay from the drop down menu). ~Add drop shadow to bottom tube layer. 5. Open and place the following elements: Fire Coins Coins 1 Flag 2 Barrel Crate Skull 1 Beware sign Candles Gold Book Lock Key Butterfly ~Some elements may need to be sized down. Using the Scale Tool in your tool box adjust pixels to desired size~ ~Add drop shadow to all elements (except Fire and Skull 1)~ 6. Open Paper 7. 7. Open mask. 8. Add mask to paper (click HERE for a tut on using masks). 9. Merge layers (Image > Merge Visible Layer). 10. Crop image (Image > Autocrop Image). 11. Scale image to desired size (Image > Scale Image). 12. Add copyright info and name. 13. Save as .png You are finished :)
This tutorial is of my own creation and any resemblance to any other tuts is purely coincidental. This tutorial is for personal use only, using it for monetary gain is against our TOU's.
Supplies-
Gimp
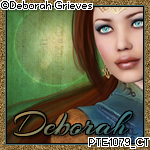
Tube of choice. I am using the art of Deborah Grieves. You must have a license to use her tubes. You can purchase this tube tonight at PSP Tubes Emporium HERE
Texture from freaky665 HERE (I used texture 02)
Font- Arizona
Let's begin!
-File>new 600x225 px.
-Change your foreground color to 426870. Change your background color to 8a6c3c. Layer>new Layer. Renmae this layer GRADIENT 1. Select the gradient tool. Set it to FG TO BG (RGB) and Radial. While pressing ctrl, click the center of your canvas and drag all the way to the left.
-Add new layer. Rename layer GRADIENT 2. Make your top layer. We are going to add another gradient. Change it to linear. Click the top left corner of your canvas and drag to the bottom right corner. Change the mode of this layer to overlay.
-Open texture. Rename this layer TEXTURE. Move this layer below your gradient 2 layer. Select the rotate tool. Click canvas. In the angle box put 90. Layer>Scale Layer 21%. Change the mode to multiply.
-Open tube close up. Rename this layer TUBE 1. Move this layer below the texture layer. Place to the far left. Change the mode to value. Lower the opacity to 60.
-Open full boy tube. Rename layer TUBE 2. Move layer below texture layer. Place to the far right. Change the mode to overlay.
-Open tube close up again. Make the top layer. Rename layer MAIN TUBE. Scale 75%. Place in the middle. Filters>Light & Shadow>Drop Shadow 2, 2, 2, black, 50. Layer>Duplicate Layer. Filters>Blur>Gaussian Blur on default. Change the mode to overlay and lower the opacity to 60.
-Add new layer. rename this layer LIGHT. Move this layer below the tube 2 layer. Filters>Light & Shadow>Gradient Flare on default. Repeat.
-Add new layer. Make the top layer. Change your foreground to 8a6c3c. using the bucket fill tool, fill your canvas. Filters>Noise>RGB Noise on default. Layer>Transparency>Alpha To Selection. Select>Shrink 5. Press delete on your keyboard. Add new layer. Bucket fill with 2b5b64. Shrink by 1 and delete. Add new layer. Fill with black. Shrink by 1 and delete. Select>none.
-Add your name and copyright.
Avatar:
Close of all the layers above the gradient 2 layer (click eye next to layer in layer box). Edit>Copy Visible.
-File>New 150x150 px.
-Edit>Paste As>New Layer. Layer>Layer To Image Size.
-open tube. Make the top layer. Place to the far right.
-Add border. Repeat the steps above for adding border to banner.
-Add your name and copyright.
All done!
Wednesday, February 15, 2012
This tutorial is of my own creation and any resemblance to any other tuts is purely coincidental. This tutorial is for personal use only, using it for monetary gain is against our TOU's.
Supplies:
Gimp
Tube of choice. I am using the art of Myriadelle. You must have a license to use these tubes. this tube comes in a bunch of layers-non holiday layers included! You can purchase this tube starting today at PSP Tubes Emporium HERE
FTU kit from PolkaDot Scraps called O'Lucky HERE
Mask 141 from weescotslass HERE
Font- AsukaCapsSSK
Let's get started!
-Filte>New 600x600 px.
-Open frame 4. Layer>Scale Layer 70%. Select the magic wand. Click inside the frame. Select>Grow 5. Open paper 7 and move below frame layer. Layer>Transparency>Add Alpha Channel. Select>Invert. Press delete on your keyboard. Select>none. Make the frame active. Filter>Light & Shadow>Drop Shadow 2, 2, 2, black, 50.
-Open frame 4 again. Make the bottom layer. Scale 80%. Add paper 6 (the same way we added paper 7 to other frame). Repeat drop shadow on frame.
-Open tube. Move below the top frame layer in the layer box. Place to the far left. Layer>Duplicate Layer. Layer>Layer To Image Size. Select the flip tool and click canvas. Duplicate. Move this duplicate to the left. Duplicate. Layer to image size. Flip.
-Click the top tube layer in the layer box and go to Layer>Merge Down. Merge all the tube layers together. Using the eraser tool, erase parts of the tube sticking outside of the frame.
-Change the mode of this tube layer to overlay.
-Open tube again. Make the top layer. Scale 85%. Place in middle of frame.
Other Elements:
scatter 1
button 2
flower 2, 4, 5
ribbon 2, 3
clover 3
pot 1
hat 1
horseshoe 1
-Open paper 5. Make the bottom layer. Apply mask. Click HERE to learn how to use masks. -Add your name and copyright.
All finished!
Tuesday, February 14, 2012
We just wanted to give a shout-out to our girl Shani @ Wicked Princess Scraps. She has some amazing kits!!!!! I swear she cranks them out daily (just kidding, but she does have TONS of awesome kits). Click HERE to check out a few of her latest creations.
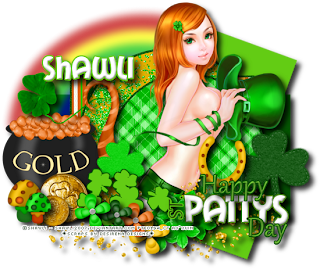
This tutorial is of my own creation and any resemblance to any other tuts is purely coincidental. This tutorial is for personal use only, using it for monetary gain is against our TOU's.
Supplies Needed:
~Gimp (any version will do).
~Lucky Irish PTU scrapkit by Desirena Designs which you can find @ PSP Tubes Emporium HERE. This kit will be available 2-15-12.
~Tube of choice. I used the artwork of Shawli, you must have a license to use this art. You can also purchase this art from PTE HERE.This tube will be available 2-15-12.
~Template of choice. I used Leah's template 55 which you can get on our blog HERE.
~Font of choice. I used Mail Ray Stuff.
Let's get started!!!
1. Open a new layer ( I prefer a large canvas, so I make mine 1050x656). Make your canvas transparent (Layer > Transparency > Color to Alpha).
2. Open template in PSD format, remove and move layers of template around until they are the way you like them.
~Add paper from scrapkit to individual layers of the template (Right click on template layer in layer box > Alpha to Selection > CTRL I > Select paper layer in layer box > Delete).
These are the papers I used:
Paper 1
Paper 5
Paper 8
~I added noise to some of the template layers to make them look glittery (Filters > Noise > RGB Noise).
~I colorized some of the template layers to better match the scrapkit (Colors > Colorize > play with the setting until you get the desired color).
~Add drop shadow to template layers (Filters > Light & Shadow > Drop Shadow).
3. Open tube, add drop shadow.
4. Open and place the following elements: Rainbow Glitter 2 Pot of Gold Coin 1 Coin 2 Shamrock 1 Shamrock 2 Mushroom Mushroom 2 Clover Clovers Doodle 2 Horseshoe Flower 1 Flower 2 Flower 3 Flower 4
~Some of the elements may need to be sized down. Using your scale tool in your tool box adjust the pixel size until element is the correct size~
~Add drop shadow to all elements (except rainbow)~
5. Merge Layers (Image > Merge Visible Layers).
6. Crop Image (Image > Autocrop Image).
7. Scale image to desired size (Image > Scale Image).
8. Add copyright info and name.
9. Save as .png
ALL DONE!!!!!!!!!!
Monday, February 13, 2012
This tutorial is of my own creation and any resemblance to any other tuts is purely coincidental. This tutorial is for personal use only, using it for monetary gain is against our TOU's.
Supplies Needed: ~Gimp (any version will do). ~Tube of choice. I used the artwork of Robert Alvarado, you must have a license to use this art which you can get @ PSP Tubes Emporium HERE. ~Black & White FTU scrapkit by Mirella which you can get on the Creative Misfits blog HERE. ~Mask of choice. I used mask 7 which you can get from HorsePlay's Pasture HERE. ~Font of choice. I used Monika Italic. Let's get started!!!!! 1. Open a new layer ( I prefer a large canvas, so I make mine 1050x656). Make your canvas transparent (Layer > Transparency > Color to alpha). 2. Open Element 19 (frame), add drop shadow (Filters > Light & Shadow > Drop Shadow). 3. Open Paper 5 center it behind frame, remove excess paper using a cutting tool or eraser. 4. Open tube, add drop shadow. 5. Open and place the following elements: Element 4 Element 5 Element 23 Element 31 (x2) Element 45 Element 50 Element 52 (x2) Element 67 (x2) Element 71 (x2) ~Some elements may need to be sized down. Using the Scale Tool in your tool box adjust pixels to desired size~ ~Add drop shadow to all elements~ 6. Open Paper 18. 7. Open mask. 8. Add mask to paper (click HERE for a tut on using masks). 9. Merge layers (Image > Merge Visible Layer). 10. Crop image (Image > Autocrop Image). 11. Scale image to desired size (Image > Scale Image). 12. Add copyright info and name. 13. Save as .png You are finished :)

This tutorial is of my own creation and any resemblance to any other tuts is purely coincidental. This tutorial is for personal use only, using it for monetary gain is against our TOU's.
Supplies:
Gimp
PTU kit from Jen's Sweet Temptations called Kiss-able. You can purchase this kit at Lollipops N Gumdrops HERE
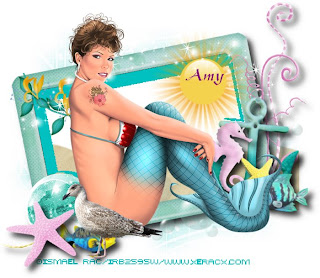
Tube of choice. I am using the art of Ismael Rac. You must have a license to use his tubes. You can purchase them HERE
Collab Template from Deb & Paula Rose (I used Temp 1-1) HERE
Mask 302 from weescotslass HERE
Font- Yesteryear
Lets get started!
-Open template. Image>Scale Image 450x450 px. Image>Canvas Size 600x600 px and click center.
-Let's add papers to the template layers. Make the template layer active (see below). Right click template layer in layer box and choose alpha to selection. Open paper (see below). Right click paper layer in layer box and choose add alpha channel. Layer>Scale Layer by 60%.Select>Invert. Press delete on your keyboard. Select>None. Delete the original template layer.Here are the template layers and which papers I used:
raster 4- paper 13
raster 3- paper 4
raster 2- paper 12
raster 1- paper 2 Filters>Light & Shadow>Drop Shadow 2, 2, 2, black, 50
raster 7- paper 11 Filters>Repeat Drop Shadow
raster 6- paper 9 repeat drop shadow
raster 5- paper 1 repeat drop shadow
raster 10- paper 14
-Open tube. Scale 75%. Place in middle of tag. Repeat drop shadow. Layer>Duplicate Layer. Filters>Blur>Gaussian Blur on default. Change the mode to soft light and lower the opacity to 65.
Elements:
heart
heart 1
doodle 1
balloons
curtain
envelope
cupcake
brad 1
heart frame 2
-Open paper 6. Make the bottom layer. Apply mask. Click HERE to learn how to use masks.
-Add your name and copyright.
You're finished!
Saturday, February 11, 2012
This tutorial is of my own creation and any resemblance to any other tuts is purely coincidental. This tutorial is for personal use only, using it for monetary gain is against our TOU's.
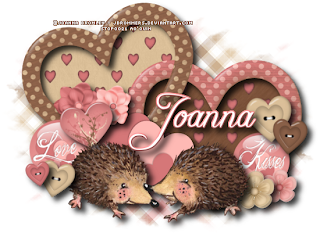
Supplies Needed: ~Gimp (any version will do). ~Tube of choice. I used the artwork of Joanna Bromley you must have a license to use this art which you can get @ PSP Tube Stop HERE. ~Love Potion FTU scrapkit by Capricious Scraps which you can get HERE. ~Mask of choice. I used WSL mask 302 which you can get HERE. ~Font of choice. I used Freebooter Script. Let's get started!!!!! 1. Open a new layer ( I prefer a large canvas, so I make mine 1050x656). Make your canvas transparent (Layer > Transparency > Color to alpha). 2. Open Frame 9, add drop shadow (Filters > Light & Shadow > Drop Shadow). 3. Open Papers 9 & 10 center them behind frame, remove excess paper using a cutting tool or eraser. 4. Open tube, add drop shadow. 5. Open and place the following elements: Glass button 2 Glass button 3 Glass button 6 Flower 1 Flower 2 Flower 3 Flower 4 Heart cluster Button 1 Button 2 Button 4 (x2) ~Some elements may need to be sized down. Using the Scale Tool in your tool box adjust pixels to desired size~ ~Add drop shadow to all elements~ 6. Open Paper 4. 7. Open mask. 8. Add mask to paper (click HERE for a tut on using masks). 9. Merge layers (Image > Merge Visible Layer). 10. Crop image (Image > Autocrop Image). 11. Scale image to desired size (Image > Scale Image). 12. Add copyright info and name. 13. Save as .png You are finished :)

This tutorial is of my own creation and any resemblance to any other tuts is purely coincidental. This tutorial is for personal use only, using it for monetary gain is against our TOU's.
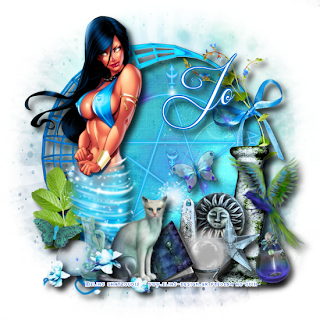
Supplies Needed: ~Gimp (any version will do). ~Tube of choice. I used the artwork of Elias Chatzoudis you must have a license to use this art which you can get from PTE HERE. ~Mystical PTU scrapkit by A Taggers Scrap which you can get HERE. ~Mask of choice. I used bling mask Ella 1 which you can get from Creative Misfits HERE. ~Font of choice. I used Respective. Let's get started!!!!! 1. Open a new layer ( I prefer a large canvas, so I make mine 1050x656). Make your canvas transparent (Layer > Transparency > Color to alpha). 2. Open Frame 6, add drop shadow (Filters > Light & Shadow > Drop Shadow). 3. Open Paper 13 center it behind frame, remove excess paper using a cutting tool or eraser. 4. Open tube. ~You will need to duplicate this tube so that you have 2 (at the bottom of your layer box click on the blue box. This will give you 2 tube layers). ~Select the top tube layer in your tool box. Add Gaussion Blur (Filters > Blur > Gaussion Blur, use default settings). ~On that same tube layer change the mode to Overlay (at the top of your Layer Box you will see where it says Mode, click the arrow and select Overlay from the drop down menu). ~Add drop shadow to bottom tube layer. 5. Open and place the following elements: Glyph 3 Flowers 3 Flowers 4 Pedestal Bird Cat Butterfly Butterfly 2 Bottle 2 Bottle 3 Book Glass ball Crystal ball Deco 5 Deco 7 Star Sun Leaves ~Some elements may need to be sized down. Using the Scale Tool in your tool box adjust pixels to desired size~ ~Add drop shadow to all elements (except Glyph 3 & Deco 7)~ 6. Open Paper 4. 7. Open mask. 8. Add mask to paper (click HERE for a tut on using masks). 9. Merge layers (Image > Merge Visible Layer). 10. Crop image (Image > Autocrop Image). 11. Scale image to desired size (Image > Scale Image). 12. Add copyright info and name. 13. Save as .png You are finished :)
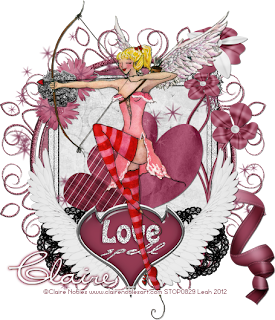
This tutorial is of my own creation and any resemblance to any other tuts is purely coincidental. This tutorial is for personal use only, using it for monetary gain is against our TOU's.
Supplies:
Gimp
Tube of choice. I am using the art of Claire Nobles. You must have a license to use these tubes. You can purchase this tube at PSP Tube Stop HERE
FTU kit from Tasha's Playground called Love Spell HERE
Font- Miss
Lets get started!
-File>New 600x600 px.
-Open frame 3. Layer>Scale Layer 75%. Select the magic wand and click inside of the frame. Select>Grow 2. Open paper 2. Move paper below frame in layer box. Layer>Transparency>Add Alpha Channel. Select>Invert. Press delete on your keyboard. Select>None. Make the frame active. Filters>Light & Shadow>Drop Shadow 1, 1, 0, black, 50.
-Open frame 2. Make the top layer. Place frame in the middle of circle frame. Add paper 9 to this frame. Repeat drop shadow on frame.
-Open tube. Make the top layer. Scale 75%. Place in middle of canvas. Repeat drop shadow. Layer>Duplicate Layer. Filters>Blur>Gaussian Blur on default. Change the mode to soft light.
Other elements:
winged heart 3
flower
flower 3
flower 4
deco
heart scatter
ribbon
flower
paper heart
heart 2
-Add your name and copyright.
All done!
Friday, February 10, 2012
This tutorial is of my own creation and any resemblance to any other tuts is purely coincidental. This tutorial is for personal use only, using it for monetary gain is against our TOU's.
Supplies:
Gimp Tube of choice. I am using the art of Victoria Fox. You must have a licenseto use these tubes. The tube I am using is coming soon to PTE HERE. Texture from crazykira HERE Brush set from Axeraider70 HERE. Get the gimp version of the brushes HERE
Fonts- Quinfo Bold & 1 Snappy DNA
-File>New 600x250 px.
-Change your foreground to to white. Change your background to eb2b42. Select your gradient tool. I'm using FG to BG (RGB) and bi-linear. Press ctrl on your keyboard and click the middle of your canvas. Drag to the left. Rename this layer gradient.
-Open tube close up. Filters>BlurDuplicate Layer. Select the flip tool and click canvas. Layer>Merge Down. Change the mode to hard light. Rename this layer tube blur. -Open texture 01m-03. Move under the tube blur layer in the layer box. Change the mode to soft light. Filters>Enhance>Unsharp Mask. Rename this layer texture.
-Open tube again. Duplicate 9 times for a total of 10. Arrange the tubes across the canvas.
-Merge the 10 tube layers together. Move the merged tube layer under the texture layer. Change the mode to soft light. Rename layer tube merged.
-Open tube 1 more time. Make the top layer. Layer>Scale Layer 75%. Place tube to the far left of canvas. Filters>Light & Shadow>drop Shadow 2, 2, 2, black, 50. Duplicate. Filters>Blur>Gaussian Blur on default. Change the mode to soft light. Lower opacity to 60. Merge the blured tube, tube and drop shadow together. Rename layer main tube. -Layer>New Layer. Move this layer under the texture layer. Select the paintbrush tool. Change your foreground to black. Select the galactic 8 brush. Randomly click the canvas. Lower the opacity to 50. Reneame layer brush. -New layer. Move this layer below main tube. Select the rectangle tool. Make a thin selection at the bottom of your canvas.
-Change foreground to eb2b42. Select the bucket fill tool and fill selection. Filters>Noise>RGB Noise on default. Add new layer. Change foreground to black. Fill selection. Select>Shrink 3. Press delete on your keyboard. select>None. Repeat drop shadow. Merge down. Rename this layer rect.
-Select the text tool. Set size to 20. Foreground to black. Using the Quinfo Bold font, typer your name 3 times (or how many ever times it takes to fit in the rect). Move this layer under the main tube. Place your name on top of the rect. Lower opacity to 60. Rename layer name repeat.
-Add your name again with the 1 Snappy DNA font. Make this the top layer. Rename this layer name.
-Now lets add our border. Add new layer. Make this the top layer. change foreground to f30622. Change the background to white. Layer>Transparency>Alpha To Selection Add gradient. Shrink by 5. Delete. Add new layer. Bucket fill with black. Shrink by 1 and delete. Add new layer. change foreground to white and background to f30622. Add gradient. Shrink by 3. Delete. Repeat noise. Add new layer. Bucket fill with black. Shrink by 1 and delete. Select none. Merge these 4 border layers together. Rename layer border.
-Add your copyright.
-Save here as XCF image. We will need to reopen it later for the avatar.
-Merge these layers together: tube blur, texture, brush, tube merged & gradient. Raname this layer bottom. -Merge these layers together: copyright, border, name, main tube, name repeat & rect. Rename this layer top. -Now you should have 2 layers. -Add new layer. Move this layer below the top layer. Rename this layer 1. Filters>Light & Shadow>Gradient Flare.

-Add new layer. Rename 2. Filters>Reshow Gradient Flare. Change the radius to 100.0. Click ok.

-Add new layer. rename this layer 3. Reshow gradient flare. Changeradius to 120.0. Click ok.

-You should now have 5 layers. -Make the bottom layer active. Duplicate this layer 2 times for a total of 3. Make top layer active and duplicate 2 times for a total of 3. -Next we need to rearrange our layers to get ready to animate. Arrange your layers like I did in the picture below.

-Now we need to merge some layers. Merge top copy #1, 1 & bottom copy #1 together.

-Merge top copy, 2 & bottom copy together.

-Merge top, 3 and bottom together. Now you should only have 3 layers.

-Go to Filters>Animation>Playback to see your animation in action.

-If you are happy with it, it is time to save. Filters>Save As

AVATAR:

-Open the XCF image we saved earlier. Make all of the layers above the tube blur layer invisible by clicking the eye next to each layer. edit>Copy Visible.

-File>New 150x150 px.

-Edit>Paste As>New Layer. Name this layer bottom.

-Add your name. Name this layer name.

-Add border. Merge border layers together and name layer border.

-Add copyright. Name this layer copyright.

-Merge all layers (except bottom layer) together. You should have 2 layers.

-Add new layer. Move this layer below the tube layer. Name this layer 1. Gradient flare- change radius to 20.0.

-Add new layer. Name this layer 2. Gradient flare- change radius to 40.0.

-Add new layer. Name this layer 3. Gradient flare. Change radius to 60.0.

-Duplicate bottom layer 2 times. Duplicate top layer 2 times. Arrange the layers like the picture below.

-Merge tube copy #1, 3 & bottom copy #1.

-Merge tube copy, 2 & bottom copy.

-Merge tube, 1 & bottom. Now you should have 3 layers left.

-Go to playback to see your animation.

-If you are happy, as the same way we did for the banner.
You're finished!

Snag Our Blinkies

GimptasticBlinkie1GimptasticBlinkie2GimptasticBlinkie3GimptasticBlinkie4GimptasticBlinkie5

Chit Chat


Blog Archive

Don't Be A Pirate!

NoPirate1NoPirate2