Thursday, December 22, 2011

This tutorial is of my own creation and any resemblance to any other tuts is purely coincidental. This tutorial is for personal use only, using it for monetary gain is against our TOU's.
Supplies Needed:
~Gimp (any version will do).
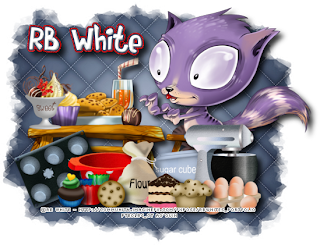
~Tube of choice. I used the artwork of RB White you must have a license to use this art which you can get @ PTE HERE.
~Mama & Me FTU scrapkit by Wicked Princess Scraps which you get HERE.
~Mask of choice. I used WSL mask 363 which you can get HERE.
~Font of choice. I used Rumpelstiltskin.
Let's get started!!!!!
1. Open a new layer ( I prefer a large canvas, so I make mine 1050x656). Make your canvas transparent (Layer > Transparency > Color to alpha).
2. Open Potholder element.
3. Open tube, add drop shadow.
4. Open and place the following elements:
Cupcake pan
Cupcake molds
Cupcake
Big bowl
Sugar cubes
Mixer
BonBon 2
Eggs
Flour
Sundae
Piece of cake
Muffin 2
Cookie
~Some elements may need to be sized down. Using the Scale Tool in your tool box adjust pixels to desired size~
~Add drop shadow to all elements (except BonBon 2 & Sundae)~
5. Open mask.
6. Add mask to Potholder element (click HERE for a tut on using masks).
7. Merge layers (Image > Merge Visible Layer).
8. Crop image (Image > Autocrop Image).
9. Scale image to desired size (Image > Scale Image).
10. Add copyright info and name.
11. Save as .png
You are finished :)
Labels:FTU tuts
Subscribe to:
Post Comments
(Atom)
Labels
12x12 Layout
A Taggers Scrap
Animated
Announcements
Art of Freya
Basic tuts
Blog Trains
CDO
Cluster Frame
CT tags
Extras
Forum Set
Freebies
FTU CU
FTU Kits
FTU tuts
Holiday
Jackie's Jewels
Kissing Kate
Masks
PTU Kits
PTU tuts
Quick Pages
Results
Results with Amys kits
Show Offs
Sweet Cravings Scraps
Tasha's Playground
Templates
Timeline Banners
Chit Chat
Blog Archive
-
▼
2011
(337)
-
▼
December
(40)
- PTU Tut- Fireworks
- PTU tut - Stalking
- PTE CT tag by Amy
- PTU tut - Shabby Chic
- PTU tut - Welcome 2012
- Tag Show Off!!!
- FTU tut - The Stroke of Midnight
- PTE CT tag by Amy
- Merry Christmas from Amy & Leah
- FTU tut - Sweet Treat
- FTU tut - Sweet Tooth Crazy
- PTE CT tag by Amy
- PTU Tut- 2012
- PTE CT tag by Amy
- FTU tut - Flirty n' Dirty
- PTE CT tag by Amy
- PTU Tut- Dear Santa
- FTU tut - Christmas Morning
- PTU tut - Don't Open til Christmas
- PTU tut - Snow much Fun!!!
- PTE CT tag by Amy
- FTU tut - So What...
- Tut using Leah's kit Santa Stop Here
- PTE CT tag by Amy
- FTU Tut- Dragon Land
- FTU Kit- Santa Stop Here
- PTE CT tag by Amy
- FTU tut - Eskimo Christmas
- FTU tut - Rockin'
- We have joined a NEW CT!!!!!!!!
- PTU Tut- Merry Christmas
- PTE CT tag by Amy
- PTU tut - My Frosted Garden
- PTU tut- Winter Chill
- PTE CT tag by Amy
- PTU Tut- Jingle Bells
- PTU tut - Snow Queen
- PTU Tut- Santa Baby
- FTU tut - Merry little Christmas
- ~*~We have joined 2 new CT's~*~
-
▼
December
(40)


0 comments:
Post a Comment