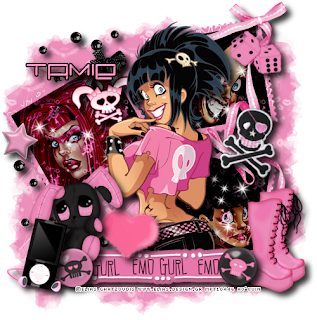
This tutorial is of my own creation and any resemblance to any other tuts is purely coincidental. This tutorial is for personal use only, using it for monetary gain is against our TOU's. Supplies Needed: ~Gimp (any version will do). ~Tubes of choice. I used the art of Elias Chatzoudis. You must have a license to use this art which you can now get HERE. ~Emo Gurl PTU scrapkit which you can get from Addictive Pleasures HERE. ~Mask of choice. I used WSL mask 323 which you can get HERE. ~Font of choice. I used Trancemission Medium. Let's get started!!!!! 1. Open a new layer ( I prefer a large canvas, so I make mine 1050x656). Make your canvas transparent (Layer > Transparency > Color to alpha). 2. Open Frame 3, add drop shadow (Filters > Light & Shadow > Drop Shadow). 3. Open Paper 11 center it behind the frame , remove excess paper a cutting tool or eraser from your tool box. 4. Open tubes, I used 3 close-ups and a full body tube. I changed the mode on the close-ups to Hard Light (at the top of the layer box you will see a box marked Mode. Click on the arrow and pick Hard Light from the drop down menu. See the image below). Add drop shadow to the full body tube. 5. Open and place the following elements: Dice Ribbon Bow 5 Skull 3 Skull 4 Star 2 Decor Fluffy Heart Bunny Button Button 2 Boots MP4 Shiny Sprinkle Sparkles ~Some of the elements may need to be sized down. Using your scale tool in your tool box adjust the pixel size until element is the correct size~ ~Add drop shadow to all elements~ 6. Open Paper 3. 7. Open mask. 8. Add mask to paper (click HERE for a tut on using masks) 9. Merge layers (Image > Merge Visible Layer). 10. Autocrop image (Image > Autocrop Image). 11. Scale image to desired size (Image > Scale Image). 12. Add copyright info and name. 13. Save as .png You are finished :)
Labels
Chit Chat
Blog Archive
-
▼
2011
(337)
-
▼
February
(20)
- New PTU tut "Spring is Calling"
- PTU tut- Dreams Do Come True
- New PTU tut "Kiss Me"
- Fairy Tale Templates
- New PTU tut "Emo Cutie"
- PTU tut- Lil' Emo
- PTU tut- Yo Ho Ho
- New PTU tut "Cats Meow"
- WOOT!!!!!! We joined a new CT!!!!!!!!!
- PTU tut- Vintage Gorjuss
- New PTU tut "Time Gone By"
- PTU tut- Midnight Poison
- Anti Valentines Templates
- New PTU tut "So Emo"
- New FTU tut "Be Mine"
- 80's Themed Templates
- PTU Tut- Love Hurts
- PU Valentine Quick Pages
- More Templates:)
- New PTU tut "Hit That"
-
▼
February
(20)


0 comments:
Post a Comment