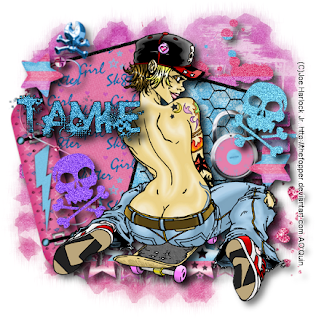
This tutorial is of my own creation and any resemblance to any other tuts is purely coincidental. This tutorial is for personal use only, using it for monetary gain is against our TOU's. ~Gimp (any version will do). ~Sk8ter Girl PTU scrapkit which you can get from Addictive Pleasures HERE. ~Tube of choice. I used the wonderful art of Joe Harlock Jr, he is a FTU artist and you can find his artwork HERE. ~Template of choice. I used TD temp74 which you can get HERE. ~Mask of choice. I used WSL mask222 which you can get HERE. ~Font of choice. I used Trashco. Let's get started!!! 1. Open a new layer ( I prefer a large canvas, so I make mine 1050x656). Make your canvas transparent (Layer > Transparency > Color to Alpha). 2. Open template in PSD format, move layers of template around until they are the way you like them. ~Add paper from scrapkit to individual layers of the template (Right click on layer in layer box > Alpha to Selection > CTRL I > Select paper layer in layer box > Delete). These are the papers I used: Paper 1 Paper 4 Paper 7 ~I added noise to some of the template layers to make them look glittery (Filters > Noise > RGB Noise). ~I colorized some of the template layers to better match the scrapkit (Colors > Colorize > play with the setting until you get the desired color). ~Add drop shadow to template layers (Filters > Light & Shadow > Drop Shadow). 3. Open tube, add drop shadow. 4. Open and place the following elements: Splatter Star (x's2) Skull2 Wire3 Skateboard Stars2 Lock Wire GlitterHearts ~Some of the elements may need to be sized down. Using your scale tool in your tool box adjust the pixel size until element is the correct size~ ~Add drop shadow to all elements~ 5. Open Paper 8 6. Open mask 7. Add mask to paper (right click on paper layer in layer box > add layer mask > black full transparency). ~Select mask layer in layer box, right click on mask layer (on canvas) > copy. ~Make mask layer invisible (click on eye next to mask in layer box). ~Select paper in layer box, right click on paper (on canvas, all you will see is the outline of the paper) > Paste. ~Anchor layer (click on anchor next to trash can on layer box). ~Right click on paper layer in layer box > apply layer mask. ~Delete mask from layer box. 8. Merge Layers (Image > Merge Visible Layers). 9. Crop Image (Image > Autocrop Image). 10. Scale image to desired size (Image > Scale Image). 11. Add copyright info and name 12. Save as .png YOU ARE FINISHED!!!!!!!!!!
Labels
Chit Chat
Blog Archive
-
▼
2010
(101)
-
▼
July
(17)
- I'm so ganster
- PTU tut "EMOLICIOUS"
- PTU tut "I'd Rather be a Vampire"
- PTU tut "Vroom Vroom"
- New tut by Leah-Forbidden Love
- PTU tut "Talk About Friendship"
- PTU tut "Sk8 or Die"
- Freebie Cluster Frame
- PTU tut "So Rockalicious"
- PTU tut "Addicted to Rac"
- PTU tut "Naughty Warning"
- FTU tut "Punk Alert"
- PTU tut "Evening Stroll"
- PTU tut "Feel the Music"
- FTU tut "Dancing Queen"
- PTU tut "Circus Life"
- Creative Intentionz CT tags by Amy
-
▼
July
(17)


0 comments:
Post a Comment