Thursday, July 8, 2010
 This tutorial is of my own creation and any resemblance to any other tuts is purely coincidental. This tutorial is for personal use only, using it for monetary gain is against our TOU's.
Supplies Needed:
~Gimp (any version will do).
~Tube of choice. I used the tubes included with the kit. Please be sure to use the proper copyright info included in the tubes TOU.
~Shooting Star PTU scrapkit which you can get from Sweet Cravings Scraps HERE.
~Mask of choice. I used BK mask49 which you can get HERE.
~Font of choice. I used Scrap Calligraphy.
Let's get started!!!!!
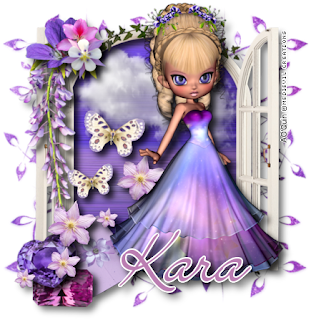
1. Open a new layer ( I prefer a large canvas, so I make mine 1050x656). Make your canvas transparent (Layer > Transparency > Color to alpha).
2. Open Frame 7, add drop shadow (Filters > Light & Shadow > Drop Shadow).
3. Open Paper 21 center it behind circular portion of the frame, remove excess paper using a cutting tool or eraser.
4. Open your tube, add drop shadow.
5. Open and place the following elements:
Flower 2
Flower 4
Flower 6
Flower 9
Flower Shower
Butterfly 1 x2
Jewel 2
Jewel 3
Envelope 3
Cloud
~Add drop shadow to all elements~
6. Open Paper 13.
7. Open mask.
8. Add mask to paper (right click on paper layer in layer box > Add Layer Mask > Black Full Transparency).
~Select mask in layer box, right click on mask (on canvas) > copy.
~Make mask layer invisible (click on eye next to mask in layer box).
~Select paper in layer box, right click on paper (on canvas, all you will see is the outline of the paper) > Paste.
~Anchor layer (click on anchor next to trash can on layer box).
~Right click on paper layer in layer box > apply layer mask.
~Delete mask layer from layer box.
9. Merge layers (Image > Merge Visible Layer).
10. Crop image (Image > Autocrop Image).
11. Scale image to desired size (Image > Scale Image).
12. Add copyright info and name.
13. Save as .png
You are finished :)
Labels:PTU tuts
Subscribe to:
Post Comments
(Atom)
Labels
12x12 Layout
A Taggers Scrap
Animated
Announcements
Art of Freya
Basic tuts
Blog Trains
CDO
Cluster Frame
CT tags
Extras
Forum Set
Freebies
FTU CU
FTU Kits
FTU tuts
Holiday
Jackie's Jewels
Kissing Kate
Masks
PTU Kits
PTU tuts
Quick Pages
Results
Results with Amys kits
Show Offs
Sweet Cravings Scraps
Tasha's Playground
Templates
Timeline Banners
Chit Chat
Blog Archive
-
▼
2010
(101)
-
▼
July
(17)
- I'm so ganster
- PTU tut "EMOLICIOUS"
- PTU tut "I'd Rather be a Vampire"
- PTU tut "Vroom Vroom"
- New tut by Leah-Forbidden Love
- PTU tut "Talk About Friendship"
- PTU tut "Sk8 or Die"
- Freebie Cluster Frame
- PTU tut "So Rockalicious"
- PTU tut "Addicted to Rac"
- PTU tut "Naughty Warning"
- FTU tut "Punk Alert"
- PTU tut "Evening Stroll"
- PTU tut "Feel the Music"
- FTU tut "Dancing Queen"
- PTU tut "Circus Life"
- Creative Intentionz CT tags by Amy
-
▼
July
(17)


0 comments:
Post a Comment