Gimptastic Scraps Available Exclusively @

Gimptastic Scraps CT



Blog Trains
CU Licenses




Thursday, March 17, 2011
Sarah over at Sarah's Tags N Things has a new tut up called Emo QT using my template #61. I think it turned out amazing! Thanks for using my template Sarah!
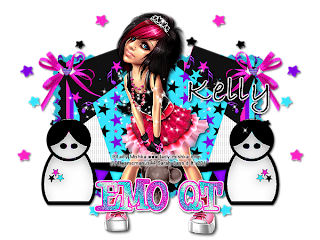 Anyway...jump on over to Sarah's blog HERE to check out this awesome tut!
We have received an award from our friend Lucianna over @ Annaica's Place.
Thank you so much for thinking of us :) We are honored!!!!
 The aim of the award is to bring recognition to blogs with minimal followers. Since we have accepted the award we must pass it on to at least 3 other blogs (but not more than 5), that have inspired us and we feel deserve a bit more attention. The rules are to say thank you on our blog to the one who passed it on to us (THANK YOU LUCIANNA!!!!!!!) and link to their blog (see above). Pick the blogs to pass the award on to, leave a note on their blog and then list them with links to their blogs...
So here are the blogs we chose:
I whipped up some easter templates today. I hope you can put them to good use!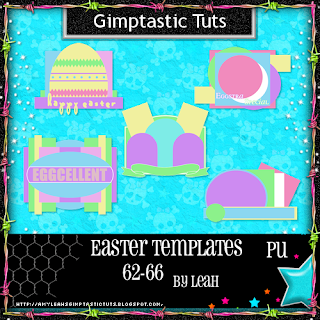
You can download them HERE
Tuesday, March 15, 2011
 This tutorial is of my own creation and any resemblance to any other tuts is purely coincidental. This tutorial is for personal use only, using it for monetary gain is against our TOU's.
Supplies:
Gimp- Any version should work
Sweet PTU kit from Addictive Pleasures called 'Tattoo' HERE
Tube of choice. I am using the art of Elias Chatzoudis. You must have a license to use his tubes. You cn purchase them HERE
WSL_Mask141 form weescotslass HERE
Fonts- Misfit & Pea Noodle's Girlfriend
Let's get started!
-Open gimp. File>New 600x600 pixels.
-Open frame 4. Layer>Scale Layer by 60%. Select your magic wand. Click inside the frame. Select>Grow by 5. Add a new layer below this layer. Select your bucket fill tool. Set your foreground color to black. Fill the selection. Select>None. Make the frame layer active.
Filters>Light & Shadow>Drop Shadow of 2, 2, 2, black, 50.
-Open tube. Move tube to the 2nd layer in the layer box. Layer>Duplicate Layer. Hide the duplicate tube by clicking the eye next to it in the layer box. Make the black circle )fill layer) active. Right click layer in layer box and choose alpha to selection.
Select>Invert. Make the visible tube active. Press delete on your keyboard. Select none. Change the mode to value.
-Unhide your duplicate tube layer. Scale by 75%. Repeat drop shadow. Dulpicate. Filters>Blur>Gaussian Blur on the default settings. Change the mode to soft light.
-Open frame 3. Scale by 70%. Move this layer below the main tube layer in the layer box. Repeat drop shadow.
Elements:
Add a drop shadow od 2, 2, 2, black, 50 to all element layers. See my tag for placement.
wax seal- scale 65%
seal- no scale
flames 2- scale 50%
beads- no scale
tattoo 5- scale 50%
netting- no scale and no drop shadow
glitter- scale 65%
ribbon 4- scale 50%
star- no scale and no drop shadow
Open paper 12. Move this paper layer to the bottom in your layer box. Apply mask. If you don't know how to use masks click HERE.
Add your name and copyright and thats it!
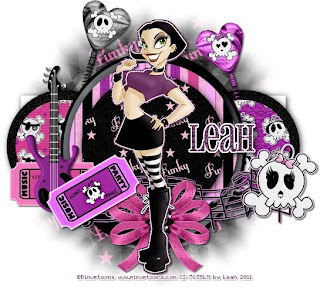 This tutorial is of my own creation and any resemblance to any other tuts is purely coincidental. This tutorial is for personal use only, using it for monetary gain is against our TOU's.
Supplies:
Great FTU kit from Lacarolita called 'Funky Punky' HERE
Tube of choice. I am using pinuptoons. You must have a license to use them. You can purchase them HERE
Template 59 by me (Leah) HERE
WSL_Mask138 from weescotslass HERE
Font- Pharmacy
Let's get started!
-Open template. Delete the credits. Image>Scale Image 500x287 pixels. Image>Canvas Size 600x600 pixels and make sure to click center.
-Let's add papers to the template layers. Make the template layer active (see below). Right click template layer in layer box and choose alpha to selection. Open paper (see below). Right click paper layer in layer box and choose add alpha channel. Layer>Scale Layer by 60%.
Select>Invert. Press delete on your keyboard. Select>None. Delete the original template layer.
Here are the template layers and which papers I used:
circle 1- paper 1 Filters>Light & Shadow>Drop Shadow 2, 2, 15, black, 80
circle 2- paper 9 Filters>Repeat Drop Shadow
circle 3- paper 4
circle 4- paper 3
-Make the rect layer active. Colors>Colorize. Leave the hue and saturation sliders where they are at. Change the lightness slider to 100. Repeat drop shadow.
-Make the circle 5 layer active. Filters>Noise>RGB Noise. Uncheck Independent RGB. Leave the rest of the settings. Repeat drop shadow. Do the same to the circle 6 layer.
-Open tube. Move the tube layer to the top in the layer box. Scale by 85%. Alpha to selection. Select>Grow by 1. Add a new layer below this layer. Select your bucket fill tool and make your foreground color white. Fill the selection. Grow by 2. Add new layer below this layer. Set your foreground color to 622d5b. Fill the selection. Select none. Add noise but change the red, green & blue sliders to 0.40. Add a drop shadow of 2, 2, 2, black, 50.
Elements:
Add a drop shadow of 2, 2, 2, black, 50 to all element layers. See my tag for placement.
musical notes- scale 50%
punky skull 1- scale 25%
spiral heart 1- scale 35%
spiral heart 3- scale 35% select your flip tool and click canvas
ticket 2- scale 30% select your rotate tool. In the angle box put -30
ticket 1- scale 30%
bow 2- scale 35%
1 bass guitar- scale 25%
LP1- scale 35%
-Open paper 2 and apply mask.
-Add your name and copyright and you're finished!!!
Monday, March 14, 2011
 This tutorial is of my own creation and any resemblance to any other tuts is purely coincidental. This tutorial is for personal use only, using it for monetary gain is against our TOU's.
Supplies Needed:
~Gimp (any version will do).
~Tube of choice. I used the art of Celine. You must have a license to use this art which you can get HERE.
~Yolanda Clover PTU scrapkit which you can get from Addictive Pleasures HERE.
~Mask of choice. I used mask 19 from Leah which you can get on our blog HERE.
~Font of choice. I used TheNautiGal.
Let's get started!!!!!
1. Open a new layer ( I prefer a large canvas, so I make mine 1050x656). Make your canvas transparent (Layer > Transparency > Color to alpha).
2. Open Frame 5, add drop shadow (Filters > Light & Shadow > Drop Shadow).
3. Open Paper 4 center it behind the frame , remove excess paper a cutting tool or eraser from your tool box.
4. Open tube, add drop shadow.
5. Open and place the following elements:
Bouquet
Pot of Gold
Jewels
Hat
Harp
Heart
Horse Shoe 2
Clover
Clover 4
Butterfly
~Some of the elements may need to be sized down. Using your scale tool in your tool box adjust the pixel size until element is the correct size~
~Add drop shadow to all elements~
6. Open Paper 11.
7. Open mask.
8. Add mask to paper (click HERE for a tut on using masks)
9. Merge layers (Image > Merge Visible Layer).
10. Autocrop image (Image > Autocrop Image).
11. Scale image to desired size (Image > Scale Image).
12. Add copyright info and name.
13. Save as .png
You are finished :)
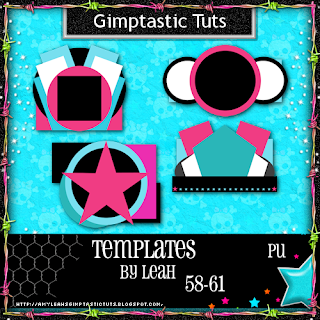
I made some more templates for you to mess around with:) If you make anything with them please feel free to send your results to Gimptasticblog@yahoo.com and we will proudly show your tags off on our blog!
You can download them HERE
Subscribe to:
Posts
(Atom)
Snag Our Blinkies


Don't Be A Pirate!