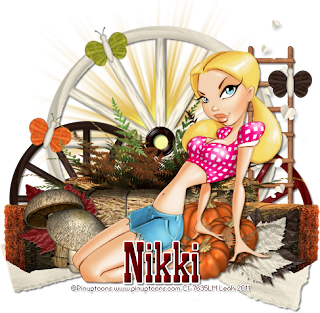
 This tutorial is of my own creation and any resemblance to any other tuts is purely coincidental. This tutorial is for personal use only, using it for monetary gain is against our TOU's.
Supplies:
Gimp- Any version should work
Adorable PTU kit from Creative Intentionz called Autumn Romance HERE
Tube of choice. I am using pinuptoons. You must have a license to use them. You can get them HERE
Font- Showguide
Let's begin!
-File>New 500x500 pixels.
-Open wagon wheel 3. Layer>Scale Layer 75%. Move towards the top middle. Filters>Light & Shadow>Drop Shadow of 2, 2, 2, black, 50.
-Open hay bale 2. Scale 75%. Move to the bottom of the wagon wheel.
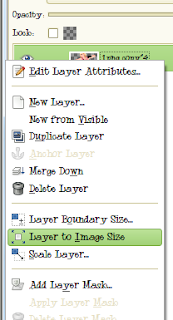
-Open hay bale 1. Scale 60%. Move this layer below hay bale 1 in your layer box. Place to the left of the other hay bale. Right click this layer in the layer box and choose layer to image size.
Layer>Duplicate Layer. Select your flip tool and click the canvas to flip your duplicte to the other side.
-Open fern 2. Move this layer below hay bale 1 in the layer box.
-Open wagon wheel 1. Scale 50%. Move this layer above the white wagon wheel in the layer box. Place to the bottom left of the white wheel. I had some of the brown wheel sticking out below the hay so I erased it. repeat drop shadow. Open wagon wheel 2 and repeat above.
-Open tube. Make the top layer. Scale 70%. Repeat drop shadow. Duplicate. Filters>Blur>Gaussian Blur on default. Change the mode (top of layer box) to soft light.
Lower the opacity (top of layer box) to 50.
Other Elements:
Add a drop shadow of 2, 2, 2, black, 50 to all element layers unless otherwse stated. See my tag for placement.
pumpkin 2
ladder
leaf 3
leaf 1
mushroom 2
leaf 2- flip
knot 3
hearts 3- no drop shadow
butterfly 3- rotate -20 no drop shadow
butterfly 5 rotate 20 no drop shadow
butterfly 1 no drop shadow
sun
-Add your name and copyright.
All done! I hope you enjoyed my tut!
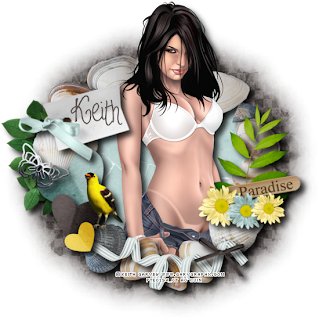 This tutorial is of my own creation and any resemblance to any other tuts is purely coincidental. This tutorial is for personal use only, using it for monetary gain is against our TOU's.
Supplies Needed:
~Gimp (any version will do).
~Tube of choice. I used the artwork of Keith Garvey you must have a license to use this art which you can get @ PTE HERE.
~My Paradise FTU scrapkit by Polka Dot Scraps which you get HERE.
~Mask of choice. I used WSL mask 362 which you can get HERE.
~Font of choice. I used Pea Biggio.
Let's get started!!!!!
1. Open a new layer ( I prefer a large canvas, so I make mine 1050x656). Make your canvas transparent (Layer > Transparency > Color to alpha).
2. Open Frame 1, add drop shadow (Filters > Light & Shadow > Drop Shadow).
3. Open Paper 5 center it behind frame, remove excess paper using a cutting tool or eraser.
4. Open tube, add drop shadow.
5. Open and place the following elements:
element 1
element 4
element 5
element 7
element 8
element 9
element 10
element 18
element 22
element 27
element 28 (x2)
element 29
element 38
~Some elements may need to be sized down. Using the Scale Tool in your tool box adjust pixels to desired size~
~Add drop shadow to all elements~
6. Open Paper 3.
7. Open mask.
8. Add mask to paper (click HERE for a tut on using masks)
9. Merge layers (Image > Merge Visible Layer).
10. Crop image (Image > Autocrop Image).
11. Scale image to desired size (Image > Scale Image).
12. Add copyright info and name.
13. Save as .png
You are finished :)
  This tutorial is of my own creation and any resemblance to any other tuts is purely coincidental. This tutorial is for personal use only, using it for monetary gain is against our TOU's.
Supplies:
Gimp- Any version should work
7 tubes of choice. I am using the work of Isamel Rac. You must have a license to use his tubes. You can purchase them HERE
Fonts- Abstract, Satisfaction and Velvenda Cooler
Just a little warning....this is a bit tricky
Let's get started!
-File>New 600x225 pixels. Fill your background layer with white.
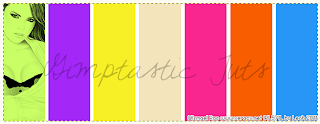
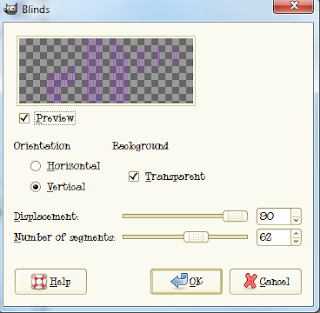
-Layer>New Layer. Name this layer 'one'. Select your rectangle select tool. Make a selection on the far left side.
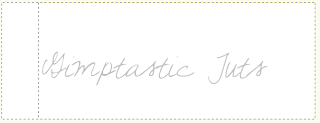
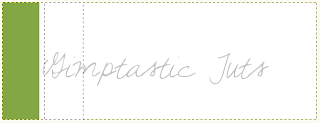
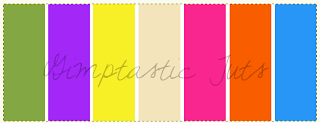 This next part is for the animation. If you wish not to animate your tag skip to where you see ******
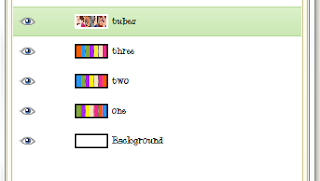
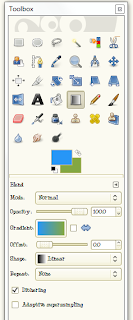
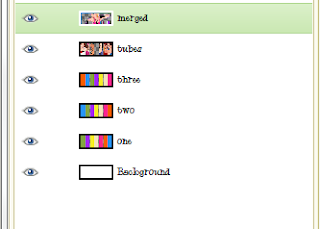
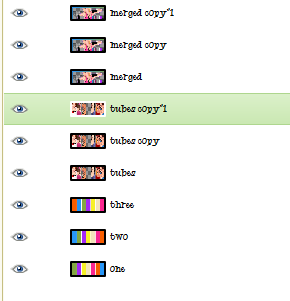
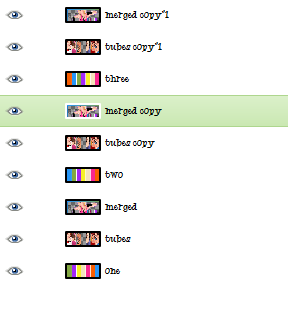
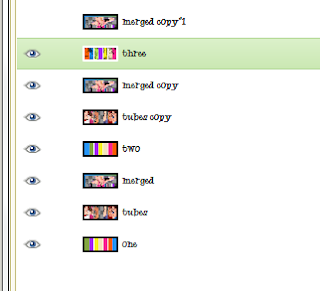
-Layer>Duplicate Layer. Name this layer 'two'. Select your magic wand. Click the green rectangle. Select your bucket fill tool. Fill the selection with the blue we used earlier. Select none.
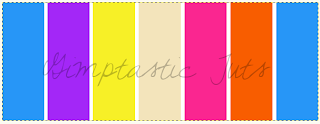
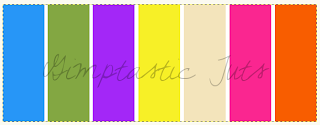 -Duplicate this layer. Name this layer 'three'. We are going to change the colors again.
Purple- change to green
Yellow- change to purple
Cream- change to yellow
Pink- change to cream
Orange- change to pink
Blue- change to orange
 -The above is for the animation part of the tag. So close off the layers named two & three by clicking the eye next to it in the layer box.. You should have layer one visible.
******
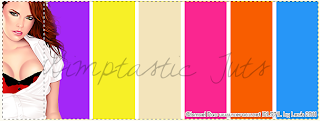
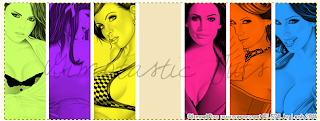
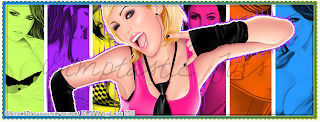
-Using the magic wand, click the 1st rectangle (green). Now open your 1st tube. Place her inside of the selection.
 This tutorial is of my own creation and any resemblance to any other tuts is purely coincidental. This tutorial is for personal use only, using it for monetary gain is against our TOU's.
Supplies Needed:
~Gimp (any version will do).
~Bad Ass Chick FTU scrapkit by Kittz Kreationz HERE.
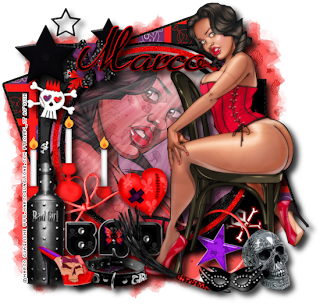
~Tubes of choice. I used the artwork of Marco Guaglione, you must have a license to use this art. You can purchase this art from PTE HERE.
~Template of choice. I used Leah's template 93 which you can get on our blog HERE.
~Mask of choice. I use WSL mask 363 which you can get HERE.
~Font of choice. I used Heather.
Let's get started!!!
1. Open a new layer ( I prefer a large canvas, so I make mine 1050x656). Make your canvas transparent (Layer > Transparency > Color to Alpha).
2. Open template in PSD format, remove and move layers of template around until they are the way you like them.
~Add paper from scrapkit to individual layers of the template (Right click on template layer in layer box > Alpha to Selection > CTRL I > Select paper layer in layer box > Delete).
These are the papers I used:
Paper 2
Paper 15
Paper 002
Paper 0038
~I added noise to some of the template layers to make them look glittery (Filters > Noise > RGB Noise).
~I colorized some of the template layers to better match the scrapkit (Colors > Colorize > play with the setting until you get the desired color).
~Add drop shadow to template layers (Filters > Light & Shadow > Drop Shadow).
3. Open tubes, I used both a full body and a close up.
~Open full body tube, you will need to duplicate this tube so that you have 2 (at the bottom of your layer box click on the blue box. This will give you 2 tube layers).
~Select the top tube layer in your tool box. Add Gaussion Blur (Filters > Blur > Gaussion Blur, use default settings)
~On that same tube layer change the mode to Screen (at the top of your Layer Box you will see where it says Mode, click the arrow and select Screen from the drop down menu).
~Add drop shadow to bottom tube layer.
~I changed the mode on the close-up to Hardlight (at the top of your Layer Box you will see where it says Mode, click the arrow and select Hardlight from the drop down menu). This tube has been added to the template in the same way you add paper (Right click on template layer in layer box > Alpha to Selection > CTRL I > Select tube layer in layer box > Delete).
4. Open and place the following elements:
Stars
Star 1
Light Ray
Candleabra
Flower
Skull 2
Metal Skull
G-String Bow
Mended Heart
Bottle
Collar
Whip
Shoe
Mask
BAD 1
~Some of the elements may need to be sized down. Using your scale tool in your tool box adjust the pixel size until element is the correct size~
~Add drop shadow to all elements (except Light Ray)~
5. Open Paper 12.
6. Open mask.
7. Add mask to paper (click HERE for a tut on using masks)
8. Merge Layers (Image > Merge Visible Layers).
9. Crop Image (Image > Autocrop Image).
10. Scale image to desired size (Image > Scale Image).
11. Add copyright info and name
12. Save as .png
ALL DONE!!!!!!!!!!
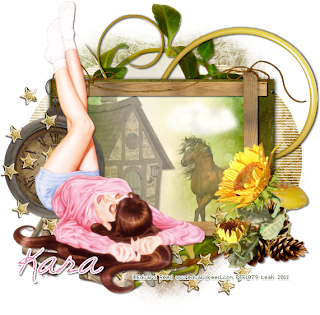 This tutorial is of my own creation and any resemblance to any other tuts is purely coincidental. This tutorial is for personal use only, using it for monetary gain is against our TOU's.
Supplies
Gimp- Any version should work
Stunning PTU kit from Sweet Cravings Scraps called Escape HERE
Tube of choice. I am using Edward Reed. You must have a license to use his tubes. You can purchase them HERE
Template 53 by me HERE
Mask- WSL_mask41 HERE
Font- Sunshine in my soul
Let's get started!
-Open template. Delete credits & words. Layer>Scale Layer 500x380 pixels. Image>Canvas Size 600x600 pixels and press center.
-Let's add papers to the template layers. Make the template layer active (see below). Right click template layer in layer box and choose alpha to selection. Open paper (see below). Right click paper layer in layer box and choose add alpha channel. Layer>Scale Layer by 60%.
Select>Invert. Press delete on your keyboard. Select>None. Delete the original template layer.
Here are the template layers and which papers I used:
square 1- paper 3 Filters>Light & Shadow>Drop Shadow 1, 1, 10, black, 100
square 2- paper 6 Filters>Repeat Drop Shadow
circle 1 #1- paper 1 repeat drop shadow
circle 1- paper 18
circle 2- paper 17
-Open tube. Place on left side. Add drop shadow of 2, 2, 2, black, 50. Layer>Duplicate Layer. Filters>Blur>Gaussian Blur on default. Change the mode of the duplicate tube to screen. Lower the opacity of this tube to 50.
-Open frame 4. Scale 50%. Move frame layer below tube in the layer box. Repeat drop shadow.
Elements
Add drop shadow of 2, 2, 2, black, 50 to all element layers unless stated otherwise. See my tag for placement.
house opacity 50
well
horse opacity 50
cloud no drop shadow
flower 7 no drop shadow
pinecones
vine
stars 1 no drop shadow
mushroom
clock
string 2 no drop shadow
flare rotate -90
-Open paper 8 and move to the bottom layer. Apply masks. Click HERE to learn to use masks.
-Add your name and copyright.
All finished!
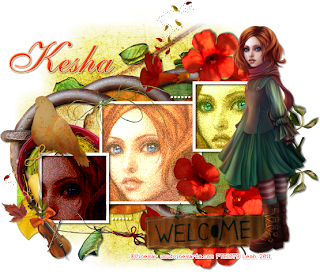 This tutorial is of my own creation and any resemblance to any other tuts is purely coincidental. This tutorial is for personal use only, using it for monetary gain is against our TOU's.
Supplies
Gimp- Any version should work
Beautiful PTU kit Welcom Autumn from KnC Scrapz HERE
Template 414 from Divine Intentionz HERE
Tube of choice. I am using Vinegar. You must have a license to use these tubes. You can purchase them HERE
Mask 10 by Vix HERE
Font- ALS Script
Let's begin!
-Open template. Delete credits. Layer>Scale Layer 500x301 pixels. Image>Canvas Size 600x600 pixels and press center.
-Let's add papers to the template layers. Make the template layer active (see below). Right click template layer in layer box and choose alpha to selection. Open paper (see below). Right click paper layer in layer box and choose add alpha channel. Layer>Scale Layer by 60%.
Select>Invert. Press delete on your keyboard. Select>None. Delete the original template layer.
Here are the template layers and which papers I used:
circle 3- paper 10
circle 5- paper 5 Filters>Light & Shadow>Drop Shadow 2, 2, 2, black, 50
circle 1- paper 4 Filters>Repeat Drop Shadow
square 2- paper 9 repeat drop shadow
square 1- paper 1 repeat drop shadow
-Make the frame back 3 layer active. Alpha to selection. Select your bucket fill tool. Set your foreground color to a8d51b. Fill the selection. Filters>Noise>RGB Noise on default. Open tube. Place face in the selection. Invert & delete. Select none. Change the mode of the tube to grain merge.
-Make the frame back 2 layer active. Alpha to selection. Fill the selection with 300100. Repeat noise. Open tube. Place in selection. Invert & delete. Select none. Change the mode to grain merge.
-Make the frame back layer active. Alpha to selection. Fill with ecd7a4. Repeat noise. Open tube and place in selection. Invert & delete. Select none. Change mode to grain merge.
-Repeat drop shadow on the frame, frame 2 & frame 3 layers.
-Make the brush layer active. Colors>Colorize. Leave the hue and saturation slider alone, but change the lightness slider to 100. Repeat drop shadow.
-Open tube. Make top layer. Scale 75%. Repeat drop shadow.
Elements
Add drop shadow of 2, 2, 2, black, 50 to all element layers unless stated otherwise. See my tag for placement.
red floer
green ribbon no drop shadow
branch no drop shadow
paper bird
leaf 1 no drop shadow
basket no drop shadow
ring
element 3
welcome sign
leaves no drop shadow
violin
plastic leaf no drop shadow
-Open paper 8. Make bottom layer. Apply mask.
-Add your name and copyright.
You're finished!
We would love to see your results. Send them to Gimptasticblog@yahoo.com.
 Pass the award to 15 bloggers
Sarah's Tags n Things, Osa Honey, Leather & Lace Tuts, Crazy Carita Scraps, Rieka Rafita, Annaica's Place, Sweet Cravings Scraps, Sass'd & Swagg'd Templates, Dees'Sign Depot, Cinnamon Scraps, Lizquis Scraps, Kandi Kisses, Candylicious Scraps, Signature Collections, Xioya's Creations
Share seven random things about myself (AMY) 1. I live in Washington 2. I have 1 daughter and another on the way 3. I am a closet Britney Spears fan 4. I hate bugs 5. Winter is my favorite season 6. I would never live in Texas again...even if I was paid to 7. My favorite drink is an Arnold Palmer
Answer the following questions (AMY) Favorite color: Green Favorite song: Brass Monkey by the Beastie Boys Biggest pet peeve: Shady people When you are upset, you: Cry Your favorite pet: My dog Peaches Black or white: White Biggest Fear: Death Best feature: My awesome personality...LOL Everyday attitude: I try to be happy everyday :) What is perfection: A happy family Guilty pleasure: Reality TV
Share seven random things about myself (LEAH) 1. I have 3 kids 2. I love to knit 3. I ♥ Pepsi 4. I live in Colorado 5. My favorite color is pink 6. I love to sing 7. My favorite food is steak
Answer the following questions (LEAH) Favorite color: pink Favorite song: I can't pick just one Favorite dessert: cheesecake Biggest pet peeve: finding my husbands whiskars in the sink When you are upset, you: Clean Your favorite pet: My cat Tippy I had when I was a kid Black or white: Black Biggest Fear: Something happening to my husband or kids Everyday attitude: Don't worry...be happy! What is perfection: Alone time with my hubby (of course that hardly ever happens) Guilty pleasure: A red beer....oh how I love those!
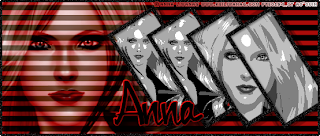 Here is a tag I made using a hot new tube from Anna Liwanag.
You can find this tube and others available for purchase at PTE HERE
This tutorial is of my own creation and any resemblance to any other tuts is purely coincidental. This tutorial is for personal use only, using it for monetary gain is against our TOU's. Supplies Needed: ~Gimp (any version will do). ~Rock and Roll University PTU scrapkit by Wicked Princess Scraps HERE. ~Tubes of choice. I used the artwork of Lady Mishka, you must have a license to use this art. You can purchase this art from SATC HERE. ~Template of choice. I used Leah's template 90 which you can get on our blog HERE. ~Font of choice. I used Neuropol. Let's get started!!! 1. Open a new layer ( I prefer a large canvas, so I make mine 1050x656). Make your canvas transparent (Layer > Transparency > Color to Alpha). 2. Open template in PSD format, remove and move layers of template around until they are the way you like them. ~Add paper from scrapkit to individual layers of the template (Right click on template layer in layer box > Alpha to Selection > CTRL I > Select paper layer in layer box > Delete). These are the papers I used: Paper 3 Paper 6 Paper 8 Paper 18 Paper 20 ~I added noise to some of the template layers to make them look glittery (Filters > Noise > RGB Noise). ~I colorized some of the template layers to better match the scrapkit (Colors > Colorize > play with the setting until you get the desired color). ~Add drop shadow to template layers (Filters > Light & Shadow > Drop Shadow). 3. Open tubes, I used both a full body and a close up. ~Open full body tube, you will need to duplicate this tube so that you have 2 (at the bottom of your layer box click on the blue box. This will give you 2 tube layers). ~Select the top tube layer in your tool box. Add Gaussion Blur (Filters > Blur > Gaussion Blur, use default settings) ~On that same tube layer change the mode to Overlay (at the top of your Layer Box you will see where it says Mode, click the arrow and select Overlay from the drop down menu). ~Add drop shadow to bottom tube layer. ~I changed the mode on the close-up to Hardlight (at the top of your Layer Box you will see where it says Mode, click the arrow and select Hardlight from the drop down menu). This tube has been added to the template in the same way you add paper (Right click on template layer in layer box > Alpha to Selection > CTRL I > Select tube layer in layer box > Delete). 4. Open and place the following elements: Record Paper Pencil Music note 1 Music note 2 Piano Skull with hat Skull 1 Backpack Stereo Skateboard Bear Scissors ~Some of the elements may need to be sized down. Using your scale tool in your tool box adjust the pixel size until element is the correct size~ ~Add drop shadow to all elements~ 5. Merge Layers (Image > Merge Visible Layers). 6. Crop Image (Image > Autocrop Image). 7. Scale image to desired size (Image > Scale Image). 8. Add copyright info and name 9. Save as .png ALL DONE!!!!!!!!!!
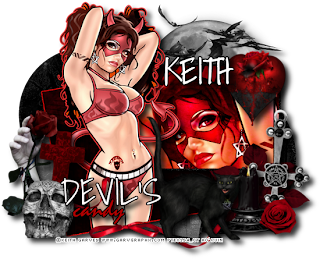 This tutorial is of my own creation and any resemblance to any other tuts is purely coincidental. This tutorial is for personal use only, using it for monetary gain is against our TOU's.
Supplies Needed:
~Gimp (any version will do).
~A Taggers Scrap portion of the FTU Horror Whorez blog train, which you can get HERE.
~Tubes of choice. I used the artwork of Keith Garvey, you must have a license to use this art. You can purchase this art from PTE HERE.
~Template of choice. I used the Devil's Candy template by Crazy Cakes Scraps which you can HERE.
~Font of choice. I used Pea Faith.
Let's get started!!!
1. Open a new layer ( I prefer a large canvas, so I make mine 1050x656). Make your canvas transparent (Layer > Transparency > Color to Alpha).
2. Open template in PSD format, remove and move layers of template around until they are the way you like them.
~Add paper from scrapkit to individual layers of the template (Right click on template layer in layer box > Alpha to Selection > CTRL I > Select paper layer in layer box > Delete).
These are the papers I used:
Paper 1
Paper 3
Paper 4
Paper 6
~I added noise to some of the template layers to make them look glittery (Filters > Noise > RGB Noise).
~I colorized some of the template layers to better match the scrapkit (Colors > Colorize > play with the setting until you get the desired color).
~Add drop shadow to template layers (Filters > Light & Shadow > Drop Shadow).
3. Open tubes, I used both a full body and a close up.
~Open full body tube, add drop shadow.
~I changed the mode on the close-up to Hardlight (at the top of your Layer Box you will see where it says Mode, click the arrow and select Hardlight from the drop down menu). This tube has been added to the template in the same way you add paper (Right click on template layer in layer box > Alpha to Selection > CTRL I > Select tube layer in layer box > Delete).
4. Open and place the following elements:
Moon & Bats
Ribbon 4
Leaves
Cross
Cross 2
Candle 1
Cat
Rose 2
Bloody arm
Heart
Skull 2
~Some of the elements may need to be sized down. Using your scale tool in your tool box adjust the pixel size until element is the correct size~
~Add drop shadow to all elements~
5. Merge Layers (Image > Merge Visible Layers).
6. Crop Image (Image > Autocrop Image).
7. Scale image to desired size (Image > Scale Image).
8. Add copyright info and name
9. Save as .png
ALL DONE!!!!!!!!!!
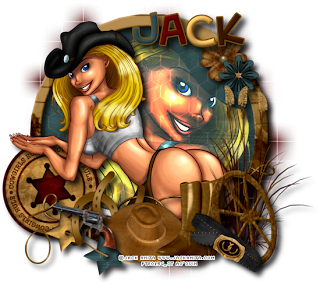 This tutorial is of my own creation and any resemblance to any other tuts is purely coincidental. This tutorial is for personal use only, using it for monetary gain is against our TOU's.
Supplies Needed:
~Gimp (any version will do).
~Tubes of choice. I used the artwork of Jack Anita , you must have a license to use this art which you can get from PTE HERE.
~Cowgirl Outlaw FTU scrapkit by Scraps Dimensions which you can get HERE
~Mask of choice. I used WSL mask 84 which you can get HERE.
~Font of choice. I used Creative Block.
Let's get started!!!!!
1. Open a new layer ( I prefer a large canvas, so I make mine 1050x656). Make your canvas transparent (Layer > Transparency > Color to alpha).
2. Open Frame 2, add drop shadow (Filters > Light & Shadow > Drop Shadow).
3. Open Paper 3 center it behind frame, remove excess paper using a cutting tool or eraser.
4. Open tubes. I used both a full body tube and a close-up.
~Take the close up layer and move it (in your layer box) under Frame 2, but above the paper. Change the Mode on the tube to Dodge (at the top of your Layer Box you will see where it says Mode, click the arrow and select Dodge from the drop down menu). Remove excess tube layer using a cutting tool or eraser.
~Add drop shadow to the full body tube.
5. Open and place the following elements:
Button 2
Wire
Embellishment 2
Horseshoe
Hat
Gun
Flower 2
Flower 5
Grass
Boots
Wheel
Belt
~Some elements may need to be sized down. Using the Scale Tool in your tool box adjust pixels to desired size~
~Add drop shadow to all elements~
6. Open Paper 4
7. Open mask.
8. Add mask to paper
9. Merge layers (Image > Merge Visible Layer).
10. Crop image (Image > Autocrop Image).
11. Scale image to desired size (Image > Scale Image).
12. Add copyright info and name.
13. Save as .png
You are finished :)
 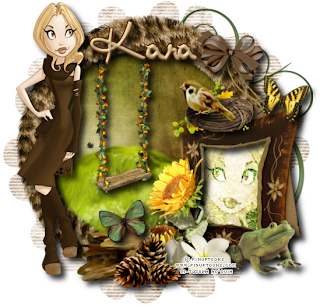 This tutorial is of my own creation and any resemblance to any other tuts is purely coincidental. This tutorial is for personal use only, using it for monetary gain is against our TOU's.
Supplies Needed:
~Gimp (any version will do).
~Tubes of choice. I used the artwork of PinupToons , you must have a license to use this art which you can now get HERE.
~Escape PTU scrapkit by Sweet Cravings Scraps which you can get HERE
~Mask of choice. I used Vix mask GBS0905 which you can get HERE.
~Font of choice. I used AlicoScriptSSK Bold.
Let's get started!!!!!
1. Open a new layer ( I prefer a large canvas, so I make mine 1050x656). Make your canvas transparent (Layer > Transparency > Color to alpha).
2. Open Frame 5 (round frame), add drop shadow (Filters > Light & Shadow > Drop Shadow).
3. Open Paper 6 center it behind frame, remove excess paper using a cutting tool or eraser.
4. Open Frame 1 (rectangular frame), add drop shadow.
5. Open Paper 10 center it behind frame, remove excess paper using a cutting tool or eraser.
6. Open tubes. I used both a full body tube and a close-up.
~Take the close up layer and move it (in your layer box) under Frame 1, but above the paper. Change the Mode on the tube to Screen (at the top of your Layer Box you will see where it says Mode, click the arrow and select Screen from the drop down menu). Remove excess tube layer using a cutting tool or eraser.
~Add drop shadow to the full body tube.
7. Open and place the following elements:
Flare 3
Grass Hill
Floral Swing
Tree Log
Flower 1
Flower 7
Frog
Pine Cones
Butterfly 1
Butterfly 2
Bird in Nest
Bow 6
~Some elements may need to be sized down. Using the Scale Tool in your tool box adjust pixels to desired size~
~Add drop shadow to all elements (except Flare 3)~
8. Open Paper 20
9. Open mask.
10. Add mask to paper
11. Merge layers (Image > Merge Visible Layer).
12. Crop image (Image > Autocrop Image).
13. Scale image to desired size (Image > Scale Image).
14. Add copyright info and name.
15. Save as .png
You are finished :)
  ♥ Download them HERE ♥
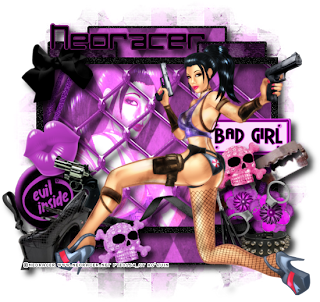
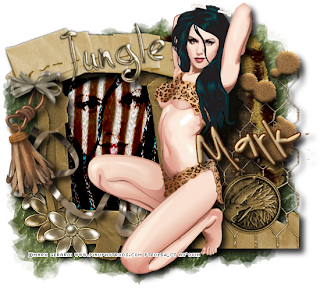 This tutorial is of my own creation and any resemblance to any other tuts is purely coincidental. This tutorial is for personal use only, using it for monetary gain is against our TOU's.
Supplies Needed:
~Gimp (any version will do).
~Tubes of choice. I used the artwork of Mark Gerardi , you must have a license to use this art which you can get from PTE HERE.
~Yvonne's Dream FTU scrapkit by Crazy Carita Scraps which you can get HERE
~Mask of choice. I used WSL mask 363 which you can get HERE.
~Font of choice. I used Pea Amy Sue.
Let's get started!!!!!
1. Open a new layer ( I prefer a large canvas, so I make mine 1050x656). Make your canvas transparent (Layer > Transparency > Color to alpha).
2. Open Frame 6, add drop shadow (Filters > Light & Shadow > Drop Shadow).
3. Open Paper 15 center it behind frame, remove excess paper using a cutting tool or eraser.
4. Open Frame 6, add drop shadow.
5. Open Paper 9 center it behind frame, remove excess paper using a cutting tool or eraser.
6. Open tubes. I used both a full body tube and a close-up.
~Take the close up layer and move it (in your layer box) under Frame 6, but above the paper. Change the Mode on the tube to Burn (at the top of your Layer Box you will see where it says Mode, click the arrow and select Burn from the drop down menu). Remove excess tube layer using a cutting tool or eraser.
~Add drop shadow to the full body tube.
7. Open and place the following elements:
Mesh
Splat 1
Ribbon 2
Tassle 2
Bow 2
Wordart 1
~Some elements may need to be sized down. Using the Scale Tool in your tool box adjust pixels to desired size~
~Add drop shadow to all elements~
8. Open Paper 5
9. Open mask.
10. Add mask to paper (click HERE for a tut on using masks)
11. Merge layers (Image > Merge Visible Layer).
12. Crop image (Image > Autocrop Image).
13. Scale image to desired size (Image > Scale Image).
14. Add copyright info and name.
15. Save as .png
You are finished :)
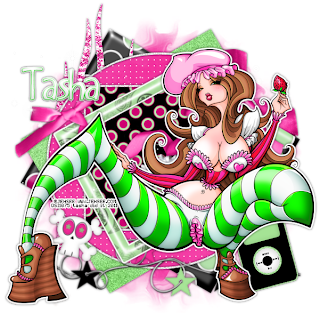
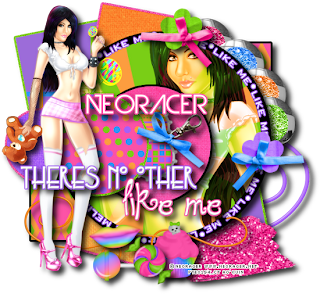 This tutorial is of my own creation and any resemblance to any other tuts is purely coincidental. This tutorial is for personal use only, using it for monetary gain is against our TOU's.
Supplies Needed:
~Gimp (any version will do).
~Emotionally Yours FTU scrapkit by Grunge and Glitter HERE.
~Tubes of choice. I used the artwork of Neoracer, you must have a license to use this art. You can purchase this art from PTE HERE.
~Template of choice. I used the NOLM template by Brutal Designs which you can HERE.
~Font of choice. I used Devil Breeze.
Let's get started!!!
1. Open a new layer ( I prefer a large canvas, so I make mine 1050x656). Make your canvas transparent (Layer > Transparency > Color to Alpha).
2. Open template in PSD format, remove and move layers of template around until they are the way you like them.
~Add paper from scrapkit to individual layers of the template (Right click on template layer in layer box > Alpha to Selection > CTRL I > Select paper layer in layer box > Delete).
These are the papers I used:
Paper 1
Paper 6
Paper 8
Paper 9
Paper 11
Paper 12
Paper 15
~I added noise to some of the template layers to make them look glittery (Filters > Noise > RGB Noise).
~I colorized some of the template layers to better match the scrapkit (Colors > Colorize > play with the setting until you get the desired color).
~Add drop shadow to template layers (Filters > Light & Shadow > Drop Shadow).
3. Open tubes, I used both a full body and a close up.
~Open full body tube, you will need to duplicate this tube so that you have 2 (at the bottom of your layer box click on the blue box. This will give you 2 tube layers).
~Select the top tube layer in your tool box. Add Gaussion Blur (Filters > Blur > Gaussion Blur, use default settings)
~On that same tube layer change the mode to Overlay (at the top of your Layer Box you will see where it says Mode, click the arrow and select Overlay from the drop down menu).
~Add drop shadow to bottom tube layer.
~I changed the mode on the close-up to Hardlight (at the top of your Layer Box you will see where it says Mode, click the arrow and select Hardlight from the drop down menu). This tube has been added to the template in the same way you add paper (Right click on template layer in layer box > Alpha to Selection > CTRL I > Select tube layer in layer box > Delete).
4. Open and place the following elements:
Doodle 2
Doodle 5
Glitter Smudge 2
Brad 2
Brad 3
Brad 4
Brad 5
Bow Flower 1
Bow Flower 2
Bottlecap 1
Bottlecap 2
Buckle Bow 1
Lips
Lollipop
Skull Cupcake
Candy
~Some of the elements may need to be sized down. Using your scale tool in your tool box adjust the pixel size until element is the correct size~
~Add drop shadow to all elements~
5. Merge Layers (Image > Merge Visible Layers).
6. Crop Image (Image > Autocrop Image).
7. Scale image to desired size (Image > Scale Image).
8. Add copyright info and name
9. Save as .png
ALL DONE!!!!!!!!!!
 This tutorial is of my own creation and any resemblance to any other tuts is purely coincidental. This tutorial is for personal use only, using it for monetary gain is against our TOU's.
Supplies:
Gimp- Any version should work
Awesome PTU kit from Rieka Rafita called Free Biker HERE
Tube of choice. I am using Keith Garvey. You must have a license to use his tubes. You can purchase them HERE
Fonts- Velvenda Cooler, Petra ScriptEF, Walk da walk two
Let's begin!
-File>New 500x500 pixles.
-Open frame 2. Layer>Scale Layer 70%. Move to the left of canvas. Select the magic wand. Click inside of the frame. Select>Grow by 5. Open paper 9. Move paper below frame layer in layer box. Right click paper layer in layer box and choose add alpha channel. Select>Invert. Press delete on your keyboard. Select>None. Make the frame layer active. Filters>Light & Shadow>Drop Shadow 3, 3, 3, black, 80.
-Open frame 3. Scale 50%. Select the rotate tool. In the angle box put -20. Move to the bottom right of the circle frame. Click inside frame with magic wand. Grow by 5. Open paper 5. Move below frame layer. Add alpha channel. Scale 0%. Invert and delete. Select none.
Repeat drop shadow on frame layer. Open tube. Select the flip tool and click canvas to flip the tube. Move tube below the square frame. Place inside of the square frame. Erase parts of the tube sticking out of the frame. Change the mode of the tube to multiply.
-Open frame 5. Rotate 90. Make the top layer. Move to the left of tag. Using the magic wand, click inside the top square of the frame. Add a new layer below this frame. Choose the bucket fill tool and make sure your foreground color is set to black. Fill the selection. Select none.
Repeat dor the 2 remaining squares of the frame. I filled the middle square with 3b343b. I filled the bottom square with 666060. Open tube again. Move below the red frame. Place in red frame. Erase parts of tube sticking out of red frame. Change the mode of this tube to value. Repeat drop shadow on frame.
-Open tube one more time. Scale 75%. Add a drop shadow of 2, 2, 2, black, 50. Layers>Dulpicate Layer. Filters>Blur>Gaussian Blur on default. Change the mode of duplicate tube to soft light.
Elements
Add drop shadow of 2, 2, 2, black to all element layers unless otherwise stated. See my tag for placement.
tattoo
fence- no drop shadow
boots
lips- rotate 15
flame
skull chain
sparkle 2- rotate 90- no drop shadow
aces
ribbon 1
cigarette
skull 2- rotate 20
star 3
-Make the top layer active. Select the text tool. Using the velvenda cooler font, size 50, forground color d22626, type 'Born to be'. Place at top of tag. Filter>Decor>Add Bevel. Uncheck work on copy. Right click this text layer in the layer box and choose alpha to selection. Grow by 1. Add new layer below this layer. Set the foreground color to white and fill selection. Select none. Repeat drop shadow. Now select the PetraScriptEF font, size 100, foreground color black and type 'wild'. Alpha to selection. Add new layer below this layer. Fill with white.
select none and repeat drop shadow.
-Add your name using the walk da wakl two font. Also add your copyright.
You're finished! Hope you enjoyed this tutorial!
This tutorial is of my own creation and any resemblance to any other tuts is purely coincidental. This tutorial is for personal use only, using it for monetary gain is against our TOU's. Supplies Needed: ~Gimp (any version will do). ~Image of choice. I used the artwork of Jon Rattenbury, you must have a license to use this art which you can get @ PTE HERE. ~Live Your Dream PTU scrapkit by Crazy Carita which you get @ PTE HERE. ~Mask of choice. I used AL mask 1 which you can get on our blog HERE. ~Font of choice. I used SandyTextHMK. Let's get started!!!!! 1. Open a new layer ( I prefer a large canvas, so I make mine 1050x656). Make your canvas transparent (Layer > Transparency > Color to alpha). 2. Open el 10 (frame), add drop shadow (Filters > Light & Shadow > Drop Shadow). 3. Open background image center it behind frame, remove excess using a cutting tool or eraser. 4. Open and place the following elements: el 5 el 8 el 11 el 13 el 15 el 22 el 24 el 25 el 27 el 29 ~Some elements may need to be sized down. Using the Scale Tool in your tool box adjust pixels to desired size~ ~Add drop shadow to all elements~ 6. Open Paper 8. 7. Open mask. 8. Add mask to paper 9. Merge layers (Image > Merge Visible Layer). 10. Crop image (Image > Autocrop Image). 11. Scale image to desired size (Image > Scale Image). 12. Add copyright info and name. 13. Save as .png You are finished :)
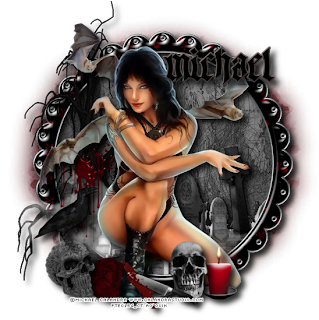 This tutorial is of my own creation and any resemblance to any other tuts is purely coincidental. This tutorial is for personal use only, using it for monetary gain is against our TOU's.
Supplies Needed:
~Gimp (any version will do).
~Tube of choice. I used the artwork of Michael Calandra, you must have a license to use this art which you can get @ PTE HERE.
~Horror Whorez FTU scrapkit by Rieka Rafita which you get HERE.
~Mask of choice. I used WSL mask 362 which you can get HERE.
~Font of choice. I used Walk Da Walk One.
Let's get started!!!!!
1. Open a new layer ( I prefer a large canvas, so I make mine 1050x656). Make your canvas transparent (Layer > Transparency > Color to alpha).
2. Open Frame 3, add drop shadow (Filters > Light & Shadow > Drop Shadow).
3. Open Paper 5 center it behind frame, remove excess paper using a cutting tool or eraser.
4. Open tube, add drop shadow.
5. Open and place the following elements:
Cemetary
Tree
Flower 1
Skull 1
Skull 2
Blood
Crow
Candle
Knife
Fog
~Some elements may need to be sized down. Using the Scale Tool in your tool box adjust pixels to desired size~
~Add drop shadow to all elements (except Fog)~
6. Open Paper 2.
7. Open mask.
8. Add mask to paper (click HERE for a tut on using masks)
9. Merge layers (Image > Merge Visible Layer).
10. Crop image (Image > Autocrop Image).
11. Scale image to desired size (Image > Scale Image).
12. Add copyright info and name.
13. Save as .png
You are finished :)
  This tutorial is of my own creation and any resemblance to any other tuts is purely coincidental. This tutorial is for personal use only, using it for monetary gain is against our TOU's.
Supplies Needed:
~Gimp (any version will do).
~Tubes of choice. I used the awesome artwork of Ismael Rac, you must have a license to use this art which you can get HERE.
~Chef Otelia PTU scrapkit by Wicked Princess Scraps which you get HERE.
~Font of choice. I used 0 Whoa DNA.
Let's get started!!!!!
1. Open a new layer ( I prefer a large canvas, so I make mine 1050x656). Make your canvas transparent (Layer > Transparency > Color to alpha).
2. Open Frame (Rectangular Frame), add drop shadow (Filters > Light & Shadow > Drop Shadow). I tilted this frame slightly using the Rotate Tool in the tool box.
3. Open Paper 13 center it behind frame, remove excess paper using a cutting tool or eraser.
4. Open tubes. I used both a full body tube and a close-up. I changed the Mode on the close-up tube to Dodge (at the top of the layer box you will see where it says Mode, click on the arrow and choose Dodge from the drop down menu). Add drop shadow to the full body tube.
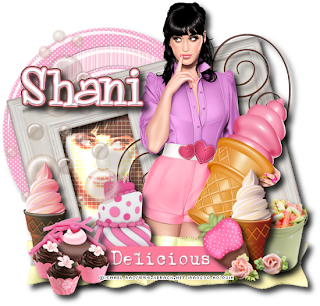
5. Open and place the following elements:
Circle Frames
Choco Swirl
Ribbon Pearled
Tiered Cake
Label 3
Pink Cone 2
Pink Cone 3
Candy Bucket
Strawberry
Licorice
Heart Cupcake
Cupcake Trio
Frosting Rose
Choco Bubbles
~Some elements may need to be sized down. Using the Scale Tool in your tool box adjust pixels to desired size~
~Add drop shadow to all elements (except Choco Bubbles)~
6. Merge layers (Image > Merge Visible Layer).
7. Crop image (Image > Autocrop Image).
8. Scale image to desired size (Image > Scale Image).
9. Add copyright info and name.
10. Save as .png
You are finished :)
  This tutorial is of my own creation and any resemblance to any other tuts is purely coincidental. This tutorial is for personal use only, using it for monetary gain is against our TOU's.
Supplies
Gimp- Any version should work
FTU kit from Rieka Rafita called Sovereign Hearts HERE
Tube of choice. I am using the work of verymany. You must have a licence to use these tubes. You can purchase them HERE
Template 71 by me HERE
-Open template. Delete the credits. Image>Canvas Size 600x600 pixels and make sure to click center.
-Let's add papers to the template layers. Make the template layer active (see below). Right click template layer in layer box and choose alpha to selection. Open paper (see below). Right click paper layer in layer box and choose add alpha channel. Layer>Scale Layer by 75%.
Select>Invert. Press delete on your keyboard. Select>None. Delete the original template layer.
Here are the template layers and which papers I used:
thin rect- paper 7 Filters>Light & Shadow>Drop Shadow 3, 3, 3, black, 80
half star 1- paper 8 Filters>repeat Drop Shadow
half star 2- paper 10 Repeat drop shadow
rect 1- paper 1 Repeat drop shadow
circle 1- paper 9 repeat drop shadow
circle 2- paper 4 repeat drop shadow
rect 2- paper 2 repeat drop shadow
rect 3- paper 3 repeat drop shadow
-Open tube. Make the top layer. Scale 55%. Repeat drop shadow. Place in middle of tag.
Elements
Add a drop shadow of 2, 2, 2, black, 50 to all element layers unless stated different. See my tag for placement.
link chain
ribbon- flip
feather no drop shadow
crossheart brad no drop shadow
glittery silver heart 1
heart 2
heart 3
heart 4
heart wing
skull
mask
rose 2
key
flower 2
-Add your name and copyright.
You're all done! I hope you enjoyed this tut!
 This tutorial is of my own creation and any resemblance to any other tuts is purely coincidental. This tutorial is for personal use only, using it for monetary gain is against our TOU's.
Supplies Needed:
~Gimp (any version will do).
~Graffita PTU scrapkit by Angel's Designz which is available at Scraps-U-nique HERE.
~Tube of choice. I used the artwork of Zlata M, you must have a license to use this art which you can get HERE.
~Template of choice. I used Template 92 by Leah which you can get on our blog HERE.
~Font of choice. I used BD Cartoon Shout.
Let's get started!!!
1. Open a new layer ( I prefer a large canvas, so I make mine 1050x656). Make your canvas transparent (Layer > Transparency > Color to Alpha).
2. Open template in PSD format, move layers of template around until they are the way you like them.
~Add paper from scrapkit to individual layers of the template (Right click on template layer in layer box > Alpha to Selection > CTRL I > Select paper layer in layer box > Delete).
These are the papers I used:
Paper 2
Paper 10
Paper 11
Paper 19
~I added noise to some of the template layers to make them look glittery (Filters > Noise > RGB Noise).
~I colorized some of the template layers to better match the scrapkit (Colors > Colorize > play with the setting until you get the desired color).
~Add drop shadow to template layers (Filters > Light & Shadow > Drop Shadow).
3. Open tube, add drop shadow.
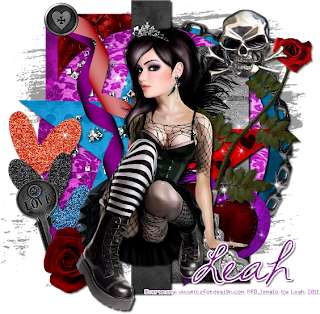
4. Open and place the following elements:
Bead Scatter
Rope
Razor
Metal Tab
Skull 1
Skull 2
Spray Can 1
Star 1
Star 2
Flower 3
Hand Prints
Emo Butterfly
Mask 2
~Some of the elements may need to be sized down. Using your scale tool in your tool box adjust the pixel size until element is the correct size~
~Add drop shadow to all elements (except Mask 2)~
5. Merge Layers (Image > Merge Visible Layers).
6. Crop Image (Image > Autocrop Image).
7. Scale image to desired size (Image > Scale Image).
8. Add copyright info and name
9. Save as .png
ALL DONE!!!!!!!!!!
This tutorial is of my own creation and any resemblance to any other tuts is purely coincidental. This tutorial is for personal use only, using it for monetary gain is against our TOU's.
Supplies Needed:
~Gimp (any version will do).
~Graffita PTU scrapkit by Angel's Designz which is available at Scraps-U-nique HERE.
~Tube of choice. I used the artwork of Zlata M, you must have a license to use this art which you can get HERE.
~Template of choice. I used Template 92 by Leah which you can get on our blog HERE.
~Font of choice. I used BD Cartoon Shout.
Let's get started!!!
1. Open a new layer ( I prefer a large canvas, so I make mine 1050x656). Make your canvas transparent (Layer > Transparency > Color to Alpha).
2. Open template in PSD format, move layers of template around until they are the way you like them.
~Add paper from scrapkit to individual layers of the template (Right click on template layer in layer box > Alpha to Selection > CTRL I > Select paper layer in layer box > Delete).
These are the papers I used:
Paper 2
Paper 10
Paper 11
Paper 19
~I added noise to some of the template layers to make them look glittery (Filters > Noise > RGB Noise).
~I colorized some of the template layers to better match the scrapkit (Colors > Colorize > play with the setting until you get the desired color).
~Add drop shadow to template layers (Filters > Light & Shadow > Drop Shadow).
3. Open tube, add drop shadow.
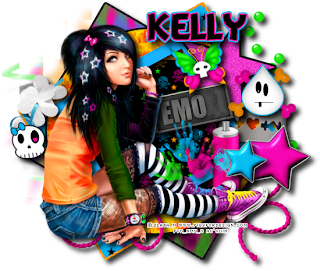
4. Open and place the following elements:
Bead Scatter
Rope
Razor
Metal Tab
Skull 1
Skull 2
Spray Can 1
Star 1
Star 2
Flower 3
Hand Prints
Emo Butterfly
Mask 2
~Some of the elements may need to be sized down. Using your scale tool in your tool box adjust the pixel size until element is the correct size~
~Add drop shadow to all elements (except Mask 2)~
5. Merge Layers (Image > Merge Visible Layers).
6. Crop Image (Image > Autocrop Image).
7. Scale image to desired size (Image > Scale Image).
8. Add copyright info and name
9. Save as .png
ALL DONE!!!!!!!!!!Labels
Chit Chat
Blog Archive
-
▼
2011
(337)
-
▼
August
(41)
- PTU tut- Gone Country
- FTU tut "Hidden Paradise"
- PTU tut "Awesome!"
- PTU tut- Rac N' Roll Animated
- FTU tut "She's Bad"
- PTU tut- My Secret Place
- PTU tut- Autumn Once Again
- Blog Award!!!!
- Tut results...
- PTE CT tag by Amy
- PTU tut "Music School Dropout"
- FTU tut "Devil's Candy"
- FTU tut "Cowgirls Rule"
- PTU tut "Fall Escape"
- Forum Set Templates
- Tut Results...
- PTE CT Tag by Amy
- FTU tut "Welcome to the Jungle"
- Tut Results...
- Tut by Tasha's Playground
- FTU tut "No Other Like Me"
- PTU tut- Born to be Wild
- PTU tut "Dream a Little Dream"
- FTU tut "Gothic Calling"
- New PTU tut "Simply Delicious"
- FTU Tut- Punk Princess
- New PTU tut "Bright Emo"
- FTU tut "Sweet Like Candy"
- PTE CT Tag by Amy
- PTU Tut- Sunshine
- PTU tut- Sweet
- FTU tut "Summer Fun"
- PTE CT Tag by Amy
- Tut results
- FTU tut "Tropical Heat"
- Tut Results
- PTU tut "For the Love of Goth"
- New Templates!
- New PTU Tut- Courage
- FTU tut "Feeling Playful" Banner & Avi
- PTU tut "Moonlight Dance"
-
▼
August
(41)


