 This tutorial is of my own creation and any resemblance to any other tuts is purely coincidental. This tutorial is for personal use only, using it for monetary gain is against our TOU's.
Supplies Needed:
~Gimp (any version will do).
~Emo Kitty PTU scrapkit by Rieka Rafita which you can get HERE.
~Tubes of choice. I used the artwork of Verymany, you must have a license to use this art which you can get HERE.
~Template of choice. I used Template 10 which you can get from Stacy's Stuff HERE.
~Mask of choice. I used WSL mask 84 which you can get HERE.
~Font of choice. I used Clarissa.
Let's get started!!!
1. Open a new layer ( I prefer a large canvas, so I make mine 1050x656). Make your canvas transparent (Layer > Transparency > Color to Alpha).
2. Open template in PSD format, move layers of template around until they are the way you like them.
~Add paper from scrapkit to individual layers of the template (Right click on template layer in layer box > Alpha to Selection > CTRL I > Select paper layer in layer box > Delete).
These are the papers I used:
Paper 1
Paper 2
Paper 15
~I lowered the opacity on the mask layer of the template to 50 (at the top of your layer box you will see where it says "OPACITY", click the small arrows next to the numbers to change opacity to the desired level) ~
~I added noise to some of the template layers to make them look glittery (Filters > Noise > RGB Noise).
~I colorized some of the template layers to better match the scrapkit (Colors > Colorize > play with the setting until you get the desired color).
~Add drop shadow to template layers (Filters > Light & Shadow > Drop Shadow).
3. Open tubes, I used both a full body and 3 close-ups. I changed the mode on the close-ups to Hardlight (at the top of your Layer Box you will see where it says Mode, click the arrow and select Hardlight from the drop down menu). I also lowered the opacity to 40, to make them lighter (follow same directions as used above on the template mask layer). The close-ups have been added to the template in the same way you add paper (Right click on template layer in layer box > Alpha to Selection > CTRL I > Select tube layer in layer box > Delete). Add drop shadow to full body tube.
4. Open and place the following elements:
Glitter Splash 2
Flame
Ribbon 2
Ribbon 4
Razorblade
Heart Crossbones
Shoe
Buttefly Skull
Skull 1
Skull Kitty
Flower 3
Flower 4
Star 2
Bag
Sparkle 1
~Some of the elements may need to be sized down. Using your scale tool in your tool box adjust the pixel size until element is the correct size~
~Add drop shadow to all elements (except Sparkle 1) ~
5. Open Paper 14
6. Open mask
7. Add mask to paper
8. Merge Layers (Image > Merge Visible Layers).
9. Crop Image (Image > Autocrop Image).
10. Scale image to desired size (Image > Scale Image).
11. Add copyright info and name
12. Save as .png
ALL DONE!!!!!!!!!!
This tutorial is of my own creation and any resemblance to any other tuts is purely coincidental. This tutorial is for personal use only, using it for monetary gain is against our TOU's. Supplies Needed: ~Gimp (any version will do). ~Well Hello Kitty PTU scrapkit by Wicked Princess Scraps which you can get HERE. ~Tube of choice. I used the artwork of Elias Chatzoudis, you must have a license to use this art which you can now get HERE. ~Template of choice. I used Template 35 by Leah which you can get from our blog HERE. ~Mask of choice. I used WSL mask 255 which you can get HERE. ~Font of choice. I used Twelve Ton Goldfish. Let's get started!!! 1. Open a new layer ( I prefer a large canvas, so I make mine 1050x656). Make your canvas transparent (Layer > Transparency > Color to Alpha). 2. Open template in PSD format, move layers of template around until they are the way you like them. ~Add paper from scrapkit to individual layers of the template (Right click on template layer in layer box > Alpha to Selection > CTRL I > Select paper layer in layer box > Delete). These are the papers I used: Paper 2 Paper 5 Paper 10 Paper 11 Paper 16 ~I added noise to some of the template layers to make them look glittery (Filters > Noise > RGB Noise). ~I colorized some of the template layers to better match the scrapkit (Colors > Colorize > play with the setting until you get the desired color). ~Add drop shadow to template layers (Filters > Light & Shadow > Drop Shadow). 3. Open tube, add drop shadow. 4. Open and place the following elements: Whip Boot Cherries Camera Fuzzy Cuffs Kitty Milk Kitty Bowl Circles Sparkles ~Some of the elements may need to be sized down. Using your scale tool in your tool box adjust the pixel size until element is the correct size~ ~Add drop shadow to all elements (except Sparkles)~ 5. Open Paper 3 6. Open mask 7. Add mask to paper (click HERE for a tut on using masks) 8. Merge Layers (Image > Merge Visible Layers). 9. Crop Image (Image > Autocrop Image). 10. Scale image to desired size (Image > Scale Image). 11. Add copyright info and name 12. Save as .png ALL DONE!!!!!!!!!!

This tutorial is of my own creation and any resemblance to any other tuts is purely coincidental. This tutorial is for personal use only, using it for monetary gain is against our TOU's. Supplies: Gimp- Any version should work Fabulous PTU kit from Sweet Cravings Scraps called Could've Been HERE Tube of choice. I am using pinuptoons. You must have a license to use these tubes. You can purchase them HERE Template 405 from Divine Intentions HERE Font- Redhead Goddess Let's get started! -Open template. Delete the credits. -Let's add papers to the template layers. Make the template layer active (see below). Right click template layer in layer box and choose alpha to selection. Open paper (see below). Right click paper layer in layer box and choose add alpha channel. Layer>Scale Layer by 60%. Select>Invert. Press delete on your keyboard. Select>None. Delete the original template layer. Here are the template layers and which papers I used: rounded rectangle- paper 21 Filters>Light & Shadow>Drop Shadow of 2, 2, 2, black, 50 rounded rectangle 2- paper 3 Filters>Repeat Drop Shadow rounded rectangle 3- paper 20 Repeat drop shadow rectangle- paper 16 Repeat drop shadow raster 2- paper 12 Repeat drop shadow frame back- paper 2 -Repeat drop shadow on the frame layer. -Make the stars layer active. Alpha to selection. Delete layer. Add a new layer. Using the bucket fill tool, fill the selsction with white. Select none. Repeat drop shadow. -Open tube. Move the tube layer below the frame layer in the layer box. Place the tube inside the frame. Select the flip tool and click the canvas to flip the tube. Using your eraser erase parts of the tube outside of the frame. Change to mode to soft light. -Open frame 9. Make the 4th layer. Scale by 50%. Select your magic wand. Click inside the frame. Press shift on your keyboard and click inside the the loops of the string that are inside of the frame. Select>Grow by 2. Open paper 14. Add alpha channel. Scale by 40%. Move paper below this frame layer. Invert & delete. Select none. Repeat drop shadow on frame. -Open tube again. Scale by 75%. Place in the right corner of the frame (see mine). Repeat drop shadow. Layers>Duplicate Layer. Move the duplicate tube layer below brown frame layer. Erase parts of the duplicate tube that are sticking out of the frame. Make the original tube layer active.Erase the bottom part of this tube so it looks like she is sticking out of the frame (see mine). Elements: Adda drop shadow of 2, 2, 2, black, 50 to al element layers unless otherwise stated. See my tag for placement. bow 3- scale 30% flower pots- scale 25% frame 4- scale 50% lantern- scale 35% fairy glitter 2- scale 35% no drop shadow flower 4- scale 55% butterfly 1- scale 25% butterfly 2- scale 20% flip with flip tool ribbon 1- scale 55% leaf 2- scale 50% and flip flower 1- scale 25% flower 3- scale 25% cute pixie boy- scale 20% button 1- scale 10% -Add your name and copyright and you're finished!!!!
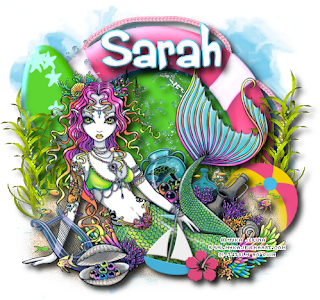 This tutorial is of my own creation and any resemblance to any other tuts is purely coincidental. This tutorial is for personal use only, using it for monetary gain is against our TOU's.
Supplies Needed:
~Gimp (any version will do).
~Tube of choice. I used the art of Myka Jelina. You must have a license to use this art which you can now get HERE.
~Sweet Summertime FTU scrapkit which you can get from Sarah's Tags N Things HERE.
~Mask of choice. I used Yarrow mask 9 which you can get HERE.
~Font of choice. I used Rumpelstiltskin.
Let's get started!!!!!
1. Open a new layer ( I prefer a large canvas, so I make mine 1050x656). Make your canvas transparent (Layer > Transparency > Color to alpha).
2. Open Pink Floatie, add drop shadow (Filters > Light & Shadow > Drop Shadow).
3. Open Paper 4 center it behind floatie element, remove excess paper using a cutting tool or eraser from your tool box.
4. Open your tube, add drop shadow.
5. Open and place the following elements:
Board 1
Seaweed 1 (x2)
Splash
Sand
Ball 1
Boat 2
Pink Flower
~Some elements may need to be sized down, use the Scale Tool in your tool box to adjust pixel size~
~Add drop shadow to all elements~
6. Open Paper 3.
7. Open mask.
8. Add mask to paper (click HERE for a tut on using masks).
9. Merge layers (Image > Merge Visible Layer).
10. crop image (Image > Autocrop Image).
11. Scale image to desired size (Image > Scale Image).
12. Add copyright info and name.
13. Save as .png
You are finished :)
 This tutorial is of my own creation and any resemblance to any other tuts is purely coincidental. This tutorial is for personal use only, using it for monetary gain is against our TOU's. Supplies Needed: ~Gimp (any version will do). ~Freshie Lime PTU scrapkit by Rieka Rafita which you can get HERE. ~Tubes of choice. I used the artwork of Misticheskaya, you must have a license to use this art which you can get HERE. ~Template of choice. I used the Flirtacious Template which you can get from Crazy Cakes Scraps HERE. ~Mask of choice. I used WSL mask 255 which you can get HERE. ~Font of choice. I used Valentina JF. Let's get started!!! 1. Open a new layer ( I prefer a large canvas, so I make mine 1050x656). Make your canvas transparent (Layer > Transparency > Color to Alpha). 2. Open template in PSD format, move layers of template around until they are the way you like them. ~Add paper from scrapkit to individual layers of the template (Right click on template layer in layer box > Alpha to Selection > CTRL I > Select paper layer in layer box > Delete). These are the papers I used: Paper 2 Paper 6 Paper 10 Paper 11 Paper 14 ~I added noise to some of the template layers to make them look glittery (Filters > Noise > RGB Noise). ~I colorized some of the template layers to better match the scrapkit (Colors > Colorize > play with the setting until you get the desired color). ~Add drop shadow to template layers (Filters > Light & Shadow > Drop Shadow). 3. Open tubes, I used both a full body and a close-up, along with the rain layer that came with the tube. I changed the mode on the close-up to Overlay (at the top of your Layer Box you will see where it says Mode, click the arrow and select Overlay from the drop down menu). The close-up and rain layers have been added to the template in the same way you add paper (Right click on template layer in layer box > Alpha to Selection > CTRL I > Select tube layer in layer box > Delete. Do the same steps with the rain layer). Add drop shadow. 4. Open and place the following elements: Cloud Flower 1 Flower 2 Flower 4 Heart 1 Heart 2 Heart Pillow Water Umbrella Ribbon 1 Dragonfly Butterfly ~Some of the elements may need to be sized down. Using your scale tool in your tool box adjust the pixel size until element is the correct size~ ~Add drop shadow to all elements~ 5. Open Paper 8 6. Open mask 7. Add mask to paper 8. Merge Layers (Image > Merge Visible Layers). 9. Crop Image (Image > Autocrop Image). 10. Scale image to desired size (Image > Scale Image). 11. Add copyright info and name 12. Save as .png ALL DONE!!!!!!!!!!
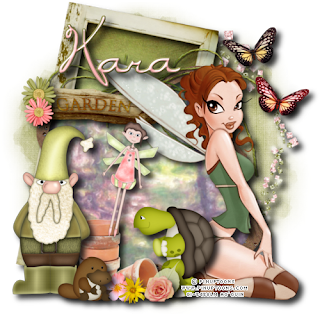
This tutorial is of my own creation and any resemblance to any other tuts is purely coincidental. This tutorial is for personal use only, using it for monetary gain is against our TOU's. Supplies Needed: ~Gimp (any version will do). ~Tube of choice. I used the artwork of PinUpToons. You must have a license to use this art which you can now get HERE. ~Could've Been PTU scrapkit which you can get from Sweet Cravings Scraps HERE. ~Mask of choice. I used WSL mask 364 which you can get HERE. ~Font of choice. I used Miss Medium. Let's get started!!!!! 1. Open a new layer ( I prefer a large canvas, so I make mine 1050x656). Make your canvas transparent (Layer > Transparency > Color to alpha). 2. Open Frame 6 & Frame 9, add drop shadow (Filters > Light & Shadow > Drop Shadow). 3. Open Paper 4 & Paper 1 center one behind each frame, remove excess paper using a cutting tool or eraser in your tool box. 4. Open tube, add drop shadow. 5. Open and place the following elements: Frame 1 (glittery circle) Garden Log Cute Turtle Cute Gnome Cute Beaver Cute Fairy Flower 1 Flower 2 Flower 3 Flower 7 Flower 8 Flower Pots Leaf 1 Butterfly 1 Butterfly 2 ~Some of the elements may need to be sized down. Using your scale tool in your tool box adjust the pixel size until element is the correct size~ ~Add drop shadow to all elements~ 6. Open Paper 17 7. Open mask 8. Add mask to paper 9. Merge layers (Image > Merge Visible Layer). 10. Autocrop image (Image > Autocrop Image). 11. Scale image to desired size (Image > Scale Image). 12. Add copyright info and name. 13. Save as .png You are finished :)
 The sale is for 2 days only so act fast!!!!!!
Click HERE to go to Rieka's blog
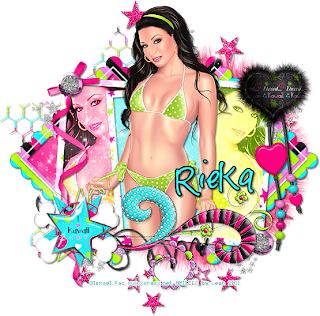
This tutorial is of my own creation and any resemblance to any other tuts is purely coincidental. This tutorial is for personal use only, using it for monetary gain is against our TOU's. Supplies: Gimp- Any version should work Amazing PTU kit from Rieka Rafita called Kawaii Gurl HERE Tube of choice. I used Isamel Rac. You must have a license to use his tubes. You can purchase them HERE Font- Pea Bhea Let's begin! -File>New. Open a canvas with the size of 600x600 pixels. -Open frame 3. Layer>Scale Layer by 80%. Select your magic wand. Click inside the 1st frame. Select>Grow by 3. Open paper 1. Move paper layer below frame layer in the layer box. Right click paper layer in layerbox and choose add alpha channel. Scale by 60%. Select>Invert. Press delete on your keyboard. Select>None. Repeat the above to add papers to the other sections of the frame. In the middle frame I used paper 2. The 3rd frame I used paper 3. Make the frame layer active. Filters>Light & Shadow>Drop Shadow of 2, 2, 2, black, 50. -Open tube. Move below the frame layer. Layer>Duplicate Layer twice for a total of 3 tube layers. Hide 2 of the tube layers by clicking the eye next to it in the layer box. Make the visible tube active. Place this tube in the 1st frame. Select your eraser tool. Erase parts of the tube sticking out of the frame. Also, erase any part visible in the other parts of the frame. Change the mode of this tube to hard light. unhide 1 of the tubes. Select your flip tool and click canvas. Repeat the above to add this tube in the 3rd frame. Change the mode of this tube to grain merge. Unhide the last tube. Scale by 75%. Repeat drop shadow. Move to the top layer. Place in the middle of the other 2 tubes. -Open frame 2. Make the bottom layer. Cale by 50%. Select your rotate tool. Click the canvas. In the angle box put 45. Place this frame to the left of the tag. Right click layer in layer box and choose layer to image size. Duplicate and flip. Make the left frame active. Open paper 20. Make this paper the bottom layer. Add alpha channel. Scale by 70%. Erase parst of the paper sticking out of the frame. Repeat drop shadow on frame layer. Repeat the above to the right frame using paper 16. Other Elements: Add drop shadow of 2, 2, 2, black to all element layers unless otherwise stated. See my tag for placement. star skull- scale 40% Doodle- scale 50% - Rotate tool - Rotate by 90 glitter frame- scale 80% brad- scale 50% - Duplicate heart string- scale 50% sparkle 3- no scale and no drop shadow ribbon 1- scale 65% - Rotate by -90 fur ball- no scale and no drop shadow kawaii star- scale 35% star spiral- no scale string- scale 50% wire- scale 75% -Add your name and proper copyright. All finished! I hope you enjoyed my tut!!!
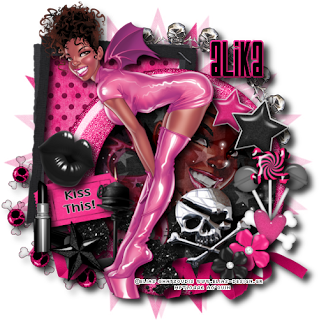 This tutorial is of my own creation and any resemblance to any other tuts is purely coincidental. This tutorial is for personal use only, using it for monetary gain is against our TOU's.
Supplies Needed:
~Gimp (any version will do).
~Tubes of choice. I used the awesome artwork of Elias Chatzoudis, you must have a license to use this art which you can now get HERE.
~Kiss This PTU scrapkit by Alikas Scraps which you get from So Sweet Scraps HERE.
~Mask of choice. I used Vix mask 151 which you can get from Vix PSP HERE.
~Font of choice. I used TriacSeventyone.
Let's get started!!!!!
1. Open a new layer ( I prefer a large canvas, so I make mine 1050x656). Make your canvas transparent (Layer > Transparency > Color to alpha).
2. Open element 33 (Rectangle Frame), add drop shadow (Filters > Light & Shadow > Drop Shadow).
3. Open Paper 10 center it behind frame, remove excess paper using a cutting tool or eraser.
4. Open element 27 (round frame), add drop shadow.
5. Open Paper 2 center it behind frame, remove excess paper using a cutting tool or eraser.
6. Open tubes. I used both a full body tube and a close-up. I lowered the opacity on the close-up to 50 (at the top of the layer box you will see a bar you can slide to change the opacity of the selected layer). Add drop shadow to the full body tube.
7. Open and place the following elements:
1
5
8
9
72
73
49 (x2)
50
30
44
64
15
23
67
56
17
60
59
~Some elements may need to be sized down. Using the Scale Tool in your tool box adjust pixels to desired size~
~Add drop shadow to all elements~
8. Open Paper 12.
9. Open mask.
10. Add mask to paper (click HERE for a tut on using masks)
11. Merge layers (Image > Merge Visible Layer).
12. Crop image (Image > Autocrop Image).
13. Scale image to desired size (Image > Scale Image).
14. Add copyright info and name.
15. Save as .png
You are finished :)


