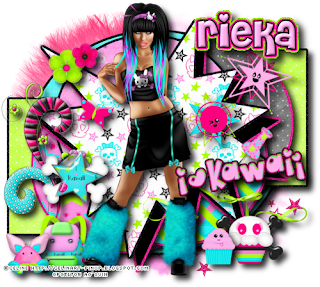
 This tutorial is of my own creation and any resemblance to any other tuts is purely coincidental. This tutorial is for personal use only, using it for monetary gain is against our TOU's.
Supplies Needed:
~Gimp (any version will do).
~Kawaii Gurl PTU scrapkit by Rieka Rafita which you can get HERE.
~Tube of choice. I used the artwork of Celine, you must have a license to use this art which you can get HERE.
~Template of choice. I used Template 69 by Leah which you can get from our blog HERE.
~Mask of choice. I used WSL mask 302 which you can get HERE.
~Font of choice. I used Cheri.
Let's get started!!!
1. Open a new layer ( I prefer a large canvas, so I make mine 1050x656). Make your canvas transparent (Layer > Transparency > Color to Alpha).
2. Open template in PSD format, move layers of template around until they are the way you like them.
~Add paper from scrapkit to individual layers of the template (Right click on template layer in layer box > Alpha to Selection > CTRL I > Select paper layer in layer box > Delete).
These are the papers I used:
Paper 3
Paper 5
Paper 7
Paper 11
Paper 16
Paper 18
Paper 19
~I added noise to some of the template layers to make them look glittery (Filters > Noise > RGB Noise).
~I colorized some of the template layers to better match the scrapkit (Colors > Colorize > play with the setting until you get the desired color).
~Add drop shadow to template layers (Filters > Light & Shadow > Drop Shadow).
3. Open tube, add drop shadow.
4. Open and place the following elements:
Star Spiral
Fur Ball
Ribbon 3
Kawaii Star 1
Kawaii Star 2
Flower 3
Flower 4
Skull Cupcake
Cupcake
Doodle
Butterfly
Thumb Tack
Star Skull
Bag
Rabbit
Wordart 1
~Some of the elements may need to be sized down. Using your scale tool in your tool box adjust the pixel size until element is the correct size~
~Add drop shadow to all elements~
5. Open Paper 9
6. Open mask
7. Add mask to paper (click HERE for a tut on using masks)
8. Merge Layers (Image > Merge Visible Layers).
9. Crop Image (Image > Autocrop Image).
10. Scale image to desired size (Image > Scale Image).
11. Add copyright info and name
12. Save as .png
ALL DONE!!!!!!!!!!
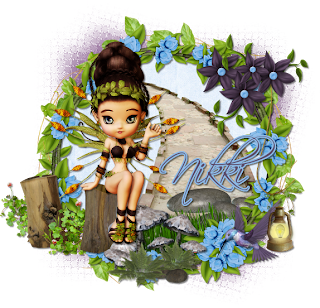
This tutorial is of my own creation and any resemblance to any other tuts is purely coincidental. This tutorial is for personal use only, using it for monetary gain is against our TOU's. Supplies: Gimp- Any version should work Beautiful PTU kit from Creative Intentionz called Fantasy Land HERE Tube of Choice. I used one provided in the kit Mask- WSL152 HERE Font- Scriptina Let's Begin! -File>New 600x600 pixels. Open floral frame 2. Layer>Scale layer by 85%. Select your magic wand. Click inside the frame. Select>Grow by 5. Open paper 8. Move layer below frame layer in layer box. Right click paper layer in the layer box and choose add alpha channel. Scale 60%. Select>Invert. Press delete on your keyboard. Select>None. Make the frame active. Filters>Light & Shadow>Drop Shadow 2, 2, 2, black, 50. Open the path. Move below the frame layer. Scale by 75%. Select your eraser. Erase parts of the path sticking out of the frame. -Open the stumps. Make top layer. Scale by 60%. Move the bottom left of the frame. Filters>Repeat Drop Shadow. -Open garden fae 3. Scale 65%. Select your flip tool. Click canvas to flip fae. Place tube on top of the stump. Repeat drop shadow. Layers>Duplicate Layer. Next go to Filters>Blur>Gaussian Blur on the default settings. Change the mode to screen. Lower the opacity to 30. -Open mushrooms. Move layer below the tube layer. Scale by 40%. Move to the bottom middle of frame. Repeat drop shadow. -Open frame 2. Make bottom layer. Elements: Add drop shadow of 2, 2, 2, black 50 to element layers unless otherwise stated. See my tag for placement. grass- no scale - erase parts of grass sticking out of frame - no drop shadow rocks- scale 50% - no drop shadow vine flowers 1- scale 50% hummingbird 1- scale 40% -Open paper 1. Move to bottom layer. Apply mask. -Add your name and you are finished!!!
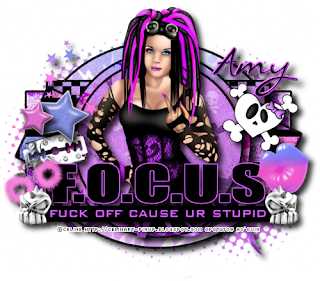 This tutorial is of my own creation and any resemblance to any other tuts is purely coincidental. This tutorial is for personal use only, using it for monetary gain is against our TOU's.
Supplies Needed:
~Gimp (any version will do).
~Kaci's portion of the Emo Babe Collab FTU scrapkit which you can get HERE.
~Tube of choice. I used the art of Celine, you must have a license to use this art which you can now get HERE.
~Template of choice. I used Template 99 by Rosey which you can get HERE.
~Font of choice. I used Callie Hand.
Let's get started!!!
1. Open a new layer ( I prefer a large canvas, so I make mine 1050x656). Make your canvas transparent (Layer > Transparency > Color to Alpha).
2. Open template in PSD format, move layers of template around until they are the way you like them.
~Add paper from scrapkit to individual layers of the template (Right click on template layer in layer box > Alpha to Selection > CTRL I > Select paper layer in layer box > Delete).
These are the papers I used:
Paper 2
Paper 3
Paper 4
Paper 5
Paper 7
Paper 10
~I added noise to some of the template layers to make them look glittery (Filters > Noise > RGB Noise).
~I colorized some of the template layers to better match the scrapkit (Colors > Colorize > play with the setting until you get the desired color).
~Add drop shadow to template layers (Filters > Light & Shadow > Drop Shadow).
3. Open tube, add drop shadow.
4. Open and place the following elements:
Stars
Star 1
Star 2
Heartblade
Ribbon 1
Cuffs
Skull 1
Lips
Metal Skull (x2)
Halftone
~Some of the elements may need to be sized down. Using your scale tool in your tool box adjust the pixel size until element is the correct size~
~Add drop shadow to all elements~
5. Merge Layers (Image > Merge Visible Layers).
6. Crop Image (Image > Autocrop Image).
7. Scale image to desired size (Image > Scale Image).
8. Add copyright info and name
9. Save as .png
ALL DONE!!!!!!!!!!
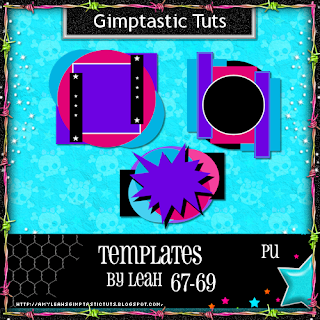
Download them HERE
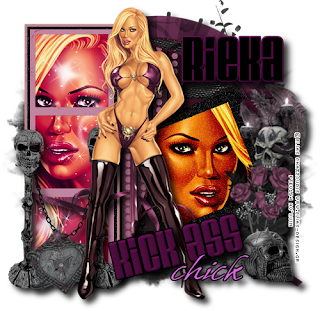 This tutorial is of my own creation and any resemblance to any other tuts is purely coincidental. This tutorial is for personal use only, using it for monetary gain is against our TOU's.
Supplies Needed:
~Gimp (any version will do).
~Goth Princess PTU scrapkit by Rieka Rafita which you can get HERE.
~Tubes of choice. I used the artwork of Elias Chatzoudis, you must have a license to use this art which you can get HERE.
~Template of choice. I used Template 29 by Leah which you can get from our blog HERE.
~Mask of choice. I used WSL mask 302 which you can get HERE.
~Font of choice. I used Velvenda Heavy.
Let's get started!!!
1. Open a new layer ( I prefer a large canvas, so I make mine 1050x656). Make your canvas transparent (Layer > Transparency > Color to Alpha).
2. Open template in PSD format, move layers of template around until they are the way you like them.
~Add paper from scrapkit to individual layers of the template (Right click on template layer in layer box > Alpha to Selection > CTRL I > Select paper layer in layer box > Delete).
These are the papers I used:
Paper 6
Paper 8
Paper 11
Paper 12
~I added noise to some of the template layers to make them look glittery (Filters > Noise > RGB Noise).
~I colorized some of the template layers to better match the scrapkit (Colors > Colorize > play with the setting until you get the desired color).
~Add drop shadow to template layers (Filters > Light & Shadow > Drop Shadow).
3. Open tubes, I used both a full body and 2 close-ups. I changed the mode on the close-ups to Hardlight (at the top of your Layer Box you will see where it says Mode, click the arrow and select Hardlight from the drop down menu). Add drop shadow to thw full body tube.
4. Open and place the following elements:
Fans
Leaves 2
Sparkle 1
Ribbon 1
Skull 1
Skull 2
Skull Chain
Clock
Flower 4
~Some of the elements may need to be sized down. Using your scale tool in your tool box adjust the pixel size until element is the correct size~
~Add drop shadow to all elements~
5. Open Paper 7
6. Open mask
7. Add mask to paper (click HERE for a tut on using masks)
8. Merge Layers (Image > Merge Visible Layers).
9. Crop Image (Image > Autocrop Image).
10. Scale image to desired size (Image > Scale Image).
11. Add copyright info and name
12. Save as .png
ALL DONE!!!!!!!!!!
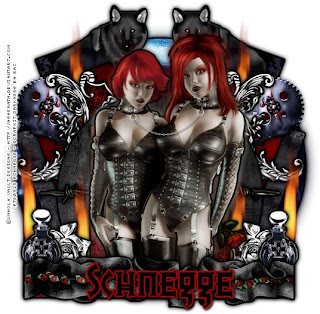
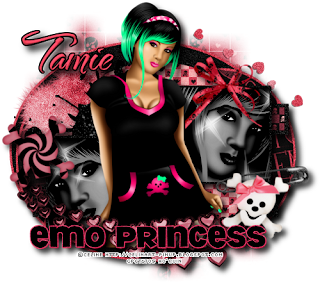 This tutorial is of my own creation and any resemblance to any other tuts is purely coincidental. This tutorial is for personal use only, using it for monetary gain is against our TOU's.
Supplies Needed:
~Gimp (any version will do).
~Emolicious PTU scrapkit which you can get from Addictive Pleasures HERE.
~Tubes of choice. I used the art of Celine, you must have a license to use this art which you can get HERE.
~Template of choice. I used a Emo Princess temp which you can get from Crazy Cakes Scraps HERE.
~Mask of choice. I used WSL mask 84 which you can get HERE.
~Font of choice. I used TheNautiGal.
Let's get started!!!
1. Open a new layer ( I prefer a large canvas, so I make mine 1050x656). Make your canvas transparent (Layer > Transparency > Color to Alpha).
2. Open template in PSD format, move layers of template around until they are the way you like them.
~Add paper from scrapkit to individual layers of the template (Right click on template layer in layer box > Alpha to Selection > CTRL I > Select paper layer in layer box > Delete).
These are the papers I used:
Paper 4
Paper 11
Paper 12
~I added noise to some of the template layers to make them look glittery (Filters > Noise > RGB Noise).
~I colorized some of the template layers to better match the scrapkit (Colors > Colorize > play with the setting until you get the desired color).
~Add drop shadow to template layers (Filters > Light & Shadow > Drop Shadow).
3. Open tubes, I used both a full body and 2 close-ups. I made the close-ups black & white (Colors>Desaturate>Luminosity), I also changed the mode on the close-ups to Hardlight (at the top of your Layer Box you will see where it says Mode, click on the arrow and select Hardlight from the drop down menu). Add drop shadow to the full body tube.
4. Open and place the following elements:
Hearts
Fluffy Heart
Splatter 2
Sparkles
Heart Swirl
Skull
Skull 2
Bow
Pin
~Some of the elements may need to be sized down. Using your scale tool in your tool box adjust the pixel size until element is the correct size~
~Add drop shadow to all elements~
5. Open Paper 8
6. Open mask
7. Add mask to paper
8. Merge Layers (Image > Merge Visible Layers).
9. Crop Image (Image > Autocrop Image).
10. Scale image to desired size (Image > Scale Image).
11. Add copyright info and name
12. Save as .png
ALL DONE!!!!!!!!!!
This tutorial is of my own creation and any resemblance to any other tuts is purely coincidental. This tutorial is for personal use only, using it for monetary gain is against our TOU's.
Supplies Needed:
~Gimp (any version will do).
~Emolicious PTU scrapkit which you can get from Addictive Pleasures HERE.
~Tubes of choice. I used the art of Celine, you must have a license to use this art which you can get HERE.
~Template of choice. I used a Emo Princess temp which you can get from Crazy Cakes Scraps HERE.
~Mask of choice. I used WSL mask 84 which you can get HERE.
~Font of choice. I used TheNautiGal.
Let's get started!!!
1. Open a new layer ( I prefer a large canvas, so I make mine 1050x656). Make your canvas transparent (Layer > Transparency > Color to Alpha).
2. Open template in PSD format, move layers of template around until they are the way you like them.
~Add paper from scrapkit to individual layers of the template (Right click on template layer in layer box > Alpha to Selection > CTRL I > Select paper layer in layer box > Delete).
These are the papers I used:
Paper 4
Paper 11
Paper 12
~I added noise to some of the template layers to make them look glittery (Filters > Noise > RGB Noise).
~I colorized some of the template layers to better match the scrapkit (Colors > Colorize > play with the setting until you get the desired color).
~Add drop shadow to template layers (Filters > Light & Shadow > Drop Shadow).
3. Open tubes, I used both a full body and 2 close-ups. I made the close-ups black & white (Colors>Desaturate>Luminosity), I also changed the mode on the close-ups to Hardlight (at the top of your Layer Box you will see where it says Mode, click on the arrow and select Hardlight from the drop down menu). Add drop shadow to the full body tube.
4. Open and place the following elements:
Hearts
Fluffy Heart
Splatter 2
Sparkles
Heart Swirl
Skull
Skull 2
Bow
Pin
~Some of the elements may need to be sized down. Using your scale tool in your tool box adjust the pixel size until element is the correct size~
~Add drop shadow to all elements~
5. Open Paper 8
6. Open mask
7. Add mask to paper
8. Merge Layers (Image > Merge Visible Layers).
9. Crop Image (Image > Autocrop Image).
10. Scale image to desired size (Image > Scale Image).
11. Add copyright info and name
12. Save as .png
ALL DONE!!!!!!!!!!This tutorial is of my own creation and any resemblance to any other tuts is purely coincidental. This tutorial is for personal use only, using it for monetary gain is against our TOU's. Supplies: Gimp- Amy version should work Pretty PTU kit from Artmama called Sanquine. Check out her blog HERE to see what stores she sells in Tube of choice. I am using the artwork of Ismael Rac. you must have a license to use his work. You can purchase his tubes HERE Font- DK Porcupine Pickle Let's get started! -File>New 600x600 pixels. -Open embellie 04. Layer>Scale Layer by 60%. Select your magic wand tool. Click inside the frame. Select>Grow by 5. Open paper 14. Move this paper layer below the frame layer in the layer box. Right click paper layer in the layer box and choose add alpha channel. Scale by 50%. Select>invert. Press delete on your keyboard. Select>None. Make the frame layer active. Filters>Light & Shadow>Drop Shadow of 2, 2, 2, black, 50. -Open tube. Move to the top layer. Scale 80%. Filters>Repeat Drop Shadow. Layer>Duplicate Layer. Move duplicate tube layer below frame layer in layer box. Make paper layer active. Right click paper layer in layer box and choose alpha to selection. Make the duplicate tube active. Invert & delete. Select none. Make original tube active. Select thr eraser tool. Erase parts of the tube sticking out of the frame. -Open embellie 04 again. Move to the bottom layer. Scale by 60%. Select your rotate tool. In the angle box put 25.00. Colors>Colorize Hue: 341 Saturation: 65 Lightness: 14 Add paper 2 inside the frame. Repeat the steps above to add paper to frame. Duplicate the frame. Select your flip tool. Click canvas. Colorize this frame using the default settings. Add paper 13 to this frame. -Open paper 4. Move to bottom layer. Add alpha channel. Scale by 50%. Select your smudge tool. Smudge the edges of the paper. Elements: Add drop shadow of 2, 2, 2, black, 50 to all element layers. See my tag for placement. 12- scale 50%14- scale 60% 25- scale 80% flip NO drop shadow 21- no scale 32- no scale 23- scale 50% duplicate - flip - press ctrl and flip 26- scale 70% 37- scale 80% 22- scale 75% -Add your name and copyright.
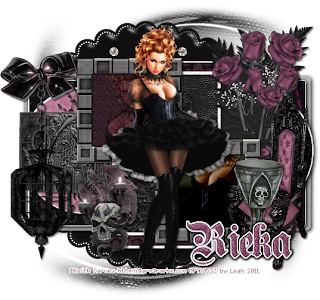 This tutorial is of my own creation and any resemblance to any other tuts is purely coincidental. This tutorial is for personal use only, using it for monetary gain is against our TOU's.
Supplies:
Gimp- Any version should work
Awesome PTU kit by Rieka rafita called Goth Princess HERE
Tube of choice. I am using the artwork of Keith Garvey. You must have a license to use his tubes. You can purchase them HERE
Template 331 by Divine Intentionz HERE
Mask 36 from HorsePlays Pasture HERE
Font- Plain Germanica
Let's Begin!!!!!
-Open templates. Delete credits. Image>Scale Image 500x351 pixels. Image>Canvas Size 600x600 and click center.
-Let's add papers to the template layers. Make the template layer active (see below). Right click template layer in layer box and choose alpha to selection. Open paper (see below). Right click paper layer in layer box and choose add alpha channel. Layer>Scale Layer by 60%.
Select>Invert. Press delete on your keyboard. Select>None. Delete the original template layer.
Here are the template layers and which papers I used:
frame background- paper 11
circle left- paper 8
circle right- paper 7
rectangle center- paper 3
rectangle right- paper 2
rectangle left- paper 4
-Make the glittered rectangle center layer active. Filters>Light & Shadow>Drop Shadow of 2, 2, 10, black, 100. Repeat this drop shadow on the following layers:
glitterd rectangle 2 right #1
glittered rectangle 2 left
glittered circle right
glittered cirlce left
-Make the glittered rectangle 2 right layer active. Colors>Colorize:
Hue: 290
Saturation: 0
Lightness: 58
Repeat drop shadow. Repeat on the glittered rectangle 1 left layer.
-Open frames 5. Move tothe top in the layer box. Scale by 50%. Select your magic wand tool. Click inside the top frame. Select>Grow by 5. Open paper 5. Move this paper layer below the frame in the layer box. Add alpha channel. Scale by 70%. Invert and press delete.
Select none. Repeat these step for the bottom frame layer using paper 1. Add drop shadow of 2, 2, 2, black, 50 to the frame layer. Open tube. Move below the frame layer in the layer box. Select the flip tool and click your canvas. Repeat drop shadow on tube.
Layer>Duplicate Layer. Place 1 tube in each frame. Using the eraser tool, erase parts og the tube sticking outside of the frame. Change the mode of the top tube to soft light. Change the mode of the bottom tube to grain merge.
-Open tube again. Move layer to the top in layer box. Scale by 80%. Repeat drop shadow. Duplicate. Filters>Blur>Gaussian Blur on the default settings. Change the mode to hard light.
-Open frames 4. Move to the bottom layer. Scale by 80%. Move to the left of the tag. (See mine)
Elements:
Add a drop shadow of 2, 2, 2, black, 50 to all element layers. See my tag for placement.
flower 4- scale 50%
chalis- scale 50%
chair- scale 50%
cage- scale 60%
bow 1- scale 35%
leaves 2- scale 50%
arch 2- scale 35%
skull 2- scale 40%
-Open paper 11. Apply mask.
-Add your name and copyright.
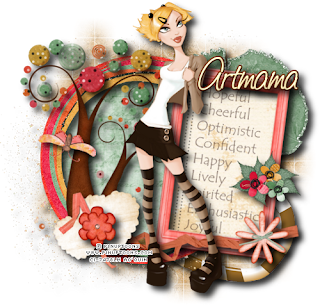 This tutorial is of my own creation and any resemblance to any other tuts is purely coincidental. This tutorial is for personal use only, using it for monetary gain is against our TOU's.
Supplies Needed:
~Gimp (any version will do).
~Tube of choice. I used the artwork of PinupToons, you must have a license to use this art which you can now get HERE.
~Sanguine PTU scrapkit by Artmama Made. Please stop by her blog HERE to see what stores she sells in.
~Mask of choice. I used WSL Mask 84 which you can get HERE.
~Font of choice. I used Saginaw Bold.
Let's get started!!!!!
1. Open a new layer ( I prefer a large canvas, so I make mine 1050x656). Make your canvas transparent (Layer > Transparency > Color to alpha).
2. Open embellie 3 (round frame), add drop shadow (Filters > Light & Shadow > Drop Shadow).
3. Open Paper 2, center it behind the frame. Remove excess using your eraser or circular cutting tool from your tool box.
4. Open embellie 4 (rectangular frame), add drop shadow.
5. Open embellie 43 (text), center it behind frame. Remove excess using your eraser or rectangular cutting tool from your tool box.
6. Open Paper 4, center it behind frame and behind embellie 43. Remove excess using your eraser or rectangular cutting tool from your tool box.
7. Open tube, add drop shadow.
8. Open and place the following elements:
embellie 15
embellie 10
embellie 14
embellie 8
embellie 26
embellie 39
embellie 17
embellie 28
embellie 19
~Some elements may need to be sized down. Using the Scale Tool in your tool box adjust pixels to desired size~
~Add drop shadow to all elements~
9. Open Paper 10.
10. Open mask.
11. Add mask to paper (click HERE for a tut on using masks)
12. Merge layers (Image > Merge Visible Layer).
13. Crop image (Image > Autocrop Image).
14. Scale image to desired size (Image > Scale Image).
15. Add copyright info and name.
16. Save as .png
You are finished :)
  Artmama is having a 'Buy Her Taggers Store' sale! This is a great opportunity to get all of her beautiful tagger sized kits at one amazingly low price. If you would like to check out her sale click HERE.
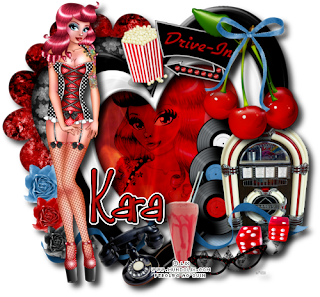 This tutorial is of my own creation and any resemblance to any other tuts is purely coincidental. This tutorial is for personal use only, using it for monetary gain is against our TOU's.
Supplies Needed:
~Gimp (any version will do).
~Tubes of choice. I used the artwork of Lix. You must have a license to use this art which you can now get HERE.
~Route 66 PTU scrapkit which you can get from Sweet Cravings Scraps HERE.
~Font of choice. I used Fabulous 50's.
Let's get started!!!!!
1. Open a new layer ( I prefer a large canvas, so I make mine 1050x656). Make your canvas transparent (Layer > Transparency > Color to alpha).
2. Open Frame 5 & Frame 4, add drop shadow (Filters > Light & Shadow > Drop Shadow).
3. Open Paper 12 & Paper 1 center one behind each frame, remove excess paper using a cutting tool or eraser in your tool box.
4. Open Frame 7, add drop shadow.
5. Open Paper 5, center it behind heart frame. Remove excess paper using a cutting tool or eraser from your tool box.
6. Open tubes, I used both a close-up and a full body tube. I changed the mode on the close-up tube to Hard Light (at the top of the Layer Box you will see where it says Mode, click on the arrow and select Hard Light from the drop down menu. Add drop shadow to full body tube.
7. Open and place the following elements:
Popcorn
Drive In Sign 2
Record 1
Record 2
Record 3
Jukebox
Ribbon 2
Dice
Telephone
Milkshake 1
Glasses
Flower 4
Flower 5
Flower 6
Cherries
Bow 2
~Some of the elements may need to be sized down. Using your scale tool in your tool box adjust the pixel size until element is the correct size~
~Add drop shadow to all elements~
8. Merge layers (Image > Merge Visible Layer).
9. Autocrop image (Image > Autocrop Image).
10. Scale image to desired size (Image > Scale Image).
11. Add copyright info and name.
12. Save as .png
You are finished :)
 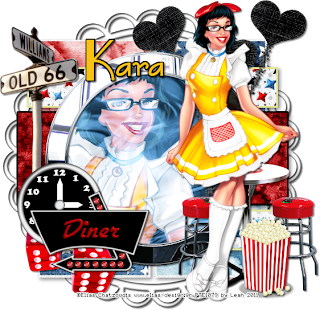 This tutorial is of my own creation and any resemblance to any other tuts is purely coincidental. This tutorial is for personal use only, using it for monetary gain is against our TOU's.
Supplies:
Gimp- Any version should work
Awesome PTU kit from Sweet Cravings Scraps called Route 66 HERE
Tube of choice. I am using the art of Elias Chatzoudis. You must have a license to use his work. You can purchase his tubes HERE
Template by Kaci on the Creative Misfits blog. I used CMSKDS_CMSquareTemp HERE
Font- Fashion Victim
Let's get started!
-Open template. Delete the credits. Image>Scale Image by 500x500 pixels. Now got to Image>Canvas Size of 600x600 pixels and make sure to click center.
-Let's add papers to the template layers. Make the template layer active (see below). Right click template layer in layer box and choose alpha to selection. Open paper (see below). Right click paper layer in layer box and choose add alpha channel. Layer>Scale Layer by 60%.
Select>Invert. Press delete on your keyboard. Select>None. Delete the original template layer.
Here are the template layers and which papers I used:
1 & 2- paper 16
4-paper 11
7 & 9- paper 15
6 & 8- paper 17
-Make layer 3 active. Colors>Colorize.
Hue-60
Saturation- 60
Lightness- 50
Now go to Filters>Light and Shadow>Drop Shadow of 3, 3, 10, black, 50.
-Make layer 5 active. Colorize but just change the lightness to -100. Filters>Repeat Drop Shadow.
-Make layer 10 active. Repeat drop shadow.
-Open frame 3. Make this the top layer in the layer box. Scale by 50%. Select your magic wand tool. Click inside the frame. Select>Grow by 5. Open paper 2. Move the paper layer below the frame layer. Add alpha channel. Scale by 50%. Invert and delete.
Select none. Make the frame layer active. Add a drop shaodw of 2, 2, 2, black, 50.
-Open tube close up. Move below the frame layer. Plavce tube inside frame (see mine). Using the magic wand click inside the frame. Grow by 20. Make the tube active. Invert and delete. Select none. Change the mode to screen.
-Open the full body tube. Repeat drop shadow. Layer>Duplicate. Filters>Blur>Gaussian Blur on the default settings. Change the mode to overlay.
Elements:
Add a drop shadow of 2, 2, 2, black, 50 to each element layer. See my tag for placement.
diner sign 1- scale 35%
clock 1- scale 30%
table- scale 35%
frame 1- scale 70%
dice- scale 35%
street sign- scale 50%
hearts 2- scale 70%
popcorn- scale 35%
-Add your name and copyright.
You're finished!

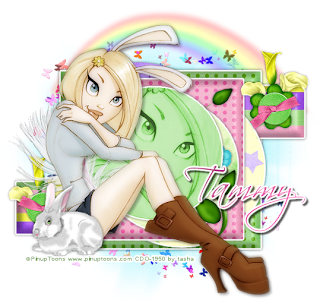
This tutorial is of my own creation and any resemblance to any other tuts is purely coincidental. This tutorial is for personal use only, using it for monetary gain is against our TOU's. Supplies Needed: ~Gimp (any version will do). ~Nymph PTU scrapkit which you can get from Addictive Pleasures HERE. ~Tube of choice. I used the art of Ismael Rac, you must have a license to use his art which you can get HERE. ~Template of choice. I used a Spring Template by Leah which you can get from Creative Misfits HERE. ~Mask of choice. I used WSL mask 302 which you can get HERE. ~Font of choice. I used Monika. Let's get started!!! 1. Open a new layer ( I prefer a large canvas, so I make mine 1050x656). Make your canvas transparent (Layer > Transparency > Color to Alpha). 2. Open template in PSD format, move layers of template around until they are the way you like them. ~Add paper from scrapkit to individual layers of the template (Right click on template layer in layer box > Alpha to Selection > CTRL I > Select paper layer in layer box > Delete). These are the papers I used: Paper 1 Paper 3 Paper 5 Paper 6 Paper 7 Paper 11 ~I added noise to some of the template layers to make them look glittery (Filters > Noise > RGB Noise). ~I colorized some of the template layers to better match the scrapkit (Colors > Colorize > play with the setting until you get the desired color). ~Add drop shadow to template layers (Filters > Light & Shadow > Drop Shadow). 3. Open tube, add drop shadow. 4. Open and place the following elements: Butterflys Ribbon 5 Leaves 2 Daisy Callalilly Flower Flower 2 Fluffy Heart Fairytrail ~Some of the elements may need to be sized down. Using your scale tool in your tool box adjust the pixel size until element is the correct size~ ~Add drop shadow to all elements~ 5. Open Paper 12 6. Open mask 7. Add mask to paper (click HERE for a tut on using masks) 8. Merge Layers (Image > Merge Visible Layers). 9. Crop Image (Image > Autocrop Image). 10. Scale image to desired size (Image > Scale Image). 11. Add copyright info and name 12. Save as .png ALL DONE!!!!!!!!!!
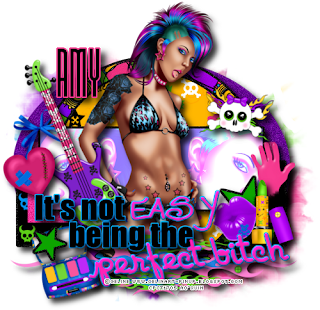 This tutorial is of my own creation and any resemblance to any other tuts is purely coincidental. This tutorial is for personal use only, using it for monetary gain is against our TOU's.
Supplies Needed:
~Gimp (any version will do).
~IYF (In Your Face) FTU scrapkit which you can get from Kittz Kretionz HERE.
~Tube of choice. I used the artwork of Celine, you must have a license to use this art which you can get HERE.
~Template of choice. I used Template 100 which you can get at Rose's Place HERE.
~Mask of choice. I used WSL mask302 which you can get HERE.
~Font of choice. I used Pasta Palazzo.
Let's get started!!!
1. Open a new layer ( I prefer a large canvas, so I make mine 1050x656). Make your canvas transparent (Layer > Transparency > Color to Alpha).
2. Open template in PSD format, move layers of template around until they are the way you like them.
~Add paper from scrapkit to individual layers of the template (Right click on layer in layer box > Alpha to Selection > CTRL I > Select paper layer in layer box > Delete).
These are the papers I used:
Paper 2
Paper 3
Paper 8
~I added noise to some of the template layers to make them look glittery (Filters > Noise > RGB Noise).
~I colorized some of the template layers to better match the scrapkit (Colors > Colorize > play with the setting until you get the desired color).
~Add drop shadow to template layers (Filters > Light & Shadow > Drop Shadow).
3. Open tubes, I used a full body and 2 close-ups. I changed the mode on the close-ups to Dodge (at the top of your Layer Box you will see where it says Mode, click on the arrow and select Dodge from the drop down menu). Add drop shadow to full body tube.
4. Open and place the following elements:
Blue Bow
Flames
Hand
Eye Shadow Compact
Lippy
Lippy 2
Guitar
Sewn up Heart
Skull
~Some of the elements may need to be sized down. Using your scale tool in your tool box adjust the pixel size until element is the correct size~
~Add drop shadow to all elements~
5. Open Paper 5
6. Open mask (click HERE for a tutorial on using masks)
7. Merge Layers (Image > Merge Visible Layers).
8. Crop Image (Image > Autocrop Image).
9. Scale image to desired size (Image > Scale Image).
10. Add copyright info and name
11. Save as .png
ALL DONE!!!!!!!!!!
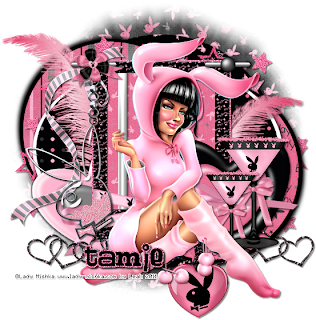 This tutorial is of my own creation and any resemblance to any other tuts is purely coincidental. This tutorial is for personal use only, using it for monetary gain is against our TOU's.
Supplies:
Gimp- Any version should work
Fabulous FTU kit from Addictive Pleasures called Playbunny 2011 which you can get HERE
Tube of choice. I am using a freebie tube from Lady Mishka. There is no license required for using this tube. You can get it HERE
Template #16 from Candylicous Designz HERE
Mask- AR315_CMC_mask132 HERE
Font- Elise
Let's begin!
-Open template. Delete the credit layer. Select your crop tool. Draw a bow as close to the template as possible. Crop. Image>Scale Image by 500x414 pixels. Change the x & y resolutions to 72.00. Image>Canvas Size 600x600 pixels and
make sure to press center.
-Let's add papers to the template layers. Make the template layer active (see below). Right click template layer in layer box and choose alpha to selection. Open paper (see below). Right click paper layer in layer box and choose add alpha channel. Layer>Scale Layer by 65%.
Select>Invert. Press delete on your keyboard. Select>None. Delete the original template layer.
Here are the template layers and which papers I used:
pink oval- paper 3
grey circle right- paper 5
grey circle left- paper 1
purple circle- paper 10 Filters>Light & Shadow>Drop Shadow of 3, 3, 10, black, 100
-Repeat this drop shadow on the oval outline and black outline layers.
-Add a drop shadow of -3, -3, 10, black, 100 to the black outline left layer.
-Open frame 4. Move this layer to the top in the layer box. Scale by 65%. Alpha to selection. Select>Grow by 2. Add new layer below this layer. Select your bucket fill tool and set your foreground color to ec7ba1. Fill the selection. Select none. Filters>Noise>RGB Noise.
Uncheck Independent RGB. Change the red, green and blue sliders 0.50. Add a drop shadow of 2, 2, 2, black, 50. Make the frame layer active. Select your magic wand. Click inside the frame. Grow by 15. Open paper 12. Move this paper layer below the frame layer in the layer
box. Add alpha channel. Scale by 50%. Invert and delete. Select none.
-Open tube. Scale by 30%. Repeat drop shadow.
Elements:
Add drop shadow of 2, 2, 2, black, 50 to each element layer. See my tag for placement.
star- no scale
staple- scale 50%
ribbon 2- scale 65%
heart 3- scale 60%
glass- scale 50% Layer>Duplicate Layer. Scale 75%
button - no scale
heartlinks- scale 60%
bow 2- scale 50%
bunny charm- no scale
button 2- no scale
feather 2- no scale Duplicate Select your flip tool and click the canvas
pole- no scale Select your eraser tool and erase the parts of the pole sticking out of the frame
-Open paper 11. Apply masks. If you don't know how to use masks click HERE.
-Add your name and copyright.
All done!
 This tutorial is of my own creation and any resemblance to any other tuts is purely coincidental. This tutorial is for personal use only, using it for monetary gain is against our TOU's.
Supplies:
Gimp- Any version should work
Pretty PTU kit from Creative Intentionz called Oh So Natural which you can purchase HERE
Tube of choice. I am using Imael Rac. You must have a licence to use his tubes. You can purchase them HERE
Font- Pea Kar Kar
-Go to File>New and open a canvas with the size of 600x600 pixels.
-Open frame 2. Layer>Scale Layer by 60%. Select your magic wand tool. Click inside the frame. Select>Grow by 10. Open paper 9. Move this paper layer below the frame layer in the layer box. Right click the paper layer in the layer box and choose add alpha channel.
Scale by 50%. Select>Invert. Press delete on the keyboard. Select>None. Make the frame layer active. Filters>Light & Shadow>Drop Shadow of 2, 2, 2, black, 50.
-Open the wood path. Scale by 50%.Move above the paper layer. Filters>Repeat drop shadow. Select your eraser tool. Erase the parts of the path that are sticking out of the frame.
-Open your tube. Scale by 85%. Move tube to the top layer. Position in the middle of the frame. Repeat drop shadow. Layer>Duplicate layer. Move the duplicate tube below the frame layer. Make the paper layer active. Right click the paper layer in the layer box and choose
alpha to selection. Make the duplicate tube active. Invert and delete. Select none. Make the original tube layer active. Erase the legs on the tube that are sticking out of the bottom of the frame.
Elements:
Add a drop shadow to each element layer unless otherwise stated. See my tag for placement.
curly ribbon- no scale I erased parts of the ribbon
branch- select your rotate tool. In the angle box put 90.00 Scale by 50%
daisy 1- scale 60%
corner 2- rotate 133.00 scale 75%
tag heart 1- scale 40% Rotate 27.00
tag heart 2- scale 40% rotate 27.00 select your flip tool and click the canvas
circle sparkle- no scale and no drop shadow
ribbon 1- scale 50% Rotate 90.00
-Open paper 6. Move to the bottom layer. Right click layer in layer box and choose add alpha channel. Scale by 60%. Right click again and choose layer to image size. Select the smudge tool. I smudged the paper using up and down motions across the edge of the paper on the top and bottom. On the sides I went from left to right. I hope that make sense!
-Add your name and your copyright.
You're done!!!!!
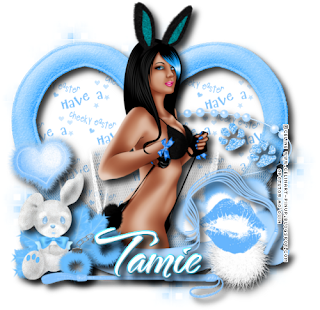 This tutorial is of my own creation and any resemblance to any other tuts is purely coincidental. This tutorial is for personal use only, using it for monetary gain is against our TOU's.
Supplies Needed:
~Gimp (any version will do).
~Tube of choice. I used the art of Celine. You must have a license to use this art which you can get HERE.
~Cheeky Bunny Blue PTU scrapkit which you can get from Addictive Pleasures HERE.
~Mask of choice. I used WSL mask 84 which you can get HERE.
~Font of choice. I used TheNautiGal.
Let's get started!!!!!
1. Open a new layer ( I prefer a large canvas, so I make mine 1050x656). Make your canvas transparent (Layer > Transparency > Color to alpha).
2. Open Heart Frame, add drop shadow (Filters > Light & Shadow > Drop Shadow).
3. Open Paper 3 center it behind the frame, remove excess paper a cutting tool or eraser from your tool box.
4. Open tube, add drop shadow.
5. Open and place the following elements:
Netting
Fluffy Hearts
Fluffy Heart 2
Beads 2
Banner
Fan
Bunny
Fluffy Ball
Decor
Lips
Crop
Whip
Handcuffs
~Some of the elements may need to be sized down. Using your scale tool in your tool box adjust the pixel size until element is the correct size~
~Add drop shadow to all elements~
6. Open Paper 10.
7. Open mask.
8. Add mask to paper (click HERE for a tut on using masks)
9. Merge layers (Image > Merge Visible Layer).
10. Autocrop image (Image > Autocrop Image).
11. Scale image to desired size (Image > Scale Image).
12. Add copyright info and name.
13. Save as .png
You are finished :)
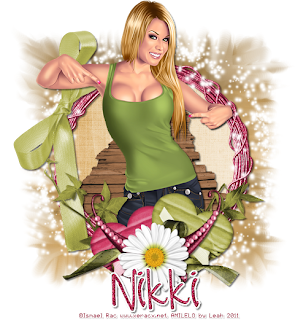
 This tutorial is of my own creation and any resemblance to any other tuts is purely coincidental. This tutorial is for personal use only, using it for monetary gain is against our TOU's. Supplies: Gimp- Any version should work Great kit from Addictive Pleasures called Bevery Hills Babe HERE Tube of choice. I am using Elias Chatoudis. You must have a licence to use his tubes. You can purchase them HERE Template 62 by me HERE WSL_Mask149 HERE Font- Shit Happens HERE Let's begin!!! -Open template. Delete the credits. Image>Canvas Size and change it to 650x650 pixels and make sure to press center. Let's add papers to the template layers. Make the template layer active (see below). Right click template layer in layer box and choose alpha to selection. Open paper (see below). Right click paper layer in layer box and choose add alpha channel. Layer>Scale Layer by 75%. Select>Invert. Press delete on your keyboard. Select>None. Delete the original template layer. Here are the template layers and which papers I used: circle 1- paper 1 Filters>Light & Shadow>Drop Shadow of 2, 2, 2, black, 50. circle 2- paper 8 circle 3- paper 7 Filters>Repeat drop shadow rect 1- paper 12 rect 2- paper 6 Repeat drop shadow rect 3- paper 10 rect 4- paper 9 square 1- paper 5 Repeat drop shadow -Make the frame 1 layer active. Go to Color>Colorize. Move the lightness slider to 100. Filters>Noise>RGB Noise uncheck Independent RGB and change the the red, blue and green sliders to 0.50. Repeat drop shdaow. Do the same to frame 2. -Make the star 1 layer active. Repeat noise. Filters>Decor>add Bevel. uncheck work on copy. Change thickness to 10. Add drop shadow of 5, 5, 2, black, 50. Do the same to the star 2 and star 3 layers. -Make the wordart layer active. Select the magic wand tool. While pressing shift click on the vowels in the words 'Beverly Hills'. Colors>Colorize and change the lightness slider to -100. Select none. Add the same bevel. -Repeat the drop shadow on the wordart back layer. -Open tube. Move this tube layer below the word art back layer in the layer box. Add drop shadow of 2, 2, 2, black, 50. Layers>Duplicate Layer. Filters>Blur>Gaussian blur on the default settings. Change the mode to grain merge. Elements: Add a drop shadow of 2, 2, 2, black, 50. See my tag for placement. ribbon bow 2- scale 60% heart- scale 70% Select your flip tool click the canvas to flip money- scale 60% signpost- 70% sunglasses- scale 45% bag 2- scale 35% shoe- scale 35% shoe 2- scale 35% scrunched ribbon- scale 50% tag- scale 35% diamond- scale 25% stars- scale 75% -Open paper 7. Apply mask. -Add your name and copyright. All done!
Labels
Chit Chat
Blog Archive
-
▼
2011
(337)
-
▼
April
(21)
- New PTU tut "Kawaii Cutie"
- New PTU tut- Fantasy
- New FTU tut "F.O.C.U.S"
- New Templates!
- *Stepping Down*
- New PTU tut "Kick Ass Chick"
- New PTU tut "Emo Princess"
- PTU tut- Rac Cutie
- PTU Tut- Gothic Beauty
- New PTU tut "Thoughts of Spring"
- Artmama's Having A Sale!!!
- New PTU tut "Classic Cutie"
- PTU tut- Old Timer
- New PTU tut "Spring Fever"
- New FTU tut "Perfect Bitch"
- FTU tut- Sexy Bunny
- Tutorial Show Off
- PTU Tut- Natural Beauty
- New PTU tut "Cheeky Easter"
- PTU tut- Beverly Hills
- New Templates!
-
▼
April
(21)


