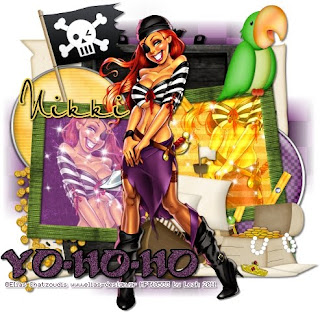
This tutorial is of my own creation and any resemblance to any other tuts is purely coincidental. This tutorial is for personal use only, using it for monetary gain is against our TOU's. Supplies: Gimp-Any version should work I used an adorable PTU kit from Creative Intentionz called 'A Pirates Life'. Check out her blog HERE to see the stores she sells in. I used the art of Elias Chatzoudis. You must have a license to use his tubes. You may purchase them HERE Vix_Mask10 HERE Fonts- BlackBeard & petraScriptEF Let's get started!! -File>New and open a canvas with the size of 500x500 pixels. -Open frame 1. Layer>Scale Layer by 75%. Using the magic wand, click inside the 1st frame. Select>Grow by 5. Open paper 2. Right click paper layer in the layer box and choose add alpha channel. Scale by 50%. Select>Invert. Press delete on your keyboard. Select>None. Do the same for the 2nd frame, but use paper 4. On the frame layer go to Filters>Light & Shadow>Drop Shadow of 2, 2, 2, black, 50. -Open tube. Move her below frame layer. Layer>Duplcate Layer. Place one tube in each frame. I used the flip tool to flip the tube in the 1st frame. Make the purple paper avtive. Using the magic wand, click outside of the paper. Make the tube on top of the purple paper active. Press delete. Select none. Change the mode of this tube to screen. Repeat above with the other tube. Change this tubes mode to grain merge. \-Open tube again. Scale by 90%. Place in the center of the tag. Filters>Repeat Drop Shaodw. Duplicate the tube. On the duplicate layer go to Filters>Blur>Gaussian Blur on the default settings. Change the mode to soft light. Elements Add a drop shadow of 2, 2, 2, black, 50 to all element layers. See my tag for placement. brad 2- no scale brad 4- no scale map- scale 85% treasure chest- no scale parrot- scale 50% coins- scale 45% sparkles- no scale & no drop shadow I erased the parts of the sparkle sticking outside of the frame treasure- scale 40% ship- scale 40% -Open paper 8. Apply mask. If you don't know how to use masks click HERE. -Now we will add the words. using the BlackBeard font, size set at 60 and your foreground color 5e3455, type ' yo-ho-ho '. Go to Filters>RGB Noise on the default settings. Right click the word layer in the layer box and choose alpha to selection. Grow by 2. Add a new layer below this layer. Using the bucket tool and your foreground color set to black, fill the selection. Select none. Repeat drop shadow. -Add your name with the PetraScriptEF font. -Add proper copyright and crop. All finished! I hope you enjoyed my tutorial!
Labels
Chit Chat
Blog Archive
-
▼
2011
(337)
-
▼
February
(20)
- New PTU tut "Spring is Calling"
- PTU tut- Dreams Do Come True
- New PTU tut "Kiss Me"
- Fairy Tale Templates
- New PTU tut "Emo Cutie"
- PTU tut- Lil' Emo
- PTU tut- Yo Ho Ho
- New PTU tut "Cats Meow"
- WOOT!!!!!! We joined a new CT!!!!!!!!!
- PTU tut- Vintage Gorjuss
- New PTU tut "Time Gone By"
- PTU tut- Midnight Poison
- Anti Valentines Templates
- New PTU tut "So Emo"
- New FTU tut "Be Mine"
- 80's Themed Templates
- PTU Tut- Love Hurts
- PU Valentine Quick Pages
- More Templates:)
- New PTU tut "Hit That"
-
▼
February
(20)


0 comments:
Post a Comment