Gimptastic Scraps Available Exclusively @

Gimptastic Scraps CT


Blog Trains

CU Licenses


Saturday, December 31, 2011

This tutorial is of my own creation and any resemblance to any other tuts is purely coincidental. This tutorial is for personal use only, using it for monetary gain is against our TOU's.
Supplies:
Gimp
PTU kit from Lisa Cree called New Year at PSP Tube Stop HERE
Tube of choice. I am using Keith Garvey. You must have a license to use his tubes. You can purchase them HERE at PSP Tubes Emporium
Mask 220 from weescotslass HERE
Font- Fontdinnerdotcom Loungy
Let's Begin!
-File>New 600x600 pixles.
Open champagne round frame. Layer>Scale Layer 75%. Select the magic wand. click inside the frame. Select>Grow 10. Layer>New Layer. Move new layer below frame layer in layer box. Change your foreground color to 41f1e. Select the bucket fill tool and fill selection. Open champagne bubbles texture. Select>Invert. Press delete on your keyboard. Open tube close up. Place inside of frame. Move below the bubble layer. Delete. Select>None. Change the mode of the tube to grain merge.
-Open beaten gold round frame. Make the top layer. Scale 35%. Place to the bottom left of the other frame. Layer>Layer To Image Size. Layer>Duplicate Layer. Select the flip tool and click canvas. Make the left frame active. With the magic wand, click inside frame. Grow by 5. Open champagne yellow bubbles texture. Move layer below frame left frame layer. Layer>Transparency>Add Alpha Channel. Invert & delete. Open tube. Place inside selection. Delete. Select none. Change mode of tube to grain merge and lower the opacity to 80. Mkae left frame active. Filters>Light & Shadow>Drop Shadow 2, 2, 2, black, 50. Repeat above for the right frame.
-Open tube. Make the top layer. Scale 80%. Place in the middle of tag. Dulpicate. Filters>Blur>Gaussian Blur on default. Change mode to soft light.
Elements:
gold starts falling 15
white bubble
clock gold underside
red balloon- rotate 20
blue balloon- rotate -15
champagne emptyyellow gold- rotate -15
party popper green 3
blue stars falling 3
blue stars falling 17
-Open ice & glitter green texture. Make the bottom layer. Apply mask. Click HERE to learn to apply masks. Lower the opacity to 65.
-Add your name and copyright and you're finished!
Friday, December 30, 2011

This tutorial is of my own creation and any resemblance to any other tuts is purely coincidental. This tutorial is for personal use only, using it for monetary gain is against our TOU's.
Supplies Needed:
~Gimp (any version will do).
~Candy Gothic PTU scrapkit by Wicked Princess Scraps, which will available for purchase soon at PTE HERE.
~Tubes of choice. I used the artwork of Lix, you must have a license to use this art. You can purchase this art from PTE HERE.
~Template of choice. I used the Stalking template which you can get from Redneck Tuts by Savage HERE.
~Font of choice. I used Valentina JF.
Let's get started!!!
1. Open a new layer ( I prefer a large canvas, so I make mine 1050x656). Make your canvas transparent (Layer > Transparency > Color to Alpha).
2. Open template in PSD format, remove and move layers of template around until they are the way you like them.
~Add paper from scrapkit to individual layers of the template (Right click on template layer in layer box > Alpha to Selection > CTRL I > Select paper layer in layer box > Delete).
These are the papers I used:
Paper 2
Paper 3
Paper 8
Paper 9
~This template comes with many options of artists to "stalk", Lix was not one of them so I added the "Lix" text using the Valentina JF font.
~I added noise to some of the template layers to make them look glittery (Filters > Noise > RGB Noise).
~I added noise to some of the template layers to make them look glittery (Filters > Noise > RGB Noise).
~I colorized some of the template layers to better match the scrapkit (Colors > Colorize > play with the setting until you get the desired color).
~Add drop shadow to template layers (Filters > Light & Shadow > Drop Shadow).
3. Open tubes, I used both a full body and a few close ups.
~Open the full body tube, add drop shadow.
~I changed the mode on the 2 larger close-ups to Dodge (at the top of your Layer Box you will see where it says Mode, click the arrow and select Dodge from the drop down menu). I changed the mode on the 4 small close-ups to Burn (follow same steps as above).
~The close-up tubes have been added to the template in the same way you add paper (Right click on template layer in layer box > Alpha to Selection > CTRL I > Select tube layer in layer box > Delete) do this for each tube layer.
4. Open and place the following elements:
Flame
Balloon x2
Boot
Tophat skull
Flower 3
Ipod
Bear
Cupcake 2
Spiked heart
Cup
Bow skull
~Some of the elements may need to be sized down. Using your scale tool in your tool box adjust the pixel size until element is the correct size~
~Add drop shadow to all elements~
5. Merge Layers (Image > Merge Visible Layers).
6. Crop Image (Image > Autocrop Image).
7. Scale image to desired size (Image > Scale Image).
8. Add copyright info and name.
9. Save as .png
ALL DONE!!!!!!!!!!

Here's a tag using a HOT tube from Keith Garvey. She'll be coming your way soon at PSP Tubes Emporium.
Thursday, December 29, 2011

This tutorial is of my own creation and any resemblance to any other tuts is purely coincidental. This tutorial is for personal use only, using it for monetary gain is against our TOU's.
Supplies Needed:
~Gimp (any version will do).
~Tube of choice. I used the artwork of PinupToons , you must have a license to use this art which you can get HERE.
~Vintage Girl PTU scrapkit by A Taggers Scrap which you can get HERE.
~Font of choice. I used 1 Snappy DNA.
Let's get started!!!!!
1. Open a new layer ( I prefer a large canvas, so I make mine 1050x656). Make your canvas transparent (Layer > Transparency > Color to alpha).
2. Open Frame 2, add drop shadow (Filters > Light & Shadow > Drop Shadow).
3. Open Paper 22 center it behind the frame, remove excess paper using a cutting tool or eraser.
4. Open Window, add drop shadow.
5. Open Paper 14 center it behind the Window, remove excess paper using a cutting tool or eraser.
6. Open tube, add drop shadow.
7. Open and place the following elements:
Net
Bow 7
Mirror
Luggage
Metal leaves
Clock 2
Fan
Candle
Pen & Nibs
Cameo 2
Flower 2
Radio
Telephone
Butterfly
Butterfly 2
Dragonfly
~Some elements may need to be sized down. Using the Scale Tool in your tool box adjust pixels to desired size~
~Add drop shadow to all elements (except Net)~
8. Merge layers (Image > Merge Visible Layer).
9. Crop image (Image > Autocrop Image).
10. Scale image to desired size (Image > Scale Image).
11. Add copyright info and name.
12. Save as .png
You are finished :)

This tutorial is of my own creation and any resemblance to any other tuts is purely coincidental. This tutorial is for personal use only, using it for monetary gain is against our TOU's.
Supplies Needed:
~Gimp (any version will do).
~Happy New Year 2012 PTU scrapkit by Pink Candy Designs which you can purchase from Lollipops N Gumdrops HERE.
~Tube of choice. I used the artwork of Tim Lowery, you must have a license to use this art. You can purchase this art from PTE HERE.
~Template of choice. I used the 2012 template which you can get from K'Lani Designs HERE.
~Font of choice. I used Satisfaction.
Let's get started!!!
1. Open a new layer ( I prefer a large canvas, so I make mine 1050x656). Make your canvas transparent (Layer > Transparency > Color to Alpha).
2. Open template in PSD format, remove and move layers of template around until they are the way you like them.
~Add paper from scrapkit to individual layers of the template (Right click on template layer in layer box > Alpha to Selection > CTRL I > Select paper layer in layer box > Delete).
These are the papers I used:
Paper 2
Paper 3
Paper 5
~I added noise to some of the template layers to make them look glittery (Filters > Noise > RGB Noise).
~I colorized some of the template layers to better match the scrapkit (Colors > Colorize > play with the setting until you get the desired color).
~Add drop shadow to template layers (Filters > Light & Shadow > Drop Shadow).
3. Open tubes, I used both a full body and 2 close ups.
~Open full body tube, you will need to duplicate this tube so that you have 2 (at the bottom of your layer box click on the blue box. This will give you 2 tube layers).
~Select the top tube layer in your tool box. Add Gaussion Blur (Filters > Blur > Gaussion Blur, use default settings).
~On that same tube layer change the mode to Overlay (at the top of your Layer Box you will see where it says Mode, click the arrow and select Overlay from the drop down menu).
~Add drop shadow to bottom tube layer.
~I changed the mode on the close-up to Hardlight (at the top of your Layer Box you will see where it says Mode, click the arrow and select Hardlight from the drop down menu). This tube has been added to the template in the same way you add paper (Right click on template layer in layer box > Alpha to Selection > CTRL I > Select tube layer in layer box > Delete).
4. Open and place the following elements:
Glitter x2
Stars x2
Beads 2
Mask
Bottle
Glass 2
Balloon
Hat 2
Handbag
Shoes
Trumpet
~Some of the elements may need to be sized down. Using your scale tool in your tool box adjust the pixel size until element is the correct size~
~Add drop shadow to all elements (except Glitter)~
5. Merge Layers (Image > Merge Visible Layers).
6. Crop Image (Image > Autocrop Image).
7. Scale image to desired size (Image > Scale Image).
8. Add copyright info and name.
9. Save as .png
ALL DONE!!!!!!!!!!
Wednesday, December 28, 2011
Here are some tags our friends at Cafemom made with Leah's newest Christmas templates. They came out great and everyone really showed how many different tags can be made with them.


Tuesday, December 27, 2011

This tutorial is of my own creation and any resemblance to any other tuts is purely coincidental. This tutorial is for personal use only, using it for monetary gain is against our TOU's.
Supplies Needed:
~Gimp (any version will do).
~Tube of choice. I used the artwork of Katerina Koukiotis you must have a license to use this art which you can get @ PSP Tube Stop HERE.
~Elegant New Year FTU scrapkit by Delph Designs. This kit is a limited time Facebook exclusive, like the page and download the exclusive HERE.
~Mask of choice. I used Bling mask Ella 5 which you can get from Creative Misfits HERE.
~Font of choice. I used Clipper Script.
Let's get started!!!!!
1. Open a new layer ( I prefer a large canvas, so I make mine 1050x656). Make your canvas transparent (Layer > Transparency > Color to alpha).
2. Open element 15 (frame), add drop shadow (Filters > Light & Shadow > Drop Shadow).
3. Open Paper 2 center it behind frame, remove excess paper using a cutting tool or eraser.
4. Open tube, add drop shadow.
5. Open and place the following elements:
element 2
element 4
element 5
element 7
element 8
element 10
element 11
element 13
element 16
element 18
element 23
element 25
~Some elements may need to be sized down. Using the Scale Tool in your tool box adjust pixels to desired size~
~Add drop shadow to all elements~
6. Open Paper 4.
7. Open mask.
8. Add mask to paper (click HERE for a tut on using masks).
9. Merge layers (Image > Merge Visible Layer).
10. Crop image (Image > Autocrop Image).
11. Scale image to desired size (Image > Scale Image).
12. Add copyright info and name.
13. Save as .png
You are finished :)

Here's a sneak peek of a Jose Cano tube that will be released REAL soon at PTE
Saturday, December 24, 2011

We just wanted to take a moment to wish all of you a "Gimptastic" and of course Merry Christmas ♥
Friday, December 23, 2011

This tutorial is of my own creation and any resemblance to any other tuts is purely coincidental. This tutorial is for personal use only, using it for monetary gain is against our TOU's.
Supplies Needed:
~Gimp (any version will do).
~Tube of choice. I used the artwork of Michelle Soneja you must have a license to use this art which you can get @ PTE HERE.
~Strawberry Wine FTU scrapkit by Rieka Rafita which you get HERE.
~Mask of choice. I used WSL mask 99-8 which you can get HERE.
~Font of choice. I used Picayune Intelligence.
Let's get started!!!!!
1. Open a new layer ( I prefer a large canvas, so I make mine 1050x656). Make your canvas transparent (Layer > Transparency > Color to alpha).
2. Open Frame 3, add drop shadow (Filters > Light & Shadow > Drop Shadow).
3. Open Paper 8 center it behind frame, remove excess paper using a cutting tool or eraser.
4. Open tube.
~You will need to duplicate this tube so that you have 2 (at the bottom of your layer box click on the blue box. This will give you 2 tube layers).
~Select the top tube layer in your tool box. Add Gaussion Blur (Filters > Blur > Gaussion Blur, use default settings).
~On that same tube layer change the mode to Overlay (at the top of your Layer Box you will see where it says Mode, click the arrow and select Overlay from the drop down menu).
~Add drop shadow to bottom tube layer.
5. Open and place the following elements:
Leaves
Flower 1
Dragonfly
Tunna
Cupcake
Strawberry 1
Strawberry 2
Strawberry 3
Strawberry 4
Strawberry basket 2
Wine bottle
Heart
~Some elements may need to be sized down. Using the Scale Tool in your tool box adjust pixels to desired size~
~Add drop shadow to all elements~
6. Open Paper 10.
7. Open mask.
8. Add mask to paper (click HERE for a tut on using masks).
9. Merge layers (Image > Merge Visible Layer).
10. Crop image (Image > Autocrop Image).
11. Scale image to desired size (Image > Scale Image).
12. Add copyright info and name.
13. Save as .png
You are finished :)
Thursday, December 22, 2011

This tutorial is of my own creation and any resemblance to any other tuts is purely coincidental. This tutorial is for personal use only, using it for monetary gain is against our TOU's.
Supplies Needed:
~Gimp (any version will do).
~Tube of choice. I used the artwork of RB White you must have a license to use this art which you can get @ PTE HERE.
~Mama & Me FTU scrapkit by Wicked Princess Scraps which you get HERE.
~Mask of choice. I used WSL mask 363 which you can get HERE.
~Font of choice. I used Rumpelstiltskin.
Let's get started!!!!!
1. Open a new layer ( I prefer a large canvas, so I make mine 1050x656). Make your canvas transparent (Layer > Transparency > Color to alpha).
2. Open Potholder element.
3. Open tube, add drop shadow.
4. Open and place the following elements:
Cupcake pan
Cupcake molds
Cupcake
Big bowl
Sugar cubes
Mixer
BonBon 2
Eggs
Flour
Sundae
Piece of cake
Muffin 2
Cookie
~Some elements may need to be sized down. Using the Scale Tool in your tool box adjust pixels to desired size~
~Add drop shadow to all elements (except BonBon 2 & Sundae)~
5. Open mask.
6. Add mask to Potholder element (click HERE for a tut on using masks).
7. Merge layers (Image > Merge Visible Layer).
8. Crop image (Image > Autocrop Image).
9. Scale image to desired size (Image > Scale Image).
10. Add copyright info and name.
11. Save as .png
You are finished :)
Wednesday, December 21, 2011

Here's a tag I made using a soon to be released tube from RB White. You will find her soon at PTE HERE.

This tutorial is of my own creation and any resemblance to any other tuts is purely coincidental. This tutorial is for personal use only, using it for monetary gain is against our TOU's.
Supplies:
Gimp
PTU kit from Eclipse Creations called Happy New Year HERE
tube of choice. I am using Ismael Rac. You must have a license to use his tubes. You can purchase them at his store HERE
Mask 159 from weescotsslass HERE
Fonts- ALS Script & Akuka Caps SSK
Let's get started!
-File>New 600x600 px.
-Open frame 3. Layer>Scale Layer 70%. Layer>Layer To Image Size. Let's add a paper to the frame.Select the magic wand. Click inside frame. Open paper 8. Move paper layer below frame layer in layer box. Layer>Transparency>Add Alpha Channel. Scale 60%. Select>Invert. Press delete on your keyboard. Select>None. Make the frame active. Filters>Light & Shadow>Drop Shadow 0, 0, 10, black, 80.
-Open tube. Make the top layer. Scale 80%. Move a little to the right. Layer>Duplicate Layer. Move duplicate tube under frame layer. Make frame active. With the magic wand, click inside of the frame. Grow by 10. Make the duplicate tube active. Invert & delete. Select none. Make the original tube active. Select the eraser tool. Erase the bottom part of tube so it looks like she is sticking out of the frame.
-Open frame pearl. Make the bottom layer. Scale 75%. Select the rotate tool and click the canvas. In the angle box put 45. Move frame to the left a little. Add paper 1 to this frame (repeat the steps above). Make the red frame active. Add drop shadow of 2, 2, 2, black, 50.
-Open froame 3 again. Move aboe the red frame layer. Scale 85%. Add drop shadow of 0, 0, 10, black, 80.
-Open frame 4. Move below the 1st yellow frame layer. Scale 50%. Move to the bottom right of tag. Add paper 4 to this frame. Make the frame layer active and add a drop shadow of 2, 2, 2, black, 50.
Elements:
Add drop shadow of 2, 2, 2, black, 50 to all element layers. See my tag for placement.
glitter
glass
fireworks 2
clock
stars- flip
hat 2
balloon 1
balloon 2
-Open paper 2. Make the bottom layer. Apply mask. Click HERE to learn how to use masks.
-With the ALS Script font, size 120, foreground black, type 2012. Move to the bottom right of tag. Layer>Transparency>Alpha To Selection. Grow by 2. Layer>New Layer. Move new layer below text layer. Set your foreground to white. Select the bucket fill tool. Fill selection. Select none. Repeat drop shadow.
-With the Asuka Caps SSK font, add your name.
-Add your copyright.
You're finished!
Tuesday, December 20, 2011

Here's a tag I made using a tube and background image from Abril Andrade Griffith. You can find the image pack in the New Releases section now. These background images can be used with any PTE artist (with proper credit).
Monday, December 19, 2011

This tutorial is of my own creation and any resemblance to any other tuts is purely coincidental. This tutorial is for personal use only, using it for monetary gain is against our TOU's.
Supplies Needed:
~Gimp (any version will do).
~Rieka Rafita's portion of the FTU Back to School blog train, which you can get HERE.
~Tube of choice. I used the artwork of Tim Lowery, you must have a license to use this art. You can purchase this art from PTE HERE.
~Template of choice. I used the Flirty&Dirty template which you can get from Crazy Cakes Scraps HERE.
~Font of choice. I used 1 Snappy DNA.
Let's get started!!!
1. Open a new layer ( I prefer a large canvas, so I make mine 1050x656). Make your canvas transparent (Layer > Transparency > Color to Alpha).
2. Open template in PSD format, remove and move layers of template around until they are the way you like them.
~Add paper from scrapkit to individual layers of the template (Right click on template layer in layer box > Alpha to Selection > CTRL I > Select paper layer in layer box > Delete).
These are the papers I used:
Paper 1
Paper 3
Paper 7
Paper 8
~I added noise to some of the template layers to make them look glittery (Filters > Noise > RGB Noise).
~I colorized some of the template layers to better match the scrapkit (Colors > Colorize > play with the setting until you get the desired color).
~Add drop shadow to template layers (Filters > Light & Shadow > Drop Shadow).
3. Open tube, add drop shadow.
4. Open and place the following elements.
Glitter1
Glitter 2
Journal 1
Journal 2
Color pencil
Beads
Tag
Flower 1
Flower 2
Flower 3
Flower 4
Scissor 1
Butterfly 1
Butterfly 3
Button 2
Wordart 1
~Some of the elements may need to be sized down. Using your scale tool in your tool box adjust the pixel size until element is the correct size~
~Add drop shadow to all elements (except Glitter 1, Glitter 2 & Wordart 1)~
5. Merge Layers (Image > Merge Visible Layers).
6. Crop Image (Image > Autocrop Image).
7. Scale image to desired size (Image > Scale Image).
8. Add copyright info and name
9. Save as .png
ALL DONE!!!!!!!!!!
Sunday, December 18, 2011

Here's a tag I made featuring a hot new tube from Keith Garvey, you can find her in the New Releases section at PTE HERE.
Saturday, December 17, 2011

This tutorial is of my own creation and any resemblance to any other tuts is purely coincidental. This tutorial is for personal use only, using it for monetary gain is against our TOU's.
Supplies:
Gimp
PTU kit from Sweet Cravings Scraps called Step Into Christmas HERE
Tube of choice. I am using Ismael Rac. You must have a license to use his tubes. You can purchase them from his store HERE
Mask 309 from weescotslass HERE
Font- Pacifico
Lets get started!
-File>New 600x600 px.
-Open frame 3. Layer>Scale Layer 55%. Select the magic wand. Click inside the frame. Select>Grow 5. Open paper 11. Move below the frame layer in the layer box. Layer>Transparency>Add Alpha Channel. Scale 50%/ Select>Invert. Press delete on your keyboard. Select>None. Make the frame layer active. Filters>Light & Shadow>Drop Shadow 2, 2, 2, 2, black, 50.
-Open frame 6. Make the top layer. Scale 70%. Filters>Repeat Drop Shadow.
-Open tube. Move below both frame layers. Scale 75%. Layer>Duplicate Layer. Make the duplicate the top layer. Make frame 3 active. Click insdie of frame with magic wand. Grow by 10. Make the bottom tube active. Invert & delete. Select none. Make the top tube active. Select the eraser tool and erase the bottom part of the tube so it looks like she is sticking out of the frames.
-Open frame 9. Make the bottom layer. Sc lae 70%. Repeat drop shadow.
Elements:
Add drop shadow of 2, 2, 2, black, 50 to all element layers. See my tag for placement.
tree 2
cute paper santa
button swag 1
candle 1
candle 2
candle 3
letter to santa - rotate -20
bift 2
gift 3
ornament 1
flower 6
ribbon 1
-Open paper 5. Make the bottom layer. Apply mask. Click HERE to learn how to use masks.
-Add yourname and copyright.
You're finished!
Friday, December 16, 2011

This tutorial is of my own creation and any resemblance to any other tuts is purely coincidental. This tutorial is for personal use only, using it for monetary gain is against our TOU's.
Supplies Needed:
~Gimp (any version will do).
~Tube of choice. I used the artwork of Myriadelle you must have a license to use this art which you can get @ PTE HERE.
~Joyous FTU scrapkit by Wicked Princess Scraps which you get from Scraps N Crap HERE.
~Mask of choice. I used WSL mask 364 which you can get HERE.
~Font of choice. I used CAC Pinafore.
Let's get started!!!!!
1. Open a new layer ( I prefer a large canvas, so I make mine 1050x656). Make your canvas transparent (Layer > Transparency > Color to alpha).
2. Open Circle frame, add drop shadow (Filters > Light & Shadow > Drop Shadow).
3. Open Paper 2 center it behind frame, remove excess paper using a cutting tool or eraser.
4. Open tube, add drop shadow.
5. Open and place the following elements:
Flower frame
Star trio
Bow
Santa gnome
Kitten
Kitten box
Puppy presents
Box
Small box
~Some elements may need to be sized down. Using the Scale Tool in your tool box adjust pixels to desired size~
~Add drop shadow to all elements (except Star frame)~
6. Open Paper 10.
7. Open mask.
8. Add mask to paper (click HERE for a tut on using masks).
9. Merge layers (Image > Merge Visible Layer).
10. Crop image (Image > Autocrop Image).
11. Scale image to desired size (Image > Scale Image).
12. Add copyright info and name.
13. Save as .png
You are finished :)
Thursday, December 15, 2011

This tutorial is of my own creation and any resemblance to any other tuts is purely coincidental. This tutorial is for personal use only, using it for monetary gain is against our TOU's.
Supplies Needed:
~Gimp (any version will do).
~Holly Wishes PTU scrapkit by A Taggers Scrap which you can get HERE.
~Tube of choice. I used the artwork of Ismael Rac, you must have a license to use this art which you can get HERE.
~Template of choice. I used Mellisa's template 4 which you can get from Creative Misfits HERE.
~Mask of choice. I used exclusive Jane mask 2-1 which you can get from Biker♥Skunk Tagz HERE.
~Font of choice. I used Monika Italic.
Let's get started!!!
1. Open a new layer (I prefer a large canvas, so I make mine 1050x656). Make your canvas transparent (Layer > Transparency > Color to Alpha).
2. Open template in PSD format, move layers of template around until they are the way you like them.
~Add paper from scrapkit to individual layers of the template (Right click on template layer in layer box > Alpha to Selection > CTRL I > Select paper layer in layer box > Delete).
These are the papers I used:
Paper 17
Paper 18
Paper 19
~I added noise to some of the template layers to make them look glittery (Filters > Noise > RGB Noise).
~I added a bevel effect to some of the template layers (Filters > Decor > Add Bevel).
~I colorized some of the template layers to better match the scrapkit (Colors > Colorize > play with the setting until you get the desired color).
~Add drop shadow to template layers (Filters > Light & Shadow > Drop Shadow).
3. Open tube.
~You will need to duplicate this tube so that you have 2 (at the bottom of your layer box click on the blue box. This will give you 2 tube layers).
~Select the top tube layer in your tool box. Add Gaussion Blur (Filters > Blur > Gaussion Blur, use default settings).
~On that same tube layer change the mode to Overlay (at the top of your Layer Box you will see where it says Mode, click the arrow and select Overlay from the drop down menu).
~Add drop shadow to bottom tube layer.
4. Open and place the following elements:
Branch 5
Branch 6
Snowflake 1
Snowflake 2
Snowflake 3
Present 2
Present 3
Present 4
Reindeer 2
Candle
Ornament 14
Ornament 18
Leaves 8
Leaf 3
Flower 6
Flower 9
Star
Jinglebells
~Some of the elements may need to be sized down. Using your scale tool in your tool box adjust the pixel size until element is the correct size~
~Add drop shadow to all elements~
5. Open Paper 6
6. Open mask
7. Add mask to paper (click HERE for a tut on using masks).
8. Merge Layers (Image > Merge Visible Layers).
9. Crop Image (Image > Autocrop Image).
10. Scale image to desired size (Image > Scale Image).
11. Add copyright info and name.
12. Save as .png
ALL DONE!!!!!!!!!!
Wednesday, December 14, 2011

This tutorial is of my own creation and any resemblance to any other tuts is purely coincidental. This tutorial is for personal use only, using it for monetary gain is against our TOU's.
Supplies Needed:
~Gimp (any version will do).
~Tube of choice. I used the artwork of BamBam you must have a license to use this art which you can get @ PTE HERE.
~A Winter's Tale PTU scrapkit by Sweet Cravings Scraps which you can also get HERE.
~Mask of choice. I used exclusive Jane mask 3 which you can get from Biker♥Skunk Tagz HERE.
~Font of choice. I used Redhead Goddess.
Let's get started!!!!!
1. Open a new layer ( I prefer a large canvas, so I make mine 1050x656). Make your canvas transparent (Layer > Transparency > Color to alpha).
2. Open element Frame 3, add drop shadow (Filters > Light & Shadow > Drop Shadow).
~I also added "noise" to the frame to give it a glittery effect (Filters > Noise > RGB Noise).
3. Open Paper 8 center it behind frame, remove excess paper using a cutting tool or eraser.
4. Open tube, you will need to duplicate the tube so that you have 2 (at the bottom of your layer box click on the blue box. This will give you 2 tube layers).
~Select the top tube layer in your layer box. Add Gaussion Blur (Filters > Blur > Gaussion Blur, use default settings).
~On that same tube layer change the mode to Overlay (at the top of your Layer Box you will see where it says Mode, click the arrow and select Overlay from the drop down menu).
~Add drop shadow to bottom tube layer.
5. Open and place the following elements:
Sign 1
SnowMound
Ribbon 5
Snowman
Cute Polar Bear
Cute Mouse
Ornament 1
Ornament 3
Ornament 4
Butterfly 1
Butterfly 2
~Some elements may need to be sized down. Using the Scale Tool in your tool box adjust pixels to desired size~
~Add drop shadow to all elements (except SnowMound)~
6. Open Paper 9.
7. Open mask.
8. Add mask to paper (click HERE for a tut on using masks).
9. Merge layers (Image > Merge Visible Layer).
10. Crop image (Image > Autocrop Image).
11. Scale image to desired size (Image > Scale Image).
12. Add copyright info and name.
13. Save as .png
You are finished :)

Here's a tag I made featuring a hot new tube from Lix, you can find her in the New Releases section at PTE HERE.
Tuesday, December 13, 2011

This tutorial is of my own creation and any resemblance to any other tuts is purely coincidental. This tutorial is for personal use only, using it for monetary gain is against our TOU's.
Supplies Needed:
~Gimp (any version will do).
~Tube of choice. I used the artwork of Anna Liwanag , you must have a license to use this art which you can get from PTE HERE.
~Punktastic FTU scrapkit by Leah which you can get on our blog HERE.
~Mask of choice. I used WSL mask 364 which you can get HERE.
~Font of choice. I used Pasta Palazzo.
Let's get started!!!!!
1. Open a new layer ( I prefer a large canvas, so I make mine 1050x656). Make your canvas transparent (Layer > Transparency > Color to alpha).
2. Open Frame 1 (round frame), add drop shadow (Filters > Light & Shadow > Drop Shadow).
3. Open Paper 12 center it behind frame.
4. Open Frame 5 (star frame), add drop shadow.
5. Open Paper 6 center it behind frame, remove excess paper using a cutting tool or eraser.
6. Open tube, add drop shadow.
7. Open and place the following elements:
Flame
Brad 1
Brad 2
Brad 4
Skull 1
Skull 2
Splat
Ribbon 1
Lock
Star 1
Wordart 2
Halftone
~Some elements may need to be sized down. Using the Scale Tool in your tool box adjust pixels to desired size~
~Add drop shadow to all elements (except Halftone)~
8. Open mask.
9. Add mask to paper 12 (click HERE for a tut on using masks).
10. Place Halftone element behind mask layer in Layer Box.
11. Merge layers (Image > Merge Visible Layer).
12. Crop image (Image > Autocrop Image).
13. Scale image to desired size (Image > Scale Image).
14. Add copyright info and name.
15. Save as .png
You are finished :)

Rochelle over at Chelle's Funny Farm did a cute tut using Leah's FTU kit Santa Stop Here.
HERE is the link to Chelle's tut.
Thank you so much for sharing your results with us.
If any of you would like to share your results please feel free to send them to us on Facebook or email us at gimptasticblog@yahoo.com
Sunday, December 11, 2011

Here's a tag I made featuring a hot new tube from Neoracer, you can find her in the New Releases section at PTE HERE
 This tutorial is of my own creation and any resemblance to any other tuts is purely coincidental. This tutorial is for personal use only, using it for monetary gain is against our TOU's.
 Supplies:
Gimp
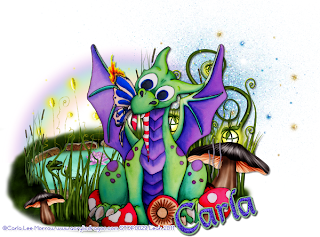
Tube of choice. I used the artwork of Carla Lee Morrow. You must have a license to use this art. You can purchase it at PSP Tube Stop HERE
FTU kit from Crystal's Creations called Fantasy Land HERE
Font- DS Mysticora
Let's get started!
-File>New 600x600 px.
-Open tube. Layer>Scale Layer 75%. Filters>Light & Shadow>Drop Shadow 2, 2, 2, black, 50. Layer>Duplicate Layer. Filters>Blur>Gaussian Blur on default. Change mode to soft light and lower the opacity to 60.
-Open grass 2. Move layer below tube layer in layer box. Scale 60%. Move to the right of the tube. Duplicate. Move duplicate to the left of tube.
-Open water pond. Make the bottom layer. Scale 75%. Move to the left of tube.
-Open rainbow. Make the bottom layer. Scale 75%. Place above the water pond.
-Open mushroom. Move below the tube layer. Scale 35%. Place to the bottom right of tube.Repeat drop shadow. Dulpicate. Select the flip tool and click canvas. Place to the bottom left of tube.
-Open lights. Move above the grass layers. Scale 35%. Repeat drop shadow. Move the the top right of tube.
-Open blue sparkle. Make the bottom layer. Place to the top right of tube.
-Add your name and copyright.
You're finished!!
Thursday, December 8, 2011

Here is a new FTU kit for everyone to play with. It comes with 36 elements and 16 papers. If you download please leave some ♥.
Download it HERE
Wednesday, December 7, 2011

Here's a tag I made using a tube by Esther Remmington and a image from Abril Andrade Griffith. The tube will be available soon and the image pack can be found in the New Releases section at PTE now.

This tutorial is of my own creation and any resemblance to any other tuts is purely coincidental. This tutorial is for personal use only, using it for monetary gain is against our TOU's.
Supplies Needed:
~Gimp (any version will do).
~Tube of choice. I used the artwork of Jenny Heidewald you must have a license to use this art which you can get @ PSP Tube Stop HERE.
~Christmas Treasure FTU scrapkit by Kittz Kreationz which you get HERE.
~Mask of choice. I used exclusive mask Jane3 which you can get from Biker♥Skunk Tagz HERE.
~Font of choice. I used Frosty.
Let's get started!!!!!
1. Open a new layer ( I prefer a large canvas, so I make mine 1050x656). Make your canvas transparent (Layer > Transparency > Color to alpha).
2. Open Xmas frame, add drop shadow (Filters > Light & Shadow > Drop Shadow).
3. Open Paper 4 center it behind frame, remove excess paper using a cutting tool or eraser.
4. Open tube, add drop shadow.
5. Open and place the following elements:
Holly
Xmas tree
Curled ribbon
Snowman
Matriochka doll
Candle
Candle 2
Heart 1
Cat on bauble
Holly cupcake
Snowflake cluster
Jingle bell
~Some elements may need to be sized down. Using the Scale Tool in your tool box adjust pixels to desired size~
~Add drop shadow to all elements~
6. Open Paper 1.
7. Open mask.
8. Add mask to paper (click HERE for a tut on using masks).
9. Merge layers (Image > Merge Visible Layer).
10. Crop image (Image > Autocrop Image).
11. Scale image to desired size (Image > Scale Image).
12. Add copyright info and name.
13. Save as .png
You are finished :)
Tuesday, December 6, 2011

This tutorial is of my own creation and any resemblance to any other tuts is purely coincidental. This tutorial is for personal use only, using it for monetary gain is against our TOU's.
Supplies Needed:
~Gimp (any version will do).
~Tube of choice. I used the artwork of Michael Calandra, you must have a license to use this art which you can get @ PTE HERE.
~Rockstar FTU scrapkit by Alikas Scraps which you can get HERE.
~Mask of choice. I used Bling Mask By Ella 5 which you can get from Creative Misfits HERE.
~Font of choice. I used Sick Capital Vice.
Let's get started!!!!!
1. Open a new layer ( I prefer a large canvas, so I make mine 1050x656). Make your canvas transparent (Layer > Transparency > Color to alpha).
2. Open as17 (round frame), add drop shadow (Filters > Light & Shadow > Drop Shadow).
3. Open Paper 5 center it behind frame, remove excess paper using a cutting tool or eraser.
4. Open as10 (filmstrip frame), I tilted the frame slightly using the Rotate tool in the Tool Box. Add drop shadow.
5. Open Paper 1 center it behind filmstrip frame, remove excess paper using a cutting tool or eraser.
6. Open tubes. I used both a full body tube and a close-up.
~Take the full body layer and move it (in your layer box) under the filmstrip, but above the paper. Change the Mode on the tube to Hardlight (at the top of your Layer Box you will see where it says Mode, click the arrow and select Hardlight from the drop down menu). Remove excess tube layer using a cutting tool or eraser.
~Add drop shadow to the close-up tube.
7. Open and place the following elements:
as24
as32
as34
as41
as42
as44
as45
as46
as47
as51
as52
as64
~Some elements may need to be sized down. Using the Scale Tool in your tool box adjust pixels to desired size~
~Add drop shadow to all elements~
8. Open Paper 10.
9. Open mask.
10. Add mask to paper (click HERE for a tut on using masks).
11. Merge layers (Image > Merge Visible Layer).
12. Crop image (Image > Autocrop Image).
13. Scale image to desired size (Image > Scale Image).
14. Add copyright info and name.
15. Save as .png
You are finished :)

That's right all, we have joined the creative team over at PSP Tube Stop. There are some awesome artists and we can not wait to get started working with their amazing art. Keep your eyes open for tuts featuring PTS artists soon. Click on the blinkie to check out the store and all they have to offer.

This tutorial is of my own creation and any resemblance to any other tuts is purely coincidental. This tutorial is for personal use only, using it for monetary gain is against our TOU's
Supplies:
Gimp
PTU scrap kit called Jolly Christmas from A Taggers Scrap HERE
Tube of choice. I am using Zlata_M. You must have a license to use her tubes. You can purchase them at Pics For Design HERE
Mask 31 from HorsePlay's Pasture HERE
Fonts- Buffalo Nickel & 1 Snappy DNA
Let's get started!
-File>New 600x600 px.
-Open frame 7. Layer>Scale Layer 60%. Layer>Layer To Image Size. Select your magic wand. Click inside the frame. Select>Grow 5. Open paper 16 and move below frame in layer box. Layer>Transparency>Add Alpha Channel. Scale 50%. Select>Invert. Press delete on your keyboard. Select>None. Make the frame active. Filters>Light & Shadow>Drop Shadow 2, 2, 2, black, 50.
-Open tube. Make the top layer. Scale 55%. Place in middle of frame. Filters>Repeat Drop Shadow. Layer>Duplicate Layer. Move duplicate tube under the purple frame. Make the paper active. With the magic wand, click outside the paper. Make the duplicate tube active again. Delete. Select none. Make the original tube active. Select the eraser tool and erase the bottom of the tube so it looks like she is sticking out of the frame.
-Open frame 6. Make the bottom layer. Select the rotate tool. Click the canvas and in the angle box put 90. Scale 60%. Move to the left of the purple frame. Layer To Image Size. Duplicate. Select the flip tool. Click canvas. Add paper 18 to the left frame (repeat steps for adding paper to purple frame). Add paper 17 to right frame. Repeat drop shadow on both frames.
-Open frame 1. Make the bottom layer. Place in the center. Add paper 10 to this frame. Repeat drop shadow on frame.
Other Elements:
Add drop shadow of 2, 2, 2, black, 50 to all element layers. see my tag for placement.
lights 2
bow 4
reindeer 2
tree 2
snowflakes 4 & 8
ribbon 3
glows
ornament 9
cherub
snow couple
-Open paper 8. Move to the bottom layer. Apply mask. Click HERE to learn how to use masks.
-Select your text tool. Select the buffalo nickel font, size 60, foreground 009cb7. Click canvas and type 'Merry'. Place text below tube. Filters>Noise>RGB Noise on default. Filters>Decor>Add Bevel. Uncheck work on copy. Layer>Transparency>Alpha To Selection. Grow by 2. Layer>New Layer. Move new layer below text layer. Select the bucket tool and make white your foreground color. Fill the selection. Select none. Repeat drop shadow.
-Change your foreground color to dc9013 and text size to 50. Type 'Christmas'. Repeat the above steps to add the effects to your text.
-Add your name with the 1 snappy dna font. Also add your copyright.
You're finished!
Monday, December 5, 2011

Here's a tag I made using a hot mermaid from Tony Tzanoukakis. She will be available soon at PTE HERE.

This tutorial is of my own creation and any resemblance to any other tuts is purely coincidental. This tutorial is for personal use only, using it for monetary gain is against our TOU's.
Supplies Needed:
~Gimp (any version will do).
~Tube of choice. I used the artwork of Alicia Mujica you must have a license to use this art which you can get @ PTE HERE.
~My Frosted Garden PTU scrapkit by Alicia Mujica which you can also get @ PTE HERE.
~Mask of choice. I used WSL mask 99-8 which you can get HERE.
~Font of choice. I used Picayune Intelligence.
Let's get started!!!!!
1. Open a new layer ( I prefer a large canvas, so I make mine 1050x656). Make your canvas transparent (Layer > Transparency > Color to alpha).
2. Open element Marco (frame), add drop shadow (Filters > Light & Shadow > Drop Shadow).
3. Open Paper 1a center it behind frame, remove excess paper using a cutting tool or eraser.
4. Open tube, you will need to duplicate the tube so that you have 2 (at the bottom of your layer box click on the blue box. This will give you 2 tube layers).
~Select the top tube layer in your layer box. Add Gaussion Blur (Filters > Blur > Gaussion Blur, use default settings).
~On that same tube layer change the mode to Overlay (at the top of your Layer Box you will see where it says Mode, click the arrow and select Overlay from the drop down menu).
~Add drop shadow to bottom tube layer.
5. Open and place the following elements:
Luna
Arbol Luces
Cartel Frosted 2
Macetero Frosted
Flor Frosted
Flor 2 Frosted
Berenjera Frosted
Hoja Frosted
Bolade Frosted
Caracol Frosted
Seta Frosted
Estrella
Estrella 2
Estrella 3
Charco *
* I added Noise to this element to give a sparkle/glitter effect (Filters > Noise > RGB Noise)
~Some elements may need to be sized down. Using the Scale Tool in your tool box adjust pixels to desired size~
~Add drop shadow to all elements~
6. Open Paper 4a.
7. Open mask.
8. Add mask to paper (click HERE for a tut on using masks).
9. Merge layers (Image > Merge Visible Layer).
10. Crop image (Image > Autocrop Image).
11. Scale image to desired size (Image > Scale Image).
12. Add copyright info and name.
13. Save as .png
You are finished :)
Sunday, December 4, 2011

This tutorial is of my own creation and any resemblance to any other tuts is purely coincidental. This tutorial is for personal use only, using it for monetary gain is against our TOU's.
Supplies Needed:
~Gimp (any version will do).
~Tube of choice. I used the artwork of Lix, you must have a license to use this art which you can get @ PTE HERE.
~Winter Forest PTU scrapkit by A Taggers Scrap which you can get HERE.
~Mask of choice. I used WSL mask 363 which you can get HERE.
~Font of choice. I used Monika Italic.
Let's get started!!!!!
1. Open a new layer ( I prefer a large canvas, so I make mine 1050x656). Make your canvas transparent (Layer > Transparency > Color to alpha).
2. Open Window, add drop shadow (Filters > Light & Shadow > Drop Shadow).
3. Open Paper 2 center it behind window, remove excess paper using a cutting tool or eraser.
4. Open tubes. I used both a full body tube and a close-up.
~Take the close up layer and move it (in your layer box) under window, but above the paper. Change the Mode on the tube to Dodge (at the top of your Layer Box you will see where it says Mode, click the arrow and select Dodge from the drop down menu). Remove excess tube layer using a cutting tool or eraser.
~Add drop shadow to the full body tube.
5. Open and place the following elements:
Leaves 3
Butterfly house
Butterfly 2
Butterfly 3
Chest
Violin
Kitty
Birds
Pinecones
Ribbon 3
Pebble 1
Pebble 2
Flower 1
Flower 2
Sequin flower
~Some elements may need to be sized down. Using the Scale Tool in your tool box adjust pixels to desired size~
~Add drop shadow to all elements~
6. Open Paper 14
7. Open mask.
8. Add mask to paper (click HERE for a tut on using masks)
9. Merge layers (Image > Merge Visible Layer).
10. Crop image (Image > Autocrop Image).
11. Scale image to desired size (Image > Scale Image).
12. Add copyright info and name.
13. Save as .png
You are finished :)
Saturday, December 3, 2011

Here's a fun tag I made featuring another great Christmas tube from BamBam, you can find her in the Christmas tubes section at PTE HERE.

This tutorial is of my own creation and any resemblance to any other tuts is purely coincidental. This tutorial is for personal use only, using it for monetary gain is against our TOU's
Supplies:
Gimp
PTU kit from Rebellious Scraps called A Pink Christmas. You can get it from Lollipops N Gumdrops HERE
Tube of choice. I am using Anna Liwanag. You must have a license to use these tubes. Purchase them at PTE HERE
Template 5 by me from Creative Misfits (scroll to Leah) HERE
Mask 338 from weescotslass HERE
Font- Petra Script EF
Let's begin!
-Open template. Delete the bells and dash dot layers. Image>Scale Image 500x500 px and change the x & y resolutions to 72. Image>Canvas Size 600x600 px and press center.
-Let's add papers to the template layers. Make the template layer active (see below). Right click template layer in layer box and choose alpha to selection. Open paper (see below). Right click paper layer in layer box and choose add alpha channel. Layer>Scale Layer by 60%.Select>Invert. Press delete on your keyboard. Select>None. Delete the original template layer.Here are the template layers and which papers I used:
rect- paper 6
square 1 & square 2- paper 5
square 3 and square 4- paper 4 Filters>Light & Shadow>Drop Shadow 2, 2, 2, black, 50
-Make rect frame active. Alpha to selection. Layer>New Layer. Change your foreground color to dfb8ce. Select the bucket fill toll and fill the selection. Select none. Fiters>Noise>RGB Noise. Change all sliders except alpha to 0.30. Repeat drop shadow. Delete the original layer.
-Make green dashes layer active. Colors>Colorize. Just change the lightness slider to 100. Repeat drop shadow. Repeat for red dashes.
-Make green circle active. Layer>Layer To Image Size. Alpha to selection. Add new layer. Select the blend tool. Change foreground to 5f1530. Change background to dfb8ce. Change to radial. Click in the middle of the selection and drag to the right. Open tube close up. Place tube in selection. Invert & delete. Select none. Change the mode of the tube to screen. Delete the green circle layer. Repeat for red circle layer, but make your foreground dfb8ce and your background 5f1530.
-Open full tube. Move below the bells back layer in layer box. Scale 75%. Place in middle of tag. Repeat drop shadow. Layer>Duplicate Layer. Filters>Blur>Gaissian Blur on default. Change mode to soft light. Lower the opacity to 50.
-Make jingle layer active. Colorize- HUE: 336 SATURATION: 49 LIGHTNESS: -34. Repeat noise. Make jingle back active. Repeat drop shadow. Make bells active. Colorize: HUE: 316 SATURATION: 50 LIGHTNESS: 54. Repeat noise. Repeat drop shadow on bells back.
Elements:
Add drop shadow of 2, 2, 2, black, 50 to all element layers unless otherwise stated ( it will say NDS for no drop shadow). See my tag for placement.
frame 2
frame 3 NDS
swag 2 NDS
deco 3
pinecone NDS
holly
box
ornaments 1, 2 & 3
Stars 3 & 4
-Open paper 1. Move to bottom. Apply masks. Click HERE to learn how to use masks.
-Add your name and copyright.
You're Finished!!
Friday, December 2, 2011

This tutorial is of my own creation and any resemblance to any other tuts is purely coincidental. This tutorial is for personal use only, using it for monetary gain is against our TOU's.
Supplies Needed:
~Gimp (any version will do).
~Tube of choice. I used the artwork of Lady Mishka you must have a license to use this art which you can get @ PFD HERE.
~Winter Blessings PTU scrapkit by ChiChi Designz which you can get from Lollipops N Gumdrops HERE.
~Mask of choice. I used WSL mask 364 which you can get HERE.
~Font of choice. I used ValentinaJF.
Let's get started!!!!!
1. Open a new layer ( I prefer a large canvas, so I make mine 1050x656). Make your canvas transparent (Layer > Transparency > Color to alpha).
2. Open Gem frame, add drop shadow (Filters > Light & Shadow > Drop Shadow).
3. Open Paper 16 center it behind frame.
4. Open tube, add drop shadow.
5. Open and place the following elements:
Window 1
Bird
Reindeer
Bunny
Snowman
Snow 2
Snowballs
Snowflake
Candle
Pinecone
Pinecone 1
Lantern
Rose
~Some elements may need to be sized down. Using the Scale Tool in your tool box adjust pixels to desired size~
~Add drop shadow to all elements (except Snow 2)~
6. Open mask.
7. Add mask to paper 16 (click HERE for a tut on using masks).
8. Merge layers (Image > Merge Visible Layer).
9. Crop image (Image > Autocrop Image).
10. Scale image to desired size (Image > Scale Image).
11. Add copyright info and name.
12. Save as .png
You are finished :)
 This tutorial is of my own creation and any resemblance to any other tuts is purely coincidental. This tutorial is for personal use only, using it for monetary gain is against our TOU's
Supplies:
Gimp
PTU kit from Tasha's Playground called Christmas Chaos HERE
Tube of choice. I am using Ismael Rac. You must have a license to use his tubes. Get them HERE
Template 4 from me HERE (scroll down to Leah)
Mask 336 from weescotslass HERE
Font-Yellowtail
Let's begin!
Open template. Image>Scale Image 500x500 px and change the x & y resolutions to 72. Image>Canvas Size 600x600 px and press center.
-Let's add papers to the template layers. Make the template layer active (see below). Right click template layer in layer box and choose alpha to selection. Open paper (see below). Right click paper layer in layer box and choose add alpha channel. Layer>Scale Layer by 60%.Select>Invert. Press delete on your keyboard. Select>None. Delete the original template layer.Here are the template layers and which papers I used:
s 1- paper 2
s 2- paper 4
bottom rect & top rect- paper 3
circle 1- paper 6 Filters>Light & Shadow>Drop Shadow 2, 2, 2, black, 50
circle 2- paper 12 Filters>Repeat drop shadow
circle 3- paper 11 repeat drop shadow
lrg rect- paper 5
-Repeat drop shadow on the following layers: f 1, f 2, bottom frame and top frame.
-Make the lrg rect back layer active. Filters>Noise>RGB Noise. Change all sliders, except alpha, to 0.50. Add drop shadow of 0, 0, 010, black, 100.
-Make the words layer active. Filters>Decor>Add Bevel. Uncheck work on copy. On the words back layer, add drop shadow of 2, 2, 2, black, 50.
-Open tube. Move below the word art layers. Sclae 70%. Place in the middle of tag. Layer>Duplicate Layer. Move duplicate tube above paper 2 layer. Make paper 2 active. Select your magic wand and click outside the paper. Make the duplicate tube active. Delete. Select none. Make the original tube active. Select your eraser tool and erase the bottom half of her so it looks like she is sticking out of the frame.
Elements:
Add drop shadow of 2, 2, 2, black, 50 to all element layers, unless otherwise stated ( it will say NDS for no drop shadow). See my tag for placement.
wreath
snowflake charm
bag NDS
santa NDS
candle
light NDS
decor
elf dude
cupcake NDS
snow swirl
snowflake 2 NDS
-Open paper 10 and make the bottom layer. Apply mask. Click HERE to learn how to use masks.
-Add your name and copyright.
You're finished!
Subscribe to:
Posts
(Atom)
Snag Our Blinkies


Don't Be A Pirate!

