Gimptastic Scraps Available Exclusively @

Gimptastic Scraps CT


Blog Trains

CU Licenses


 This tutorial is of my own creation and any resemblance to any other tuts is purely coincidental. This tutorial is for personal use only, using it for monetary gain is against our TOU's.
Supplies Needed:
~Gimp (any version will do).
~Jaded PTU scrapkit which you can get from Sweet Cravings Scraps HERE.
~Tubes of choice. I used the tubes included in the kit, please be sure to use the proper copyright info when using these tubes.
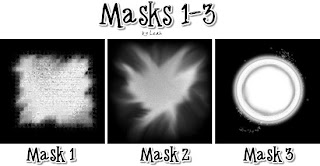
~Mask of choice. I used WSL mask363 which you can get HERE.
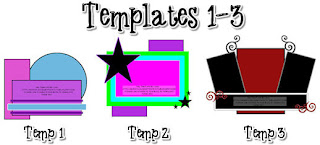
~Template of choice. I used Template 44 which you can get from Sapphy'z Demented Hallucinationz HERE.
~Font of choice. I used Shelter Me.
Let's get started!!!
1. Open a new layer ( I prefer a large canvas, so I make mine 1050x656). Make your canvas transparent (Layer > Transparency > Color to Alpha).
2. Open Template in PSD format, move layers of template around until they are the way you like them.
~Add paper from scrapkit to individual layers of the template (Right click on layer in layer box > Alpha to Selection > CTRL I > Select paper layer in layer box > Delete).
These are the papers I used:
Paper 3
Paper 12
~I also added noise to some of the layers to make them look glittery (Filters > Noise > RGB Noise).
~Add drop shadow to layers (Filters > Light & Shadow > Drop Shadow).
3. Open tubes, I used both a full body and close up. I lowered the opacity of the close up to 50 (at the top of the layer box you will see a bar you can slide to change the opacity of the selected layer). Add drop shadow to the full body tube.
4. Open and place the following elements:
Flower 6
SafetyPin 2
Lips 1
Skull 3
CustomBike
MetalDoodle 2
Flames 2
CurledGlitter 3
~Some elements may need to be sized down. Use your Scale Tool in your tool box to adjust the pixel size~
~Add drop shadow to all elements~
5. Open Paper 5
6. Open mask
7. Add mask to paper (right click on paper layer in layer box > add layer mask > black full transparency).
~Select mask layer in layer box, right click on mask layer (on canvas) > copy.
~Make mask layer invisible (click on eye next to mask in layer box).
~Select paper in layer box, right click on paper (on canvas, all you will see is the outline of the paper) > Paste.
~Anchor layer (click on anchor next to trash can on layer box).
~Right click on paper layer in layer box > apply layer mask.
~Delete mask from layer box.
8. Merge Layers (Image > Merge Visible Layers).
9. Crop Image (Image > Autocrop Image).
10. Scale image to desired size (Image > Scale Image).
11. Add copyright info and name
12. Save as .png
YOU ARE DONE!!!!!!!!!!
This tutorial is of my own creation and any resemblance to any other tuts is purely coincidental. This tutorial is for personal use only, using it for monetary gain is against our TOU's.
Supplies Needed:
~Gimp (any version will do).
~Jaded PTU scrapkit which you can get from Sweet Cravings Scraps HERE.
~Tubes of choice. I used the tubes included in the kit, please be sure to use the proper copyright info when using these tubes.
~Mask of choice. I used WSL mask363 which you can get HERE.
~Template of choice. I used Template 44 which you can get from Sapphy'z Demented Hallucinationz HERE.
~Font of choice. I used Shelter Me.
Let's get started!!!
1. Open a new layer ( I prefer a large canvas, so I make mine 1050x656). Make your canvas transparent (Layer > Transparency > Color to Alpha).
2. Open Template in PSD format, move layers of template around until they are the way you like them.
~Add paper from scrapkit to individual layers of the template (Right click on layer in layer box > Alpha to Selection > CTRL I > Select paper layer in layer box > Delete).
These are the papers I used:
Paper 3
Paper 12
~I also added noise to some of the layers to make them look glittery (Filters > Noise > RGB Noise).
~Add drop shadow to layers (Filters > Light & Shadow > Drop Shadow).
3. Open tubes, I used both a full body and close up. I lowered the opacity of the close up to 50 (at the top of the layer box you will see a bar you can slide to change the opacity of the selected layer). Add drop shadow to the full body tube.
4. Open and place the following elements:
Flower 6
SafetyPin 2
Lips 1
Skull 3
CustomBike
MetalDoodle 2
Flames 2
CurledGlitter 3
~Some elements may need to be sized down. Use your Scale Tool in your tool box to adjust the pixel size~
~Add drop shadow to all elements~
5. Open Paper 5
6. Open mask
7. Add mask to paper (right click on paper layer in layer box > add layer mask > black full transparency).
~Select mask layer in layer box, right click on mask layer (on canvas) > copy.
~Make mask layer invisible (click on eye next to mask in layer box).
~Select paper in layer box, right click on paper (on canvas, all you will see is the outline of the paper) > Paste.
~Anchor layer (click on anchor next to trash can on layer box).
~Right click on paper layer in layer box > apply layer mask.
~Delete mask from layer box.
8. Merge Layers (Image > Merge Visible Layers).
9. Crop Image (Image > Autocrop Image).
10. Scale image to desired size (Image > Scale Image).
11. Add copyright info and name
12. Save as .png
YOU ARE DONE!!!!!!!!!!


 This tutorial is of my own creation and any resemblance to any other tuts is purely coincidental. This tutorial is for personal use only, using it for monetary gain is against our TOU's.
Supplies Needed:
~Gimp (any version will do).
~Tubes of choice. I used the adorable PinUpToons. You must have a license to use this art which you can get HERE.
~Cool PTU scrapkit which you can get from Addictive Pleasures HERE.
~Mask of choice. I used AquaRebel315 mask 39 which you can get HERE.
~Font of choice. I used Monster Poparazzi.
Let's get started!!!!!
1. Open a new layer ( I prefer a large canvas, so I make mine 1050x656). Make your canvas transparent (Layer > Transparency > Color to alpha).
2. Open Frame, add drop shadow (Filters > Light & Shadow > Drop Shadow).
3. Open Paper 10 center it behind the frame, remove excess paper using the circular cutting tool in your tool box.
4. Open Frame 5, add drop shadow.
5. Open Paper 7 center it behind the frame, remove excess paper using the rectangular cutting tool in your tool box.
6. Open tubes, I used both a full body and close ups. Open the close ups behind Frame 5, I lowered the opacity of the close ups to 40 (at the top of the layer box you will see a bar you can slide to change the opacity of the selected layer). Add drop shadow to the full body tube.
7. Open and place the following elements:
Bow 8
Stud
FluffyHeart
GlassBrad
Lips
Ruffled Ribbon
Ribbon 7
Net
Decor
~Some of the elements may need to be sized down. Using your scale tool in your tool box adjust the pixel size until element is the correct size~
~Add drop shadow to all elements~
8. Open Paper 4.
9. Open mask.
10. Add mask to paper (right click on paper layer in layer box > Add Layer Mask > Black Full Transparency).
~Select mask in layer box, right click on mask (on canvas) > copy.
~Make mask layer invisible (click on eye next to mask in layer box).
~Select paper in layer box, right click on paper (on canvas, all you will see is the outline of the paper) > Paste.
~Anchor layer (click on anchor next to trash can on layer box).
~Right click on paper layer (in layer box) > Apply Layer Mask.
~Delete mask layer from layer box.
11. Merge layers (Image > Merge Visible Layer).
12. Autocrop image (Image > Autocrop Image).
13. Scale image to desired size (Image > Scale Image).
14. Add copyright info and name.
15. Save as .png
You are finished :)
This tutorial is of my own creation and any resemblance to any other tuts is purely coincidental. This tutorial is for personal use only, using it for monetary gain is against our TOU's.
Supplies Needed:
~Gimp (any version will do).
~Tubes of choice. I used the adorable PinUpToons. You must have a license to use this art which you can get HERE.
~Cool PTU scrapkit which you can get from Addictive Pleasures HERE.
~Mask of choice. I used AquaRebel315 mask 39 which you can get HERE.
~Font of choice. I used Monster Poparazzi.
Let's get started!!!!!
1. Open a new layer ( I prefer a large canvas, so I make mine 1050x656). Make your canvas transparent (Layer > Transparency > Color to alpha).
2. Open Frame, add drop shadow (Filters > Light & Shadow > Drop Shadow).
3. Open Paper 10 center it behind the frame, remove excess paper using the circular cutting tool in your tool box.
4. Open Frame 5, add drop shadow.
5. Open Paper 7 center it behind the frame, remove excess paper using the rectangular cutting tool in your tool box.
6. Open tubes, I used both a full body and close ups. Open the close ups behind Frame 5, I lowered the opacity of the close ups to 40 (at the top of the layer box you will see a bar you can slide to change the opacity of the selected layer). Add drop shadow to the full body tube.
7. Open and place the following elements:
Bow 8
Stud
FluffyHeart
GlassBrad
Lips
Ruffled Ribbon
Ribbon 7
Net
Decor
~Some of the elements may need to be sized down. Using your scale tool in your tool box adjust the pixel size until element is the correct size~
~Add drop shadow to all elements~
8. Open Paper 4.
9. Open mask.
10. Add mask to paper (right click on paper layer in layer box > Add Layer Mask > Black Full Transparency).
~Select mask in layer box, right click on mask (on canvas) > copy.
~Make mask layer invisible (click on eye next to mask in layer box).
~Select paper in layer box, right click on paper (on canvas, all you will see is the outline of the paper) > Paste.
~Anchor layer (click on anchor next to trash can on layer box).
~Right click on paper layer (in layer box) > Apply Layer Mask.
~Delete mask layer from layer box.
11. Merge layers (Image > Merge Visible Layer).
12. Autocrop image (Image > Autocrop Image).
13. Scale image to desired size (Image > Scale Image).
14. Add copyright info and name.
15. Save as .png
You are finished :) 
This tutorial is of my own creation and any resemblance to any other tuts is purely coincidental. This tutorial is for personal use only, using it for monetary gain is against our TOU's I'm using Gimp for this tut. Any version will work. Remember to save your work often! I used the work of Elias Chazoudis. You must have a license to use his work. You can purchase his tubes HERE. Supplies: Rock n Roses PTU kit from Addictive Pleasures HERE Template 363 form Divine Intentionz HERE Font- Pea Jack and Jane Let's get started! When you delete a layer, you may need to repostion it during this tutorial. -Open template and go to Image>Scale Image. In the top box put 400 pixels and press enter. Now click scale. Go to Image>Canvas Size. I made mine 450x450 pixles. Make sure it is centered. Press resize. Delete credits and wordart layers. -Choose the circle layer. Right click the circle layer in the layer box and click alpha to selection. Delete this layer. Go to Select>Invert. Open paper 5. Right click this layer in the layer box and click add alpha channel. Scale it by 50%. Press delete on your keyboard. Invert again. Go to Select>Grow by 2. Add a new layer below the paper we just opened. Fill the circle with white. Select>None. Add a drop shadow using the default settings. -Select the circle right layer. Alpha to selection. Delete layer. Invert. Open paper 8. Add alpha channel and scale by 50%. Delete and invert. Grow by 2. Add a new layer below this paper layer. Fill with black. Select none. Use same drop shadow. -Select the circle left layer. Alpha to selection. Delete layer. Invert. Open paper 7. Add alpha channel and scale by 50%. Delete and invert. Grow by 2. Add a new layerbelow this paper. Fill with white. Select none. Add a drop shadow, but change the offset x and y to -8. -Choose the copy of thin rectangle layer. Alpha to selection. Delete layer and invert. Open paper 6. Add alpha channel. Scale by 50%. Delete and invert. Grow by 2. Add a new layer above this paper layer. Fill with black. Select>Shrink by 3. Delete. Select none. Add a drop shadow of 2,2,2,black,40. -Select the thin rectangle layer. Alpha to selection. Delete layer. Add a new layer. Fill with white. Add a new layer above this layer. Grow by 2. Fill with black. Shrink by 3. Delete. Select none. Drop shadow 2,2,2,black,40. -Select the frame back layer. Select the magic wand tool and put the mode on add to the current selection (the 2nd box). Click inside the 1st and 3rd boxes. Open paper 4. Add alpha channel. Scale by 50%. Invert. Delete. Select none. -Select the frame back layer again. Using your magic wand click the middle square. Delete the frame back layer and invert. Open paper 3. Add alpha channel. Scale by 50%. Delete. Select none. -Add a drop shadow to the frame layer. -Open your tube. Put it below the tube layer. Duplicate it 3 times. Hide 3 of the layers. Select the layer with the 2 suqares. Alpha to selection. Invert. Postion your tube in the 1st square. (See mine for placement) Delete. Erase any excess that might be in the 3rd square. Change the mode to soft light. Do the same with the 2nd and 3rd square. -Unhide your last tube layer. Move it to the top. Scale by 65%. Drop shadow 2,2,2,black,40. Element time! Add drop shadow of 2,2,2,black,40 to all elements. See my tag for plcacement. -Ribbon 4- scale by 50%- bottom right -Rose-scale by 75%-behind tube -Wordart 2- scale by 40%. Alpha to selection. Add a new layer below this layer. Grow by 2. Fill with white.- bottom right -Lips-scale by 40%.- bottom right -Barbed wire- scale by 50%- bottom rectangle -Splatter 2- no scale- bottom layer -Wax seal- scale by 60%-below large circle layer -Screw- scale by 15%- Duplicae 3 times.- corners of frame layer Add your name, copyright and crop your image. You are finished!
 This tutorial is of my own creation and any resemblance to any other tuts is purely coincidental. This tutorial is for personal use only, using it for monetary gain is against our TOU's.
Supplies Needed:
~Gimp (any version will do).
~Wicked Ways PTU scrapkit which you can get from Sweet Cravings Scraps HERE.
~Tube of choice. I used the outstanding art of Myka Jelina, you must have a license to use this art which you can get HERE.
~Template of choice. I used MC template 76 which you can get HERE.
~Font of choice. I used Burton's Nightmare.
Let's get started!!!
1. Open a new layer ( I prefer a large canvas, so I make mine 1050x656). Make your canvas transparent (Layer > Transparency > Color to Alpha).
2. Open template in PSD format, move layers of template around until they are the way you like them.
~Add paper from scrapkit to individual layers of the template (Right click on layer in layer box > Alpha to Selection > CTRL I > Select paper layer in layer box > Delete).
These are the papers I used:
Paper 5
Paper 8
Paper 18
~I added noise to some of the template layers to make them look glittery (Filters > Noise > RGB Noise).
~I colorized some of the template layers to better match the scrapkit (Colors > Colorize > play with the setting until you get the desired color).
~Add drop shadow to template layers (Filters > Light & Shadow > Drop Shadow).
3. Open tube, add drop shadow.
4. Open and place the following elements:
Rose 3
Rose 4
Rose 5
Metal Plate Wordart
Small Paint Splatter 3
Glittery Star 3
Glittery Star 5
Metal Butterfly 4
~Some of the elements may need to be sized down. Using your scale tool in your tool box adjust the pixel size until element is the correct size~
~Add drop shadow to all elements~
5. Merge Layers (Image > Merge Visible Layers).
6. Crop Image (Image > Autocrop Image).
7. Scale image to desired size (Image > Scale Image).
8. Add copyright info and name
9. Save as .png
YOU ARE DONE!!!!!!!!!!
This tutorial is of my own creation and any resemblance to any other tuts is purely coincidental. This tutorial is for personal use only, using it for monetary gain is against our TOU's.
Supplies Needed:
~Gimp (any version will do).
~Wicked Ways PTU scrapkit which you can get from Sweet Cravings Scraps HERE.
~Tube of choice. I used the outstanding art of Myka Jelina, you must have a license to use this art which you can get HERE.
~Template of choice. I used MC template 76 which you can get HERE.
~Font of choice. I used Burton's Nightmare.
Let's get started!!!
1. Open a new layer ( I prefer a large canvas, so I make mine 1050x656). Make your canvas transparent (Layer > Transparency > Color to Alpha).
2. Open template in PSD format, move layers of template around until they are the way you like them.
~Add paper from scrapkit to individual layers of the template (Right click on layer in layer box > Alpha to Selection > CTRL I > Select paper layer in layer box > Delete).
These are the papers I used:
Paper 5
Paper 8
Paper 18
~I added noise to some of the template layers to make them look glittery (Filters > Noise > RGB Noise).
~I colorized some of the template layers to better match the scrapkit (Colors > Colorize > play with the setting until you get the desired color).
~Add drop shadow to template layers (Filters > Light & Shadow > Drop Shadow).
3. Open tube, add drop shadow.
4. Open and place the following elements:
Rose 3
Rose 4
Rose 5
Metal Plate Wordart
Small Paint Splatter 3
Glittery Star 3
Glittery Star 5
Metal Butterfly 4
~Some of the elements may need to be sized down. Using your scale tool in your tool box adjust the pixel size until element is the correct size~
~Add drop shadow to all elements~
5. Merge Layers (Image > Merge Visible Layers).
6. Crop Image (Image > Autocrop Image).
7. Scale image to desired size (Image > Scale Image).
8. Add copyright info and name
9. Save as .png
YOU ARE DONE!!!!!!!!!!


 This tutorial is of my own creation and any resemblance to any other tuts is purely coincidental. This tutorial is for personal use only, using it for monetary gain is against our TOU's.
Supplies Needed:
~Gimp (any version will do).
~DJ PTU scrapkit which you can get from Addictive Pleasures HERE.
~Tube of choice. I used the outstanding art of Ismael Rac, you must have a license to use his art which you can get HERE.
~Template of choice. I used LaCarolita template 24 which you can get HERE.
~Font of choice. I used SMC Hollywood.
Let's get started!!!
1. Open a new layer ( I prefer a large canvas, so I make mine 1050x656). Make your canvas transparent (Layer > Transparency > Color to Alpha).
2. Open template in PSD format, move layers of template around until they are the way you like them.
~Add paper from scrapkit to individual layers of the template (Right click on layer in layer box > Alpha to Selection > CTRL I > Select paper layer in layer box > Delete).
These are the papers I used:
Paper 5
Paper 9
~I added noise to some of the template layers to make them look glittery (Filters > Noise > RGB Noise).
~I colorized some of the template layers to better match the scrapkit (Colors > Colorize > play with the setting until you get the desired color).
~Add drop shadow to template layers (Filters > Light & Shadow > Drop Shadow).
3. Open tubes, I used both a full body and close ups. I lowered the opacity of the close ups to 50 (at the top of the layer box you will see a bar you can slide to change the opacity of the selected layer). Add drop shadow to the full body tube.
4. Open and place the following elements:
CD
CD 2
MP3player
LicensePlate
Mic
Headphones 2
DJmixer
Record 3
MusicNotes
DiscoBall
Glitter 2
Flare
~Some of the elements may need to be sized down. Using your scale tool in your tool box adjust the pixel size until element is the correct size~
~Add drop shadow to all elements~
5. Merge Layers (Image > Merge Visible Layers).
6. Crop Image (Image > Autocrop Image).
7. Scale image to desired size (Image > Scale Image).
8. Add copyright info and name
9. Save as .png
YOU ARE DONE!!!!!!!!!!
This tutorial is of my own creation and any resemblance to any other tuts is purely coincidental. This tutorial is for personal use only, using it for monetary gain is against our TOU's.
Supplies Needed:
~Gimp (any version will do).
~DJ PTU scrapkit which you can get from Addictive Pleasures HERE.
~Tube of choice. I used the outstanding art of Ismael Rac, you must have a license to use his art which you can get HERE.
~Template of choice. I used LaCarolita template 24 which you can get HERE.
~Font of choice. I used SMC Hollywood.
Let's get started!!!
1. Open a new layer ( I prefer a large canvas, so I make mine 1050x656). Make your canvas transparent (Layer > Transparency > Color to Alpha).
2. Open template in PSD format, move layers of template around until they are the way you like them.
~Add paper from scrapkit to individual layers of the template (Right click on layer in layer box > Alpha to Selection > CTRL I > Select paper layer in layer box > Delete).
These are the papers I used:
Paper 5
Paper 9
~I added noise to some of the template layers to make them look glittery (Filters > Noise > RGB Noise).
~I colorized some of the template layers to better match the scrapkit (Colors > Colorize > play with the setting until you get the desired color).
~Add drop shadow to template layers (Filters > Light & Shadow > Drop Shadow).
3. Open tubes, I used both a full body and close ups. I lowered the opacity of the close ups to 50 (at the top of the layer box you will see a bar you can slide to change the opacity of the selected layer). Add drop shadow to the full body tube.
4. Open and place the following elements:
CD
CD 2
MP3player
LicensePlate
Mic
Headphones 2
DJmixer
Record 3
MusicNotes
DiscoBall
Glitter 2
Flare
~Some of the elements may need to be sized down. Using your scale tool in your tool box adjust the pixel size until element is the correct size~
~Add drop shadow to all elements~
5. Merge Layers (Image > Merge Visible Layers).
6. Crop Image (Image > Autocrop Image).
7. Scale image to desired size (Image > Scale Image).
8. Add copyright info and name
9. Save as .png
YOU ARE DONE!!!!!!!!!!
 This tutorial is of my own creation and any resemblance to any other tuts is purely coincidental. This tutorial is for personal use only, using it for monetary gain is against our TOU's.
Supplies Needed:
~Gimp (any version will do).
~Scrumpalicious FTU scrapkit which you can get from Kittz Kreationz HERE.
~Tube of choice. I used the awesome art of Ismael Rac, you must have a license to use his art which you can get HERE.
~Template of choice. I used ElegantlyWasted template 22 which you can get HERE.
~Mask of choice. I used MC mask6 which you can get HERE.
~Font of choice. I used BlackJack.
Let's get started!!!
1. Open a new layer ( I prefer a large canvas, so I make mine 1050x656). Make your canvas transparent (Layer > Transparency > Color to Alpha).
2. Open template in PSD format, move layers of template around until they are the way you like them.
~Add paper from scrapkit to individual layers of the template (Right click on layer in layer box > Alpha to Selection > CTRL I > Select paper layer in layer box > Delete).
These are the papers I used:
Paper 1
Paper 2
Paper 5
Paper 7
Paper 11
Paper 15
~I added noise to some of the template layers to make them look glittery (Filters > Noise > RGB Noise).
~I colorized some of the template layers to better match the scrapkit (Colors > Colorize > play with the setting until you get the desired color).
~Add drop shadow to template layers (Filters > Light & Shadow > Drop Shadow).
3. Open tube, add drop shadow.
4. Open and place the following elements:
Fresh Rose
Fresh Rose 2
Lollipop
Ice Cream Cone
Heart Flame
Hearts
~Some of the elements may need to be sized down. Using your scale tool in your tool box adjust the pixel size until element is the correct size~
~Add drop shadow to all elements~
5. Open Paper 3
6. Open mask
7. Add mask to paper (right click on paper layer in layer box > add layer mask > black full transparency).
~Select mask layer in layer box, right click on mask layer (on canvas) > copy.
~Make mask layer invisible (click on eye next to mask in layer box).
~Select paper in layer box, right click on paper (on canvas, all you will see is the outline of the paper) > Paste.
~Anchor layer (click on anchor next to trash can on layer box).
~Right click on paper layer in layer box > apply layer mask.
~Delete mask from layer box.
8. Merge Layers (Image > Merge Visible Layers).
9. Crop Image (Image > Autocrop Image).
10. Scale image to desired size (Image > Scale Image).
11. Add copyright info and name
12. Save as .png
YOU ARE ALL DONE!!!!!!!!!!
This tutorial is of my own creation and any resemblance to any other tuts is purely coincidental. This tutorial is for personal use only, using it for monetary gain is against our TOU's.
Supplies Needed:
~Gimp (any version will do).
~Scrumpalicious FTU scrapkit which you can get from Kittz Kreationz HERE.
~Tube of choice. I used the awesome art of Ismael Rac, you must have a license to use his art which you can get HERE.
~Template of choice. I used ElegantlyWasted template 22 which you can get HERE.
~Mask of choice. I used MC mask6 which you can get HERE.
~Font of choice. I used BlackJack.
Let's get started!!!
1. Open a new layer ( I prefer a large canvas, so I make mine 1050x656). Make your canvas transparent (Layer > Transparency > Color to Alpha).
2. Open template in PSD format, move layers of template around until they are the way you like them.
~Add paper from scrapkit to individual layers of the template (Right click on layer in layer box > Alpha to Selection > CTRL I > Select paper layer in layer box > Delete).
These are the papers I used:
Paper 1
Paper 2
Paper 5
Paper 7
Paper 11
Paper 15
~I added noise to some of the template layers to make them look glittery (Filters > Noise > RGB Noise).
~I colorized some of the template layers to better match the scrapkit (Colors > Colorize > play with the setting until you get the desired color).
~Add drop shadow to template layers (Filters > Light & Shadow > Drop Shadow).
3. Open tube, add drop shadow.
4. Open and place the following elements:
Fresh Rose
Fresh Rose 2
Lollipop
Ice Cream Cone
Heart Flame
Hearts
~Some of the elements may need to be sized down. Using your scale tool in your tool box adjust the pixel size until element is the correct size~
~Add drop shadow to all elements~
5. Open Paper 3
6. Open mask
7. Add mask to paper (right click on paper layer in layer box > add layer mask > black full transparency).
~Select mask layer in layer box, right click on mask layer (on canvas) > copy.
~Make mask layer invisible (click on eye next to mask in layer box).
~Select paper in layer box, right click on paper (on canvas, all you will see is the outline of the paper) > Paste.
~Anchor layer (click on anchor next to trash can on layer box).
~Right click on paper layer in layer box > apply layer mask.
~Delete mask from layer box.
8. Merge Layers (Image > Merge Visible Layers).
9. Crop Image (Image > Autocrop Image).
10. Scale image to desired size (Image > Scale Image).
11. Add copyright info and name
12. Save as .png
YOU ARE ALL DONE!!!!!!!!!! This tutorial is of my own creation and any resemblance to any other tuts is purely coincidental. This tutorial is for personal use only, using it for monetary gain is against our TOU's.
~Gimp (any version will do).
~Get Set PTU scrapkit which you can get from Addictive Pleasures HERE.
~Tube of choice. I used the ultra hot art of Ismael Rac, you must have a license to use his art which you can get HERE.
~Template of choice. I used MisfitTemp2 by Melissa which you can get HERE.
~Mask of choice. I used WSL mask363 which you can get HERE.
~Font of choice. I used Satisfaction & Tai Le Bold.
Let's get started!!!
1. Open a new layer ( I prefer a large canvas, so I make mine 1050x656). Make your canvas transparent (Layer > Transparency > Color to Alpha).
2. Open template in PSD format, move layers of template around until they are the way you like them.
~Add paper from scrapkit to individual layers of the template (Right click on layer in layer box > Alpha to Selection > CTRL I > Select paper layer in layer box > Delete).
These are the papers I used:
Paper 2
Paper 4
Paper 10
~I added noise to some of the template layers to make them look glittery (Filters > Noise > RGB Noise).
~I colorized some of the template layers to better match the scrapkit (Colors > Colorize > play with the setting until you get the desired color).
~Add drop shadow to template layers (Filters > Light & Shadow > Drop Shadow).
3. Open tube, add drop shadow.
4. Open and place the following elements:
Bow 3
Bow 4
Wrench
Wheel
Charm
GlassBrad
Speedometer
Stoplight
TireIron
Beads 2
~Some of the elements may need to be sized down. Using your scale tool in your tool box adjust the pixel size until element is the correct size~
~Add drop shadow to all elements~
5. Open Paper 3
6. Open mask
7. Add mask to paper (right click on paper layer in layer box > add layer mask > black full transparency).
~Select mask layer in layer box, right click on mask layer (on canvas) > copy.
~Make mask layer invisible (click on eye next to mask in layer box).
~Select paper in layer box, right click on paper (on canvas, all you will see is the outline of the paper) > Paste.
~Anchor layer (click on anchor next to trash can on layer box).
~Right click on paper layer in layer box > apply layer mask.
~Delete mask from layer box.
8. Add "You wanna Race?" text, add drop shadow
9. Merge Layers (Image > Merge Visible Layers).
10. Crop Image (Image > Autocrop Image).
11. Scale image to desired size (Image > Scale Image).
12. Add copyright info and name
13. Save as .png
YOU ARE FINISHED!!!!!!!!!!
This tutorial is of my own creation and any resemblance to any other tuts is purely coincidental. This tutorial is for personal use only, using it for monetary gain is against our TOU's.
~Gimp (any version will do).
~Get Set PTU scrapkit which you can get from Addictive Pleasures HERE.
~Tube of choice. I used the ultra hot art of Ismael Rac, you must have a license to use his art which you can get HERE.
~Template of choice. I used MisfitTemp2 by Melissa which you can get HERE.
~Mask of choice. I used WSL mask363 which you can get HERE.
~Font of choice. I used Satisfaction & Tai Le Bold.
Let's get started!!!
1. Open a new layer ( I prefer a large canvas, so I make mine 1050x656). Make your canvas transparent (Layer > Transparency > Color to Alpha).
2. Open template in PSD format, move layers of template around until they are the way you like them.
~Add paper from scrapkit to individual layers of the template (Right click on layer in layer box > Alpha to Selection > CTRL I > Select paper layer in layer box > Delete).
These are the papers I used:
Paper 2
Paper 4
Paper 10
~I added noise to some of the template layers to make them look glittery (Filters > Noise > RGB Noise).
~I colorized some of the template layers to better match the scrapkit (Colors > Colorize > play with the setting until you get the desired color).
~Add drop shadow to template layers (Filters > Light & Shadow > Drop Shadow).
3. Open tube, add drop shadow.
4. Open and place the following elements:
Bow 3
Bow 4
Wrench
Wheel
Charm
GlassBrad
Speedometer
Stoplight
TireIron
Beads 2
~Some of the elements may need to be sized down. Using your scale tool in your tool box adjust the pixel size until element is the correct size~
~Add drop shadow to all elements~
5. Open Paper 3
6. Open mask
7. Add mask to paper (right click on paper layer in layer box > add layer mask > black full transparency).
~Select mask layer in layer box, right click on mask layer (on canvas) > copy.
~Make mask layer invisible (click on eye next to mask in layer box).
~Select paper in layer box, right click on paper (on canvas, all you will see is the outline of the paper) > Paste.
~Anchor layer (click on anchor next to trash can on layer box).
~Right click on paper layer in layer box > apply layer mask.
~Delete mask from layer box.
8. Add "You wanna Race?" text, add drop shadow
9. Merge Layers (Image > Merge Visible Layers).
10. Crop Image (Image > Autocrop Image).
11. Scale image to desired size (Image > Scale Image).
12. Add copyright info and name
13. Save as .png
YOU ARE FINISHED!!!!!!!!!!
 This tutorial is of my own creation and any resemblance to any other tuts is purely coincidental. This tutorial is for personal use only, using it for monetary gain is against our TOU's.
~Gimp (any version will do).
~Cookies & Cream PTU scrapkit which you can get from Creative Intentionz HERE.
~Tube of choice. I used the adorable PinUpToons, you must have a license to use this art which you can get HERE.
~Template of choice. I used temp 298 from Divine Intentionz which you can get HERE.
~Mask of choice. I used MC mask10 which you can get HERE.
~Font of choice. I used Aquarelle.
Let's get started!!!
1. Open a new layer ( I prefer a large canvas, so I make mine 1050x656). Make your canvas transparent (Layer > Transparency > Color to Alpha).
2. Open template in PSD format, move layers of template around until they are the way you like them.
~Add paper from scrapkit to individual layers of the template (Right click on layer in layer box > Alpha to Selection > CTRL I > Select paper layer in layer box > Delete).
These are the papers I used:
Paper 1
Paper 4
Paper 5
Paper 10
Paper 11
~I added noise to some of the template layers to make them look glittery (Filters > Noise > RGB Noise).
~I colorized some of the template layers to better match the scrapkit (Colors > Colorize > play with the setting until you get the desired color).
~Add drop shadow to template layers (Filters > Light & Shadow > Drop Shadow).
3. Open tubes, I used both a full body and a close up. I lowered the opacity of the close ups to 50 (at the top of the layer box you will see a bar you can slide to change the opacity of the selected layer). Add drop shadow to the full body tube.
4. Open and place the following elements:
BinderClip 4
HeartCharm 3
HeartCharm 4
CurlyRibbon 3
RibbonWrap 4
BlingDoodle 1
BeadFlower 1
BeadFlower 2 (x2)
BeadFlower 3 (x2)
~Some of the elements may need to be sized down. Using your scale tool in your tool box adjust the pixel size until element is the correct size~
~Add drop shadow to all elements~
4. Open Paper 3
5. Open mask
6. Add mask to paper (right click on paper layer in layer box > add layer mask > black full transparency).
~Select mask layer in layer box, right click on mask layer (on canvas) > copy.
~Make mask layer invisible (click on eye next to mask in layer box).
~Select paper in layer box, right click on paper (on canvas, all you will see is the outline of the paper) > Paste.
~Anchor layer (click on anchor next to trash can on layer box).
~Right click on paper layer in layer box>apply layer mask.
~Delete mask from layer box.
7. Merge Layers (Image > Merge Visible Layers).
8. Crop Image (Image > Autocrop Image).
9. Scale image to desired size (Image > Scale Image).
10. Add copyright info and name
11. Save as .png
YOU ARE ALL DONE!!!!!!!!!!
This tutorial is of my own creation and any resemblance to any other tuts is purely coincidental. This tutorial is for personal use only, using it for monetary gain is against our TOU's.
~Gimp (any version will do).
~Cookies & Cream PTU scrapkit which you can get from Creative Intentionz HERE.
~Tube of choice. I used the adorable PinUpToons, you must have a license to use this art which you can get HERE.
~Template of choice. I used temp 298 from Divine Intentionz which you can get HERE.
~Mask of choice. I used MC mask10 which you can get HERE.
~Font of choice. I used Aquarelle.
Let's get started!!!
1. Open a new layer ( I prefer a large canvas, so I make mine 1050x656). Make your canvas transparent (Layer > Transparency > Color to Alpha).
2. Open template in PSD format, move layers of template around until they are the way you like them.
~Add paper from scrapkit to individual layers of the template (Right click on layer in layer box > Alpha to Selection > CTRL I > Select paper layer in layer box > Delete).
These are the papers I used:
Paper 1
Paper 4
Paper 5
Paper 10
Paper 11
~I added noise to some of the template layers to make them look glittery (Filters > Noise > RGB Noise).
~I colorized some of the template layers to better match the scrapkit (Colors > Colorize > play with the setting until you get the desired color).
~Add drop shadow to template layers (Filters > Light & Shadow > Drop Shadow).
3. Open tubes, I used both a full body and a close up. I lowered the opacity of the close ups to 50 (at the top of the layer box you will see a bar you can slide to change the opacity of the selected layer). Add drop shadow to the full body tube.
4. Open and place the following elements:
BinderClip 4
HeartCharm 3
HeartCharm 4
CurlyRibbon 3
RibbonWrap 4
BlingDoodle 1
BeadFlower 1
BeadFlower 2 (x2)
BeadFlower 3 (x2)
~Some of the elements may need to be sized down. Using your scale tool in your tool box adjust the pixel size until element is the correct size~
~Add drop shadow to all elements~
4. Open Paper 3
5. Open mask
6. Add mask to paper (right click on paper layer in layer box > add layer mask > black full transparency).
~Select mask layer in layer box, right click on mask layer (on canvas) > copy.
~Make mask layer invisible (click on eye next to mask in layer box).
~Select paper in layer box, right click on paper (on canvas, all you will see is the outline of the paper) > Paste.
~Anchor layer (click on anchor next to trash can on layer box).
~Right click on paper layer in layer box>apply layer mask.
~Delete mask from layer box.
7. Merge Layers (Image > Merge Visible Layers).
8. Crop Image (Image > Autocrop Image).
9. Scale image to desired size (Image > Scale Image).
10. Add copyright info and name
11. Save as .png
YOU ARE ALL DONE!!!!!!!!!!

This tutorial is of my own creation and any resemblance to any other tuts is purely coincidental. This tutorial is for personal use only, using it for monetary gain is against our TOU's. Supplies Needed: ~Gimp (any version will do). ~Disturbia PTU scrapkit which you can get from Addictive Pleasures HERE. ~Tubes of choice. I used the super HOT art of Ismael Rac, you must have a license to use his art which you can get HERE. ~Template of choice. I used Template 37 which you can get at Sapphire's Splendor HERE. ~Font of choice. I used Bleeding Freaks. Let's get started!!! 1. Open a new layer ( I prefer a large canvas, so I make mine 1050x656). Make your canvas transparent (Layer > Transparency > Color to Alpha). 2. Open template in PSD format, move layers of template around until they are the way you like them. ~Add paper from scrapkit to individual layers of the template (Right click on layer in layer box > Alpha to Selection > CTRL I > Select paper layer in layer box > Delete). These are the papers I used: Paper 2 Paper 3 Paper 7 Paper 8 ~I added noise to some of the template layers to make them look glittery (Filters > Noise > RGB Noise). ~I colorized some of the template layers to better match the scrapkit (Colors > Colorize > play with the setting until you get the desired color). ~Add drop shadow to template layers (Filters > Light & Shadow > Drop Shadow). 3. Open tubes, I used both a full body and close ups. I lowered the opacity of the close ups to 50 (at the top of the layer box you will see a bar you can slide to change the opacity of the selected layer). Add drop shadow to the full body tube. 4. Open and place the following elements: Spider Skull2 Rose2 BallGag1 Handcuffs BarbedWire Syringe2 RazorBlade Bottle Chain Decor2 Splat Blood2 ~Some of the elements may need to be sized down. Using your scale tool in your tool box adjust the pixel size until element is the correct size~ ~Add drop shadow to all elements~ 5. Merge Layers (Image > Merge Visible Layers). 6. Crop Image (Image > Autocrop Image). 7. Scale image to desired size (Image > Scale Image). 8. Add copyright info and name 9. Save as .png ALL DONE!!!!!!!!!!
Snag Our Blinkies


Don't Be A Pirate!

