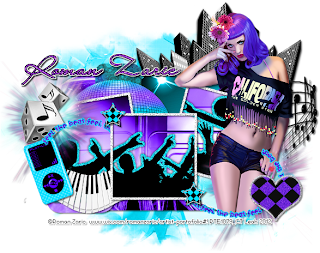
Saturday, April 14, 2012
 This tutorial is of my own creation and any resemblance to any other tuts is purely coincidental. This tutorial is for personal use only, using it for monetary gain is against our TOU's.
Supplies:
Gimp
Tube of choice. I am using the art of Roman Zaric. You must have a license to use these tube. You can purchase the one I used starting 4-15-12 at PSP Tubes Emporium HERE
PTU Kit from Abstract Creations called Feel The Beat at PSP Tubes Emporium HERE. This kit will be available for purchase starting 4-15-12.
Template 430 from Divine Intentionz HERE
Mask 302 from weescotslass HERE
Font- Lainie Day SH
Let's get started!
-Open template. Delete credits. Image>Scale Image 450x289 px. Image>Canvas Size 600x600 px and click center.
-Let's add papers to the template layers. Make the template layer active (see below). Right click template layer in layer box and choose alpha to selection. Open paper (see below). Right click paper layer in layer box and choose add alpha channel. Layer>Scale Layer60%. Select>Invert. Press delete on your keyboard. Select>None. Delete the original template layer.Here are the template layers and which papers I used:
rounded edge rect 4- paper 14 Filters>Light & Shadow>Drop Shadow 2, 2, 2, black, 50
rounded edge rect 3- paper 15 repeat drop shadow
circle 1- paper 4
circle 2- paper8
square 2- paper 10 repeat drop shadow
rounded edge rect 2- paper 9 repeat drop shadow
rounded edge rect 1- paper 2 repeat drop shadow
rectangle- paper 12
-Make glitter circle 1 active. Add drop shadow of 0, 0, 5, black, 80. Repeat for glitter circle 2.
--Open element 26. Scale 75%. Move this layer bleow frame 3 layer in layer box. Place in the middle of tag (so it covers all 3 pink squares). Repeat drop shadow. Layer>Merge Down to merge the element layer with the drop shadow layer. Name this layer FANS 1. Layer>Duplicate Layer. Move duplicate below frame 1 layer. Name this layer FANS 2. Duplicate. Move this duplicate below frame 2 layer. Name this layer FANS 3.
Make frame back 3 active. Layer>Transparency>Alpha To Selection. Make FANS 1 actvie. Select>Invert. Press Delete on your keyboard. Select>None.
Make frame back 1 active. Alpha to selection. Make FANS 2 active. Invert & delete. Select none.
Make frame back 2 active. Alpha to selection. Make FANS 3 active. Invert & delete. Select none.
-Add paper 6 to all frame back layers as we did above for the FANS layers.
-Make frame 3 active. Filters>Noise>RGB Noise. Change all sliders (except alpha) to .50. Repeat drop shadow. Repeat for frame 1 & frame 2.
-Open tube. Make the top layer. Scale 70%. Place to the right side of tag. Repeat drop shadow.
Elements:
28
38
23
22
17
2
33
12 - rotate -20
-Open aper 4. Make the bottom layer. Apply mask. Click HERE to learn how to use masks.
-Add name and copyright.
All done!!
Labels:PTU tuts
Subscribe to:
Post Comments
(Atom)
Labels
12x12 Layout
A Taggers Scrap
Animated
Announcements
Art of Freya
Basic tuts
Blog Trains
CDO
Cluster Frame
CT tags
Extras
Forum Set
Freebies
FTU CU
FTU Kits
FTU tuts
Holiday
Jackie's Jewels
Kissing Kate
Masks
PTU Kits
PTU tuts
Quick Pages
Results
Results with Amys kits
Show Offs
Sweet Cravings Scraps
Tasha's Playground
Templates
Timeline Banners
Chit Chat
Blog Archive
-
▼
2012
(550)
-
▼
April
(57)
- FTU Tut- Peach
- Tag Show-off
- FTU Tut- Sea Goddess
- PTE CT Tag & Snags
- PTE CT tag by Amy & some extras
- PTU Tut- I'm Waiting
- FTU Kit - Star
- FTU Tut- Wanna Play?
- PTE CT tag by Amy, plus some extras :)
- PTU Tut- Out Of Control
- PTE CT Tag By Leah
- FTU Tut- To Grandmothers House
- PTE CT tag by Amy
- Tag Show Off!!
- PTU tut - Garden Jewel
- PTU tut - Bring it
- Party Rock Cluster Frame Freebie
- FTU Tut- Audrey
- PTE CT Tag by Leah
- Tut Results
- PTU tut- Troublemaker
- PTU tut - Sexting and the City
- PTE CT tag by Amy
- PTU Tut- Think Good Thoughts
- PTE CT Tag by Leah
- PTU tut - Spring Fling
- PTE CT tag by Amy
- PTE CT Tag by Leah (AC)
- PTU tut - Sail Away
- FREEBIE- Love To Love Facebook Timeline Cover
- FTU tut - Blood Lust
- PTU Tut- California Girl
- PTU Tut- Satisfaction
- Sorrowful You Cluster Frame Freebie
- FTU Tut- Raising Hell
- Freebie- Totally Rad Facebook Timeline Banner
- FTU Tut- Classic Beauty
- PTE CT tag by Amy
- FTU Tut- Hell On Wheels
- FREEBIE - Ladybug Garden Facebook Timeline Banner
- FTU tut - Ask Me if I Care
- PTE CT Tag by Leah
- What a Feeling Cluster Frame Freebie
- FTU tut - End of Days
- FTU Tut- I Love Cupcakes
- FTU tut - Steampunk Angel
- Templates 130-134
- PTU tut - Vintage Reflection
- New PTE Artist- Gina King
- New PTE Artist - Gina King
- PTU tut - Who's that Girl?
- PTU Tut- Spring Breeze
- FTU Tut- Spring Time
- PTU tut - Ladybug Garden
- FTU tut - SWAG
- PTU Tut- Hit Like A Girl
- PTE CT Tag by Leah
-
▼
April
(57)


0 comments:
Post a Comment