Gimptastic Scraps Available Exclusively @

Gimptastic Scraps CT


Blog Trains

CU Licenses


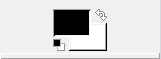
~Now make sure the template layer is selected in your layer box. Then select Filters > Render > Line Nova (see image below for the settings I used).
 ~Below is what your template should now look like~
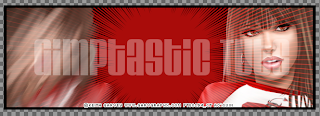
 5. Open 1 tube, smudge the tube using your Smudge Tool in your tool box. Be sure to erase any excess that may smudge outside of the size of your template.
6. Open another tube, the same size as the tube you just smudged and place it on the opposite side of the template. Change the mode on this tube to Screen mode (at the top of your layer box you will see where it says Mode, select Screen from the drop down menu.) This will give the tube a sheer look. Remove any excess tube that is outside of your templates layer using either an eraser or cutting tool from your tool box
See image below for an example of what your tag should now look like...
5. Open 1 tube, smudge the tube using your Smudge Tool in your tool box. Be sure to erase any excess that may smudge outside of the size of your template.
6. Open another tube, the same size as the tube you just smudged and place it on the opposite side of the template. Change the mode on this tube to Screen mode (at the top of your layer box you will see where it says Mode, select Screen from the drop down menu.) This will give the tube a sheer look. Remove any excess tube that is outside of your templates layer using either an eraser or cutting tool from your tool box
See image below for an example of what your tag should now look like...
7. Now open another tube, same size as the 2 you have already used and place this one directly over the tube you have smudged. Change this tube to Screen mode as well. This will give the tube a kind of glowing effect. Remove any excess tube that is outside of your templates layer using either an eraser or cutting tool from your tool box 8. Now open a larger close-up tube, change the mode on this tube to Hardlight. Remove any excess tube that is outside of your templates layer using either an eraser or cutting tool from your tool box ~Below is an example of what your tag should now look like~
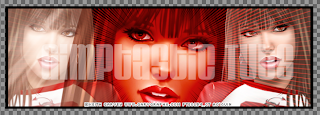
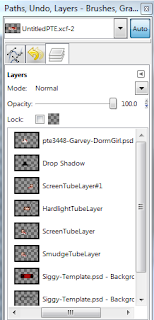
9. Now open the main tube and add drop shadow (Filters > Light & Shadow > Drop Shadow). Remove any excess tube that is outside of your templates layer using either an eraser or cutting tool from your tool box. ~Below is an example of what your layer box should look like, so you know how I have layered the tubes~
10. Add desired text to your tag.
11. Merge Layers (Image > Merge Visible Layers > Merge).
12. Crop Image (Image > Autocrop Image).
13. Scale image to desired size (Image > Scale Image).
14. Add copyright info and name
~Save as .png~
You are DONE!!!!!!!
~Now for the avatar, this one is fairly simple~
1. Open a new layer ( I prefer a large canvas, so I make mine 1050x656). Make your canvas transparent (Layer > Transparency > Color to Alpha).
2. Open Avatar template in PSD format.
3. Colorize grey template layer to desired color, I chose red (Colors > Colorize > adjust to desired color).
4. Open close-up tube, change mode on tube to Screen mode (at the top of your layer box you will see where it says Mode, select Screen from the drop down menu.) Remove any excess tube that is outside of your templates layer using either an eraser or cutting tool from your tool box.
5. Open main tube, add drop shadow (Filters > Light & Shadow > Drop Shadow). Remove any excess tube that is outside of your templates layer using either an eraser or cutting tool from your tool box.
6. Merge Layers (Image > Merge Visible Layers > Merge).
7. Crop Image (Image > Autocrop Image).
8. Scale image to desired size (Image > Scale Image).
9. Add copyright info and name
~Save as .png~
~You are DONE!!!!~
Snag Our Blinkies


Don't Be A Pirate!


0 comments:
Post a Comment