Gimptastic Scraps Available Exclusively @

Gimptastic Scraps CT


Blog Trains

CU Licenses


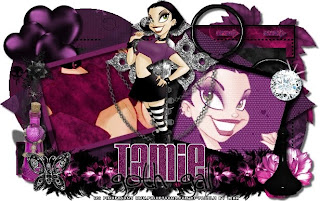
This tutorial is of my own creation and any resemblance to any other tuts is purely coincidental. This tutorial is for personal use only, using it for monetary gain is against our TOU's. Supplies: Amazing PTU kit from Addictive Pleasures called 'Gothica' HERE I used the art of pinuptoons. You must have a license to use them. You can purchase them HERE Template #1 from Brandi over at Creative Misfits HERE Fonts- Velvanda Cooler and Tall Paul Let's Begin! -Open template. Delete the credits. Right click each layer in the layer box and choose layer to image size. Next go to Image>Scale Image and change the x resolution to 72 and press enter and then press scale. -Make the large rectangle layer active. using the magic wand tool clcik outside the rectangle. Open paper 8. Right click in the layer box and choose add alpha channel. Go to Layer>Scale Layer by 75%. Press delete on your keyboard to erase anything outside of the selection. Go to Select>None. Layer to image size. Delete the original large rectangle layer. -Make the triangle 1 layer active. Click outside with magic wand. Open paper 9 and add alpha channel. Scale by 50%. Press delete and select none. Go to Filters>Light and Shadow>Drop Shadow of 4, 4, 3, black, 60. Delete the original triangle 1 layer. -Make the triangle 2 layer active. Click outside with magic wand. Open paper 3 and add alpha channel. Scale by 50%. Press delete and select none. Go to Filters>Repeat Drop Shadow. Delete the original triangle 2 layer. -Make the circle 1 layer active. Click outside with magic wand. Open paper 2 and add alpha channel. Scale by 50%. Press delete and select none. Add drop shadow. Delete the original circle 1 layer. -Make the circle 2 layer active. Click outside with the magic wand. Open paper 12 and add alpha channel. Scale by 50%. Press delete and select none. Add drop shadow. Delete original circle 2 layer. -Make the small rectangle 1 layer active. Click outside with magic wand. Open paper 4 and add alpha channel. Scale by 50%. Press delete. Go to Select>Invert. Layer to image size. Now go to Select>Grow by 2. Add a new layer above this layer. Using the bucket fill tool, fill with 742059. Go to Select>Shrink by 3. Press delete and select none. Add drop shadow. Delete original small rectangle 1 layer. -Make small rectangle 2 layer active. Click outside with magic wand. Open paper 1 and add alpha channel. Scale by 50%. Press delete and invert. Layer to image size. Grow by 2. Add a new layer above this layer. Fill with black. Shrink by 3 and press delete. Select none and add drop shadow. Delete original small rectangle 2 layer. -Make the merged (arrows) layer active. Right click layer in layer box and choose alpha to selection. Add a new layer above this layer. Fill with purple from before. Select none. Go to Filters>Noise>RGB Noise on the default settings. Add drop shadow. Delete original merged layer. -Make square 1 active. Alpha to selection. Add new layer above this layer. Fill with black. Select none. Click inside with magic wand. Grow by 3. Open paper 7 and add alpha channel. Scale by 50%. Move this paper layer below the frame in the layer box. Invert and press delete. Select none. Add drop shadow. Delete original square 1 layer. -Make square 2 active. Alpha to selection. Add new layer above this layer. Fill with same purple. Select none. Click inside with magic wand. Grow by 3. Open paper 6 and add alpha channel. Scale by 50%. Move paper layer below frame layer in layer box. Invert and press delete. Select none and add drop shadow. Delete original square 2 layer. -Open tube. Move this layer to the top in the layer box. Scale by 75% and add drop shadow. -Open tube close up. Move layer below the right frame layer. Using the flip tool flip the tube. Make the paper of the right frame active and clcik outside with magic wand. Make the tube active. Press delete. layer to image size. Select none. Change the layer mode to screen. Do the same with the left frame, except change the layer mode to hard light. Time for elements! Add drop shdow to all element layer. See my tag as a reference as to where to place element layers. -Feathers Scale by 50% -Frame Scale by 50% -Hearts Scale by 50% -Curlylace Scale by 40% -Diamond no scale -Cross Scale by 75% -Butterfly3 Scale by 35% -Bottle Scale by 40% -Leaves no scale -Bottle2 Scale by 35% -Flower3 Scale by 50% -Add your name with the Velevanda Cooler font -Type 'goth gal' with the tall paul font -Add copyright and crop You're finished!!!!
Snag Our Blinkies


Don't Be A Pirate!


0 comments:
Post a Comment