Gimptastic Scraps Available Exclusively @

Gimptastic Scraps CT







Blog Trains

CU Licenses









Tuesday, October 18, 2011

This award was given to us by Vanessa over at Leather & Lace Tuts and Lesia at Deadly Desire. We are honored and really appreciate that you thought of us:)
Here are 3 blogs that put a smile on our faces:
Monday, October 17, 2011
This tutorial is of my own creation and any resemblance to any other tuts is purely coincidental. This tutorial is for personal use only, using it for monetary gain is against our TOU's.
Using masks in Gimp is a little tricky. Here is a tutorial on how to use them. I am not going to add this to a tag, but if you would like to add a mask to a tag you need to move the layers to the bottom.
Supplies:
Mask 1 from our blog HERE
Here we go!
-Go to File>New and make the canvas size 600x600 pixels. Press okay.
This part won't be needed if you are adding a mask to a tag.
-Add a new layer by clicking the folded paper icon at the bottom of your layer box.
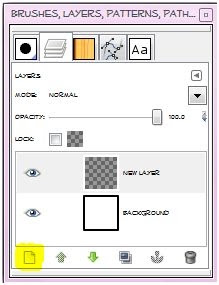
Using your bucket fill tool fill the new
layer with color of choice. I am using black. You can also do this with a paper from a scrap kit if you'd like. To
do that, just open the paper and move the paper layer to the bottom in your layer box and skip adding a new layer and filling it with color.
-Open your mask and make sure it is above the black layer in the layer box. You may get a pop up box like the one below. Just press convert.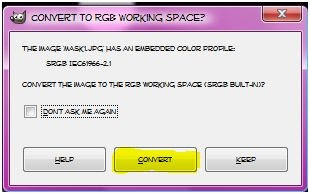
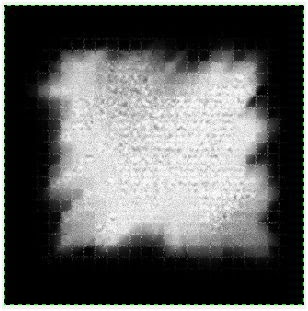
-Make your black layer (or paper layer) active and right click the layer in the layer box. Click add layer mask. Make sure black (full trancparency) is checked. Click add. 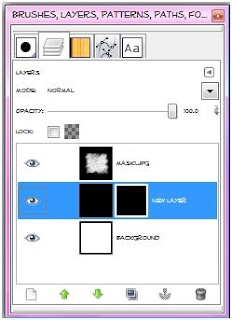
-Make sure there is a white outline on the 2nd box by your black layer in the layer box. If not, just click on it the layer box. 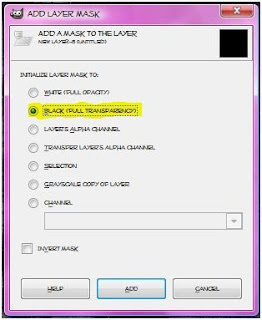
-Make your mask layer active. Go to Edit>Copy. Hide this layer by clicking the little eye next to the layer in the layer box. 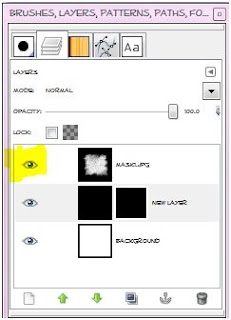
-Make your black layer (or paper layer) active. Go to Edit>Paste. Now you will have a floating section in your layer box. You need to anchor it. To do this click the little anchor icon at the bottom of the layer box. 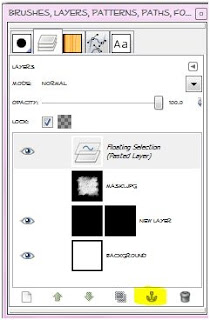
-You can delete the mask layer in the layer box. Now you should just see the mask. 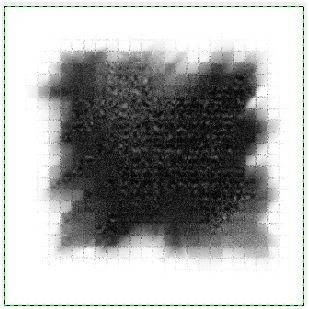
Saturday, October 15, 2011
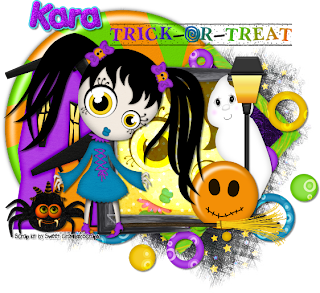 Supplies:
Gimp
Adorable PTU kit from Sweet Cravings Scraps called Nightmare on my Street HERE
Mask 167 from weescotslass HERE
Font- Porky's
Let's Begin!
-File>New 600x600 px.
-Open frame 3. Layers>Scale Layer 40%. Select your rectangle tool. Make a selection around your frame.
 -Open paper 1 and move below frame layer. Layers>Transparency>Add Alpha Channel. Scale 60%. Select>Invert. Press delete on your keyboard. Select>None. Make frame layer active. Filters>Light & Shadow>Drop Shadow 1, 1, 10, black, 50.
-Open frame 1. Make the bottom layer. Scale 40%. Select the rotate tool. In the angle box, put
-45. Select your magic wand. Click inside the frame. Select>Grow by 5. Open paper 4. Move paper under frame layer. Add alpha channel. Scale 60%. Invert & delete. Select none. Repeat drom shadow on frame layer.
-Open cute zombie twin 2. Move below the black frame. Place her face in the black frame. Erase parts of her that are sticking outside of the black frame. Change the mode to grain merge.
-Open cute zombie twin 2 again. Make the top layer. Scale 60%. Move to the left of your tag. Add a drop shadow of 2, 2, 2, black, 50.
-Open spooky house. Move below the yellow paper.Scale by 50%. Place behind the girl.
-Open frame 5. Make the bottom layer. Scale 55%. Place to the left of your tag. Some of the frame was sticking out below the house, so I erased it. Add drop shadow of 0, 0, 10, black, 80.
Other Elements:
Add a drop shadow of 2, 2, 2, black, 50 to all elements, unless otherwise stated (it will say NDS). See my tag for placement.
word art NDS
broom- Rotate -90 NDS
cute shy ghost
doodleios
cute goo spider
smiley 2
-Open paper 6 and make the bottom layer. Apply your mask.
-Add your name and copyright.
You're finished!!
Friday, October 14, 2011
It seems that our tut site has been reported for a TOU violation. Our tut site was disabled with no warning, so we wern't able to fix whatever we were reported for (what ever that may be). We have had our blog and tut site up for a while and have never had one problem. We are working on getting everything fixed. I hope it won't be long until we are up and running again.
If you have a problem with our blog or tut site, please email us at Gimptasticblog@yahoo.com. We will fix whatever the problem is right away. We would rather have the chance to fix it, then to wake up one day and see all our hard work disappear.
Wednesday, October 12, 2011
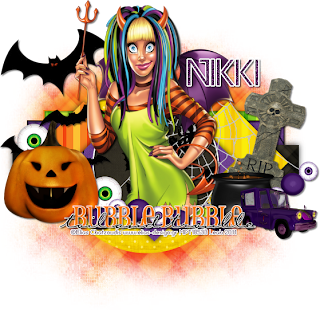
Supplies:
Gimp
Great PTU kit from Creative Intentionz called Spookylicious HERE
Tube of choice. I am using Elias Chatzoudis. You must have a license to use his tubes. You can purchase them HERE
Template 107 by me HERE
Mask- grungi10 by Sharon HERE
Font- Devil Breeze
Let's get started!
-Open template. Delete the credits. Image>Scale Image 500x283 pixels. Image>Canvas Size 600x600 pixels and make sure to click center.
-Let's add papers to the template layers. Make the template layer active (see below). Right click template layer in layer box and choose alpha to selection. Open paper (see below). Right click paper layer in layer box and choose add alpha channel. Layer>Scale Layer by 60%.
Select>Invert. Press delete on your keyboard. Select>None. Delete the original template layer.
Here are the template layers and which papers I used:
circle- paper 6
diamond 1- paper 7 Fitlers>Light & Shadow>Drop Shadow 0, 0, 15, black, 80
diamond 2- paper 20 Filters>Repeat Drop Shadow
diamond 3- paper 19 repeat drop shadow
rect 1- paper 1 repeat drop shadow
rect 2- paper 12
rect 3- paper 18
-Add a drop shadow of 2, 2, 2, black, 50 to the following layers:
All frame layers
words 2
words 4
-Open tube. Move layer below word art layers. Sclae 75%. Repeat drop shadow. Layers>Duplicate Layer. Filters>Blur>Gaussian Blur on default. Change the mode to soft light. Lower the
opacity to 50.
Elements:
Add drop shadow of 2, 2, 2, black, 50 to all element layers, unless otherwise stated (it will say NDS). See my tag for placement.
bats
eye beads 1
spider web NDS
pumpkin 1
cauldron
grave stone 1- rotate 20
eye NDS
I scream van
moon 5 NDS
-Open paper 4. Make the bottom layer. Apply mask.
-Add your name and copyrights.
Tuesday, October 11, 2011

This award was given to us by Sarah from Sarah's Tags n Things!! Thank you so very much for this award!
Here are the 5 blogs we would like to give this award to:
I made another kit! I had fun making it and I hope you have fun tagging with it:)
 Download it HERE
Subscribe to:
Posts
(Atom)
Snag Our Blinkies





Don't Be A Pirate!

