Gimptastic Scraps Available Exclusively @

Gimptastic Scraps CT







Blog Trains

CU Licenses









 This tutorial is of my own creation and any resemblance to any other tuts is purely coincidental. This tutorial is for personal use only, using it for monetary gain is against our TOU's.
Supplies Needed:
~Gimp (any version will do).
~Urban Chic PTU scrapkit by Rieka Rafita which is an exclusive kit for SATC. You can find more info on her blog HERE.
~Tubes of choice. I used the artwork of Arthur Crowe, you must have a license to use this art which you can get HERE.
~Template of choice. I used the Jehsee Template which you can get from Annaica's Place HERE.
~Mask of choice. I used WSL mask 302 which you can get HERE.
~Font of choice. I used Whatka.
Let's get started!!!
1. Open a new layer ( I prefer a large canvas, so I make mine 1050x656). Make your canvas transparent (Layer > Transparency > Color to Alpha).
2. Open template in PSD format, move layers of template around until they are the way you like them.
~Add paper from scrapkit to individual layers of the template (Right click on template layer in layer box > Alpha to Selection > CTRL I > Select paper layer in layer box > Delete).
These are the papers I used:
Paper 3
Paper 7
Paper 9
Paper 11
~I added noise to some of the template layers to make them look glittery (Filters > Noise > RGB Noise).
~I colorized some of the template layers to better match the scrapkit (Colors > Colorize > play with the setting until you get the desired color).
~Add drop shadow to template layers (Filters > Light & Shadow > Drop Shadow).
3. Open tubes, I used both a full body and 2 close-ups. I changed the mode on the close-ups to Screen (at the top of your Layer Box you will see where it says Mode, click the arrow and select Screen from the drop down menu). The close-ups have been added to the template (directly on top of Paper 11) in the same way you add paper (Right click on template layer in layer box > Alpha to Selection > CTRL I > Select tube layer in layer box > Delete). Add drop shadow to the full body tube (and the puppy dog tube as well).
4. Open and place the following elements:
Ribbon 2
Punk Teddy
Skull 1
Skull 2
String 2
Button 3
Star
Lip
Guitar
Headphones
~Some of the elements may need to be sized down. Using your scale tool in your tool box adjust the pixel size until element is the correct size~
~Add drop shadow to all elements~
5. Open Paper 18
6. Open mask
7. Add mask to paper (click HERE for a tut on using masks)
8. Merge Layers (Image > Merge Visible Layers).
9. Crop Image (Image > Autocrop Image).
10. Scale image to desired size (Image > Scale Image).
11. Add copyright info and name
12. Save as .png
ALL DONE!!!!!!!!!!
This tutorial is of my own creation and any resemblance to any other tuts is purely coincidental. This tutorial is for personal use only, using it for monetary gain is against our TOU's.
Supplies Needed:
~Gimp (any version will do).
~Urban Chic PTU scrapkit by Rieka Rafita which is an exclusive kit for SATC. You can find more info on her blog HERE.
~Tubes of choice. I used the artwork of Arthur Crowe, you must have a license to use this art which you can get HERE.
~Template of choice. I used the Jehsee Template which you can get from Annaica's Place HERE.
~Mask of choice. I used WSL mask 302 which you can get HERE.
~Font of choice. I used Whatka.
Let's get started!!!
1. Open a new layer ( I prefer a large canvas, so I make mine 1050x656). Make your canvas transparent (Layer > Transparency > Color to Alpha).
2. Open template in PSD format, move layers of template around until they are the way you like them.
~Add paper from scrapkit to individual layers of the template (Right click on template layer in layer box > Alpha to Selection > CTRL I > Select paper layer in layer box > Delete).
These are the papers I used:
Paper 3
Paper 7
Paper 9
Paper 11
~I added noise to some of the template layers to make them look glittery (Filters > Noise > RGB Noise).
~I colorized some of the template layers to better match the scrapkit (Colors > Colorize > play with the setting until you get the desired color).
~Add drop shadow to template layers (Filters > Light & Shadow > Drop Shadow).
3. Open tubes, I used both a full body and 2 close-ups. I changed the mode on the close-ups to Screen (at the top of your Layer Box you will see where it says Mode, click the arrow and select Screen from the drop down menu). The close-ups have been added to the template (directly on top of Paper 11) in the same way you add paper (Right click on template layer in layer box > Alpha to Selection > CTRL I > Select tube layer in layer box > Delete). Add drop shadow to the full body tube (and the puppy dog tube as well).
4. Open and place the following elements:
Ribbon 2
Punk Teddy
Skull 1
Skull 2
String 2
Button 3
Star
Lip
Guitar
Headphones
~Some of the elements may need to be sized down. Using your scale tool in your tool box adjust the pixel size until element is the correct size~
~Add drop shadow to all elements~
5. Open Paper 18
6. Open mask
7. Add mask to paper (click HERE for a tut on using masks)
8. Merge Layers (Image > Merge Visible Layers).
9. Crop Image (Image > Autocrop Image).
10. Scale image to desired size (Image > Scale Image).
11. Add copyright info and name
12. Save as .png
ALL DONE!!!!!!!!!!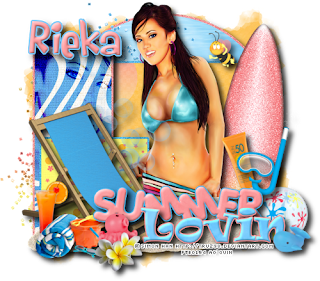 This tutorial is of my own creation and any resemblance to any other tuts is purely coincidental. This tutorial is for personal use only, using it for monetary gain is against our TOU's.
Supplies Needed:
~Gimp (any version will do).
~Summer Breeze PTU scrapkit by Rieka Rafita which you can get HERE.
~Tubes of choice. I used the artwork of Simon Han, you must have a license to use this art which you can get HERE.
~Template of choice. I used Template 12 which you can get from Mythical Designs HERE.
~Mask of choice. I used WSL mask 363 which you can get HERE.
~Font of choice. I used Rumpelstiltskin.
Let's get started!!!
1. Open a new layer ( I prefer a large canvas, so I make mine 1050x656). Make your canvas transparent (Layer > Transparency > Color to Alpha).
2. Open template in PSD format, move layers of template around until they are the way you like them.
~Add paper from scrapkit to individual layers of the template (Right click on template layer in layer box > Alpha to Selection > CTRL I > Select paper layer in layer box > Delete).
These are the papers I used:
Paper 9
Paper 12
Paper 14
Paper 15
~I added noise to some of the template layers to make them look glittery (Filters > Noise > RGB Noise).
~I colorized some of the template layers to better match the scrapkit (Colors > Colorize > play with the setting until you get the desired color).
~I beveled the text on this template to give it a shiny effect (Filters > Decor > Add Bevel). See image below for settings I used:
This tutorial is of my own creation and any resemblance to any other tuts is purely coincidental. This tutorial is for personal use only, using it for monetary gain is against our TOU's.
Supplies Needed:
~Gimp (any version will do).
~Summer Breeze PTU scrapkit by Rieka Rafita which you can get HERE.
~Tubes of choice. I used the artwork of Simon Han, you must have a license to use this art which you can get HERE.
~Template of choice. I used Template 12 which you can get from Mythical Designs HERE.
~Mask of choice. I used WSL mask 363 which you can get HERE.
~Font of choice. I used Rumpelstiltskin.
Let's get started!!!
1. Open a new layer ( I prefer a large canvas, so I make mine 1050x656). Make your canvas transparent (Layer > Transparency > Color to Alpha).
2. Open template in PSD format, move layers of template around until they are the way you like them.
~Add paper from scrapkit to individual layers of the template (Right click on template layer in layer box > Alpha to Selection > CTRL I > Select paper layer in layer box > Delete).
These are the papers I used:
Paper 9
Paper 12
Paper 14
Paper 15
~I added noise to some of the template layers to make them look glittery (Filters > Noise > RGB Noise).
~I colorized some of the template layers to better match the scrapkit (Colors > Colorize > play with the setting until you get the desired color).
~I beveled the text on this template to give it a shiny effect (Filters > Decor > Add Bevel). See image below for settings I used:
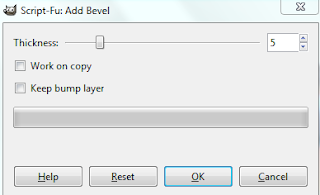 ~Add drop shadow to template layers (Filters > Light & Shadow > Drop Shadow).
3. Open tubes, I used both a full body and a close-up. I changed the mode on the close-up to Burn (at the top of your Layer Box you will see where it says Mode, click the arrow and select Burn from the drop down menu). The close-up has been added to the template in the same way you add paper (Right click on template layer in layer box > Alpha to Selection > CTRL I > Select tube layer in layer box > Delete. Add drop shadow to full body tube.
4. Open and place the following elements:
Glitter Splash
Surfboard
Sand
Bubbles
Bee
Deck Chair
Cocktail 1
Towel
Sun Lotion
Beach Ball
Scuba
Octopus
Dolphin
Flower 1
~Some of the elements may need to be sized down. Using your scale tool in your tool box adjust the pixel size until element is the correct size~
~Add drop shadow to all elements~
5. Open Paper 8
6. Open mask
7. Add mask to paper (click HERE for a tut on using masks)
8. Merge Layers (Image > Merge Visible Layers).
9. Crop Image (Image > Autocrop Image).
10. Scale image to desired size (Image > Scale Image).
11. Add copyright info and name
12. Save as .png
ALL DONE!!!!!!!!!!
~Add drop shadow to template layers (Filters > Light & Shadow > Drop Shadow).
3. Open tubes, I used both a full body and a close-up. I changed the mode on the close-up to Burn (at the top of your Layer Box you will see where it says Mode, click the arrow and select Burn from the drop down menu). The close-up has been added to the template in the same way you add paper (Right click on template layer in layer box > Alpha to Selection > CTRL I > Select tube layer in layer box > Delete. Add drop shadow to full body tube.
4. Open and place the following elements:
Glitter Splash
Surfboard
Sand
Bubbles
Bee
Deck Chair
Cocktail 1
Towel
Sun Lotion
Beach Ball
Scuba
Octopus
Dolphin
Flower 1
~Some of the elements may need to be sized down. Using your scale tool in your tool box adjust the pixel size until element is the correct size~
~Add drop shadow to all elements~
5. Open Paper 8
6. Open mask
7. Add mask to paper (click HERE for a tut on using masks)
8. Merge Layers (Image > Merge Visible Layers).
9. Crop Image (Image > Autocrop Image).
10. Scale image to desired size (Image > Scale Image).
11. Add copyright info and name
12. Save as .png
ALL DONE!!!!!!!!!! This tutorial is of my own creation and any resemblance to any other tuts is purely coincidental. This tutorial is for personal use only, using it for monetary gain is against our TOU's.
Supplies Needed:
~Gimp (any version will do).
~I am a Panda FTU scrapkit by Tasha @ Tasha's Playground HERE.
~Tubes of choice. I used the artwork of Alfadesire, you must have a license to use this art which you can get HERE.
~Template of choice. I used template 392 which you can get from Divine Intentionz HERE.
~Mask of choice. I used WSL mask 363 which you can get HERE.
~Font of choice. I used Pink Panda.
Let's get started!!!
1. Open a new layer ( I prefer a large canvas, so I make mine 1050x656). Make your canvas transparent (Layer > Transparency > Color to Alpha).
2. Open template in PSD format, remove and move layers of template around until they are the way you like them.
~Add paper from scrapkit to individual layers of the template (Right click on template layer in layer box > Alpha to Selection > CTRL I > Select paper layer in layer box > Delete).
These are the papers I used:
Paper 1
Paper 2
Paper 3
Paper 4
Paper 5
~I added noise to some of the template layers to make them look glittery (Filters > Noise > RGB Noise).
~I colorized some of the template layers to better match the scrapkit (Colors > Colorize > play with the setting until you get the desired color).
~Add drop shadow to template layers (Filters > Light & Shadow > Drop Shadow).
3. Open tubes, I used both a full body and a close-up. I changed the mode on the close-up to Screen (at the top of your Layer Box you will see where it says Mode, click the arrow and select Screen from the drop down menu). The close-up has been added to the template in the same way you add paper (Right click on template layer in layer box > Alpha to Selection > CTRL I > Select tube layer in layer box > Delete). Add drop shadow to the full body tube.
4. Open and place the following elements:
Star Trail
Ribbon 3
mp3player
Flower 1
Flower 4
Boombox
Skull 1
Skull 2
Skull 3
Soda Can
Sticker 1
Cupcake 2
Sparkles 2
~Some of the elements may need to be sized down. Using your scale tool in your tool box adjust the pixel size until element is the correct size~
~Add drop shadow to all elements (except Sparkles 2)~
5. Open Paper 7
6. Open mask
7. Add mask to paper
8. Merge Layers (Image > Merge Visible Layers).
9. Crop Image (Image > Autocrop Image).
10. Scale image to desired size (Image > Scale Image).
11. Add copyright info and name
12. Save as .png
ALL DONE!!!!!!!!!!
This tutorial is of my own creation and any resemblance to any other tuts is purely coincidental. This tutorial is for personal use only, using it for monetary gain is against our TOU's.
Supplies Needed:
~Gimp (any version will do).
~I am a Panda FTU scrapkit by Tasha @ Tasha's Playground HERE.
~Tubes of choice. I used the artwork of Alfadesire, you must have a license to use this art which you can get HERE.
~Template of choice. I used template 392 which you can get from Divine Intentionz HERE.
~Mask of choice. I used WSL mask 363 which you can get HERE.
~Font of choice. I used Pink Panda.
Let's get started!!!
1. Open a new layer ( I prefer a large canvas, so I make mine 1050x656). Make your canvas transparent (Layer > Transparency > Color to Alpha).
2. Open template in PSD format, remove and move layers of template around until they are the way you like them.
~Add paper from scrapkit to individual layers of the template (Right click on template layer in layer box > Alpha to Selection > CTRL I > Select paper layer in layer box > Delete).
These are the papers I used:
Paper 1
Paper 2
Paper 3
Paper 4
Paper 5
~I added noise to some of the template layers to make them look glittery (Filters > Noise > RGB Noise).
~I colorized some of the template layers to better match the scrapkit (Colors > Colorize > play with the setting until you get the desired color).
~Add drop shadow to template layers (Filters > Light & Shadow > Drop Shadow).
3. Open tubes, I used both a full body and a close-up. I changed the mode on the close-up to Screen (at the top of your Layer Box you will see where it says Mode, click the arrow and select Screen from the drop down menu). The close-up has been added to the template in the same way you add paper (Right click on template layer in layer box > Alpha to Selection > CTRL I > Select tube layer in layer box > Delete). Add drop shadow to the full body tube.
4. Open and place the following elements:
Star Trail
Ribbon 3
mp3player
Flower 1
Flower 4
Boombox
Skull 1
Skull 2
Skull 3
Soda Can
Sticker 1
Cupcake 2
Sparkles 2
~Some of the elements may need to be sized down. Using your scale tool in your tool box adjust the pixel size until element is the correct size~
~Add drop shadow to all elements (except Sparkles 2)~
5. Open Paper 7
6. Open mask
7. Add mask to paper
8. Merge Layers (Image > Merge Visible Layers).
9. Crop Image (Image > Autocrop Image).
10. Scale image to desired size (Image > Scale Image).
11. Add copyright info and name
12. Save as .png
ALL DONE!!!!!!!!!!
 Get them HERE
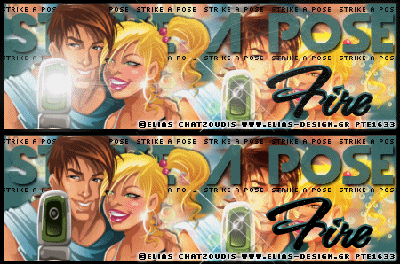
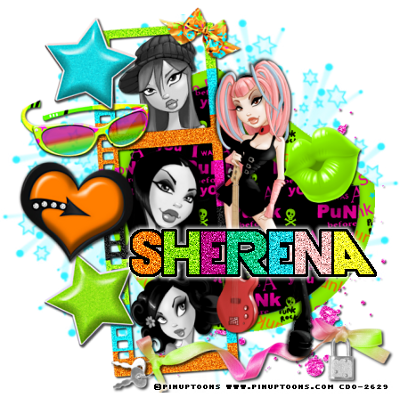

This tutorial is of my own creation and any resemblance to any other tuts is purely coincidental. This tutorial is for personal use only, using it for monetary gain is against our TOU's. Supplies: Gimp- Any version should work Cute PTU kit from Wicked Princess Scraps called Nurse Sugar HERE Template 70 by me HERE Tube of choice. I am using Elias Chatzoudis. You must have a license to use his tubes. You can purchase them HERE Mask- AR315_CMC_mask129 HERE Font- Will & Grace -Open template. Delete the credits. Image>Scale Image 500x401 px. Image>Canvas Size 600x600 pixels and press center. -Let's add papers to the template layers. Make the template layer active (see below). Right click template layer in layer box and choose alpha to selection. Open paper (see below). Right click paper layer in layer box and choose add alpha channel. Layer>Scale Layer by 60%. Select>Invert. Press delete on your keyboard. Select>None. Delete the original template layer. Here are the template layers and which papers I used: circle 1- paper 7 circle 2- paper 1 Filters>Light & Shadow>Drop Shadow 2, 2, 2, black, 50 circle 3- paper 5 Filters>Repeat drop shadow square 4- paper 10 repeat drop shadow square 5- paper 13 repeat drop shadow -Make the circle frame layer acitve. Add a drop shadow of 2, 2, 7, black, 50. -Make square 1 active. Colors>Colorize. Hue: 180 Saturation: 50 Lightness: 68. Filters>Add Noise>RGB Noise on default settings. Colorize squares 2 & 3 with these settings. Hue: 336 Saturation: 50 Lightness: 50. Add a drop shadow of 2, 2, 2, black, 50 to the frame, frame 1 and frame 2 layers. -Open the tube close up. Select the flip tool and click the canvas to flip the tube. Place inside the small squares. Scale by 75%. Layer>Duplicate Layer 2 times for a total of 3 tube layers. Move the top tube under the frame layer in the layer box. Move the middle tube under the frame 1 layer. Move the last tube under the frame 2 layer. Using the eraser tool, erase parts of all the tubes sticking out of the frames. Change the modes of all tube layers to value. -Open full body tube. Make the top palyer. Repeat drop shadow. -Open the statline. Scale by 65%. Erase parts of the tube underneat the statline. Repeat drop shadow on statline. Elements: Add a drop shadow of 2, 2, 2, black, 50 to all element layers unless otherwise stated. See my tag for placement. first aid- scale 20% syringe- scale 35% nurseugarid- scale 35% pill- scale 20% pill bottle- scale 25% clipboard- scale 35% Select rotate tool and rotate by 25 post it 2- scale 25% post it 1- scale 20% beading- scale 55% flower string- no scale and no drop shadow tigerlilly- scale 25% heart frame- scale 50 and duplicate -Open paper 8 and move to the bottom. Open your mask and apply it to the paper. If you don't know how to use masks, click HERE. -Add your name and copyright. You're finished! I hope you enjoyed my tut!!!
Snag Our Blinkies





Don't Be A Pirate!

