Gimptastic Scraps Available Exclusively @

Gimptastic Scraps CT







Blog Trains

CU Licenses









 This tutorial is of my own creation and any resemblance to any other tuts is purely coincidental. This tutorial is for personal use only, using it for monetary gain is against our TOU's.
Supplies Needed:
~Gimp (any version will do).
~CandyCane PTU scrapkit which you can get from Addictive Pleasures HERE.
~Tube of choice. I used the art of Jessica Dougherty, you must have a license to use this art which you can get HERE.
~Template of choice. I used Template 125 which you can get at Blissfully Beth HERE.
~Mask of choice. I used DBV mask111 which you can get HERE.
~Font of choice. I used SwingSet.
Let's get started!!!
1. Open a new layer ( I prefer a large canvas, so I make mine 1050x656). Make your canvas transparent (Layer > Transparency > Color to Alpha).
2. Open template in PSD format, move layers of template around until they are the way you like them.
~Add paper from scrapkit to individual layers of the template (Right click on template layer in layer box > Alpha to Selection > CTRL I > Select paper layer in layer box > Delete).
These are the papers I used:
Paper 4
Paper 5
Paper 12
~I added noise to some of the template layers to make them look glittery (Filters > Noise > RGB Noise).
~I colorized some of the template layers to better match the scrapkit (Colors > Colorize > play with the setting until you get the desired color).
~Add drop shadow to template layers (Filters > Light & Shadow > Drop Shadow).
3. Open tube, add drop shadow.
4. Open and place the following elements:
Beads
Glitter
FluffyBall (x2)
Presents
Candy
Candycane
Candycane 3
Holly
Kitten
~Some of the elements may need to be sized down. Using your scale tool in your tool box adjust the pixel size until element is the correct size~
~Add drop shadow to all elements~
5. Open Paper 7
6. Open mask
7. Apply layer mask (click HERE for a tut on using masks)
8. Merge Layers (Image > Merge Visible Layers).
9. Crop Image (Image > Autocrop Image).
10. Scale image to desired size (Image > Scale Image).
11. Add copyright info and name
12. Save as .png
ALL DONE!!!!!!!!!!
This tutorial is of my own creation and any resemblance to any other tuts is purely coincidental. This tutorial is for personal use only, using it for monetary gain is against our TOU's.
Supplies Needed:
~Gimp (any version will do).
~CandyCane PTU scrapkit which you can get from Addictive Pleasures HERE.
~Tube of choice. I used the art of Jessica Dougherty, you must have a license to use this art which you can get HERE.
~Template of choice. I used Template 125 which you can get at Blissfully Beth HERE.
~Mask of choice. I used DBV mask111 which you can get HERE.
~Font of choice. I used SwingSet.
Let's get started!!!
1. Open a new layer ( I prefer a large canvas, so I make mine 1050x656). Make your canvas transparent (Layer > Transparency > Color to Alpha).
2. Open template in PSD format, move layers of template around until they are the way you like them.
~Add paper from scrapkit to individual layers of the template (Right click on template layer in layer box > Alpha to Selection > CTRL I > Select paper layer in layer box > Delete).
These are the papers I used:
Paper 4
Paper 5
Paper 12
~I added noise to some of the template layers to make them look glittery (Filters > Noise > RGB Noise).
~I colorized some of the template layers to better match the scrapkit (Colors > Colorize > play with the setting until you get the desired color).
~Add drop shadow to template layers (Filters > Light & Shadow > Drop Shadow).
3. Open tube, add drop shadow.
4. Open and place the following elements:
Beads
Glitter
FluffyBall (x2)
Presents
Candy
Candycane
Candycane 3
Holly
Kitten
~Some of the elements may need to be sized down. Using your scale tool in your tool box adjust the pixel size until element is the correct size~
~Add drop shadow to all elements~
5. Open Paper 7
6. Open mask
7. Apply layer mask (click HERE for a tut on using masks)
8. Merge Layers (Image > Merge Visible Layers).
9. Crop Image (Image > Autocrop Image).
10. Scale image to desired size (Image > Scale Image).
11. Add copyright info and name
12. Save as .png
ALL DONE!!!!!!!!!! This tutorial is of my own creation and any resemblance to any other tuts is purely coincidental. This tutorial is for personal use only, using it for monetary gain is against our TOU's.
Supplies Needed:
~Gimp (any version will do).
~Half Past Christmas PTU scrapkit which you can get from Addictive Pleasures HERE.
~Tube of choice. I used the artwork of Lix , you must have a license to use this art which you can get HERE.
~Template of choice. I used EI Template 36 which you can get at Elegant Inspirations HERE.
~Mask of choice. I used WSL mask302 which you can get HERE.
~Font of choice. I used Trubble.
Let's get started!!!
1. Open a new layer ( I prefer a large canvas, so I make mine 1050x656). Make your canvas transparent (Layer > Transparency > Color to Alpha).
2. Open template in PSD format, move layers of template around until they are the way you like them.
~Add paper from scrapkit to individual layers of the template (Right click on template layer in layer box > Alpha to Selection > CTRL I > Select paper layer in layer box > Delete).
These are the papers I used:
Paper 2
Paper 5
Paper 8
Paper 10
Paper 12
~I added noise to some of the template layers to make them look glittery (Filters > Noise > RGB Noise).
~I colorized some of the template layers to better match the scrapkit (Colors > Colorize > play with the setting until you get the desired color).
~Add drop shadow to template layers (Filters > Light & Shadow > Drop Shadow).
3. Open tube, add drop shadow.
4. Open and place the following elements:
Beads
Bells
Tinsel
Present 2
Present 3
KittenWithPresent
SnowmanBox
Tree
Bow
Poinsettia
Bauble2
~Some of the elements may need to be sized down. Using your scale tool in your tool box adjust the pixel size until element is the correct size~
~Add drop shadow to all elements~
5. Open Paper 6
6. Open mask
7. Apply layer mask (click HERE for a tut on using masks)
8. Merge Layers (Image > Merge Visible Layers).
9. Crop Image (Image > Autocrop Image).
10. Scale image to desired size (Image > Scale Image).
11. Add copyright info and name
12. Save as .png
ALL DONE!!!!!!!!!!
This tutorial is of my own creation and any resemblance to any other tuts is purely coincidental. This tutorial is for personal use only, using it for monetary gain is against our TOU's.
Supplies Needed:
~Gimp (any version will do).
~Half Past Christmas PTU scrapkit which you can get from Addictive Pleasures HERE.
~Tube of choice. I used the artwork of Lix , you must have a license to use this art which you can get HERE.
~Template of choice. I used EI Template 36 which you can get at Elegant Inspirations HERE.
~Mask of choice. I used WSL mask302 which you can get HERE.
~Font of choice. I used Trubble.
Let's get started!!!
1. Open a new layer ( I prefer a large canvas, so I make mine 1050x656). Make your canvas transparent (Layer > Transparency > Color to Alpha).
2. Open template in PSD format, move layers of template around until they are the way you like them.
~Add paper from scrapkit to individual layers of the template (Right click on template layer in layer box > Alpha to Selection > CTRL I > Select paper layer in layer box > Delete).
These are the papers I used:
Paper 2
Paper 5
Paper 8
Paper 10
Paper 12
~I added noise to some of the template layers to make them look glittery (Filters > Noise > RGB Noise).
~I colorized some of the template layers to better match the scrapkit (Colors > Colorize > play with the setting until you get the desired color).
~Add drop shadow to template layers (Filters > Light & Shadow > Drop Shadow).
3. Open tube, add drop shadow.
4. Open and place the following elements:
Beads
Bells
Tinsel
Present 2
Present 3
KittenWithPresent
SnowmanBox
Tree
Bow
Poinsettia
Bauble2
~Some of the elements may need to be sized down. Using your scale tool in your tool box adjust the pixel size until element is the correct size~
~Add drop shadow to all elements~
5. Open Paper 6
6. Open mask
7. Apply layer mask (click HERE for a tut on using masks)
8. Merge Layers (Image > Merge Visible Layers).
9. Crop Image (Image > Autocrop Image).
10. Scale image to desired size (Image > Scale Image).
11. Add copyright info and name
12. Save as .png
ALL DONE!!!!!!!!!!
This tutorial is of my own creation and any resemblance to any other tuts is purely coincidental. This tutorial is for personal use only, using it for monetary gain is against our TOU's. Supplies Needed: ~Gimp (any version will do). ~Tubes of choice. I used the adorable artwork of Toosh Toosh, you must have a license to use this art which you can get HERE. ~It's Snow Wonderful PTU scrapkit by Artmama which you can get from Exquisite Scraps HERE. ~It's Snow Wonderful PTU decor add-on by Artmama which you get from Exquisite Scraps HERE. ~Mask of choice. I used WSL mask363 which you can get HERE. ~Font of choice. I used Little Bliss Bold. Let's get started!!!!! 1. Open a new layer ( I prefer a large canvas, so I make mine 1050x656). Make your canvas transparent (Layer > Transparency > Color to alpha). 2. Open Decor 22 (window) from the decor add-on, add drop shadow (Filters > Light & Shadow > Drop Shadow). 3. Open Paper 14 center it behind the window, remove excess paper using a cutting tool or eraser. 4. Open your tubes, add drop shadow. 5. Open and place the following elements from the scrapkit: embellie 32 embellie 1 embellie 42 embellie 19 embellie 56 embellie 37 embellie 38 embellie 39 embellie 40 ~Open and place the following elements from the decor add-on Decor 11 Decor 13 ~Some elements may need to be sized down. Using the Scale Tool in your tool box adjust pixels to desired size~ ~Add drop shadow to all elements~ 6. Open Paper 13 7. Open mask. 8. Add mask to paper (click HERE for a tut on using masks) 9. Merge layers (Image > Merge Visible Layer). 10. Crop image (Image > Autocrop Image). 11. Scale image to desired size (Image > Scale Image). 12. Add copyright info and name. 13. Save as .png You are finished :) Attachments (0)
 This tutorial is of my own creation and any resemblance to any other tuts is purely coincidental. This tutorial is for personal use only, using it for monetary gain is against our TOU's.
~Gimp (any version will do).
~Do You Believe PTU scrapkit which you can get from Creative Intentionz HERE.
~Tube of choice. I used the artwork of Tyson McAdoo, you must have a license to use this art which you can get HERE.
~Template of choice. I used temp 201 from Blissfully Beth which you can get HERE.
~Mask of choice. I used WSL mask 302 which you can get HERE.
~Font of choice. I used Creative Power.
Let's get started!!!
1. Open a new layer ( I prefer a large canvas, so I make mine 1050x656). Make your canvas transparent (Layer > Transparency > Color to Alpha).
2. Open template in PSD format, move layers of template around until they are the way you like them.
~Add paper from scrapkit to individual layers of the template (Right click on layer in layer box > Alpha to Selection > CTRL I > Select paper layer in layer box > Delete).
These are the papers I used:
Paper 1
Paper 2
Paper 9
Paper 11
Paper 13
~I added noise to some of the template layers to make them look glittery (Filters > Noise > RGB Noise).
~I colorized some of the template layers to better match the scrapkit (Colors > Colorize > play with the setting until you get the desired color).
~Add drop shadow to template layers (Filters > Light & Shadow > Drop Shadow).
3. Open tube, add drop shadow.
4. Open and place the following elements:
Candy Cane
Penguin 1
Poinsettia 1
Present 3
(the above embellishment is mislabled, it's actually the yellow poinsettia)
Bell 1
Bell 2
Decoration 1
Holly 1
Holly 2
~Some of the elements may need to be sized down. Using your scale tool in your tool box adjust the pixel size until element is the correct size~
~Add drop shadow to all elements~
4. Open Paper 6
5. Open mask
6. Add mask to paper (click HERE for a tut on using masks)
7. Merge Layers (Image > Merge Visible Layers).
8. Crop Image (Image > Autocrop Image).
9. Scale image to desired size (Image > Scale Image).
10. Add copyright info and name
11. Save as .png
YOU ARE ALL DONE!!!!!!!!!!
This tutorial is of my own creation and any resemblance to any other tuts is purely coincidental. This tutorial is for personal use only, using it for monetary gain is against our TOU's.
~Gimp (any version will do).
~Do You Believe PTU scrapkit which you can get from Creative Intentionz HERE.
~Tube of choice. I used the artwork of Tyson McAdoo, you must have a license to use this art which you can get HERE.
~Template of choice. I used temp 201 from Blissfully Beth which you can get HERE.
~Mask of choice. I used WSL mask 302 which you can get HERE.
~Font of choice. I used Creative Power.
Let's get started!!!
1. Open a new layer ( I prefer a large canvas, so I make mine 1050x656). Make your canvas transparent (Layer > Transparency > Color to Alpha).
2. Open template in PSD format, move layers of template around until they are the way you like them.
~Add paper from scrapkit to individual layers of the template (Right click on layer in layer box > Alpha to Selection > CTRL I > Select paper layer in layer box > Delete).
These are the papers I used:
Paper 1
Paper 2
Paper 9
Paper 11
Paper 13
~I added noise to some of the template layers to make them look glittery (Filters > Noise > RGB Noise).
~I colorized some of the template layers to better match the scrapkit (Colors > Colorize > play with the setting until you get the desired color).
~Add drop shadow to template layers (Filters > Light & Shadow > Drop Shadow).
3. Open tube, add drop shadow.
4. Open and place the following elements:
Candy Cane
Penguin 1
Poinsettia 1
Present 3
(the above embellishment is mislabled, it's actually the yellow poinsettia)
Bell 1
Bell 2
Decoration 1
Holly 1
Holly 2
~Some of the elements may need to be sized down. Using your scale tool in your tool box adjust the pixel size until element is the correct size~
~Add drop shadow to all elements~
4. Open Paper 6
5. Open mask
6. Add mask to paper (click HERE for a tut on using masks)
7. Merge Layers (Image > Merge Visible Layers).
8. Crop Image (Image > Autocrop Image).
9. Scale image to desired size (Image > Scale Image).
10. Add copyright info and name
11. Save as .png
YOU ARE ALL DONE!!!!!!!!!! I am going to show you how to make text 'glitter' using gimp.
Supplies
Gimp- Any version should work
Bold Text- I am using velvenda cooler
Let's do this!
-Go to File>New and open a canvas with the size of 300x300 pixels.
-Type out your name using any color you wish. I am using 52126a. Right click your text layer in your layer box and choose layer to image size. Go to Layers>Duplicate Layer 2 times for a
total of 3 text layers.
-Make your top text layer active. Go to Filters>Noise>RGB Noise. The settings will depend on the color you are using. Just play around with the settings till you get something you like.
Here are the settings I used:
I am going to show you how to make text 'glitter' using gimp.
Supplies
Gimp- Any version should work
Bold Text- I am using velvenda cooler
Let's do this!
-Go to File>New and open a canvas with the size of 300x300 pixels.
-Type out your name using any color you wish. I am using 52126a. Right click your text layer in your layer box and choose layer to image size. Go to Layers>Duplicate Layer 2 times for a
total of 3 text layers.
-Make your top text layer active. Go to Filters>Noise>RGB Noise. The settings will depend on the color you are using. Just play around with the settings till you get something you like.
Here are the settings I used:


 -Click save and your done!
You can download the temp HERE
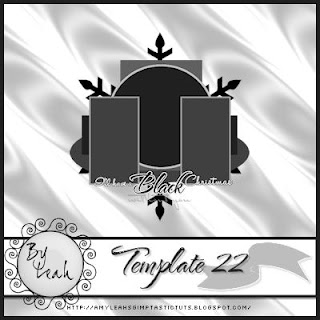
This tutorial is of my own creation and any resemblance to any other tuts is purely coincidental. This tutorial is for personal use only, using it for monetary gain is against our TOU's. Supplies: Gimp Any version should work Stunning PTU kit from Addictive Pleasures called 'Black Christmas' HERE Template 22 by me HERE Font- Ma Sexy Let's get started! -Open template an delete the credits. -Make the circle layer active. Right click layer in layer box and choose layer to image size. Using the magic wand, click outside the circle. Open paper 12. Right click layer in layer box and choose add alpha channel. Layer>Scale Layer by 50%. Press delete on your keyboard. Select none. Delete circle layer. -Make the circle back layer active. Filters>Noise>RGB Noise on default settings. Filters>Light & Shadow> Drop Shadow of 2, 2, 15, black, 100. -Make the square layer active. Layer to image size. Click outside with magic wand. Open paper 10 and add alpha channel. Scale by 50%. Delete and select none. Filters>Repeat Drop Shadow. Delete the square layer. -Make the thin rect layer active. Layer to image size. Click outside with magic wand. Open paper 5 and add alpha channel. Scale by 75%. Delete. Select>Invert. Add new later above this layer. Select>Grow by 1. Fill with white. Select>Shrink by 3. Delete and select none. Repeat drop shadow. Delete the thin rect layer. -Make the oval layer active. Layer to image size. Click outside with magic wand. Open paper 4 and add alpha channel. Scale by 85%. Delete and invert. Add new layer below this layer. Grow by 3. Fill with white. Select none and repeat drop shadow. Delete oval layer. -Make the rect 1 layer active. Layer to image size. Click outside with magic wand. Open paper 7 and add alha channel. Scale by 50%. Delete and select none. -Make rect 2 layer active. Layer to image size. Click outside with magic wand. Open paper 3 and add alpha channel. Scale by 50%. Delete and select none. Delete the rect 2 layer. -Add noise to the frame 1, frame 2 and black layers. -Add a drop shadow of 2, 2, 10, black, 100 to the snowflake layer. -Open your tube (full body). Move layer below word art layers in the layer box. Add drop shdow of 3, 5, 2, black, 50. -Open tube close up. Move layer below frame 2. Layer>Duplicate Layer. Layer to image size. Using the flip tool flip your tube. Move this duplicate tube layer below the frame 1 layer. Erase parts of the tube sticking out of the frame. To do this make the paper layer below the tube active. Click outside with magic wand. Make the tube layer active and press delete. Do with both close up tube layers. Change the mode of both tube layers to value and change the opacity to 50. Elements Add a drop shadow of 2, 2, 2, black, 50 to all element layers. See my tag for placement. -Frame 5 Scale 50% -Snowflake Scale 65% -Sparkles no scale duplicate and flip -Garland Scale 50% -Candle 2 Scale 60% duplicate and flip -Mistletoe 60% -Curtains Scale 85% -Candle no scale -Candles Scale 35% duplicate and flip -Bauble 3 Scale 25% -Tree 5 Scale 50% -Add drop shadow to all 3 word back layers. -Make the without you layer active. Layer to image size. Right click in layer box and choose alpha to selection. Add new layer below this layer. Grow by 2 and fill with white. Select none. Filters>Blur>Gaussian Blur 5. Add drop shadow. -Add your name, copyrights and crop. I hope you enjoyed this tut! Happy Holidays!
 This tutorial is of my own creation and any resemblance to any other tuts is purely coincidental. This tutorial is for personal use only, using it for monetary gain is against our TOU's.
Supplies Needed:
~Gimp (any version will do).
~Black Christmas PTU scrapkit which you can get from Addictive Pleasures HERE.
~Tube of choice. I used the art of Jennifer Janesko, you must have a license to use this art which you can get HERE.
~Template of choice. I used MC Template 76 which you can get at Melissaz Creationz HERE.
~Mask of choice. I used WSL mask363 which you can get HERE.
~Font of choice. I used Scriptina.
Let's get started!!!
1. Open a new layer ( I prefer a large canvas, so I make mine 1050x656). Make your canvas transparent (Layer > Transparency > Color to Alpha).
2. Open template in PSD format, move layers of template around until they are the way you like them.
~Add paper from scrapkit to individual layers of the template (Right click on template layer in layer box > Alpha to Selection > CTRL I > Select paper layer in layer box > Delete).
These are the papers I used:
Paper 2
Paper 4
Paper 5
Paper 11
Paper 12
~I added noise to some of the template layers to make them look glittery (Filters > Noise > RGB Noise).
~I colorized some of the template layers to better match the scrapkit (Colors > Colorize > play with the setting until you get the desired color).
~Add drop shadow to template layers (Filters > Light & Shadow > Drop Shadow).
3. Open tube, add drop shadow.
4. Open and place the following elements:
Beads
Tree 5
Present
Present 2
Present 3
Snowflake
Joy
Bow 2
Candles
Lantern
Twig
Holly
Ornament
Bauble 4
~Some of the elements may need to be sized down. Using your scale tool in your tool box adjust the pixel size until element is the correct size~
~Add drop shadow to all elements~
5. Open Paper 7
6. Open mask
7. Apply layer mask (click HERE for a tut on using masks)
8. Merge Layers (Image > Merge Visible Layers).
9. Crop Image (Image > Autocrop Image).
10. Scale image to desired size (Image > Scale Image).
11. Add copyright info and name
12. Save as .png
ALL DONE!!!!!!!!!!
This tutorial is of my own creation and any resemblance to any other tuts is purely coincidental. This tutorial is for personal use only, using it for monetary gain is against our TOU's.
Supplies Needed:
~Gimp (any version will do).
~Black Christmas PTU scrapkit which you can get from Addictive Pleasures HERE.
~Tube of choice. I used the art of Jennifer Janesko, you must have a license to use this art which you can get HERE.
~Template of choice. I used MC Template 76 which you can get at Melissaz Creationz HERE.
~Mask of choice. I used WSL mask363 which you can get HERE.
~Font of choice. I used Scriptina.
Let's get started!!!
1. Open a new layer ( I prefer a large canvas, so I make mine 1050x656). Make your canvas transparent (Layer > Transparency > Color to Alpha).
2. Open template in PSD format, move layers of template around until they are the way you like them.
~Add paper from scrapkit to individual layers of the template (Right click on template layer in layer box > Alpha to Selection > CTRL I > Select paper layer in layer box > Delete).
These are the papers I used:
Paper 2
Paper 4
Paper 5
Paper 11
Paper 12
~I added noise to some of the template layers to make them look glittery (Filters > Noise > RGB Noise).
~I colorized some of the template layers to better match the scrapkit (Colors > Colorize > play with the setting until you get the desired color).
~Add drop shadow to template layers (Filters > Light & Shadow > Drop Shadow).
3. Open tube, add drop shadow.
4. Open and place the following elements:
Beads
Tree 5
Present
Present 2
Present 3
Snowflake
Joy
Bow 2
Candles
Lantern
Twig
Holly
Ornament
Bauble 4
~Some of the elements may need to be sized down. Using your scale tool in your tool box adjust the pixel size until element is the correct size~
~Add drop shadow to all elements~
5. Open Paper 7
6. Open mask
7. Apply layer mask (click HERE for a tut on using masks)
8. Merge Layers (Image > Merge Visible Layers).
9. Crop Image (Image > Autocrop Image).
10. Scale image to desired size (Image > Scale Image).
11. Add copyright info and name
12. Save as .png
ALL DONE!!!!!!!!!!Snag Our Blinkies





Don't Be A Pirate!

