Tuesday, January 24, 2012

This tutorial is of my own creation and any resemblance to any other tuts is purely coincidental. This tutorial is for personal use only, using it for monetary gain is against our TOU's.
Supplies:
Gimp
Tube of choice. I am using the art of Lix. You must have a license to use these tubes. You can purchase this tube starting today at PSP Tubes Emporium HERE!
Texture 7 by Bokeh HERE
Star brushes HERE
Fonts- Appleberry & Sketchy
File>New 600x250 pixels.
Change your foreground color to 319ccc. Change background color to c03769. Select the gradient tool. Below are the settings I have my gradient on:
 Layer>New Layer. While pressing ctrl on your keyboard, click the top middle of your tag, and drag your mouse to the bottom middle.
Add new layer. We are adding another gradient to this layer. Change your settings to what I have below:
 Click in the middle of your canvas and drag out to the left (while pressing ctrl on your keyboard). Change the mode of this layer to hard light.
Open texture. Move between the 2 graidient layers ( 2nd layer). Layer>Transpareny>Add Alpha Channel. Layer>Scale Layer 80%. Change the mode to dodge.
Open tube. Move below the texture layer. Layer>Duplicate Layer 2 times (for a total of 3 tube layers). Arrange on your canvas as shown below:
 I changed the mode of the left tube to screen, middle tube to overlay, right tube to grain merge. You can chage the modes to whatever you think looks best.
Open tube again. Make the top layer. Scale 75%. Place to the far left of tag. Filters>Light & Shadow>Drop Shadow 2, 2, 2, black, 50. Duplicate. Filters>Blur>Gaussian Blur on default. Change the mode to dodge and lower the opacity to 30.
Make the bottom gradient layer active. Select the rectangle select tool. Make a selection at the bottom of your tag. I highlighted below where I made my selection:
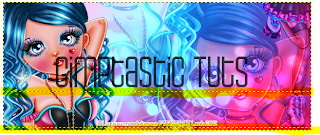
Make the layer under the main tube active. Make a thin rectangle selection at the bottom. Change foreground to e8d95a. Add new layer. Select the bucket fill tool and fill selection. Add new layer. Change foreground back to the blue used earlier. Fill selection. Select>Shrink by 2. Press delete on your keyboard. Select none. Filters>Noise>RGB Noise. Change all the sliders (except alpha) to 0.50. Repeat drop shadow. Your tag should now look like mine below:
 Selete the appleberry font. Change foreground to pink from before. Set the size to 23. Type 'roller girl' 2 times. Place text on yellow rectangle. Add noise of 0.30 (on all sliders except alpha). Add drop shadow of 1, 1, 0, black, 35.
 Selete the appleberry font. Change foreground to pink from before. Set the size to 23. Type 'roller girl' 2 times. Place text on yellow rectangle. Add noise of 0.30 (on all sliders except alpha). Add drop shadow of 1, 1, 0, black, 35.
Add new layer. Move below the 2nd gradient layer. Select the paint brush tool. Select the brush you want to use and click the canvas. I used brush 11 & 12.
Make the top layer active. Add new layer. I added a gradient using the pink and blue colors we used earlier. Click the left top corner and drag mouse to the bottom right corner to add gradient. Layer>Transpareny>Apha To Selection. Shrink by 4. Delete. Add new layer below this layer. Using the bucket fill tool, fill selection. Shrink by 1 and delete. Add new layer below yellow layer. Fill with black. Shrink by 3. Delete. Select none. Add a gaussian blur on default. Change opacity of this layer to 60. Repeat noise. I also added noise to the gradient layer.
Add name using the sketchy font. Add you copy right and you're finished!
Labels:FTU tuts
Subscribe to:
Post Comments
(Atom)
Labels
12x12 Layout
A Taggers Scrap
Animated
Announcements
Art of Freya
Basic tuts
Blog Trains
CDO
Cluster Frame
CT tags
Extras
Forum Set
Freebies
FTU CU
FTU Kits
FTU tuts
Holiday
Jackie's Jewels
Kissing Kate
Masks
PTU Kits
PTU tuts
Quick Pages
Results
Results with Amys kits
Show Offs
Sweet Cravings Scraps
Tasha's Playground
Templates
Timeline Banners
Chit Chat
Blog Archive
-
▼
2012
(550)
-
▼
January
(59)
- PTU tut - Celebrate
- PTU Tut- Paris
- PTE CT tag by Amy
- PTE CT Tags By Leah
- PTU tut - Lavender Love Affair
- PTU tut - Rock N' Roll
- PTU Tut- Be Mine
- FTU tut - Blend Animation Banner
- FTU tut - Afternoon Tea
- PTE CT tag by Amy
- PTU tut - Sweet Heat
- PTE CT Tag by Leah
- FTU Tut- Roller Girl
- FTU Tut- Snow White
- PTE CT tag by Amy
- PTU tut - Love to Love
- FTU Tut- Bite Me Cupid
- Tasha's Playground CT Tags by Leah
- FTU Tut- Soulful
- PTU tut - My Favorite Things
- FTU Love Spell- Collab with Tasha's Playground
- PTE CT tag by Amy
- PTE CT Tag
- FTU TUt- The Cat's Meow
- PTU tut - Limited Edition
- PTE CT tag by Amy
- PTU Tut- Persuasion
- PTU tut - Vintage Stroll
- FTU tut - Woodland Dream
- PTE CT Tag
- PTU Tut- Life Is Beautiful
- PTE CT Tag
- FTU tut - All You Need is Love
- Show-off tag by Amy
- PTU tut - Love Sweet Love
- PTU tut- Have a Nice Day
- FTU tut - I Love That You Love Me
- PTE CT Tag
- Templates 121-124
- PTU tut - Awesomesauce
- FTU tut - Dream Breeze
- PTE CT Tag
- PTE CT tag by Amy
- PTU Tut- Lips Like Sugar
- FTU Tut- Heartbreaker
- FTU tut - Cupid's Error
- PTU tut - Cops & Robbers
- PTE CT tag by Amy
- PTE CT tag by Amy
- FTU Tut- Playful
- PTU Tut- Just Fun
- PTU tut - Sunday Casual
- CT Tags
- PTU Tut- Blow Ya Mind
- PTU Tut- Beautiful Girl
- PTE CT tag by Amy
- FTU tut - Who's Afraid of the Big Bad Wolf?
- PTU tut - Emo Style
- PTE CT tag by Amy
-
▼
January
(59)


0 comments:
Post a Comment