Gimptastic Scraps Available Exclusively @

Gimptastic Scraps CT


Blog Trains

CU Licenses


 This tutorial is of my own creation and any resemblance to any other tuts is purely coincidental. This tutorial is for personal use only, using it for monetary gain is against our TOU's.
Supplies
Gimp
Amazing PTU kit from Rieka Rafita called Autumn Days HERE
Tube of choice. I am using the art of Ismael Rac. You must have a license to use his tubes. You can purchase them HERE
Template- Waiting For Fall by Sarah's Tags n Things HERE
Mask 192 from weescotslass HERE
Font- Qwigly
Let's get started!
-Open template. Delete the credits. Image>Scale Image 500x375 pixels. Image>Canvas Size 600x600 pixels and make sure to click center.
-Let's add papers to the template layers. Make the template layer active (see below). Right click template layer in layer box and choose alpha to selection. Open paper (see below). Right click paper layer in layer box and choose add alpha channel.
Select>Invert. Press delete on your keyboard. Select>None. Delete the original template layer.
Here are the template layers and which papers I used:
raster 2- paper 1 Filters>Light & Shadow>Drop Shadow 2, 2, 2, black, 50
raster 4- paper 11 Filters>Repeat Drop Shadow
raster 6- paper 9 repeat drop shadow
copy of raster 6- paper 7
copy of vector- paper 5 repeat drop shadow
raster 5- paper 2 repeat drop shadow
raster 3- paper 6 repeat drop shadow
-Make raster 9 layer active. Add a drop shadow of 3, 3, 3, black, 50.
-Make raster 10 active. Colors>Colorize.
Hue: 2
Saturation: 47
Lightness: -69
Filters>Noise>RGB Noise on default. Add drop shadow of 2, 2, 2, black, 50.
-Make raster 11 active. Colorize.
Hue: 103
Saturation: 49
Lightness: -58. Repeat noise and drop shadow
-Open frame 2. Move below the leaf and word art layers in the layer box. Scale 60%. Place in the middle of tag. Select your magic wand. Click inside of frame. Select>Grow by 5.
Open tube. Scale 75%. Your tube layer should be above your frame layer. Layer>Duplicate layer. Move the duplicate tube below the frame layer. Invert & delete. Select none.
Make the original tube layer active. Select your eraser tool. Erase the bottom portion of the tube so it looks like she is sticking outside of the frame. Repeat
drop shadow on the frame layer.
-Open frame 1. Move below the paper layer below the duplicate tube in the layer box. Scale 75%. Select your rotate tool. Rotate by 10. Place to the right of the tag. Select the magic wand.
Press shift and click in all 3 boxes of frame. Grow by 5. Add a new layer below this frame layer. Set your foreground color to fbe14e. Set your background color to 870a08. Select blend tool.
Leave on the default settings. Click the left top corner of the frame and drag your mouse down to the bottom right corner of frame. Open tube. Place indise of this frame.
Invert and delete. Select none. Chage the mode of the tube to grain merge. Repeat noise. Repeat drop shadow on frame.
Elements:
Add drop shadow of 2, 2, 2, black to all element layers unless otherwise stated. See my tag for placement.
twig 1
bow no- drop shadow
rope with beads- rotate -50
scarecrow- flip with flip tool
flower 3
basket 2
squirrel- no drop shadow
falling leaves- no drop shadow
butterfly.
-Open paper 13 and apply mask. Click HERE to learn how to use masks.
-Add your name and copyright and you are done!
This tutorial is of my own creation and any resemblance to any other tuts is purely coincidental. This tutorial is for personal use only, using it for monetary gain is against our TOU's.
Supplies
Gimp
Amazing PTU kit from Rieka Rafita called Autumn Days HERE
Tube of choice. I am using the art of Ismael Rac. You must have a license to use his tubes. You can purchase them HERE
Template- Waiting For Fall by Sarah's Tags n Things HERE
Mask 192 from weescotslass HERE
Font- Qwigly
Let's get started!
-Open template. Delete the credits. Image>Scale Image 500x375 pixels. Image>Canvas Size 600x600 pixels and make sure to click center.
-Let's add papers to the template layers. Make the template layer active (see below). Right click template layer in layer box and choose alpha to selection. Open paper (see below). Right click paper layer in layer box and choose add alpha channel.
Select>Invert. Press delete on your keyboard. Select>None. Delete the original template layer.
Here are the template layers and which papers I used:
raster 2- paper 1 Filters>Light & Shadow>Drop Shadow 2, 2, 2, black, 50
raster 4- paper 11 Filters>Repeat Drop Shadow
raster 6- paper 9 repeat drop shadow
copy of raster 6- paper 7
copy of vector- paper 5 repeat drop shadow
raster 5- paper 2 repeat drop shadow
raster 3- paper 6 repeat drop shadow
-Make raster 9 layer active. Add a drop shadow of 3, 3, 3, black, 50.
-Make raster 10 active. Colors>Colorize.
Hue: 2
Saturation: 47
Lightness: -69
Filters>Noise>RGB Noise on default. Add drop shadow of 2, 2, 2, black, 50.
-Make raster 11 active. Colorize.
Hue: 103
Saturation: 49
Lightness: -58. Repeat noise and drop shadow
-Open frame 2. Move below the leaf and word art layers in the layer box. Scale 60%. Place in the middle of tag. Select your magic wand. Click inside of frame. Select>Grow by 5.
Open tube. Scale 75%. Your tube layer should be above your frame layer. Layer>Duplicate layer. Move the duplicate tube below the frame layer. Invert & delete. Select none.
Make the original tube layer active. Select your eraser tool. Erase the bottom portion of the tube so it looks like she is sticking outside of the frame. Repeat
drop shadow on the frame layer.
-Open frame 1. Move below the paper layer below the duplicate tube in the layer box. Scale 75%. Select your rotate tool. Rotate by 10. Place to the right of the tag. Select the magic wand.
Press shift and click in all 3 boxes of frame. Grow by 5. Add a new layer below this frame layer. Set your foreground color to fbe14e. Set your background color to 870a08. Select blend tool.
Leave on the default settings. Click the left top corner of the frame and drag your mouse down to the bottom right corner of frame. Open tube. Place indise of this frame.
Invert and delete. Select none. Chage the mode of the tube to grain merge. Repeat noise. Repeat drop shadow on frame.
Elements:
Add drop shadow of 2, 2, 2, black to all element layers unless otherwise stated. See my tag for placement.
twig 1
bow no- drop shadow
rope with beads- rotate -50
scarecrow- flip with flip tool
flower 3
basket 2
squirrel- no drop shadow
falling leaves- no drop shadow
butterfly.
-Open paper 13 and apply mask. Click HERE to learn how to use masks.
-Add your name and copyright and you are done! This tutorial is of my own creation and any resemblance to any other tuts is purely coincidental. This tutorial is for personal use only, using it for monetary gain is against our TOU's.
Supplies
Gimp
Awesome PTU kit G Gurl Swag from my friend Tasha over at Tasha's Playground HERE
Tube of choice. I am using the art of Keith Garvey. You must have a license to use his tubes. You can purchase them HERE
Template 2 by Linda and Tasha HERE
Mask 11 by vix HERE
Font- Pea Bhea
Let's get started!
-Open template. Delete the credits. Image>Scale Image 500x442 pixels. Image>Canvas Size 600x600 pixels and make sure to click center.
-Let's add papers to the template layers. Make the template layer active (see below). Right click template layer in layer box and choose alpha to selection. Open paper (see below). Right click paper layer in layer box and choose add alpha channel.
Select>Invert. Press delete on your keyboard. Select>None. Delete the original template layer.
Here are the template layers and which papers I used:
back rectangle- paper 14 Filters>Light & Shadow>Drop Shadow 1, 1, 15, black, 80
middle frame back- paper 5
right frame back- paper 13
left frame back- paper 6
-Make the back rectangle frame layer active. Colors>Colorize. Change the lightness slider to -100. Leave the rest alone. Filters>Noise>RGB Noise. Change all the sliders (except alpha) to 0.50.
Make the left frame layer active. Colorize again just changing the lightness to -100. Repeat noise. Add drop shadow of 2, 2, 2, black, 50. Make the right frame layer active. Colorize. Hue: o
saturation: 40 lightness: -46. Repeat noise and drop shadow. Make the middle frame layer active. Colorize. Hue: 233 Saturation: 20 Lightness: -41.
Repeat noise and drop shadow.
-Make the left cirlce layer active. Filters>Decor>Add Bevel. Uncheck work on copy. Repeat drop shadow. Repeat these steps for right circle.
-Make the rectangle layer active. Repeat add bevel. Repeat for left & right rectangle layers.
-Make the text layer active. Alpha to selection. Add new layer below this layer. Select>Grow by 1. Fill selection with white using the bucket fill tool. Repeat drop shadow.
-Repeat drop shadow on raster 1 layer.
-Open tube. Move layer above right frame paper (black paper). Place tube inside right frame. Layer>Duplicate Layer. Select the flip tool. Click canvas to flip tube. Move duplicate tube layer above left
frame paper layer (red paper). Select the eraser tool. Erase parts of both tubes that are outside of the frames. Lower opacity of both tubes to 30.
-Open tube again. Scale 80%. Move layer below the word art layers. Place in middle of tag. Repeat drop shadow. Duplicate tube. Filters>Blur>Gaussian Blur on default. Change the mode of the duplicate
tube to soft light. Lower the opacity to 75. Erase parts of the tubes under the word art.
Elements:
Add drop shadow of 2, 2, 2, black, 50 to all element layers unless otherwise stated. See my tag for placement.
road- rotate 90
dice
sparkle 3- no drop shadow
city scape
winged hearts
stars
disco ball- no drop shadow
charm
ribbon 3- no drop shadow
-Open paper 17. Make the bottom layer. Apply mask.
-Add your name and copyright.
You're finished! I hope you enjoyed this tutorial!
This tutorial is of my own creation and any resemblance to any other tuts is purely coincidental. This tutorial is for personal use only, using it for monetary gain is against our TOU's.
Supplies
Gimp
Awesome PTU kit G Gurl Swag from my friend Tasha over at Tasha's Playground HERE
Tube of choice. I am using the art of Keith Garvey. You must have a license to use his tubes. You can purchase them HERE
Template 2 by Linda and Tasha HERE
Mask 11 by vix HERE
Font- Pea Bhea
Let's get started!
-Open template. Delete the credits. Image>Scale Image 500x442 pixels. Image>Canvas Size 600x600 pixels and make sure to click center.
-Let's add papers to the template layers. Make the template layer active (see below). Right click template layer in layer box and choose alpha to selection. Open paper (see below). Right click paper layer in layer box and choose add alpha channel.
Select>Invert. Press delete on your keyboard. Select>None. Delete the original template layer.
Here are the template layers and which papers I used:
back rectangle- paper 14 Filters>Light & Shadow>Drop Shadow 1, 1, 15, black, 80
middle frame back- paper 5
right frame back- paper 13
left frame back- paper 6
-Make the back rectangle frame layer active. Colors>Colorize. Change the lightness slider to -100. Leave the rest alone. Filters>Noise>RGB Noise. Change all the sliders (except alpha) to 0.50.
Make the left frame layer active. Colorize again just changing the lightness to -100. Repeat noise. Add drop shadow of 2, 2, 2, black, 50. Make the right frame layer active. Colorize. Hue: o
saturation: 40 lightness: -46. Repeat noise and drop shadow. Make the middle frame layer active. Colorize. Hue: 233 Saturation: 20 Lightness: -41.
Repeat noise and drop shadow.
-Make the left cirlce layer active. Filters>Decor>Add Bevel. Uncheck work on copy. Repeat drop shadow. Repeat these steps for right circle.
-Make the rectangle layer active. Repeat add bevel. Repeat for left & right rectangle layers.
-Make the text layer active. Alpha to selection. Add new layer below this layer. Select>Grow by 1. Fill selection with white using the bucket fill tool. Repeat drop shadow.
-Repeat drop shadow on raster 1 layer.
-Open tube. Move layer above right frame paper (black paper). Place tube inside right frame. Layer>Duplicate Layer. Select the flip tool. Click canvas to flip tube. Move duplicate tube layer above left
frame paper layer (red paper). Select the eraser tool. Erase parts of both tubes that are outside of the frames. Lower opacity of both tubes to 30.
-Open tube again. Scale 80%. Move layer below the word art layers. Place in middle of tag. Repeat drop shadow. Duplicate tube. Filters>Blur>Gaussian Blur on default. Change the mode of the duplicate
tube to soft light. Lower the opacity to 75. Erase parts of the tubes under the word art.
Elements:
Add drop shadow of 2, 2, 2, black, 50 to all element layers unless otherwise stated. See my tag for placement.
road- rotate 90
dice
sparkle 3- no drop shadow
city scape
winged hearts
stars
disco ball- no drop shadow
charm
ribbon 3- no drop shadow
-Open paper 17. Make the bottom layer. Apply mask.
-Add your name and copyright.
You're finished! I hope you enjoyed this tutorial!

 Download them HERE
 Here is a tag I made using a fab new tube by Lorenzo DiMauro. This tube is a must have for any Prince fan for sure!!! You can find this tube in the new releases section at PTE HERE.


 Here's a tag I made using a hot tube from a brand new artist over at PTE, Roman Zaric.
 Here is a tag I made using an amazing new tube by Michael Calandra which is available in the new releases section at PTE HERE
 This tutorial is of my own creation and any resemblance to any other tuts is purely coincidental. This tutorial is for personal use only, using it for monetary gain is against our TOU's.
Supplies Needed:
~Gimp (any version will do).
~A Little Birdie Told Me FTU scrapkit by Wicked Princess Scraps which you can get HERE.
~Tube of choice. I used the artwork of Karina Dale, you must have a license to use this art which you can get at PTE HERE.
~Template of choice. I used the Plain Temp 1 which you can get from Brutal Designs HERE.
~Mask of choice. I used Vix Big mask 005 which you can get HERE.
~Font of choice. I used Aquarelle Medium.
Let's get started!!!
1. Open a new layer ( I prefer a large canvas, so I make mine 1050x656). Make your canvas transparent (Layer > Transparency > Color to Alpha).
2. Open template in PSD format, move layers of template around until they are the way you like them.
~Add paper from scrapkit to individual layers of the template (Right click on template layer in layer box > Alpha to Selection > CTRL I > Select paper layer in layer box > Delete).
These are the papers I used:
Paper 6
Paper 10
Paper 11
Paper 13
~I added noise to some of the template layers to make them look glittery (Filters > Noise > RGB Noise).
~I colorized some of the template layers to better match the scrapkit (Colors > Colorize > play with the setting until you get the desired color).
~Add drop shadow to template layers (Filters > Light & Shadow > Drop Shadow).
3. Open tube, add drop shadow.
4. Open and place the following elements:
Cloud 2
Birdhouse
Birdhouse 2
Flower Spray 2
Basket 2
Goose
Goose 2
Bird
Bird 2
Eggs
Watering Can
Butterfly 2
~Some of the elements may need to be sized down. Using your scale tool in your tool box adjust the pixel size until element is the correct size~
~Add drop shadow to all elements~
5. Open Paper 9
6. Open mask
7. Add mask to paper (click HERE for a tut on using masks)
8. Merge Layers (Image > Merge Visible Layers).
9. Crop Image (Image > Autocrop Image).
10. Scale image to desired size (Image > Scale Image).
11. Add copyright info and name
12. Save as .png
ALL DONE!!!!!!!!!!
This tutorial is of my own creation and any resemblance to any other tuts is purely coincidental. This tutorial is for personal use only, using it for monetary gain is against our TOU's.
Supplies Needed:
~Gimp (any version will do).
~A Little Birdie Told Me FTU scrapkit by Wicked Princess Scraps which you can get HERE.
~Tube of choice. I used the artwork of Karina Dale, you must have a license to use this art which you can get at PTE HERE.
~Template of choice. I used the Plain Temp 1 which you can get from Brutal Designs HERE.
~Mask of choice. I used Vix Big mask 005 which you can get HERE.
~Font of choice. I used Aquarelle Medium.
Let's get started!!!
1. Open a new layer ( I prefer a large canvas, so I make mine 1050x656). Make your canvas transparent (Layer > Transparency > Color to Alpha).
2. Open template in PSD format, move layers of template around until they are the way you like them.
~Add paper from scrapkit to individual layers of the template (Right click on template layer in layer box > Alpha to Selection > CTRL I > Select paper layer in layer box > Delete).
These are the papers I used:
Paper 6
Paper 10
Paper 11
Paper 13
~I added noise to some of the template layers to make them look glittery (Filters > Noise > RGB Noise).
~I colorized some of the template layers to better match the scrapkit (Colors > Colorize > play with the setting until you get the desired color).
~Add drop shadow to template layers (Filters > Light & Shadow > Drop Shadow).
3. Open tube, add drop shadow.
4. Open and place the following elements:
Cloud 2
Birdhouse
Birdhouse 2
Flower Spray 2
Basket 2
Goose
Goose 2
Bird
Bird 2
Eggs
Watering Can
Butterfly 2
~Some of the elements may need to be sized down. Using your scale tool in your tool box adjust the pixel size until element is the correct size~
~Add drop shadow to all elements~
5. Open Paper 9
6. Open mask
7. Add mask to paper (click HERE for a tut on using masks)
8. Merge Layers (Image > Merge Visible Layers).
9. Crop Image (Image > Autocrop Image).
10. Scale image to desired size (Image > Scale Image).
11. Add copyright info and name
12. Save as .png
ALL DONE!!!!!!!!!! This tutorial is of my own creation and any resemblance to any other tuts is purely coincidental. This tutorial is for personal use only, using it for monetary gain is against our TOU's.
Supplies
Gimp
Beautiful PTU kit from Sweet Cravings Scraps called Breakfast at Tiffany's HERE
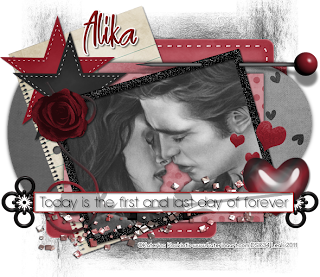
Tube of choive. I am using the are of Misticheskaya. You must have a license to use these tubes. You can purchase them HERE
Template- Whisper from Crazy Cakes HERE
Mask 230 from weescotslass HERE
Font- ALS Script
Let's get started!
-Open template. Delete the credits and layers 3, 8, 12 & 14. Image>Scale Image 500x500. pixels. Image>Canvas Size 600x600 pixels and make sure to click center.
-Let's add papers to the template layers. Make the template layer active (see below). Right click template layer in layer box and choose alpha to selection. Open paper (see below). Right click paper layer in layer box and choose add alpha channel. Layer>Scale Layer by 60%.
Select>Invert. Press delete on your keyboard. Select>None. Delete the original template layer.
Here are the template layers and which papers I used:
2- paper 7 Filters>Light & Shadow>Drop Shadow 2, 2, 2, black, 50
4- paper 5 Filters>Repeat Drop Shadow
5- paper 17
6- paper 16 repeat drop shadow
7- paper 2 repeat drop shadow
9- paper 4 repeat drop shadow
10- paper 6 repeat drop shadow
11- paper 19
13- paper 14 repeat drop shadow
15- paper 8 repeat drop shadow
-Make the word art layer active. Alpha to selection. Select>Grow by 2. Add new layer below this layer. Select the bucket fill tool. Make your foreground color white and fill the selection. Add drop shadow of 2, 2, 5, black, 80.
-Open frame 4. Scale 40%. Move below the word art layers. Place in the middle of tag. Select your magic wand. Grow by 5. Open tube. Scale 50%. Place in frame. She should be below the frame layer in the layer box. Layer>Duplicate Layer. Move duplicate layer above frame. Make the original tube layer acitve. Invert & Delete. Select none. Make the duplicate tube layer active. Using the eraser,
erase the bottom part of the tube sitcking out of the frame. Add drop shadow of 2, 2, 2, black, 50 to frame layer.
Elements
Add drop shadow of 1, 1, 1, black, 50 to all element layers, unless other wise stated . See my tag for placement.
flower swag
ribbon 1 - no dorp shadow
lamp post
heart box 2
gem - no drop shadow
letter 1
button 1
button 2
rain - no drop shadow
flower 1
beart box 1
flower 5
frame 2 - no drop shadow
-Open paper 11. Make the bottom layer. Apply mask. Click HERE to learn to use masks.
-Add your name and copyright and you're finished!!!!
This tutorial is of my own creation and any resemblance to any other tuts is purely coincidental. This tutorial is for personal use only, using it for monetary gain is against our TOU's.
Supplies
Gimp
Beautiful PTU kit from Sweet Cravings Scraps called Breakfast at Tiffany's HERE
Tube of choive. I am using the are of Misticheskaya. You must have a license to use these tubes. You can purchase them HERE
Template- Whisper from Crazy Cakes HERE
Mask 230 from weescotslass HERE
Font- ALS Script
Let's get started!
-Open template. Delete the credits and layers 3, 8, 12 & 14. Image>Scale Image 500x500. pixels. Image>Canvas Size 600x600 pixels and make sure to click center.
-Let's add papers to the template layers. Make the template layer active (see below). Right click template layer in layer box and choose alpha to selection. Open paper (see below). Right click paper layer in layer box and choose add alpha channel. Layer>Scale Layer by 60%.
Select>Invert. Press delete on your keyboard. Select>None. Delete the original template layer.
Here are the template layers and which papers I used:
2- paper 7 Filters>Light & Shadow>Drop Shadow 2, 2, 2, black, 50
4- paper 5 Filters>Repeat Drop Shadow
5- paper 17
6- paper 16 repeat drop shadow
7- paper 2 repeat drop shadow
9- paper 4 repeat drop shadow
10- paper 6 repeat drop shadow
11- paper 19
13- paper 14 repeat drop shadow
15- paper 8 repeat drop shadow
-Make the word art layer active. Alpha to selection. Select>Grow by 2. Add new layer below this layer. Select the bucket fill tool. Make your foreground color white and fill the selection. Add drop shadow of 2, 2, 5, black, 80.
-Open frame 4. Scale 40%. Move below the word art layers. Place in the middle of tag. Select your magic wand. Grow by 5. Open tube. Scale 50%. Place in frame. She should be below the frame layer in the layer box. Layer>Duplicate Layer. Move duplicate layer above frame. Make the original tube layer acitve. Invert & Delete. Select none. Make the duplicate tube layer active. Using the eraser,
erase the bottom part of the tube sitcking out of the frame. Add drop shadow of 2, 2, 2, black, 50 to frame layer.
Elements
Add drop shadow of 1, 1, 1, black, 50 to all element layers, unless other wise stated . See my tag for placement.
flower swag
ribbon 1 - no dorp shadow
lamp post
heart box 2
gem - no drop shadow
letter 1
button 1
button 2
rain - no drop shadow
flower 1
beart box 1
flower 5
frame 2 - no drop shadow
-Open paper 11. Make the bottom layer. Apply mask. Click HERE to learn to use masks.
-Add your name and copyright and you're finished!!!!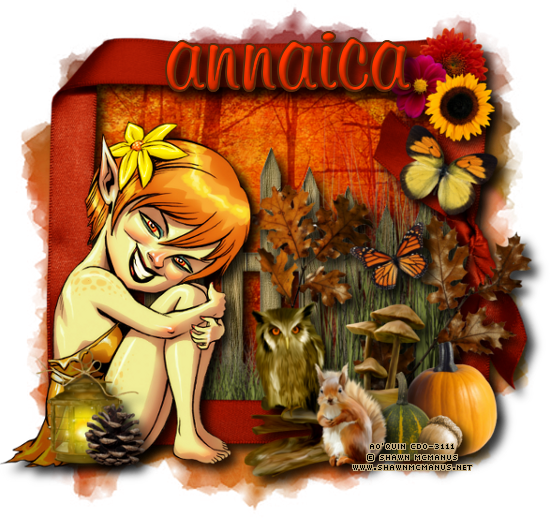
 Here is a tag I made using an awesome new tube by Alicia Mujica and a great new kit by Crazy Carita Scraps. Both can be found in the new releases section at PTE HERE
 This tutorial is of my own creation and any resemblance to any other tuts is purely coincidental. This tutorial is for personal use only, using it for monetary gain is against our TOU's.
Supplies
Gimp- Any version should work
Awesome PTU kit from Rieka Rafita called Don't stop the Music HERE
Tube of choice. I am using Elias Chatzoudis. You must have a license to use his tubes. You can purchase them HERE
Template 61 by me HERE
Mask 302 from weescotslass HERE
Font- 1012
Let's get started!
-Open template. Delete the credits and both star layers. Image>Scale Image 500x341 pixels. Image>Canvas Size 600x600 pixels and make sure to click center.
-Let's add papers to the template layers. Make the template layer active (see below). Right click template layer in layer box and choose alpha to selection. Open paper (see below). Right click paper layer in layer box and choose add alpha channel. Select>Invert. Press delete on your keyboard. Select>None. Delete the original template layer.
Here are the template layers and which papers I used:
rect 1- paper 12 Filters>Light & Shadow>Drop Shadow 3, 3, 10, black, 80
pentagon 1- paper 15 Filters>Repeat drop shadow
pentagon 2 & 3- paper 1
oval- paper 7
square 1- paper 10 repeat drop shadow
square 2- paper 3 repeat drop shadow
rect 2- paper 2 Drop shadow of 0, 0, 10, black, 80
-Open tube. Move the tube layer below the thin rectangle (at the bottom of the tag). Erase parts of the tube that stick out beneath the thin rectangle. Alpha to selection. Select>Grow by 1. Add a new layer below the tube layer. Select your bucket fill tool. Set your foreground to white and fill the selection. Grow by 2. Add a new layer beneath this layer. Set your foreground color to ffd625 and set your background color to bb3a7d. Add a linear gradient to the selection. Select none. Filters>Noise>RGB Noise. Change all sliders (except alpha) to 0.40 and uncheck independent RGB. Add drop shadow of
2, 2, 2, black, 50. Make the tube layer active. Layer>Duplicate Layer. Filters>Blur>Gaussian Blur on default. Change the mode of the duplicate tube to soft light.
Elements:
Add drop shadow of 1, 1, 2, black, 50 to all element layers unless stated otherwise. See my tag for placement.
musical note 2- no drop shadow
rock skull- select rotate tool and rotate by 15
frame 2- no drop shadow
scattered bling- no drop shadow
ribbon 4
piano
ticket 1- rotate 20
ticket 2- no drop shdaow
can
splatter- no drop shadow
music note 2
music note 4
music note 5
radio
cassette- no drop shadow
word art 1
-Open paper 11. Move to the bottom layer. Apply mask.
-Add your name and copyright.
You're finished!!
This tutorial is of my own creation and any resemblance to any other tuts is purely coincidental. This tutorial is for personal use only, using it for monetary gain is against our TOU's.
Supplies
Gimp- Any version should work
Awesome PTU kit from Rieka Rafita called Don't stop the Music HERE
Tube of choice. I am using Elias Chatzoudis. You must have a license to use his tubes. You can purchase them HERE
Template 61 by me HERE
Mask 302 from weescotslass HERE
Font- 1012
Let's get started!
-Open template. Delete the credits and both star layers. Image>Scale Image 500x341 pixels. Image>Canvas Size 600x600 pixels and make sure to click center.
-Let's add papers to the template layers. Make the template layer active (see below). Right click template layer in layer box and choose alpha to selection. Open paper (see below). Right click paper layer in layer box and choose add alpha channel. Select>Invert. Press delete on your keyboard. Select>None. Delete the original template layer.
Here are the template layers and which papers I used:
rect 1- paper 12 Filters>Light & Shadow>Drop Shadow 3, 3, 10, black, 80
pentagon 1- paper 15 Filters>Repeat drop shadow
pentagon 2 & 3- paper 1
oval- paper 7
square 1- paper 10 repeat drop shadow
square 2- paper 3 repeat drop shadow
rect 2- paper 2 Drop shadow of 0, 0, 10, black, 80
-Open tube. Move the tube layer below the thin rectangle (at the bottom of the tag). Erase parts of the tube that stick out beneath the thin rectangle. Alpha to selection. Select>Grow by 1. Add a new layer below the tube layer. Select your bucket fill tool. Set your foreground to white and fill the selection. Grow by 2. Add a new layer beneath this layer. Set your foreground color to ffd625 and set your background color to bb3a7d. Add a linear gradient to the selection. Select none. Filters>Noise>RGB Noise. Change all sliders (except alpha) to 0.40 and uncheck independent RGB. Add drop shadow of
2, 2, 2, black, 50. Make the tube layer active. Layer>Duplicate Layer. Filters>Blur>Gaussian Blur on default. Change the mode of the duplicate tube to soft light.
Elements:
Add drop shadow of 1, 1, 2, black, 50 to all element layers unless stated otherwise. See my tag for placement.
musical note 2- no drop shadow
rock skull- select rotate tool and rotate by 15
frame 2- no drop shadow
scattered bling- no drop shadow
ribbon 4
piano
ticket 1- rotate 20
ticket 2- no drop shdaow
can
splatter- no drop shadow
music note 2
music note 4
music note 5
radio
cassette- no drop shadow
word art 1
-Open paper 11. Move to the bottom layer. Apply mask.
-Add your name and copyright.
You're finished!!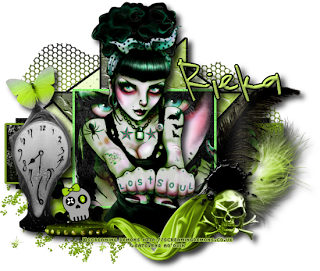
 This tutorial is of my own creation and any resemblance to any other tuts is purely coincidental. This tutorial is for personal use only, using it for monetary gain is against our TOU's.
Supplies
Gimp- Any version should work
PTU kit from Pink Candy Designs called Bad Candy HERE
Tube of choice. I am using The Hunter. You must have a license to use his tubes. You can purchase them HERE
Template- Very Sext from Crazy Cakes HERE
Mask 21 from Witchy's Heart HERE
Font- Shit Happens
Let's get started!
-Open template. Delete the credits. Image>Scale Image 500x500 pixels.
-Let's add papers to the template layers. Make the template layer active (see below). Right click template layer in layer box and choose alpha to selection. Open paper (see below). Right click paper layer in layer box and choose add alpha channel. Layer>Scale Layer by 60%.
Select>Invert. Press delete on your keyboard. Select>None. Delete the original template layer.
Here are the template layers and which papers I used:
1-paper 5 Filters>LIght & Shadow>Drop Shadow 3, 3, 3, black, 50
2- paper 1 Filters>Repeat drop shadow
3- paper 3 repeat drop shadow
4- paper 8
5- paper 4 repeat drop shadow
6- paper 6 repeat drop shadow
7- paper 7
8- paper 2 repeat drop shadow
-Open tube. Move below word art in the layer box. Scale 70%. Add drop shadow of 2, 2, 2, black, 50. Layer>Duplicate Layer. Fitlers>Blur>Gaussian BLur on default. Change the mode of the duplicate tube to soft light.
-Repeat drop shadow on word art.
-Open frame. Make the bottom layer. Scale by 70%. Select the rotate tool. In the angle box put -20. Add drop shadow of 3, 3, 3, black, 50.
Elements
Add drop shadow of 2, 2, 2, black, 50 to all element layers unless otherwise stated. See my tag for placement.
glitter no drop shadow
feather no drop shadow
pearls 2
ribbon
skull rotate 20
martini
flameframe 2
heart 2 rotate 20 no drop shadow
fluffy heart no drop shadow
heart
butterfly 2
hearts
-Open paper 4. Apply mask. Click HERE if you don't know how to use masks.
-Add name and copyright.
This tutorial is of my own creation and any resemblance to any other tuts is purely coincidental. This tutorial is for personal use only, using it for monetary gain is against our TOU's.
Supplies
Gimp- Any version should work
PTU kit from Pink Candy Designs called Bad Candy HERE
Tube of choice. I am using The Hunter. You must have a license to use his tubes. You can purchase them HERE
Template- Very Sext from Crazy Cakes HERE
Mask 21 from Witchy's Heart HERE
Font- Shit Happens
Let's get started!
-Open template. Delete the credits. Image>Scale Image 500x500 pixels.
-Let's add papers to the template layers. Make the template layer active (see below). Right click template layer in layer box and choose alpha to selection. Open paper (see below). Right click paper layer in layer box and choose add alpha channel. Layer>Scale Layer by 60%.
Select>Invert. Press delete on your keyboard. Select>None. Delete the original template layer.
Here are the template layers and which papers I used:
1-paper 5 Filters>LIght & Shadow>Drop Shadow 3, 3, 3, black, 50
2- paper 1 Filters>Repeat drop shadow
3- paper 3 repeat drop shadow
4- paper 8
5- paper 4 repeat drop shadow
6- paper 6 repeat drop shadow
7- paper 7
8- paper 2 repeat drop shadow
-Open tube. Move below word art in the layer box. Scale 70%. Add drop shadow of 2, 2, 2, black, 50. Layer>Duplicate Layer. Fitlers>Blur>Gaussian BLur on default. Change the mode of the duplicate tube to soft light.
-Repeat drop shadow on word art.
-Open frame. Make the bottom layer. Scale by 70%. Select the rotate tool. In the angle box put -20. Add drop shadow of 3, 3, 3, black, 50.
Elements
Add drop shadow of 2, 2, 2, black, 50 to all element layers unless otherwise stated. See my tag for placement.
glitter no drop shadow
feather no drop shadow
pearls 2
ribbon
skull rotate 20
martini
flameframe 2
heart 2 rotate 20 no drop shadow
fluffy heart no drop shadow
heart
butterfly 2
hearts
-Open paper 4. Apply mask. Click HERE if you don't know how to use masks.
-Add name and copyright. This tutorial is of my own creation and any resemblance to any other tuts is purely coincidental. This tutorial is for personal use only, using it for monetary gain is against our TOU's.
Supplies Needed:
~Gimp (any version will do).
~Tube of choice. I used the artwork of Neoracer you must have a license to use this art which you can get @ PTE HERE.
~Pimp my Swag FTU scrapkit by Designs by Vaybs which you get HERE.
~Mask of choice. I used RR mask 8 which you can get from Rieka Rafita HERE.
~Font of choice. I used SkinDeep BB.
Let's get started!!!!!
1. Open a new layer ( I prefer a large canvas, so I make mine 1050x656). Make your canvas transparent (Layer > Transparency > Color to alpha).
2. Open element 36 (frame), add drop shadow (Filters > Light & Shadow > Drop Shadow).
3. Open Paper 10 center it behind frame, remove excess paper using a cutting tool or eraser.
4. Open tube, add drop shadow.
5. Open and place the following elements:
element 4
element 5
element 6
element 7
element 28
element 34
element 42
element 56
element 58
element 60
element 66
element 74
element 77
element 79
~Some elements may need to be sized down. Using the Scale Tool in your tool box adjust pixels to desired size~
~Add drop shadow to all elements~
6. Open Paper 17.
7. Open mask.
8. Add mask to paper (click HERE for a tut on using masks)
9. Merge layers (Image > Merge Visible Layer).
10. Crop image (Image > Autocrop Image).
11. Scale image to desired size (Image > Scale Image).
12. Add copyright info and name.
13. Save as .png
You are finished :)
This tutorial is of my own creation and any resemblance to any other tuts is purely coincidental. This tutorial is for personal use only, using it for monetary gain is against our TOU's.
Supplies Needed:
~Gimp (any version will do).
~Tube of choice. I used the artwork of Neoracer you must have a license to use this art which you can get @ PTE HERE.
~Pimp my Swag FTU scrapkit by Designs by Vaybs which you get HERE.
~Mask of choice. I used RR mask 8 which you can get from Rieka Rafita HERE.
~Font of choice. I used SkinDeep BB.
Let's get started!!!!!
1. Open a new layer ( I prefer a large canvas, so I make mine 1050x656). Make your canvas transparent (Layer > Transparency > Color to alpha).
2. Open element 36 (frame), add drop shadow (Filters > Light & Shadow > Drop Shadow).
3. Open Paper 10 center it behind frame, remove excess paper using a cutting tool or eraser.
4. Open tube, add drop shadow.
5. Open and place the following elements:
element 4
element 5
element 6
element 7
element 28
element 34
element 42
element 56
element 58
element 60
element 66
element 74
element 77
element 79
~Some elements may need to be sized down. Using the Scale Tool in your tool box adjust pixels to desired size~
~Add drop shadow to all elements~
6. Open Paper 17.
7. Open mask.
8. Add mask to paper (click HERE for a tut on using masks)
9. Merge layers (Image > Merge Visible Layer).
10. Crop image (Image > Autocrop Image).
11. Scale image to desired size (Image > Scale Image).
12. Add copyright info and name.
13. Save as .png
You are finished :)  This tutorial is of my own creation and any resemblance to any other tuts is purely coincidental. This tutorial is for personal use only, using it for monetary gain is against our TOU's.
Supplies Needed:
~Gimp (any version will do).
~Falling for You PTU scrapkit by Wicked Princess Scraps which you can get HERE.
~Tube of choice. I used the artwork of Ismael Rac, you must have a license to use this art which you can get HERE.
~Template of choice. I used the Waiting for Fall which you can get from Sarah's Tags N Things HERE.
~Mask of choice. I used WSL mask 284 which you can get HERE.
~Font of choice. I used Valentina JF.
Let's get started!!!
1. Open a new layer ( I prefer a large canvas, so I make mine 1050x656). Make your canvas transparent (Layer > Transparency > Color to Alpha).
2. Open template in PSD format, move layers of template around until they are the way you like them.
~Add paper from scrapkit to individual layers of the template (Right click on template layer in layer box > Alpha to Selection > CTRL I > Select paper layer in layer box > Delete).
These are the papers I used:
Paper 4
Paper 6
Paper 8
Paper 9
~I added noise to some of the template layers to make them look glittery (Filters > Noise > RGB Noise).
~I colorized some of the template layers to better match the scrapkit (Colors > Colorize > play with the setting until you get the desired color).
~Add drop shadow to template layers (Filters > Light & Shadow > Drop Shadow).
3. Open tube, add drop shadow.
4. Open and place the following elements:
Autumn Branch
Bucket of Leaves
Candle
Candle 2
Apple Bowl
Fabric Flower
Flower
Vase
Tomatoes
Nut
Bark
Leaf 2
Leaf 3
Leaf 4
Leaf 5
Green Leaf
Multi-color Butterfly
~Some of the elements may need to be sized down. Using your scale tool in your tool box adjust the pixel size until element is the correct size~
~Add drop shadow to all elements~
5. Open Paper 1
6. Open mask
7. Add mask to paper (click HERE for a tut on using masks)
8. Merge Layers (Image > Merge Visible Layers).
9. Crop Image (Image > Autocrop Image).
10. Scale image to desired size (Image > Scale Image).
11. Add copyright info and name
12. Save as .png
ALL DONE!!!!!!!!!!
This tutorial is of my own creation and any resemblance to any other tuts is purely coincidental. This tutorial is for personal use only, using it for monetary gain is against our TOU's.
Supplies Needed:
~Gimp (any version will do).
~Falling for You PTU scrapkit by Wicked Princess Scraps which you can get HERE.
~Tube of choice. I used the artwork of Ismael Rac, you must have a license to use this art which you can get HERE.
~Template of choice. I used the Waiting for Fall which you can get from Sarah's Tags N Things HERE.
~Mask of choice. I used WSL mask 284 which you can get HERE.
~Font of choice. I used Valentina JF.
Let's get started!!!
1. Open a new layer ( I prefer a large canvas, so I make mine 1050x656). Make your canvas transparent (Layer > Transparency > Color to Alpha).
2. Open template in PSD format, move layers of template around until they are the way you like them.
~Add paper from scrapkit to individual layers of the template (Right click on template layer in layer box > Alpha to Selection > CTRL I > Select paper layer in layer box > Delete).
These are the papers I used:
Paper 4
Paper 6
Paper 8
Paper 9
~I added noise to some of the template layers to make them look glittery (Filters > Noise > RGB Noise).
~I colorized some of the template layers to better match the scrapkit (Colors > Colorize > play with the setting until you get the desired color).
~Add drop shadow to template layers (Filters > Light & Shadow > Drop Shadow).
3. Open tube, add drop shadow.
4. Open and place the following elements:
Autumn Branch
Bucket of Leaves
Candle
Candle 2
Apple Bowl
Fabric Flower
Flower
Vase
Tomatoes
Nut
Bark
Leaf 2
Leaf 3
Leaf 4
Leaf 5
Green Leaf
Multi-color Butterfly
~Some of the elements may need to be sized down. Using your scale tool in your tool box adjust the pixel size until element is the correct size~
~Add drop shadow to all elements~
5. Open Paper 1
6. Open mask
7. Add mask to paper (click HERE for a tut on using masks)
8. Merge Layers (Image > Merge Visible Layers).
9. Crop Image (Image > Autocrop Image).
10. Scale image to desired size (Image > Scale Image).
11. Add copyright info and name
12. Save as .png
ALL DONE!!!!!!!!!!
 This tutorial is of my own creation and any resemblance to any other tuts is purely coincidental. This tutorial is for personal use only, using it for monetary gain is against our TOU's.
SuppliesGimp- Any version should work
Awesome PTU kit Death Becomes Her from Wicked Princess Scraps HERE
Tube of choice. I am using Elias Chatzoudis. You must have a license to use his tubes. You can purchase them HERE
Template- mischievious by Crazy Cakes Scraps HERE
Font- ValentinaJF
Let's get started!
-Open template. Delete the credits. Image>Scale Image 500x500 pixels. Image>Canvas Size 600x600 pixels and make sure to click center.
-Let's add papers to the template layers. Make the template layer active (see below). Right click template layer in layer box and choose alpha to selection. Open paper (see below). Right click paper layer in layer box and choose add alpha channel. Layer>Scale Layer by 60%.
Select>Invert. Press delete on your keyboard. Select>None. Delete the original template layer.
Here are the template layers and which papers I used:
4- paper 8 Filters>Light & Shadow>Drop Shadow 2, 2, 10, black, 100
5- paper 7 Filters>Repeat Drop Shadow
6- paper 18 repeat drop shadow
7- paper 5 repeat drop shadow
8- paper 17
9- paper 14 repeat drop shadow
10- paper 1
-make layer 3 active. Colors>Colorize. Change the lightness slider to -100. Leave the rest on their default settings. Filters>Noise>RGB Noise. Change all sliders except alpha to 0.50.
Repeat drop shadow.
-Make the wordart layer active. Colorize.
Hue 249
Saturation 31
Lightness -6
-On layers 11 & 14 colorize.
Hue 286
Saturation 15
Lightness -7
Add a drop shadow of 1, 1, 1, black, 50 to both layers.
-Open tube. Move below the word art layer in the layer box. Add a drop shadow of 2, 2, 2, black, 50. Layer>Dulpicate Layer. On the duplicate layer: Filters>Blur>Gaussian Blur on default.
Change the mode (top of layer box) to soft light. Lower the opacity (top of layer box) to 50.
Elements
Add a drop shadow of 2, 2, 2, 50 to all element layers unless stated otherwise. see my tag for placement.
bottle cap
heart spray
candle
rose branch
loopy wire no drop shadow
feather no drop shadow
cross Rotate 15
barbed wire earings
bag no drop shadow
thorny heart
whip 2
-Add your name and copyright. You're finished!!!
This tutorial is of my own creation and any resemblance to any other tuts is purely coincidental. This tutorial is for personal use only, using it for monetary gain is against our TOU's.
SuppliesGimp- Any version should work
Awesome PTU kit Death Becomes Her from Wicked Princess Scraps HERE
Tube of choice. I am using Elias Chatzoudis. You must have a license to use his tubes. You can purchase them HERE
Template- mischievious by Crazy Cakes Scraps HERE
Font- ValentinaJF
Let's get started!
-Open template. Delete the credits. Image>Scale Image 500x500 pixels. Image>Canvas Size 600x600 pixels and make sure to click center.
-Let's add papers to the template layers. Make the template layer active (see below). Right click template layer in layer box and choose alpha to selection. Open paper (see below). Right click paper layer in layer box and choose add alpha channel. Layer>Scale Layer by 60%.
Select>Invert. Press delete on your keyboard. Select>None. Delete the original template layer.
Here are the template layers and which papers I used:
4- paper 8 Filters>Light & Shadow>Drop Shadow 2, 2, 10, black, 100
5- paper 7 Filters>Repeat Drop Shadow
6- paper 18 repeat drop shadow
7- paper 5 repeat drop shadow
8- paper 17
9- paper 14 repeat drop shadow
10- paper 1
-make layer 3 active. Colors>Colorize. Change the lightness slider to -100. Leave the rest on their default settings. Filters>Noise>RGB Noise. Change all sliders except alpha to 0.50.
Repeat drop shadow.
-Make the wordart layer active. Colorize.
Hue 249
Saturation 31
Lightness -6
-On layers 11 & 14 colorize.
Hue 286
Saturation 15
Lightness -7
Add a drop shadow of 1, 1, 1, black, 50 to both layers.
-Open tube. Move below the word art layer in the layer box. Add a drop shadow of 2, 2, 2, black, 50. Layer>Dulpicate Layer. On the duplicate layer: Filters>Blur>Gaussian Blur on default.
Change the mode (top of layer box) to soft light. Lower the opacity (top of layer box) to 50.
Elements
Add a drop shadow of 2, 2, 2, 50 to all element layers unless stated otherwise. see my tag for placement.
bottle cap
heart spray
candle
rose branch
loopy wire no drop shadow
feather no drop shadow
cross Rotate 15
barbed wire earings
bag no drop shadow
thorny heart
whip 2
-Add your name and copyright. You're finished!!!
 This tutorial is of my own creation and any resemblance to any other tuts is purely coincidental. This tutorial is for personal use only, using it for monetary gain is against our TOU's.
Supplies Needed:
~Gimp (any version will do).
~True Taggin Love's portion of the FTU The North Wing Valentine blog train, which you can get HERE.
~Tubes of choice. I used the artwork of Marco Guaglione, you must have a license to use this art. You can purchase this art from PTE HERE.
~Template of choice. I used the Just Fi Temp 004 template which you can get HERE.
~Font of choice. I used AceBingham SH.
Let's get started!!!
1. Open a new layer ( I prefer a large canvas, so I make mine 1050x656). Make your canvas transparent (Layer > Transparency > Color to Alpha).
2. Open template in PSD format, remove and move layers of template around until they are the way you like them.
~Add paper from scrapkit to individual layers of the template (Right click on template layer in layer box > Alpha to Selection > CTRL I > Select paper layer in layer box > Delete).
These are the papers I used:
Paper 2
Paper 4
Paper 5
Paper 8
~I added noise to some of the template layers to make them look glittery (Filters > Noise > RGB Noise).
~I colorized some of the template layers to better match the scrapkit (Colors > Colorize > play with the setting until you get the desired color).
~Add drop shadow to template layers (Filters > Light & Shadow > Drop Shadow).
3. Open tubes, I used both a full body and a close up.
~Open full body tube, add drop shadow.
~I changed the mode on the close-up to Hardlight (at the top of your Layer Box you will see where it says Mode, click the arrow and select Hardlight from the drop down menu). This tube has been added to the template in the same way you add paper (Right click on template layer in layer box > Alpha to Selection > CTRL I > Select tube layer in layer box > Delete).
4. Open and place the following elements:
String 4
Greenery
Stacked Flower 1
Stacked Flower 2
Flower 1
Flower 2
Flower 3
Heart 1
Butterfly 1
Butterfly 2
~Some of the elements may need to be sized down. Using your scale tool in your tool box adjust the pixel size until element is the correct size~
~Add drop shadow to all elements~
5. Merge Layers (Image > Merge Visible Layers).
6. Crop Image (Image > Autocrop Image).
7. Scale image to desired size (Image > Scale Image).
8. Add copyright info and name
9. Save as .png
ALL DONE!!!!!!!!!!
This tutorial is of my own creation and any resemblance to any other tuts is purely coincidental. This tutorial is for personal use only, using it for monetary gain is against our TOU's.
Supplies Needed:
~Gimp (any version will do).
~True Taggin Love's portion of the FTU The North Wing Valentine blog train, which you can get HERE.
~Tubes of choice. I used the artwork of Marco Guaglione, you must have a license to use this art. You can purchase this art from PTE HERE.
~Template of choice. I used the Just Fi Temp 004 template which you can get HERE.
~Font of choice. I used AceBingham SH.
Let's get started!!!
1. Open a new layer ( I prefer a large canvas, so I make mine 1050x656). Make your canvas transparent (Layer > Transparency > Color to Alpha).
2. Open template in PSD format, remove and move layers of template around until they are the way you like them.
~Add paper from scrapkit to individual layers of the template (Right click on template layer in layer box > Alpha to Selection > CTRL I > Select paper layer in layer box > Delete).
These are the papers I used:
Paper 2
Paper 4
Paper 5
Paper 8
~I added noise to some of the template layers to make them look glittery (Filters > Noise > RGB Noise).
~I colorized some of the template layers to better match the scrapkit (Colors > Colorize > play with the setting until you get the desired color).
~Add drop shadow to template layers (Filters > Light & Shadow > Drop Shadow).
3. Open tubes, I used both a full body and a close up.
~Open full body tube, add drop shadow.
~I changed the mode on the close-up to Hardlight (at the top of your Layer Box you will see where it says Mode, click the arrow and select Hardlight from the drop down menu). This tube has been added to the template in the same way you add paper (Right click on template layer in layer box > Alpha to Selection > CTRL I > Select tube layer in layer box > Delete).
4. Open and place the following elements:
String 4
Greenery
Stacked Flower 1
Stacked Flower 2
Flower 1
Flower 2
Flower 3
Heart 1
Butterfly 1
Butterfly 2
~Some of the elements may need to be sized down. Using your scale tool in your tool box adjust the pixel size until element is the correct size~
~Add drop shadow to all elements~
5. Merge Layers (Image > Merge Visible Layers).
6. Crop Image (Image > Autocrop Image).
7. Scale image to desired size (Image > Scale Image).
8. Add copyright info and name
9. Save as .png
ALL DONE!!!!!!!!!! This tutorial is of my own creation and any resemblance to any other tuts is purely coincidental. This tutorial is for personal use only, using it for monetary gain is against our TOU's.
Supplies Needed:
~Gimp (any version will do).
~Dirty Mechanic FTU scrapkit by True Taggin Love HERE.
~Tubes of choice. I used the artwork of BezFaery, you must have a license to use this art. You can purchase this art from PTE HERE.
~Template of choice. I used the SeptGB01 template by VixPSP which you can HERE.
~Font of choice. I used Simple Jane.
Let's get started!!!
1. Open a new layer ( I prefer a large canvas, so I make mine 1050x656). Make your canvas transparent (Layer > Transparency > Color to Alpha).
2. Open template in PSD format, remove and move layers of template around until they are the way you like them.
~Add paper from scrapkit to individual layers of the template (Right click on template layer in layer box > Alpha to Selection > CTRL I > Select paper layer in layer box > Delete).
These are the papers I used:
Paper 2
Paper 3
~I added noise to some of the template layers to make them look glittery (Filters > Noise > RGB Noise).
~I colorized some of the template layers to better match the scrapkit (Colors > Colorize > play with the setting until you get the desired color).
~Add drop shadow to template layers (Filters > Light & Shadow > Drop Shadow).
3. Open tubes, I used both a full body and a close up.
~Open full body tube, you will need to duplicate this tube so that you have 2 (at the bottom of your layer box click on the blue box. This will give you 2 tube layers).
~Select the top tube layer in your tool box. Add Gaussion Blur (Filters > Blur > Gaussion Blur, use default settings)
~On that same tube layer change the mode to Overlay (at the top of your Layer Box you will see where it says Mode, click the arrow and select Overlay from the drop down menu).
~Add drop shadow to bottom tube layer.
~I changed the mode on the close-up to Dodge (at the top of your Layer Box you will see where it says Mode, click the arrow and select Dodge from the drop down menu). This tube has been added to the template in the same way you add paper (Right click on template layer in layer box > Alpha to Selection > CTRL I > Select tube layer in layer box > Delete).
4. Open and place the following elements:
Gear Cluster
Gear
Tires
Torn Cardboard
Grease Rag
Socket
Steering Wheel
Torn Tire
Screw Head
Line of Washers & Nuts
Headlight
RPM Gage
Screwdriver
Wrench 2
Turn Signal Light
~Some of the elements may need to be sized down. Using your scale tool in your tool box adjust the pixel size until element is the correct size~
~Add drop shadow to all elements~
5. Merge Layers (Image > Merge Visible Layers).
6. Crop Image (Image > Autocrop Image).
7. Scale image to desired size (Image > Scale Image).
8. Add copyright info and name
9. Save as .png
ALL DONE!!!!!!!!!!
This tutorial is of my own creation and any resemblance to any other tuts is purely coincidental. This tutorial is for personal use only, using it for monetary gain is against our TOU's.
Supplies Needed:
~Gimp (any version will do).
~Dirty Mechanic FTU scrapkit by True Taggin Love HERE.
~Tubes of choice. I used the artwork of BezFaery, you must have a license to use this art. You can purchase this art from PTE HERE.
~Template of choice. I used the SeptGB01 template by VixPSP which you can HERE.
~Font of choice. I used Simple Jane.
Let's get started!!!
1. Open a new layer ( I prefer a large canvas, so I make mine 1050x656). Make your canvas transparent (Layer > Transparency > Color to Alpha).
2. Open template in PSD format, remove and move layers of template around until they are the way you like them.
~Add paper from scrapkit to individual layers of the template (Right click on template layer in layer box > Alpha to Selection > CTRL I > Select paper layer in layer box > Delete).
These are the papers I used:
Paper 2
Paper 3
~I added noise to some of the template layers to make them look glittery (Filters > Noise > RGB Noise).
~I colorized some of the template layers to better match the scrapkit (Colors > Colorize > play with the setting until you get the desired color).
~Add drop shadow to template layers (Filters > Light & Shadow > Drop Shadow).
3. Open tubes, I used both a full body and a close up.
~Open full body tube, you will need to duplicate this tube so that you have 2 (at the bottom of your layer box click on the blue box. This will give you 2 tube layers).
~Select the top tube layer in your tool box. Add Gaussion Blur (Filters > Blur > Gaussion Blur, use default settings)
~On that same tube layer change the mode to Overlay (at the top of your Layer Box you will see where it says Mode, click the arrow and select Overlay from the drop down menu).
~Add drop shadow to bottom tube layer.
~I changed the mode on the close-up to Dodge (at the top of your Layer Box you will see where it says Mode, click the arrow and select Dodge from the drop down menu). This tube has been added to the template in the same way you add paper (Right click on template layer in layer box > Alpha to Selection > CTRL I > Select tube layer in layer box > Delete).
4. Open and place the following elements:
Gear Cluster
Gear
Tires
Torn Cardboard
Grease Rag
Socket
Steering Wheel
Torn Tire
Screw Head
Line of Washers & Nuts
Headlight
RPM Gage
Screwdriver
Wrench 2
Turn Signal Light
~Some of the elements may need to be sized down. Using your scale tool in your tool box adjust the pixel size until element is the correct size~
~Add drop shadow to all elements~
5. Merge Layers (Image > Merge Visible Layers).
6. Crop Image (Image > Autocrop Image).
7. Scale image to desired size (Image > Scale Image).
8. Add copyright info and name
9. Save as .png
ALL DONE!!!!!!!!!! This tutorial is of my own creation and any resemblance to any other tuts is purely coincidental. This tutorial is for personal use only, using it for monetary gain is against our TOU's.
Supplies Needed:
~Gimp (any version will do).
~Emo Skull PTU scrapkit by Pink Candy Designs which you can get from Scrap-U-Nique HERE.
~Tubes of choice. I used the artwork of Marco Guaglione, you must have a license to use this art which you can get from PTE HERE.
~Template of choice. I used template 54 by AquaRebel 315 which you can get HERE.
~Font of choice. I used Valentina JF.
Let's get started!!!
1. Open a new layer ( I prefer a large canvas, so I make mine 1050x656). Make your canvas transparent (Layer > Transparency > Color to Alpha).
2. Open template in PSD format, move layers of template around until they are the way you like them.
~Add paper from scrapkit to individual layers of the template (Right click on template layer in layer box > Alpha to Selection > CTRL I > Select paper layer in layer box > Delete).
These are the papers I used:
Paper 3
Paper 6
Paper 11
~I added noise to some of the template layers to make them look glittery (Filters > Noise > RGB Noise).
~I colorized some of the template layers to better match the scrapkit (Colors > Colorize > play with the setting until you get the desired color).
~Add drop shadow to template layers (Filters > Light & Shadow > Drop Shadow).
3. Open tubes, I used both a full body and a close up.
~Open full body tube, add drop shadow.
~Place the close-up tube directly under the "shape" layer of the template. Then add the tube to the template in the same way you add paper (Right click on template layer in layer box > Alpha to Selection > CTRL I > Select tube layer in layer box > Delete).
4. Open and place the following elements:
Glitter
String
Ribbon 4
Skulls
Skull
Skull 2
Makeup 2
Lips
Collar
Charm
Charm 2
Bow
Bow 2
Rose
~Some of the elements may need to be sized down. Using your scale tool in your tool box adjust the pixel size until element is the correct size~
~Add drop shadow to all elements (except Glitter)~
5. Merge Layers (Image > Merge Visible Layers).
6. Crop Image (Image > Autocrop Image).
7. Scale image to desired size (Image > Scale Image).
8. Add copyright info and name
9. Save as .png
ALL DONE!!!!!!!!!!
This tutorial is of my own creation and any resemblance to any other tuts is purely coincidental. This tutorial is for personal use only, using it for monetary gain is against our TOU's.
Supplies Needed:
~Gimp (any version will do).
~Emo Skull PTU scrapkit by Pink Candy Designs which you can get from Scrap-U-Nique HERE.
~Tubes of choice. I used the artwork of Marco Guaglione, you must have a license to use this art which you can get from PTE HERE.
~Template of choice. I used template 54 by AquaRebel 315 which you can get HERE.
~Font of choice. I used Valentina JF.
Let's get started!!!
1. Open a new layer ( I prefer a large canvas, so I make mine 1050x656). Make your canvas transparent (Layer > Transparency > Color to Alpha).
2. Open template in PSD format, move layers of template around until they are the way you like them.
~Add paper from scrapkit to individual layers of the template (Right click on template layer in layer box > Alpha to Selection > CTRL I > Select paper layer in layer box > Delete).
These are the papers I used:
Paper 3
Paper 6
Paper 11
~I added noise to some of the template layers to make them look glittery (Filters > Noise > RGB Noise).
~I colorized some of the template layers to better match the scrapkit (Colors > Colorize > play with the setting until you get the desired color).
~Add drop shadow to template layers (Filters > Light & Shadow > Drop Shadow).
3. Open tubes, I used both a full body and a close up.
~Open full body tube, add drop shadow.
~Place the close-up tube directly under the "shape" layer of the template. Then add the tube to the template in the same way you add paper (Right click on template layer in layer box > Alpha to Selection > CTRL I > Select tube layer in layer box > Delete).
4. Open and place the following elements:
Glitter
String
Ribbon 4
Skulls
Skull
Skull 2
Makeup 2
Lips
Collar
Charm
Charm 2
Bow
Bow 2
Rose
~Some of the elements may need to be sized down. Using your scale tool in your tool box adjust the pixel size until element is the correct size~
~Add drop shadow to all elements (except Glitter)~
5. Merge Layers (Image > Merge Visible Layers).
6. Crop Image (Image > Autocrop Image).
7. Scale image to desired size (Image > Scale Image).
8. Add copyright info and name
9. Save as .png
ALL DONE!!!!!!!!!!
Snag Our Blinkies


Don't Be A Pirate!

