Gimptastic Scraps Available Exclusively @

Gimptastic Scraps CT


Blog Trains

CU Licenses


This tutorial is of my own creation and any resemblance to any other tuts is purely coincidental. This tutorial is for personal use only, using it for monetary gain is against our TOU's.
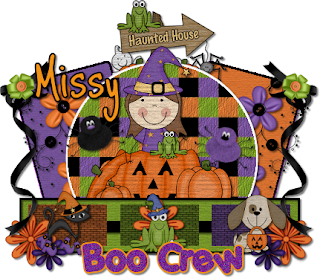
Supplies: Gimp- Any version should work The most adorable PTU halloween kit out there by Scraps with Attitude called 'Boo Crew' HERE Template 10 from me HERE Fonts- Porky's Bold and Just Me Again Down Here Let's begin! -Open template 10. Delete the credits, bg and word art layers. Using your crop tool, drag the edges ass close to the template as possible, without cutting any of it off. Crop. Go to Image>Scale Image by 400 pixels. Next go to Image>Canvas Size 450x450 pixels and make sure you click center. -Make the circle layer active. Right click the layer in the layer box and choose layer to image size. Using the magic wand, click outside of the circle. Open paper 5. Right click this paper layer in the layer box and choose add alpha channel.Next right click again in layer box and choose scale layer.Scale by 40%. Press delete on your keyboard. Go to Select>None. Delete the original circle layer. Make the circle back layer active and Go to Filters>Light and Shadow>Drop Shadow using these settings: 2, 2, 2, black, 50. -Make the right rect layer active. Layer to image size and click outside with the magic wand. Open paper 1 and add alpha channel. Scale by 40%. Press delete and select none. Delete the original right rect layer and also delete the right rect plain layer. -Make the right rect back layer active. Layer to image size. Using the bucket fill tool click inside the rect and fill with black. Add same drop shadow as before. -Make the left rect layer active. Layer to image size and click outside with magic wand. Open paper 3. Add alpha channel and scale by 40%. Press delete and select none. Delete the original left rect layer and also the left rect plain layer. -Make the left rect back layer active. Layer to image size. Fill with black and add same drop shadow. -Make the rect layer active. Layer to image size and click outside with magic wand. Open paper 2. Add alpha channel and scale by 50%. Press delete and select none. Delete the original rect layer and and the plain rect layer. -Make the rect frame layer active. Layer to image size. Fill with black. Add same drop shadow. Do the same to the strip layer. -Make the s 1 layer active. Layer to image size and click outside with magic wand. Open paper 17. Add alpha channel and scale by 50%. Press delete and select none. Delete the original s 1 layer. -Make the s 2 layer active. Layer to image size and click outside with magic wand. Open paper 18. Add alpha channel and scale by 50%. Press delete and select none. Delete the original s 2 layer. -Make the s 3 layer active. Layer to imag size and click outside with magic wand. Open paper 19. Add alpha channel and scale by 50%. Press delete and select none. Delete the original s 3 layer. -Open the witch pumpkin element. Move this layer below the long green rect layer in the layer box. Scale by 30%. Place in the middle of the template. Add same drop shadow. -Open curly ribbon 4. Move this layer to the top. Scale layer by 30%. Place on the corner of the left rect. Layer to image size. Right click in layer box and choose duplicate layer. Using your flip tool, click on the canvas. It will filp the duplicated ribbon. Add drop shadow to both ribbon layers. -Open button bow 3. Move layer above black ribbon. Scale by 5%. Layer to image size. Duplicate and flip. -Open flower group 2. Move layer above the purple rect. Scale by 30%.Place on top of the purple rect. Add drop shadow. -Open flower group 3. Move layer above the orange ect layer. Flip using the flip tool. Scale by 30%. Place on top of the orange rect. Add drop shadow. -Open the sign. Move layer above the purple flowers. Scale by 20%. Place on the top. Add drop shadow. -Open dog 1. Move layer to the top. Scale by 10%. Place on the little dark purple square. Add drop shadow. -Open frog 1. Scale by 10%. Place on the little green square. Add drop shadow. -Open cat 2. Scale by 11%. Place on last little square. Add drop shadow. -Open flower 3. Move layer below cat. Scale by 10%. Place below the cat. Layer to image size. Duplicate and flip. Move layer below dog. Duplicate again and place below frog. Add drop shadows. -Open flower 1. Scale by 10%. Place on top of 1st orange flower. Layer to image size. Duplicate ad flip. Add drop shadows. -Open fuzzy spider 1. Move layer below the girl with the pumpkins. Scale by 10%. Using the rotate tool, rotate by -15. Place to the left of the girl. Add drop shadow. -Open fuzzy spider 2. Scale by 10%. Rotate by 15. Place to the right of the girl. Add drop shadow. -Using the Porky's bold font, type Boo Crew between the flowers using this color 752891. I have my font size set to 50. Go to Filters>Noise>RGB Noise. Use the defaoult settings. Right click in the layer box and choose alpha to selection. Add a new layer below this layer. Go to Select>Grow by 2. Fill with f19216. Select none and add drop shadow. -Add your name using the Just Me Again Down Here font. -Go to Image>Merge Visible Layers and merge. Next go to Image>Auto Crop Image. And you're done!
Snag Our Blinkies


Don't Be A Pirate!


0 comments:
Post a Comment