Gimptastic Scraps Available Exclusively @

Gimptastic Scraps CT







Blog Trains

CU Licenses









 This tutorial is of my own creation and any resemblance to any other tuts is purely coincidental. This tutorial is for personal use only, using it for monetary gain is against our TOU's.
Supplies Needed:
~Gimp (any version will do).
~Tube of choice. I used the awesome artwork of Ismael Rac, you must have a license to use his art which you can get HERE.
~Autumns Arrival PTU scrapkit which you can get from Creative Intentionz HERE.
~Mask of choice. I used WSL mask293 which you can get HERE.
~Font of choice. I used Phoenix Script.
Let's get started!!!!!
1. Open a new layer ( I prefer a large canvas, so I make mine 1050x656). Make your canvas transparent (Layer > Transparency > Color to alpha).
2. Open Frame 5, add drop shadow (Filters > Light & Shadow > Drop Shadow).
3. Open Papers 8,9,11 & 12 center them behind square portions of the frame, remove excess paper using a cutting tool or eraser.
4. Open your tube, add drop shadow.
5. Open and place the following elements:
Curly Ribbon 1
Rope Cluster
Leaf 1
Leaf 2
Leaf 3
Maple Leaf 1
Twig 1
Twig 2
Sunflower 1
Sunflower 2 (x2)
Sunflower 4
Sunflower 5
Pumpkins
Squirrel
~Some elements may need to be sized down. Using the Scale Tool in your tool box adjust pixels to desired size~
~Add drop shadow to all elements~
6. Open Paper 4.
7. Open mask.
8. Add mask to paper (right click on paper layer in layer box > Add Layer Mask > Black Full Transparency).
~Select mask in layer box, right click on mask (on canvas) > copy.
~Make mask layer invisible (click on eye next to mask in layer box).
~Select paper in layer box, right click on paper (on canvas, all you will see is the outline of the paper) > Paste.
~Anchor layer (click on anchor next to trash can on layer box).
~Right click on paper layer (in layer box) > Apply Layer Mask.
~Delete mask layer from layer box.
9. Merge layers (Image > Merge Visible Layer).
10. Crop image (Image > Autocrop Image).
11. Scale image to desired size (Image > Scale Image).
12. Add copyright info and name.
13. Save as .png
You are finished :)
This tutorial is of my own creation and any resemblance to any other tuts is purely coincidental. This tutorial is for personal use only, using it for monetary gain is against our TOU's.
Supplies Needed:
~Gimp (any version will do).
~Tube of choice. I used the awesome artwork of Ismael Rac, you must have a license to use his art which you can get HERE.
~Autumns Arrival PTU scrapkit which you can get from Creative Intentionz HERE.
~Mask of choice. I used WSL mask293 which you can get HERE.
~Font of choice. I used Phoenix Script.
Let's get started!!!!!
1. Open a new layer ( I prefer a large canvas, so I make mine 1050x656). Make your canvas transparent (Layer > Transparency > Color to alpha).
2. Open Frame 5, add drop shadow (Filters > Light & Shadow > Drop Shadow).
3. Open Papers 8,9,11 & 12 center them behind square portions of the frame, remove excess paper using a cutting tool or eraser.
4. Open your tube, add drop shadow.
5. Open and place the following elements:
Curly Ribbon 1
Rope Cluster
Leaf 1
Leaf 2
Leaf 3
Maple Leaf 1
Twig 1
Twig 2
Sunflower 1
Sunflower 2 (x2)
Sunflower 4
Sunflower 5
Pumpkins
Squirrel
~Some elements may need to be sized down. Using the Scale Tool in your tool box adjust pixels to desired size~
~Add drop shadow to all elements~
6. Open Paper 4.
7. Open mask.
8. Add mask to paper (right click on paper layer in layer box > Add Layer Mask > Black Full Transparency).
~Select mask in layer box, right click on mask (on canvas) > copy.
~Make mask layer invisible (click on eye next to mask in layer box).
~Select paper in layer box, right click on paper (on canvas, all you will see is the outline of the paper) > Paste.
~Anchor layer (click on anchor next to trash can on layer box).
~Right click on paper layer (in layer box) > Apply Layer Mask.
~Delete mask layer from layer box.
9. Merge layers (Image > Merge Visible Layer).
10. Crop image (Image > Autocrop Image).
11. Scale image to desired size (Image > Scale Image).
12. Add copyright info and name.
13. Save as .png
You are finished :)
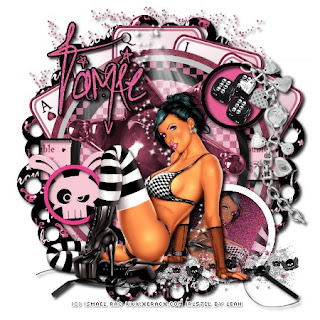 This tutorial is of my own creation and any resemblance to any other tuts is purely coincidental. This tutorial is for personal use only, using it for monetary gain is against our TOU's.
Supplies:
Gimp- Any version should work
I am using the work of Ismael Rac. You must have a licence to use his tubes. You can purchase his tubes HERE
Fabulous PTU 'Double Trouble' kit from Addicive Pleasures HERE
Template 179 from Blissfully Beth HERE
Font- Sick Capital Vice
Let's Begin!!!
-Open your template. Delete the credits and word art layers. Go to Image>Scale Image by 400x400 pixels. Press scale. Next, go to
Image>Canvas Size and make it 450x450 pixles. Make sure it is centered. Press rezise.
-Make your black layer active. Right click the layer in the layer box and choose alpha to selction. Open paper 2. Right click this paper layer in the layer box and choose add alpha channel. Now go
to Select>Invert. Go to Layer>Scale Layer by 50%. Press delete on your keyboard. Goto Select>None. You can delete the black layer now.
-Make the grey 2 layer active. Alpha to selection and invert. Open paper 3 and add alpha channel. Scale by 50%. Press delete. Select none. Delete the gray 2 layer.
-Make the black 2 layer active. Alpha to selection and invert. Open paper 12 and add alpha channel. Scale by 50%. Press delete. Select none. Go to
Filters>Light and Shadow>Drop shadow and add a drop shadow of 3, 3, 5, black, 80. Delete the black 2 layer.
-Make your gray 1 layer active. Using your fill tool click inside the circle with the color black set as your foreground color. Use the same drop shadow we used before.
-Make the pink stripe layer active. Alpha to selection and invert. Open paper 9 and add alpha channel. Scale by 50%. Press delete. Invert and add a new layer above this paper layer.
Go to Select>Grow by 2. Fill this new layer with black. GO to Select>Shrink by 3. Press delete on your keyboard. Select none. Repeat same drop shadow as before. Delete
the pink stripe layer.
-Make the white circle#2 layer active. With black as your foreground color, use your fill tool and click inside the circle. Do the same with the circle layer, but fill with e75e95.
-Make the white circle#1 layer active. Alpha to selection. Fill with gradient using the pink and black we just used. Select none. Go to Filters>Noise>RBG Noise and use the default settings.
-Make the circle frame#2 layer active. Using your ill tool and your foreground color set to white, click the frame. Add rop shadow. Do the same to the circle frame layer, just change the color to black.
Add drop shadow. Also add a drop shadow to the circle frame#1 layer.
-Open your tube. Duplicate and hide the duplicate by clicking on the eye in the layer box. Scale the original tube layer depending on the tube you are using. I scaled mine to 50%.
Fill your tube using your flip tool. Move below your white circle layer. Make the glitter gradient circle layer active. Alpha to selection and invert. Make your tube layer active.
Press delete. Select none. Change the opacity to 60.
-Unhide your other tube layer. Move this layer to the top in the layers box. Postion your tube in the middle of your template or wherever you think it looks best.
Add drop shadow.Duplicate this layer. Go to Filters>Blur>Gaussian Blur by 3. Change the mode to soft light.
Time for elements!
See my tag for placement. Also add a drop shadow to each element layer unless otherwise specified not to.
-glitter trail scale by 50% NO drop shadow
-decor 2 scale by 50%
-Cards NO scale
-frame 4 scale by 75%
-chain scale by 60%
-decor scale by 30%
-dice scale by 25% duplicate twice
-sparkles 2 scale by 65%
-light scale by 75% NO drop shadow
-ribbon 5 scale by 45%
-glitter scale by 85%
Add your name, copyright and go to Image>Autocrop Image.
This tutorial is of my own creation and any resemblance to any other tuts is purely coincidental. This tutorial is for personal use only, using it for monetary gain is against our TOU's.
Supplies:
Gimp- Any version should work
I am using the work of Ismael Rac. You must have a licence to use his tubes. You can purchase his tubes HERE
Fabulous PTU 'Double Trouble' kit from Addicive Pleasures HERE
Template 179 from Blissfully Beth HERE
Font- Sick Capital Vice
Let's Begin!!!
-Open your template. Delete the credits and word art layers. Go to Image>Scale Image by 400x400 pixels. Press scale. Next, go to
Image>Canvas Size and make it 450x450 pixles. Make sure it is centered. Press rezise.
-Make your black layer active. Right click the layer in the layer box and choose alpha to selction. Open paper 2. Right click this paper layer in the layer box and choose add alpha channel. Now go
to Select>Invert. Go to Layer>Scale Layer by 50%. Press delete on your keyboard. Goto Select>None. You can delete the black layer now.
-Make the grey 2 layer active. Alpha to selection and invert. Open paper 3 and add alpha channel. Scale by 50%. Press delete. Select none. Delete the gray 2 layer.
-Make the black 2 layer active. Alpha to selection and invert. Open paper 12 and add alpha channel. Scale by 50%. Press delete. Select none. Go to
Filters>Light and Shadow>Drop shadow and add a drop shadow of 3, 3, 5, black, 80. Delete the black 2 layer.
-Make your gray 1 layer active. Using your fill tool click inside the circle with the color black set as your foreground color. Use the same drop shadow we used before.
-Make the pink stripe layer active. Alpha to selection and invert. Open paper 9 and add alpha channel. Scale by 50%. Press delete. Invert and add a new layer above this paper layer.
Go to Select>Grow by 2. Fill this new layer with black. GO to Select>Shrink by 3. Press delete on your keyboard. Select none. Repeat same drop shadow as before. Delete
the pink stripe layer.
-Make the white circle#2 layer active. With black as your foreground color, use your fill tool and click inside the circle. Do the same with the circle layer, but fill with e75e95.
-Make the white circle#1 layer active. Alpha to selection. Fill with gradient using the pink and black we just used. Select none. Go to Filters>Noise>RBG Noise and use the default settings.
-Make the circle frame#2 layer active. Using your ill tool and your foreground color set to white, click the frame. Add rop shadow. Do the same to the circle frame layer, just change the color to black.
Add drop shadow. Also add a drop shadow to the circle frame#1 layer.
-Open your tube. Duplicate and hide the duplicate by clicking on the eye in the layer box. Scale the original tube layer depending on the tube you are using. I scaled mine to 50%.
Fill your tube using your flip tool. Move below your white circle layer. Make the glitter gradient circle layer active. Alpha to selection and invert. Make your tube layer active.
Press delete. Select none. Change the opacity to 60.
-Unhide your other tube layer. Move this layer to the top in the layers box. Postion your tube in the middle of your template or wherever you think it looks best.
Add drop shadow.Duplicate this layer. Go to Filters>Blur>Gaussian Blur by 3. Change the mode to soft light.
Time for elements!
See my tag for placement. Also add a drop shadow to each element layer unless otherwise specified not to.
-glitter trail scale by 50% NO drop shadow
-decor 2 scale by 50%
-Cards NO scale
-frame 4 scale by 75%
-chain scale by 60%
-decor scale by 30%
-dice scale by 25% duplicate twice
-sparkles 2 scale by 65%
-light scale by 75% NO drop shadow
-ribbon 5 scale by 45%
-glitter scale by 85%
Add your name, copyright and go to Image>Autocrop Image.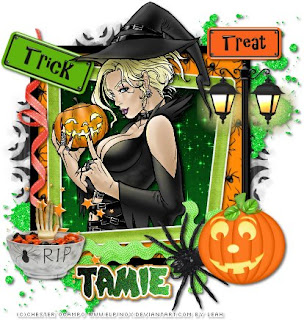 This tutorial is of my own creation and any resemblance to any other tuts is purely coincidental. This tutorial is for personal use only, using it for monetary gain is against our TOU's
 This tutorial is of my own creation and any resemblance to any other tuts is purely coincidental. This tutorial is for personal use only, using it for monetary gain is against our TOU's.
Supplies Needed:
~Gimp (any version will do).
~The Coven PTU scrapkit which you can get from Addictive Pleasures HERE.
~Tube of choice. I used the fantastic FTU art of Sheila Craig which you can find HERE.
~Mask of choice. I used WSL mask363 which you can get HERE.
~Font of choice. I used Corpse.
Let's get started!!!!!
1. Open a new layer ( I prefer a large canvas, so I make mine 1050x656). Make your canvas transparent (Layer > Transparency > Color to alpha).
2. Open Frame 2, add drop shadow (Filters > Light & Shadow > Drop Shadow).
3. Open Paper 12 center it behind circular portion of the frame, remove excess paper using a cutting tool or eraser.
4. Open your tube, add drop shadow.
5. Open and place the following elements:
ele 2
ele 8
ele 15
ele 16
ele 19
ele 31
ele 34
ele 36
rose 2
goblet
~Some of the elements may need to be sized down. Using the Scale Tool in your tool box adjust the pixel size~
~Add drop shadow to all elements~
6. Open Paper 2.
7. Open mask.
8. Add mask to paper (right click on paper layer in layer box > Add Layer Mask > Black Full Transparency).
~Select mask in layer box, right click on mask (on canvas) > copy.
~Make mask layer invisible (click on eye next to mask in layer box).
~Select paper in layer box, right click on paper (on canvas, all you will see is the outline of the paper) > Paste.
~Anchor layer (click on anchor next to trash can on layer box).
~Right click on paper layer (in layer box) > Apply Layer Mask.
~Delete mask layer from layer box.
9. Merge layers (Image > Merge Visible Layer).
10. Crop image (Image > Autocrop Image).
11. Scale image to desired size (Image > Scale Image).
12. Add copyright info and name.
13. Save as .png
You are finished :)
This tutorial is of my own creation and any resemblance to any other tuts is purely coincidental. This tutorial is for personal use only, using it for monetary gain is against our TOU's.
Supplies Needed:
~Gimp (any version will do).
~The Coven PTU scrapkit which you can get from Addictive Pleasures HERE.
~Tube of choice. I used the fantastic FTU art of Sheila Craig which you can find HERE.
~Mask of choice. I used WSL mask363 which you can get HERE.
~Font of choice. I used Corpse.
Let's get started!!!!!
1. Open a new layer ( I prefer a large canvas, so I make mine 1050x656). Make your canvas transparent (Layer > Transparency > Color to alpha).
2. Open Frame 2, add drop shadow (Filters > Light & Shadow > Drop Shadow).
3. Open Paper 12 center it behind circular portion of the frame, remove excess paper using a cutting tool or eraser.
4. Open your tube, add drop shadow.
5. Open and place the following elements:
ele 2
ele 8
ele 15
ele 16
ele 19
ele 31
ele 34
ele 36
rose 2
goblet
~Some of the elements may need to be sized down. Using the Scale Tool in your tool box adjust the pixel size~
~Add drop shadow to all elements~
6. Open Paper 2.
7. Open mask.
8. Add mask to paper (right click on paper layer in layer box > Add Layer Mask > Black Full Transparency).
~Select mask in layer box, right click on mask (on canvas) > copy.
~Make mask layer invisible (click on eye next to mask in layer box).
~Select paper in layer box, right click on paper (on canvas, all you will see is the outline of the paper) > Paste.
~Anchor layer (click on anchor next to trash can on layer box).
~Right click on paper layer (in layer box) > Apply Layer Mask.
~Delete mask layer from layer box.
9. Merge layers (Image > Merge Visible Layer).
10. Crop image (Image > Autocrop Image).
11. Scale image to desired size (Image > Scale Image).
12. Add copyright info and name.
13. Save as .png
You are finished :)
 This tutorial is of my own creation and any resemblance to any other tuts is purely coincidental. This tutorial is for personal use only, using it for monetary gain is against our TOU's.
Supplies:
Gimp- Any version should work
I am using the artwork of Elias Chatzoudis. You must have a licence to use his work. You can purchase his tubes HERE
Super fun PTU scrap kit from Addictive Pleasures called Katy Perry HERE
Fonts: Pea Roni Script, Pea Hannah Vanilla and Glider Girls all from Kevin and Amanda's awesome blog HERE
Let's do it!!!
-Open Gimp with a canvas size of 450x450 pixels.
-Open the Polariod element. Go to Image>Scale by 60%. Move it a little towards the upper left corner. Go to Layer>Duplicate Layer.
Scale your duplicate layer by 75%. Select your rotate tool and where it says angle put 20. Press rotate. Move towards the lower right corner. See my tag for placement. Add a drop shadow
of 2, 2, 40, black. opacity 100 to both polaroid layers.
-Open paper 10. Move it below the polaroid layers. Right click the layer in the layer box and press Add Alpha Channel. Scale by 75%. Using your smudge tool and the default settings, choose a circle brush and
smudge the outer edges of the paper.
-Open paper 2. Add alpha channel. Move below the paper we just smudged. Scale by 60%. Rotate by 45. Smudge the outer edge like before. add drop shadow of
2, 2, 2, black. 50.
-Open frame 4 and move it to the top. Scale by 30%. Move toward the bottom left. Using the magic wand, click inside the frame. Go to Select>Grow by 2. Add a new layer
below the frame layer. Fill with a gradient using the default settings.
Using these colors: f331ba and 154bf8 Go to Filters>Noise>RBG Noise and use the default settings.
Now add a new layer above the gradient layer. Fill with white. Go to Select>Shrink by 3. Press delete on your keyboard. Add a drop shadow of 2, 2, 2, black, 50 to the white layer and the frame layer.
-Open the star element. Move below the polaroid layers on the top right side. Scale by 60%. Add same drop shadow as before.
-Open the heart swirl element. Move this layer above everything else. Scale by 75%. Add drop shadow.
-Open the bow element. Scale by 30%. Add drop shadow.
-Open the screw element. Scale by 20%. Place on top of the bow.
-Open ribbon 6. Move layer below the bow and screw layers. Scale by 50%. Add drop shadow.
-Open the scattered hearts element. Rotate by 90. Scale by 50%. Move below the polaroid layers. Move to the right of tag. Add drop shadow.
-Select your larger polaroid layer. Using the magic wand, click the black square. Open your tube and move it just above this polaroid layer. Go to Select>Invert.
Press delete on your keyboard. Select none. Change the mode to Grain Merge.
-Open your tube again. Flip your tube using the flip tool. Select your small polaroid layer. Click the black circle using your magic wand. Select your tube layer and move her inside the selection.
Invert and delete. Change the opacity to 50. Do the same to the glitter gradient layer, just change the opacity to 60.
-Open your tube one more time. I scaled mine by 60, but it just depends on the tube you use. Add a drop shadow.
-I wrote blondes using the blue from the gradient. I use the font Pea Roni Script.
I wrote have more fun in white using the font Pea hannah Vanilla.
I added a drop shadow to both word layers.
-Add your name using the Glider Girls font in the pink we used for the gradient.
-Add your copyright and crop.
You did it!!!
This tutorial is of my own creation and any resemblance to any other tuts is purely coincidental. This tutorial is for personal use only, using it for monetary gain is against our TOU's.
Supplies:
Gimp- Any version should work
I am using the artwork of Elias Chatzoudis. You must have a licence to use his work. You can purchase his tubes HERE
Super fun PTU scrap kit from Addictive Pleasures called Katy Perry HERE
Fonts: Pea Roni Script, Pea Hannah Vanilla and Glider Girls all from Kevin and Amanda's awesome blog HERE
Let's do it!!!
-Open Gimp with a canvas size of 450x450 pixels.
-Open the Polariod element. Go to Image>Scale by 60%. Move it a little towards the upper left corner. Go to Layer>Duplicate Layer.
Scale your duplicate layer by 75%. Select your rotate tool and where it says angle put 20. Press rotate. Move towards the lower right corner. See my tag for placement. Add a drop shadow
of 2, 2, 40, black. opacity 100 to both polaroid layers.
-Open paper 10. Move it below the polaroid layers. Right click the layer in the layer box and press Add Alpha Channel. Scale by 75%. Using your smudge tool and the default settings, choose a circle brush and
smudge the outer edges of the paper.
-Open paper 2. Add alpha channel. Move below the paper we just smudged. Scale by 60%. Rotate by 45. Smudge the outer edge like before. add drop shadow of
2, 2, 2, black. 50.
-Open frame 4 and move it to the top. Scale by 30%. Move toward the bottom left. Using the magic wand, click inside the frame. Go to Select>Grow by 2. Add a new layer
below the frame layer. Fill with a gradient using the default settings.
Using these colors: f331ba and 154bf8 Go to Filters>Noise>RBG Noise and use the default settings.
Now add a new layer above the gradient layer. Fill with white. Go to Select>Shrink by 3. Press delete on your keyboard. Add a drop shadow of 2, 2, 2, black, 50 to the white layer and the frame layer.
-Open the star element. Move below the polaroid layers on the top right side. Scale by 60%. Add same drop shadow as before.
-Open the heart swirl element. Move this layer above everything else. Scale by 75%. Add drop shadow.
-Open the bow element. Scale by 30%. Add drop shadow.
-Open the screw element. Scale by 20%. Place on top of the bow.
-Open ribbon 6. Move layer below the bow and screw layers. Scale by 50%. Add drop shadow.
-Open the scattered hearts element. Rotate by 90. Scale by 50%. Move below the polaroid layers. Move to the right of tag. Add drop shadow.
-Select your larger polaroid layer. Using the magic wand, click the black square. Open your tube and move it just above this polaroid layer. Go to Select>Invert.
Press delete on your keyboard. Select none. Change the mode to Grain Merge.
-Open your tube again. Flip your tube using the flip tool. Select your small polaroid layer. Click the black circle using your magic wand. Select your tube layer and move her inside the selection.
Invert and delete. Change the opacity to 50. Do the same to the glitter gradient layer, just change the opacity to 60.
-Open your tube one more time. I scaled mine by 60, but it just depends on the tube you use. Add a drop shadow.
-I wrote blondes using the blue from the gradient. I use the font Pea Roni Script.
I wrote have more fun in white using the font Pea hannah Vanilla.
I added a drop shadow to both word layers.
-Add your name using the Glider Girls font in the pink we used for the gradient.
-Add your copyright and crop.
You did it!!!  You can get the masks HERE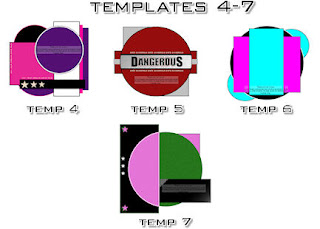
 This tutorial is of my own creation and any resemblance to any other tuts is purely coincidental. This tutorial is for personal use only, using it for monetary gain is against our TOU's.
Supplies Needed:
~Gimp (any version will do).
~It's My Party PTU scrapkit which you can get from Creative Intentionz HERE.
~Tube of choice. I used the ever so sweet artwork of Suzanne Woolcott, you must have a license to use her art which you can get HERE.
~Template of choice. I used Template 1, made by my partner in crime Leah which you can get on our blog HERE.
~Mask of choice. I used Mask 1, also made by my buddy Leah which you can get on our blog HERE.
~Font of choice. I used Monika Italic.
Let's get started!!!
1. Open a new layer ( I prefer a large canvas, so I make mine 1050x656). Make your canvas transparent (Layer > Transparency > Color to Alpha).
2. Open template in PSD format, move layers of template around until they are the way you like them.
~Add paper from scrapkit to individual layers of the template (Right click on layer in layer box > Alpha to Selection > CTRL I > Select paper layer in layer box > Delete).
These are the papers I used:
Paper 3
Paper 2
Paper 14
~I added noise to some of the template layers to make them look glittery (Filters > Noise > RGB Noise).
~I colorized some of the template layers to better match the scrapkit (Colors > Colorize > play with the setting until you get the desired color).
~Add drop shadow to template layers (Filters > Light & Shadow > Drop Shadow).
3. Open tube, add drop shadow.
4. Open and place the following elements:
CurlyRibbon 1
CurlyRibbon 2
CurlyRibbon 4
Gift 1
Gift 4
Gift 7
Gift 10
Cake 3
PartyHat 4
Balloon 1
Balloon 2
Banner 2
SparklingStars
Bubbles 4
DiscoBall 2
~Some of the elements may need to be sized down. Using your scale tool in your tool box adjust the pixel size until element is the correct size~
~Add drop shadow to all elements~
5. Open Paper 1
6. Open mask
7. Add mask to paper (right click on paper layer in layer box > add layer mask > black full transparency).
~Select mask layer in layer box, right click on mask layer (on canvas) > copy.
~Make mask layer invisible (click on eye next to mask in layer box).
~Select paper in layer box, right click on paper (on canvas, all you will see is the outline of the paper) > Paste.
~Anchor layer (click on anchor next to trash can on layer box).
~Right click on paper layer in layer box > apply layer mask.
~Delete mask from layer box.
8. Merge Layers (Image > Merge Visible Layers).
9. Crop Image (Image > Autocrop Image).
10. Scale image to desired size (Image > Scale Image).
11. Add copyright info and name
12. Save as .png
ALL DONE!!!!!!!!!!
This tutorial is of my own creation and any resemblance to any other tuts is purely coincidental. This tutorial is for personal use only, using it for monetary gain is against our TOU's.
Supplies Needed:
~Gimp (any version will do).
~It's My Party PTU scrapkit which you can get from Creative Intentionz HERE.
~Tube of choice. I used the ever so sweet artwork of Suzanne Woolcott, you must have a license to use her art which you can get HERE.
~Template of choice. I used Template 1, made by my partner in crime Leah which you can get on our blog HERE.
~Mask of choice. I used Mask 1, also made by my buddy Leah which you can get on our blog HERE.
~Font of choice. I used Monika Italic.
Let's get started!!!
1. Open a new layer ( I prefer a large canvas, so I make mine 1050x656). Make your canvas transparent (Layer > Transparency > Color to Alpha).
2. Open template in PSD format, move layers of template around until they are the way you like them.
~Add paper from scrapkit to individual layers of the template (Right click on layer in layer box > Alpha to Selection > CTRL I > Select paper layer in layer box > Delete).
These are the papers I used:
Paper 3
Paper 2
Paper 14
~I added noise to some of the template layers to make them look glittery (Filters > Noise > RGB Noise).
~I colorized some of the template layers to better match the scrapkit (Colors > Colorize > play with the setting until you get the desired color).
~Add drop shadow to template layers (Filters > Light & Shadow > Drop Shadow).
3. Open tube, add drop shadow.
4. Open and place the following elements:
CurlyRibbon 1
CurlyRibbon 2
CurlyRibbon 4
Gift 1
Gift 4
Gift 7
Gift 10
Cake 3
PartyHat 4
Balloon 1
Balloon 2
Banner 2
SparklingStars
Bubbles 4
DiscoBall 2
~Some of the elements may need to be sized down. Using your scale tool in your tool box adjust the pixel size until element is the correct size~
~Add drop shadow to all elements~
5. Open Paper 1
6. Open mask
7. Add mask to paper (right click on paper layer in layer box > add layer mask > black full transparency).
~Select mask layer in layer box, right click on mask layer (on canvas) > copy.
~Make mask layer invisible (click on eye next to mask in layer box).
~Select paper in layer box, right click on paper (on canvas, all you will see is the outline of the paper) > Paste.
~Anchor layer (click on anchor next to trash can on layer box).
~Right click on paper layer in layer box > apply layer mask.
~Delete mask from layer box.
8. Merge Layers (Image > Merge Visible Layers).
9. Crop Image (Image > Autocrop Image).
10. Scale image to desired size (Image > Scale Image).
11. Add copyright info and name
12. Save as .png
ALL DONE!!!!!!!!!!Snag Our Blinkies





Don't Be A Pirate!

